I finally got transom in place and epoxied.
These pics didn't upload in order. so I will explain a little in each one.
Its been a while so I will probably also have some out of order back and forth explaining til I get back oriented. or playing catch up.
The morning of a 24 oz covered backside of transom and wrapped around, under and lipped around to front, that was fun...
View attachment 343645
Nothing special here. other than it's fun getting glass over bolt protectors. I guess I will explain those later.
This was 2nd layer of tabbing, overlapping the 1st.
View attachment 343646
Below.
This is my version of filleting and it a concoction for sure.
The strips in the 4th. pic were used to fill the gap first, but before that I layed glass around inside hull, (another I will have to add pics of that too)
so theres the layer mentioned, then the layer that wrapped the actual transom in first pic then the 2 strips that I folded and worked in with putty knife after I wet out on table with epoxy.
the folded made 4 layers and the other 2 made 6 layers filling the gap.
I then take ravels from cutting woven and chop those up fine(5th.pic)and mix with epoxy making a thickened slurry goo that I fill and contour corners for glass to lay on, what most would use PB to do... This takes less epoxy and has more body. and I feel like I'm not throwing as much away and using so much epoxy to make PB.
View attachment 343647
View attachment 343648
This is the ravels that I have chopped up to a cotton consistency that I mix in epoxy.
View attachment 343655
Below,.
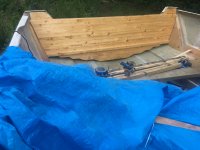
Here I am persuading 24 oz cloth to do close tight back to back turns.
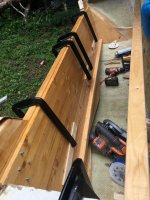
I did this by clamping boards to the ledge board of transom, with cut dog food bags between as a barrier to keep from sticking to the clamping boards.
My idea I didn't mention in 1st. pic was after all this gels and will stay in place it was set in place still green to give a good chemical bond epoxying in place, tabbing and all.
View attachment 343656
On the back side you can see some of the ravels that I chop up as filler.
I Try to find a use for even scraps. and this seems to do good.