1967 Starcraft Jet Rebuilding

Watermann

Starmada Splash of the Year 2014
Joined
Jan 12, 2013
Messages
13,787
I see. it looks like your motor has a different type of mount where there isn't room to insert the bolt. Just push the bolt through from the inside and put the nut on the outside. :D
 

catbones

Petty Officer 1st Class
Joined
Jul 15, 2012
Messages
319
I see. it looks like your motor has a different type of mount where there isn't room to insert the bolt. Just push the bolt through from the inside and put the nut on the outside. :D

That will be some measuring to get it head on from inside. :)
 

TruckDrivingFool

Lieutenant Commander
Joined
Jul 30, 2007
Messages
1,818
We're talking about the circled hole right?


That one looks to be threaded (If it's not it could be very easily) to be through bolted from the inside, no nut required.

Hang the motor, mark the holes, remove the motor, and drill the holes.

Marking holes in tight place - Simplest is a whittled down pencil, More complicated - Make marking studs from some of the appropriate size all thread(threaded rod) grind an end to a centered point, leaving some threaded portion cut off a small bit of the rod. With the motor off thread your marking studs into the holes so that the point is just barely out. Hang and position the motor then give the brackets enough of a tap to register the hole locations.

Hope that makes sense.
 

catbones

Petty Officer 1st Class
Joined
Jul 15, 2012
Messages
319
We're talking about the circled hole right?


That one looks to be threaded (If it's not it could be very easily) to be through bolted from the inside, no nut required.

Hang the motor, mark the holes, remove the motor, and drill the holes.

Marking holes in tight place - Simplest is a whittled down pencil, More complicated - Make marking studs from some of the appropriate size all thread(threaded rod) grind an end to a centered point, leaving some threaded portion cut off a small bit of the rod. With the motor off thread your marking studs into the holes so that the point is just barely out. Hang and position the motor then give the brackets enough of a tap to register the hole locations.

Hope that makes sense.

Holly... I knew this place was good for rebuilds and all other topics when I signed up back a couple years but holly!! Ask and you should receive.

Thank you very much for such detailed explanation, awe ya a beer! BTW yes its in regards to the circled hole. Thanks again.
 

catbones

Petty Officer 1st Class
Joined
Jul 15, 2012
Messages
319
No Title

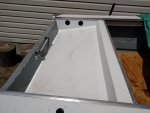
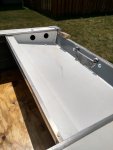
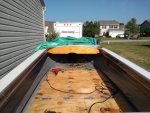
extra progress today, started early because of the heat as it was like 90+ already by 11... but;

-- did the splash well all installed and bolted
-- gave it a nice 5200 touch to it for seal
-- put the backing plate (or whatever you want to call it) for the motor mounting, that also got 5200 between the transom and plate.
-- put a few rivets into the rail

Here's some photos of the progress.
 

Attachments

  • photo226506.jpg
    photo226506.jpg
    183.3 KB · Views: 0
  • photo226507.jpg
    photo226507.jpg
    72.5 KB · Views: 0
  • photo226508.jpg
    photo226508.jpg
    68.5 KB · Views: 0
  • photo226509.jpg
    photo226509.jpg
    66.2 KB · Views: 0

catbones

Petty Officer 1st Class
Joined
Jul 15, 2012
Messages
319
No Title

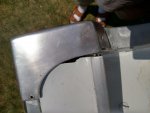
By the way, did run into little trouble... the corners, they aren't really aligning right for me. Doesn't seem like the transom shifted or anything. Any suggestions?
 

Attachments

  • photo226510.jpg
    photo226510.jpg
    71.6 KB · Views: 0
  • photo226511.jpg
    photo226511.jpg
    77 KB · Views: 0

TruckDrivingFool

Lieutenant Commander
Joined
Jul 30, 2007
Messages
1,818
Best I got is to ignore the original holes and see if you can position the caps so they cover the gap and look good. If so mount using new holes. Might also have to consider fabbing up some simple filler panels.

Worst I got is to unrivet the sides of the SW and see if you can move the trans with say a ratchet strap or the likes to make alignment better.

I'd obviously chose the first choice
 

catbones

Petty Officer 1st Class
Joined
Jul 15, 2012
Messages
319
Best I got is to ignore the original holes and see if you can position the caps so they cover the gap and look good. If so mount using new holes. Might also have to consider fabbing up some simple filler panels.

Worst I got is to unrivet the sides of the SW and see if you can move the trans with say a ratchet strap or the likes to make alignment better.

I'd obviously chose the first choice


True, gotta look up that donated by a member here pieces of aluminum and cut. Honestly, I was just gonna go the cheap way and fill in any gap before putting the corners down and attaching with 5200 ... smooth it out as much and leaving it to dry. I think that's how the previous owner had if I remember correctly. Would explain why lol.
 

Watermann

Starmada Splash of the Year 2014
Joined
Jan 12, 2013
Messages
13,787
I've run into the misalignment problem before and was able to coax the stern back into shape and use the original holes by angling a ratchet strap and pulling back in alignment.
 
Last edited:

catbones

Petty Officer 1st Class
Joined
Jul 15, 2012
Messages
319
I've run into the misalignment problem before and was able to coax the stern back into shape and use the original holes by angling a ratchet strap and pulling back in alignment.


Ohh really... I was thinking about that, to get it as close as possible. My holes do align pretty much, maybe one is off by a cm or less, but other then that all looks good. Still its a big gap.

Where did you get the strap attached to on the boat to pull it all together, do you remember?
 

Watermann

Starmada Splash of the Year 2014
Joined
Jan 12, 2013
Messages
13,787
No I had to do the strap pull on my SN so that wouldn't be much help on your SC. You thinking a bit too much got cut off the end of the gunnel?
 

catbones

Petty Officer 1st Class
Joined
Jul 15, 2012
Messages
319
No I had to do the strap pull on my SN so that wouldn't be much help on your SC. You thinking a bit too much got cut off the end of the gunnel?


I thought so too, but looking closer.. its still looking as thought the interior rail wouldn't touch or go under the cap, which makes it so strange... might as well cut extra aluminum, rivet it, and then under seal / fill the small crack with 5200 which will pretty much make it even. Still, the caps are on a slight angle though, which makes me think that the boat sitting with no weight in the garage for 2 years did something... loosen stuff up
 

Watermann

Starmada Splash of the Year 2014
Joined
Jan 12, 2013
Messages
13,787
Yeah we all loose a bit of our shape as we get older and sit around. :lol:

You should be able to pull it back into shape and the extra piece of AL will work too.
 

catbones

Petty Officer 1st Class
Joined
Jul 15, 2012
Messages
319
No Title

Installed the dashboard last night in the heat...
 

Attachments

  • photo226729.jpg
    photo226729.jpg
    20.6 KB · Views: 0
  • photo226730.jpg
    photo226730.jpg
    20.2 KB · Views: 0

catbones

Petty Officer 1st Class
Joined
Jul 15, 2012
Messages
319
No Title

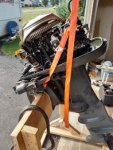
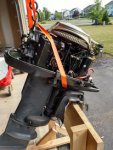
Today I got my fancy garage idea and made the motor hang without issues to be mounted onto the boat.
 

Attachments

  • photo226735.jpg
    photo226735.jpg
    22.4 KB · Views: 0
  • photo226736.jpg
    photo226736.jpg
    20.9 KB · Views: 0
  • photo226737.jpg
    photo226737.jpg
    21.1 KB · Views: 0

catbones

Petty Officer 1st Class
Joined
Jul 15, 2012
Messages
319
No Title

So today was the day I was going to mount the 196x Johnson 33 motor and the windshield. One small mistake on the windshield and a huge ... disaster mistake on the transom motor mount. You probably thinking holly poop what happened. Let's take a look;

1.) Windshield the brackets that fasten into the front .. well put them backwards, I don't think it really matters, still looks good. The bracket that holds it in place past the dash, well I rivet that thing on the wrong side. Going to have to drill out and re-do the riveting with the dashboard fastened.

2.) Motor, different story. Mounting it I only found out, that the plate I put and sealed with 5200, upside down and too far down for the clamps to hold. Great, what to do.. no choice but rip it out. Pull it OFF! ouch, yeah... big ouch. Such a nice transom, all painted and what not. Now I had to pull small part out with 5200 very well cured. So no choice, I did. Ripped it off... with first layer of paint and first 1/4 of transom. Not so bad, I guess its a learning curve. I put more 5200 onto two pieces of aluminum plating I had... smacked it down... flipped bracket, pulled it up to where it should be. screwed it in.. bolted the motor and as it stands. Still got to paint a few spots, but overall doesn't look too bad I guess. Quite upset at myself.
 

Attachments

  • photo226731.jpg
    photo226731.jpg
    20.3 KB · Views: 0
  • photo226732.jpg
    photo226732.jpg
    20.7 KB · Views: 0
  • photo226733.jpg
    photo226733.jpg
    22.1 KB · Views: 0
  • photo226734.jpg
    photo226734.jpg
    21.7 KB · Views: 0

Watermann

Starmada Splash of the Year 2014
Joined
Jan 12, 2013
Messages
13,787
Oh man what a bummer to have those little setbacks so close to the finish line. :blue:

Looks like you were able to recover and by posting mistakes it gives others a chance in the future to learn the easy way rather than the hard way. :thumb:
 

catbones

Petty Officer 1st Class
Joined
Jul 15, 2012
Messages
319
Oh man what a bummer to have those little setbacks so close to the finish line. :blue:

Looks like you were able to recover and by posting mistakes it gives others a chance in the future to learn the easy way rather than the hard way. :thumb:

Thanks, that's true help others so they don't go through same mistake. It just hurts because you prep and do so much, then a silly mistake that was sitting questionable in the back of your head did happen. I was so careful but 5200 was stronger then I could cut my way through .... Ehhh doesn't look that bad I guess and you'll see aluminum if you pop the motor for service of something.

She is getting closer and closer to a splash. Don't have much left other then wiring, carpet and bolting down accessories. Ohhh and dash.

My next plan and since my boat reg got renewed today automatically, is to hook up the wiring for the motor and what not. Install the steering and whatever else it needs. Then before carpet goes down, take her to a really dead marina and float her to see if any leaks are happening. The hull wasn't that bad, 10 rivets in total that I drilled out and used SS bolts with 5200. Hope that holds up, was mostly rear so ... No wave hit.

Ehh till next week when I got more time
 

catbones

Petty Officer 1st Class
Joined
Jul 15, 2012
Messages
319
Here's a question I've been sort of going round in circles about. Since I have remove the dash completely since the previous one was cracked and unsafe to keep in place, mounting the new one on top of it like everyone else.

In any case, how do you guys suggest I take the approach into figuring out the right position of my steering wheel? should I install seats first then decide? suggestions are welcome.
 
Top