1966 Starcraft Holiday Interior Work

66Holiday924

Chief Petty Officer
Joined
Aug 21, 2017
Messages
584
Thanks guys. I like what I'm seeing and can't wait to have the side panels done. It's going to look like an entirely different boat at that point, but there's still a few other things I'm going to do to get it cleaned up.
To Do Yet:
- Side Panels
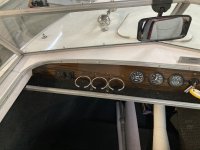
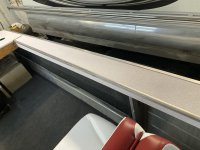
- marideck vinyl flooring down the gunnels and across the dash to clean
them up and cover old screw holes
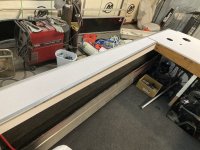
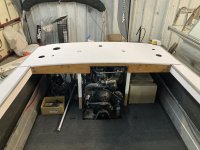
- replace carpet on transom cap with matching marideck vinyl flooring
- hull and bow painted/new decals
 

66Holiday924

Chief Petty Officer
Joined
Aug 21, 2017
Messages
584
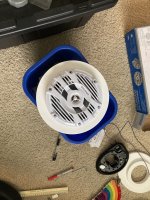
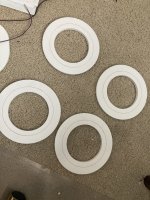
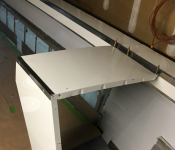
I've been kind of leisurely working on some bezels for my side panels. I anticipate that the depth of the speakers will be somewhat problematic, so to help mitigate that I decided to have some custom king's starboard bezels cut. This will not only give me a little more clearance to play with, but I think it will look nice.

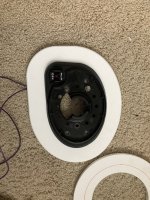
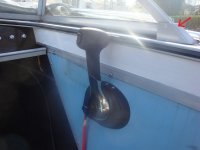
I'm also attempting to have a matching bezel for my throttle control. I had to have this one custom made. I traced the black, factory bezel on a sheet of paper and emailed it to boatoutfitters, instructed them to enlarge it by 1-1/2" and cut a 4-1/4" hole in it for me.

The red line (marked on what will be the unexposed side) on the speaker bezels marks the speaker edge. I'm using that to decide what size bolts/boltheads I want to secure the bezels to the side panels an I'm getting ready to order those bolts now.
 

Attachments

  • IMG_1189.JPG
    IMG_1189.JPG
    2.6 MB · Views: 6
  • IMG_1190.JPG
    IMG_1190.JPG
    2.5 MB · Views: 6
  • IMG_1191.JPG
    IMG_1191.JPG
    2.4 MB · Views: 6

66Holiday924

Chief Petty Officer
Joined
Aug 21, 2017
Messages
584
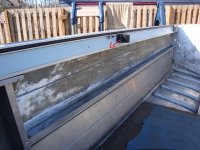
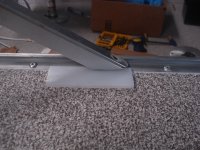
My boat's in the shop and I'm trying to do some planning. Can anybody tell me how the piece of trim in the picture attaches to the boat? I don't see any rivets.

Also, can anybody explain what is involved with removing the windshield? Are they flimsy when removed? Is there some kind of seal or gasket under it that I should replace when I put it back on?

Thanks for any help you can offer.
 

Attachments

  • DSC04462.jpg
    DSC04462.jpg
    169.7 KB · Views: 18

MNhunter1

Lieutenant Junior Grade
Joined
May 12, 2014
Messages
1,058
My boat's in the shop and I'm trying to do some planning. Can anybody tell me how the piece of trim in the picture attaches to the boat? I don't see any rivets.

Also, can anybody explain what is involved with removing the windshield? Are they flimsy when removed? Is there some kind of seal or gasket under it that I should replace when I put it back on?

Thanks for any help you can offer.
I believe it’s attached with 5/32 rivets from underneath
 

classiccat

"Captain" + Starmada Splash Of The Year 2020
Joined
Dec 20, 2010
Messages
3,412
My boat's in the shop and I'm trying to do some planning. Can anybody tell me how the piece of trim in the picture attaches to the boat? I don't see any rivets.

Also, can anybody explain what is involved with removing the windshield? Are they flimsy when removed? Is there some kind of seal or gasket under it that I should replace when I put it back on?

Thanks for any help you can offer.
on my '75, that lower gunnel trim was secured from the underside with 5/32" pop rivets.

usually they're 10-32 hardware securing the windshield down. windshield screws have a slot-head that can be made from regular screws with 2 opposing sides ground down to fit into the slot. I used n-butyl tape between the windshield frame and console.

1642993769215.png
 

classiccat

"Captain" + Starmada Splash Of The Year 2020
Joined
Dec 20, 2010
Messages
3,412
On my SS18, for each console there were 3 on the forward glasses & 2 in the side glasses...so 10 total.

1643122606518.png

1643122654708.png
 

66Holiday924

Chief Petty Officer
Joined
Aug 21, 2017
Messages
584
The shop that is doing some clean-up on the corners of my transom cap let me come in and work on the boat a little bit. I went in and removed my side panels, the trim piece I was asking about, and I looked at how my windshield is attached. I appreciate the input. It was good to be able to go into somebody else's shop, where I didn't want to disrupt their work, and didn't really want to have to borrow tools, knowing what needed to be done. I was in and out and didn't bother anybody, I think.

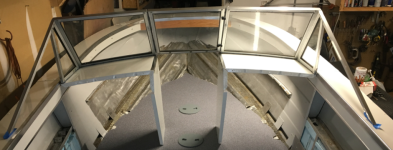
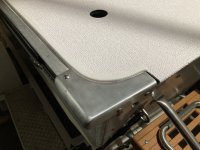
So my windshield seems to be attached the way @classiccat described, but at the ends the pieces looked like they were screwed down with regular screws... I think, The rivet on side of that piece is probably holding the windshield in place and if drill that out the windshield comes out of the trim piece, and the top of the screws holding the trim will be exposed. The picture shows the trim piece I'm talking about. Does anybody know if that's how that goes together?
 

Attachments

  • DSC04887.jpg
    DSC04887.jpg
    130.3 KB · Views: 10

66Holiday924

Chief Petty Officer
Joined
Aug 21, 2017
Messages
584
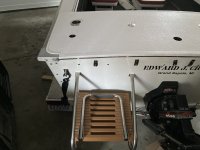
I picked my boat up from having the corners cleaned up. Sorry no pictures right now, but I'll get some later. What they did, they trimmed the corners of the new transom cap I had built, to match the curvature of my corner trim pieces, so now my transom cap is no longer held down by my corner trim pieces and lifts off without removing them. It's held on using the two hotrod pins and the eight screws holding the cleats down on either side. I only have to remove my corners if I need to remove my transom wood or rubrails.

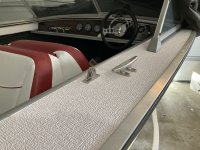
I also dropped the boat off at the next shop to have marine vinyl flooring put down. We're going down the gunnels, across the dash, and across the transom cap with that. I'm excited to see how this comes out. It should really clean the boat up from a lot of the old screw holes from past covers and hardware.
 

SHSU

Lieutenant Junior+Starmada Splash Of The Year 2019
Joined
Mar 8, 2017
Messages
1,741
So my windshield seems to be attached the way @classiccat described, but at the ends the pieces looked like they were screwed down with regular screws... I think, The rivet on side of that piece is probably holding the windshield in place and if drill that out the windshield comes out of the trim piece, and the top of the screws holding the trim will be exposed. The picture shows the trim piece I'm talking about. Does anybody know if that's how that goes together?

I would guess that is the case. I didn't have that nice trim cap over the end. It was just the screw/bolt at the end securing it. DSC04168.JPG

SHSU
 

66Holiday924

Chief Petty Officer
Joined
Aug 21, 2017
Messages
584
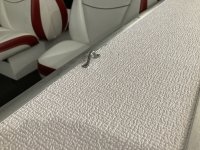
I wanted to share this picture that shows what I've been talking about. The metal shop cut the new transom cap such that the corner doesn't hold it down anymore. Instead, my transom cap will be held down by the cleat screws and the hot rod pins. This change means that my corners don't have to be removed unless I'm removing my rub-rails or transom and that should limit the wear on the new transom wood.

I have the boat home in-between shops. I've been slowly ordering new hardware, new gas fill fixture, new scoop vent for reinstallation on the transom cover. I got some nice 316 stainless hardware to install for my bimini. I ordered a couple new 10' trim pieces to replace the ones I was asking about a couple weeks ago. Today, I put some end trim on my transom cap and I spent about 15 minutes wire wheeling my corners, almost no effort and they look great. I'll get some pictures posted before it heads to the shop for the side panels.
 

Attachments

  • IMG_1229.JPG
    IMG_1229.JPG
    5.3 MB · Views: 15

66Holiday924

Chief Petty Officer
Joined
Aug 21, 2017
Messages
584
I've been waiting on a couple new trim pieces (should be in later this week). In the meantime, I've been getting some of that new 316 SS hardware installed. I cut some 3/4 marine ply and backed my forward cleats with it. I've been wanting to do that, but the side panels were in the way. They should be anchored nicely now though.

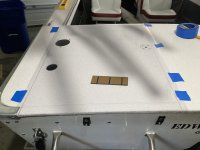
Also, I've been talking to Plasdeck. It's the same company that makes my composite swim platform (Plasteak). I'm going through the process of having a custom mat made for the boat. I think it'll look sharp and it will be a nice surface for the kids to climb onto when they board from tubing/skiing/swimming. The process: They send me a clear piece to mark up with what I want, I mail it back, they digitize it, we discuss, then they make the mat.
 

Attachments

  • IMG_1230.JPG
    IMG_1230.JPG
    5.8 MB · Views: 18
  • IMG_1246.JPG
    IMG_1246.JPG
    4.7 MB · Views: 19
  • IMG_1244.JPG
    IMG_1244.JPG
    5 MB · Views: 18
  • IMG_1245.JPG
    IMG_1245.JPG
    5.3 MB · Views: 19

SHSU

Lieutenant Junior+Starmada Splash Of The Year 2019
Joined
Mar 8, 2017
Messages
1,741
Also, I've been talking to Plasdeck. It's the same company that makes my composite swim platform (Plasteak). I'm going through the process of having a custom mat made for the boat. I think it'll look sharp and it will be a nice surface for the kids to climb onto when they board from tubing/skiing/swimming. The process: They send me a clear piece to mark up with what I want, I mail it back, they digitize it, we discuss, then they make the mat.

That should look really nice. If I had a covered space like you, I would have looked at similar

SHSU
 

renns

Petty Officer 1st Class
Joined
Dec 20, 2017
Messages
316
I would guess that is the case. I didn't have that nice trim cap over the end. It was just the screw/bolt at the end securing it. View attachment 355270

SHSU
66, hope you don't mind if I poke my head in here briefly.... @SHSU, that pic looks like you put sealant/5200 between rub rail and the Nautolex on the gunnel? If so, how did you manage to keep a clean edge and not end up smearing sealant into all the neighbouring valleys in the vinyl?
 

66Holiday924

Chief Petty Officer
Joined
Aug 21, 2017
Messages
584
66, hope you don't mind if I poke my head in here briefly.... @SHSU, that pic looks like you put sealant/5200 between rub rail and the Nautolex on the gunnel? If so, how did you manage to keep a clean edge and not end up smearing sealant into all the neighbouring valleys in the vinyl?
No problem at all. That's what we're all here for, discuss and help each other with our project boats.
 
Last edited:

SHSU

Lieutenant Junior+Starmada Splash Of The Year 2019
Joined
Mar 8, 2017
Messages
1,741
66, hope you don't mind if I poke my head in here briefly.... @SHSU, that pic looks like you put sealant/5200 between rub rail and the Nautolex on the gunnel? If so, how did you manage to keep a clean edge and not end up smearing sealant into all the neighbouring valleys in the vinyl?
A lot of blue tape. I taped off everything, both vinyl and aluminum side. Think I have a picture or two on my build thread showing how I did it. I will have to go see if I can dig one up.

SHSU
 

renns

Petty Officer 1st Class
Joined
Dec 20, 2017
Messages
316
A lot of blue tape. I taped off everything, both vinyl and aluminum side. Think I have a picture or two on my build thread showing how I did it. I will have to go see if I can dig one up.

SHSU
No worries, I'll go take a look. I'm surprised how nice the tape worked on that highly textured Nautolex!
 
Top