1961 Lonestar Flamingo - SPLASHED w/Pics

Woodonglass

Supreme Mariner
Joined
Dec 29, 2009
Messages
25,927
Re: 1962 Lonestar "Flamingo" - I finally Started w/pics

Re: 1962 Lonestar "Flamingo" - I finally Started w/pics

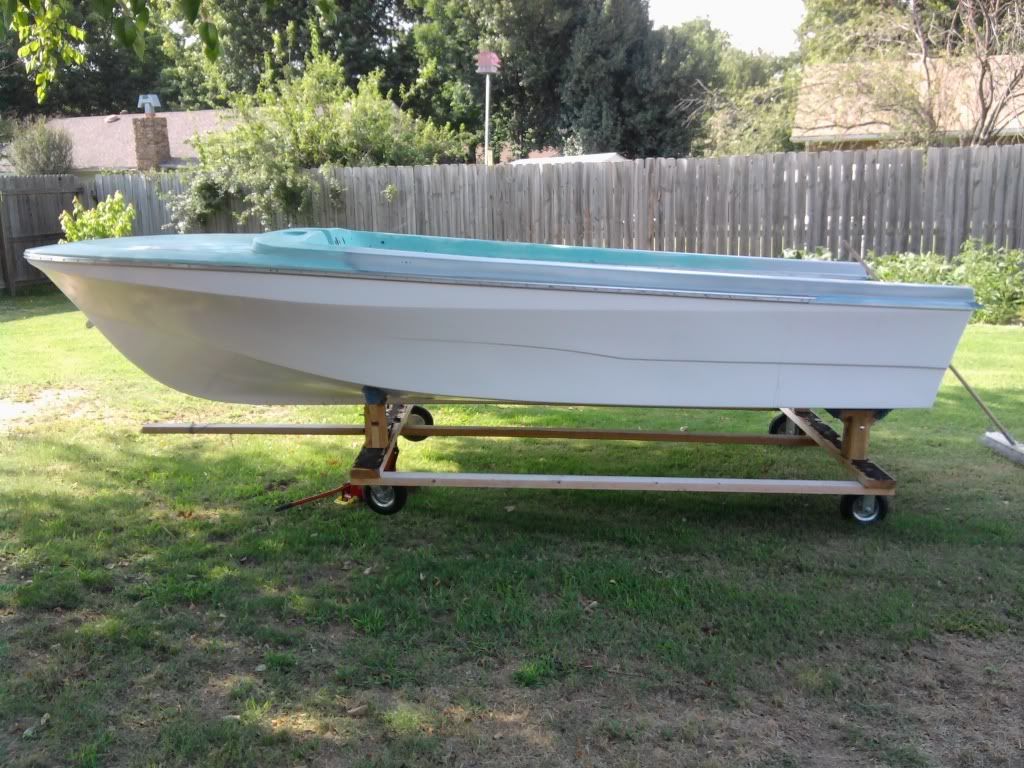
OK, 3rd and Final coal of Easypoxy has been on and cured for two weeks. I am REALLY pleased with it. Especially with the Valspar Hardener. It's hard as Nails, and I THINK she looks GREAT! Pic (in the shade) does NOT do her justice. VERY SHINY!!! She's flipped and on the cradle. Top side is Wet sanded and wiped down with Acetone. Had started priming some of the top side last year but stopped to do the hull. Hope to get her taped and plasticized tomorrow and MAYBE the rest of the primer on her. We'll see. Granddaughter was here all day so she helped "PoPo" with some of it but got bored pretty quick. We HAD to go have fun doncha know!!!! Here's some pics....

Photo0254.jpg


Photo0252.jpg


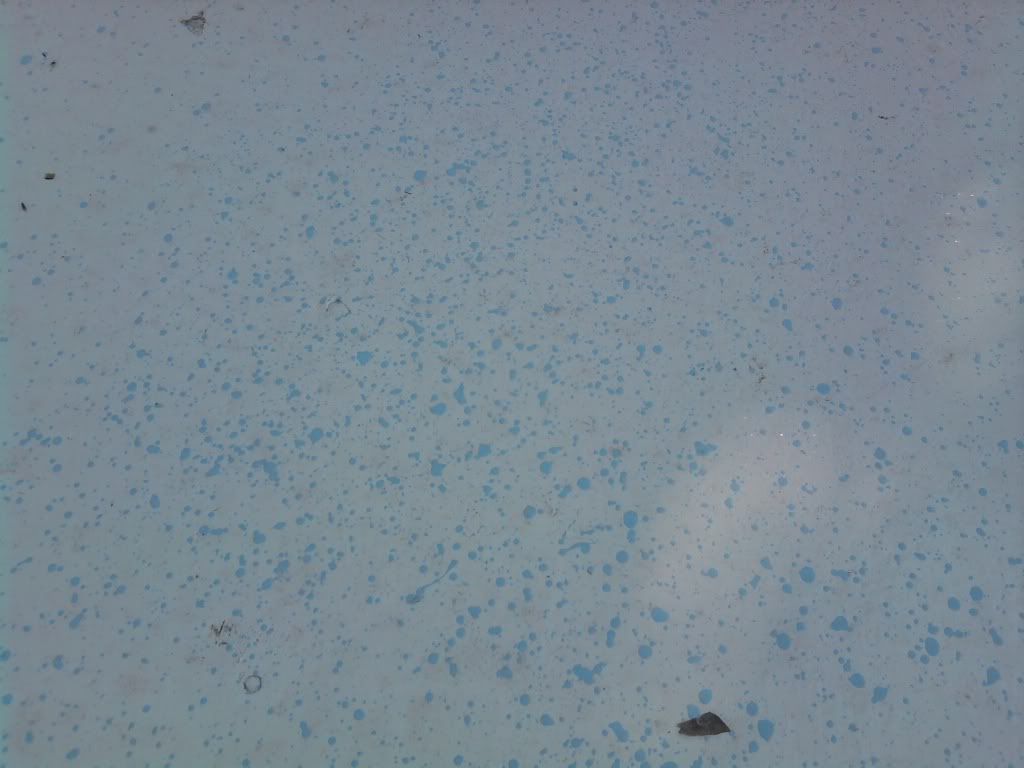
Last fall I had tried my hand at some home grown Zolatoning. Here's the results.

Photo0253.jpg
 
Last edited:

parrisw

Ensign
Joined
Jun 8, 2009
Messages
985
Re: 1962 Lonestar "Flamingo" - I finally Started w/pics

Re: 1962 Lonestar "Flamingo" - I finally Started w/pics

Nice work! Can't wait to see more!
 

Huron Angler

Admiral
Joined
Apr 7, 2009
Messages
6,025
Re: 1962 Lonestar "Flamingo" - I finally Started w/pics

Re: 1962 Lonestar "Flamingo" - I finally Started w/pics

WnG the paint job looks fantastic, very nice work. Your thorough prep and eye for detail have paid off.:)

That rig is extremely sharp looking, I love the flare in the waterline chine there on the sides.:D
 

lakelover

Rear Admiral
Joined
Mar 26, 2003
Messages
4,386
Re: 1962 Lonestar "Flamingo" - I finally Started w/pics

Re: 1962 Lonestar "Flamingo" - I finally Started w/pics

Looks better than new! Keep up the good work. That hull does have some cool lines.
 

Woodonglass

Supreme Mariner
Joined
Dec 29, 2009
Messages
25,927
Re: 1961 Lonestar "Flamingo" - I finally Started w/pics

Re: 1961 Lonestar "Flamingo" - I finally Started w/pics

Nice work! Can't wait to see more!

WnG the paint job looks fantastic, very nice work. Your thorough prep and eye for detail have paid off.:)

That rig is extremely sharp looking, I love the flare in the waterline chine there on the sides.:D

Looks better than new! Keep up the good work. That hull does have some cool lines.


Thanks guys! Can't wait to get the top coat on her!
 

TruckDrivingFool

Lieutenant Commander
Joined
Jul 30, 2007
Messages
1,818
Re: 1961 Lonestar "Flamingo" - I finally Started w/pics

Re: 1961 Lonestar "Flamingo" - I finally Started w/pics

Nice!! Even in the shade I can see the reflection of the grass in the bow so I bet it has a nice smooth gloss to it in the sun.

Last fall I had tried my hand at some home grown Zolatoning.

Is that the true technical for speckle paint?
 

Woodonglass

Supreme Mariner
Joined
Dec 29, 2009
Messages
25,927
Re: 1961 Lonestar "Flamingo" - I finally Started w/pics

Re: 1961 Lonestar "Flamingo" - I finally Started w/pics

Yep Zolatone.

Look here...

http://www.zolatoneaim.com/faq.php

I just dipped a Wallpaper paste brush in paint, 1/8" deep then tapped it on a stick to get the spatter. Takes a WHILE to get it done, but I like it and it does give a bit of a texture to the floor.
 

Cadwelder

Lieutenant Commander
Joined
Aug 30, 2010
Messages
1,780
Re: 1961 Lonestar "Flamingo" - I finally Started w/pics

Re: 1961 Lonestar "Flamingo" - I finally Started w/pics

Looks good Wood, what color you going with on the cap? Any strips or other details on the sides?
 

Woodonglass

Supreme Mariner
Joined
Dec 29, 2009
Messages
25,927
Re: 1961 Lonestar "Flamingo" - I finally Started w/pics

Re: 1961 Lonestar "Flamingo" - I finally Started w/pics

Looks good Wood, what color you going with on the cap? Any strips or other details on the sides?

Pettit Bikini Blue for top side.


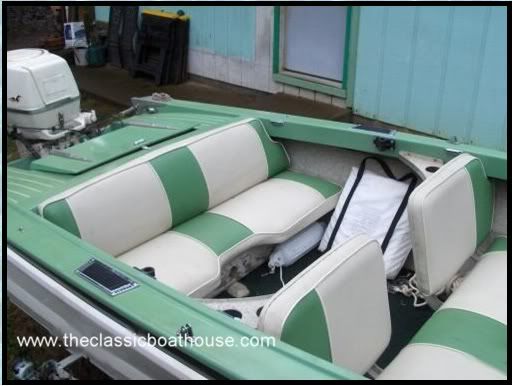
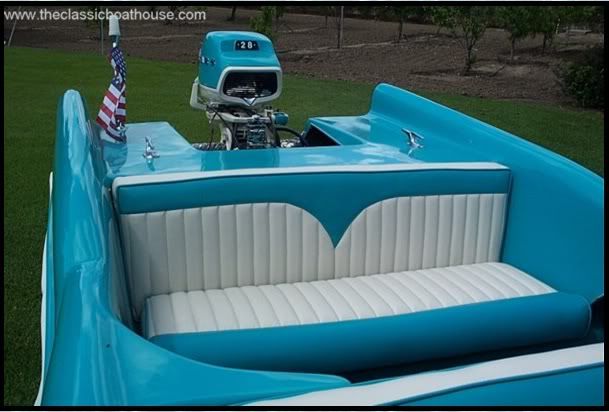
No side Decals or stripes. Original All the way!!!! My foredeck has grooves in it to give the appearance of wood, so I will be pinstriping them white to set em off. Hope to make some bench seats that look like one of these only in the bikini blue and white. Working on em now in the shop.


Seats.jpg


seats2.jpg
 

lakelover

Rear Admiral
Joined
Mar 26, 2003
Messages
4,386
Re: 1961 Lonestar "Flamingo" - I finally Started w/pics

Re: 1961 Lonestar "Flamingo" - I finally Started w/pics

That's a real nice interior setup, now that's what I call a BOAT! I think those bench seats with the split backs are so cool.
 

Bighoss

Petty Officer 1st Class
Joined
May 24, 2010
Messages
354
Re: 1961 Lonestar "Flamingo" - I finally Started w/pics

Re: 1961 Lonestar "Flamingo" - I finally Started w/pics

Wood, Thanks for stopping by my thread and giving me the info. on the paint. I had to see it for myself and get the prep and mix ratio. It looks great!
I'm definitely using the hardener. Lakelovers turned out really nice as well. I really appreciate the advice.
 

Woodonglass

Supreme Mariner
Joined
Dec 29, 2009
Messages
25,927
Re: 1961 Lonestar "Flamingo" - I finally Started w/pics

Re: 1961 Lonestar "Flamingo" - I finally Started w/pics

We had showers this morning, grandchild spent the night and now sun is out and humidity and heat are almost unbearable. MAYBE by 7:30 it'll be shady enuf in the back to get an hour or so on prepping the boat for primer. I hope so. You guys laying paint down are making me antsy!
 

ingalp01

Petty Officer 1st Class
Joined
Sep 11, 2010
Messages
357
Re: 1961 Lonestar "Flamingo" - I finally Started w/pics

Re: 1961 Lonestar "Flamingo" - I finally Started w/pics

Looking good Wood... I finally had some time today at and after work to read my way through your thread. Can't wait to see her all finished up and floatin... Also can't wait to get my hull and swim platform done with that paint formula...
 

lakelover

Rear Admiral
Joined
Mar 26, 2003
Messages
4,386
Re: 1961 Lonestar "Flamingo" - I finally Started w/pics

Re: 1961 Lonestar "Flamingo" - I finally Started w/pics

NEWSFLASH:::Woodonglass starts cult based on paint formula!!! Film at 11...
 

tallcanadian

Captain
Joined
Sep 7, 2006
Messages
3,245
Re: 1961 Lonestar "Flamingo" - I finally Started w/pics

Re: 1961 Lonestar "Flamingo" - I finally Started w/pics

Hey Wood, lookin' good. Sorry I haven't been in touch for a bit. I'm just now trying to catch up on everyone's stuff. That hull looks great. Very very nice. Can't wait to see her done., So close, so so close. :D:D
 

KellyC

Senior Chief Petty Officer
Joined
Aug 24, 2010
Messages
733
Re: 1961 Lonestar "Flamingo" - I finally Started w/pics

Re: 1961 Lonestar "Flamingo" - I finally Started w/pics

Really looking good there wood. Question for ya? Would this be right for rusto as well?
2cups of Rusto paint
1/4 cup of their thinner. If you did not buy any it is a 50/50 mix of Mineral Spirits and Xylene, so you can make your own.
1 oz. of hardener.
MIX WELL. At least 5 minutes. Do NOT SHAKE and introduce air bubbles.

With the hardener the Paint is worthless after 8 hrs in the mixing bucket.
 

fstorm08

Senior Chief Petty Officer
Joined
Aug 2, 2010
Messages
686
Re: 1961 Lonestar "Flamingo" - I finally Started w/pics

Re: 1961 Lonestar "Flamingo" - I finally Started w/pics

She's looking real good Wood!
 

Woodonglass

Supreme Mariner
Joined
Dec 29, 2009
Messages
25,927
Re: 1961 Lonestar "Flamingo" - I finally Started w/pics

Re: 1961 Lonestar "Flamingo" - I finally Started w/pics

***Note:This Painting Advice is for "Trailer Queen Boats" NOT for boats that will be left in the Marina for weeks on end. You will need Bottom Paint or Gelcoat for Marina Boats.


Your Paint costs will be under $100 for the Paint. If you have to buy a Compressor, Paint Guns, Paint strainers, Respirators, tyvek Suits, Clean up rags etc... well then your costs will be a whole lot more. I'm basically talking about the cost of the Paint.

Ok, here's my recommended formula for Majic Oil Based Acrylic Enamel Paint (Sold @ Tractor Supply Stores) for Roll n' Roll and for Spraying. (NOTE: Ace Hardware branded Rust Stop, Rustoleum, Valspar or any other Acrylic Enamel Alkyd Oil Based Paint will work too!)

21.jpg


This Should yield one THIN coat on a 14-16 foot boat hull.

For Aluminum boats, Lightly acid wash the boat (lots of guys just use 50/50 mix of white vinegar and water) then use a Self Etching Primer (I like the SEM Primer shown below, it's compatible with just about any brand of paint on the market) on ALL bare aluminum spots, only a light coat of SE Primer is required. It doesn't take much. You'll prolly still be able to see the metal bleeding thru. You can use Rustoleum SE primer too! You can get Rustoleum SE Primer in a Spray can at Most Walmarts. Next coat the entire boat with the Majic Oil Base Metal Primer Shown above. (All bare aluminum needs to have a light coat of the SE Primer, followed up with a primer coat of the Rust Preventative primer over the entire boat. Yes it works on aluminum too!!!) You can also use Rustoleum's Bare Metal Primer.

There is an extensive Aluminum Boat Prep Sticky here...http://forums.iboats.com/boat-restor...cs-457159.html


For Fiberglass Boats I recommend using the same Majic Tractor and Implement Primer - Gray ***(Make sure the Primer is GOOD!!! Check it @ the Store!!! Make em Open it up and verify the "Solids" have not settled to the bottom of the can. The solids will NOT re-mix with the paint. It is Bad and you need to get a different can. Trust me on this!!!! You can use Rustoleum Primer too. Don't have to use the Majic Primer. It's been having problems for some reason lately.)

Even though it says metal primer, in speaking with their rep's it will work fine on Fiberglass and Gelcoat.

If you have Deep sides you may need to adjust the amount of Paint you buy. I recommend Majic's Oil Base Metal Primer. IF your boat is NOT left in the water for MORE than 3-4 days at a time, this will work fine. This is NOT for boats left in the marina for the season.


This is for Roll n' Roll Application both on Fiberglass and Aluminum.

Final sand with 220 - 320 grit and wipe down with 50/50 mix of Mineral Spirits/Acetone.
(Do not thin the Primer. Do not add Hardener to the Primer.)
Apply 2 coats of primer. Follow the directions on the Primer Can for Re-Coat times. Use 3M Scotch Brite pads or 320 grit sandpaper to knock of the nubs between Primer coats then wipe down with Mineral Spirits. Just a Damp cloth. Not to much.
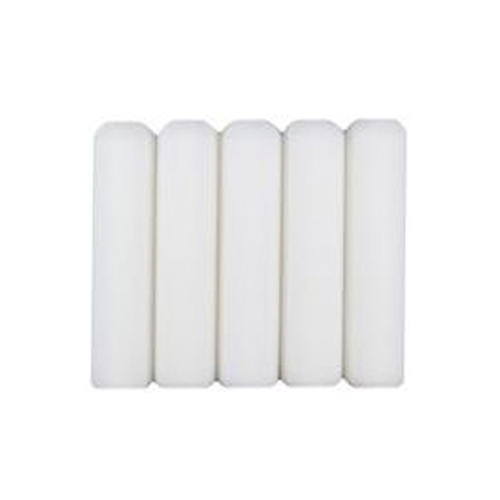
Use the Ultra Smooth Whizz Brand High Density 4" or 6" Foam Rollers. Let the Primer cure for 2-4 Hours before Shooting the first coat of Color.
732087940657xl.jpg


Mixing Formula for Final Color Coats

2 cups Paint
1/4 cup of Majic Reducer (Note: You may add more reducer if needed to make the paint flow/shoot better. Up to 1/2 cup)
57796.jpg

1 oz of Hardener per 2 cups of Paint (1/8 cup/2Tablespoons)(Sold @ Tractor Supply Stores)
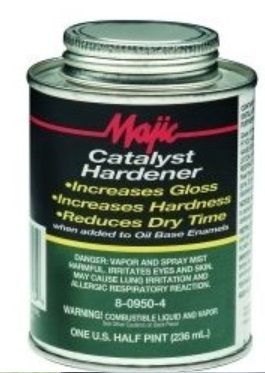


***Mix Paint, Reducer and Hardener and let "Cook" For 30 mins. Re-Stir every 10 mins during the 30 minute cooking process.


Roll n' Roll Technique
Wet roller with paint and roll out about 4-6 square feet. Thin coats work best and help prevent runs. If you can HEAR the paint (Sticky Sound) STOP! You are rolling too long. Put the first roller in a Plastic bag and use another roller. wet it out but with paint and then wring out almost all of the paint and then Re-roll the area you just painted. Use a very LIGHT stroke and the paint should lay down with NO Bubbles!. Put this roller in the bag and use the other roller, Load it with paint and Roll again. Repeat this process until the boat is painted. Always do the re-roll with a damp roller with very little paint in it and LISTEN. You will hear the sound that lets you know when it's time to stop. It's kind of a sticky sound.
Here's a link to 2 videos showing the technique.
http://www.youtube.com/watch?v=MekW6..._order&list=UL


For Spraying.

Final sand and wipe down with 50/50 mix of acetone and MS.
Two coats of Primer. Use HVLP spray gun with a 1.2 - 1.4mm Tip. Thin coats!!!


21.jpg


For 1 qt paint
1/4 cup of Acetone & 1/2 cup of Majic's Reducer. (add more reducer as needed)
In High Temps use Acrylic Enamel High Temp Reducer sold at some Auto Supply stores. (I used Acme Finish 1 from Advance Auto.)
2oz of Hardener (1/4 cup/4Tablespoons)

(NOTE: Only add Hardener to the amount of Paint that you will use in an 8hr period.) DO NOT use after this 8hr period.

I mixed up 2 cups (1/2 qt) at a time using 1oz of hardener, 1/2 cup of reducer.

One Quart should yield two coats of Paint on a 16 ft hull. If you're painting the Top Cap only, 1 qt. of paint should be all you need. Primer and Color.

Shoot first coat in the morning.
Wait 4-6 hours.
Wet sand with ScotchBrite Pad LIGHTLY to knock down any nubs or bugs.
Dry.
Tack cloth off with 50/50 mix of Mineral Spirits and Acetone.
Dry.
Shoot second Coat.
Let dry over night
Repeat wet sand and Tack cloth
Shoot 3rd and 4th coat if needed.

HINT: If you want a COLOR that you cannot find, then you can use Acrylic Artists OIL paint thinned with acetone from any Art supply store that you buy in tubes or use another color of the Majic Paint. You can also use other colors of the Majic Paint to mix the Color you want. This link...http://www.enchantedlearning.com/art/Colormixing.shtml will tell you how to mix colors to get the color you're wanting. It's not to hard to do. Start with small amounts, keep track of the ratio and then multiply it to get the amounts you need. You can get ANY Color in the Rainbow and it works GREAT!! Note: Colors change when the paint drys so use a hairdryer to dry your samples quickly.

Ambient Temperature, Relative humidity and Spray gun settings all play a big role in how the paint will lay down on the surface to be painted. Also, Remember, your paint job will only be as good as your surface prep. The primer will tell the story. If you can SEE it when it's in primer you'll see it in the finish coat. Sand it and fill it if you want it smooth on the final coat. 3M Premium Marine Filler is good stuff. I like to mix my own filler using the following formula...1cup resin, 1.5% MEKP, 1 Heaping tablespoon Cabosil and mix enough Glass bubbles till the mixture is like mayonaise or slightly thicker. I might use slightly less percentage of MEKP if I want to extend the working time and it's really hot that day, but never below .75%. I do not recommend using Bondo. Some people use it but it will absorb water if the paint chips on it. For small blemishes and surfaces scratches and above the water line It might be ok. A high build primer can also be used to take care of those small scratches and blemishes.
TCP Global sells a good High Build Primer for Fiberglass, as well as Acrylic Enamel Paints and supplies (nice HVLP Spray Guns too) at reasonable prices. I might try their paint on my next boat project.

This is a good article on how to setup most HVLP Spray Guns...
http://purplesagetradingpost.com/sum...Pspraygun.html
 
Last edited by a moderator:

lakelover

Rear Admiral
Joined
Mar 26, 2003
Messages
4,386
Re: 1961 Lonestar "Flamingo" - I finally Started w/pics

Re: 1961 Lonestar "Flamingo" - I finally Started w/pics

Yeah! That's it! Somebody finally wrote it down all in one spot!!! Thanks.

I also noticed that listening to the paint was as important as looking at it while you work. When it gets quieter, it's thin enough, and it's ready for the second light roll. At least that's what I'm thinking.

I found that if it was silent at the beginning of the roll, I was putting it on too thick and was getting the orange peel look. Then I had to spread it out more, it got stickier-sounding, then quiet again=time to do the dry roll.
 

Woodonglass

Supreme Mariner
Joined
Dec 29, 2009
Messages
25,927
Re: 1961 Lonestar "Flamingo" - I finally Started w/pics

Re: 1961 Lonestar "Flamingo" - I finally Started w/pics

Yeah! That's it! Somebody finally wrote it down all in one spot!!! Thanks.

I also noticed that listening to the paint was as important as looking at it while you work. When it gets quieter, it's thin enough, and it's ready for the second light roll. At least that's what I'm thinking.

I found that if it was silent at the beginning of the roll, I was putting it on too thick and was getting the orange peel look. Then I had to spread it out more, it got stickier-sounding, then quiet again=time to do the dry roll.

You got it!! The SOUND tells you everything!! Takes a bit to get on to it but when you do, it's a piece of cake!!!
 
Top