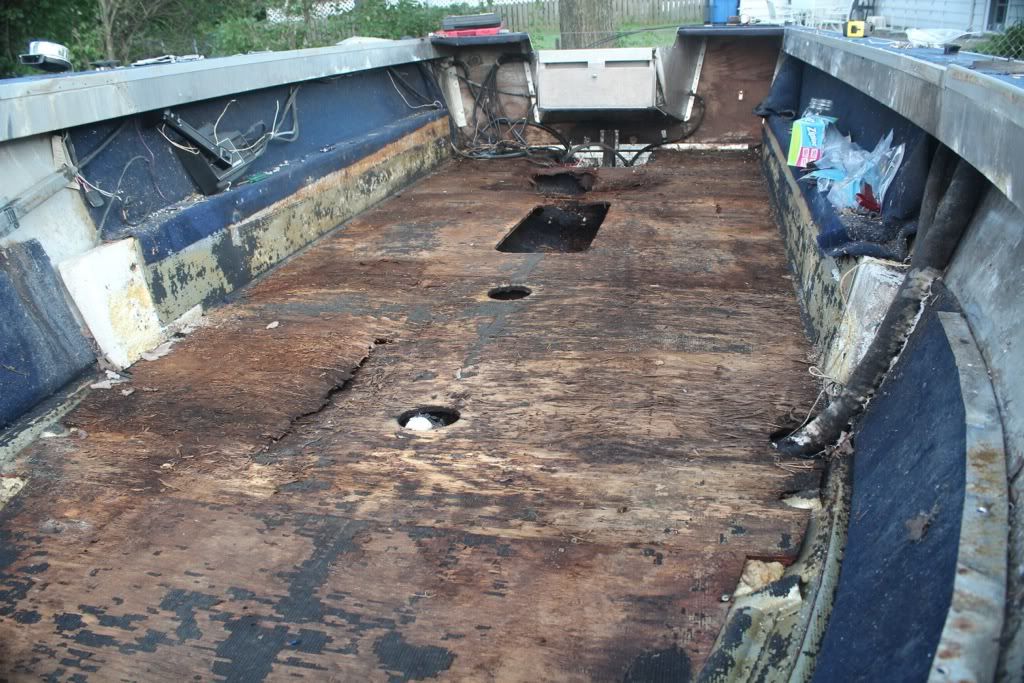
180 SS New to the Forums.

DirtyHarry83

Petty Officer 1st Class
Joined
Jun 5, 2012
Messages
305
Re: 180 SS New to the Forums.

The starter only cost me 60 bucks. I may still rebuild my current one after Dad and I finish our work shop. Keeps me busy and I like to learn about those projects.

Dad and I like to do nice things for each other. He likes seeing me happy, and we enjoy rebuilding projects together. Father and Son stuff. We'll both get to enjoy this boat.
Plus he knows he's got my help with a lot of home owner projects. haha
 

DirtyHarry83

Petty Officer 1st Class
Joined
Jun 5, 2012
Messages
305
Re: 180 SS New to the Forums.

We built a home made engine stand to hold the OB. I want to pull it tomorrow or Tuesday if possible.

Image was lost in the Garbage fire of Photo-bucket Sorry

There are more kinds of bolts on this but hey it doesn't matter as the stand will definitely hold the 90hp OB.
 
Last edited:

barato2

Commander
Joined
Dec 7, 2010
Messages
2,956
Re: 180 SS New to the Forums.

yeah, i used carb spray to do final degrease before gluvit-ing cuz hull was too hot to touch. 2 cans did 18' hull nicely. didn't worry about acid etch first. i'll let you know in a few years how it worked but it seems OK now.
 

astor

2018's Starmada Splash Of The Year.
Joined
Jul 31, 2011
Messages
425
Re: 180 SS New to the Forums.

I'm curious to see the pics of the transom replacement, as I just started digging into my SS180 today, and I don't see yet how to get the transom out. Nice work so far.
 

DirtyHarry83

Petty Officer 1st Class
Joined
Jun 5, 2012
Messages
305
Re: 180 SS New to the Forums.

I'm curious to see the pics of the transom replacement, as I just started digging into my SS180 today, and I don't see yet how to get the transom out. Nice work so far.

I just pulled the OB Saturday. I am waiting to pull the Transom at this time until I have a weld done to the hull as I believe that the weld will be any day and I don't want to move the boat without support on the stern. I'll post step by steps on pulling the transom.

I plan on buying the plywood for the deck and then make the cuts and epoxy while I wait.
 

astor

2018's Starmada Splash Of The Year.
Joined
Jul 31, 2011
Messages
425
Re: 180 SS New to the Forums.

DH,
What year is your SS180? Looks very similar to mine but some differences. Did your's have a knee brace in the center of the transom? Don't see it in the pictures.

Ben
 

DirtyHarry83

Petty Officer 1st Class
Joined
Jun 5, 2012
Messages
305
Re: 180 SS New to the Forums.

DH,
What year is your SS180? Looks very similar to mine but some differences. Did your's have a knee brace in the center of the transom? Don't see it in the pictures.

Ben

I am not sure I understand what the knee brace would be? I can show you some pictures of mine as it currently is now. I didn't remove to much other than the 2 stern seats, and some side padding that ran along the gunnels.

XX5T4Y1.jpg


I plan on doing something similar to Ez. I would like 2 stern seats with a casting platform in the middle.
 
Last edited:

DirtyHarry83

Petty Officer 1st Class
Joined
Jun 5, 2012
Messages
305
Re: 180 SS New to the Forums.

Okay so it's been a while. I've been busy and didn't feel like doing micro updates.

Dad and Harbor Freight Strike again. 1 ton lift? Hell yeah. We used a piece of cedar 4x4 (it was laying around from a fence project.) I wish I had taken pictures of the back up job I had to do with Dad trapped in the garage. It's a tight fit to put the boat in there.
z0EEFcI.jpg


We didn't have exactly what we needed to lift the flying 90 but what we did worked, and worked well.

yslMkE4.jpg


Exciting... For my next trick I will be working on the transom.
 
Last edited:

DirtyHarry83

Petty Officer 1st Class
Joined
Jun 5, 2012
Messages
305
Re: 180 SS New to the Forums.

Before I get to the Deck. I need to point out that she's had some work done. She's older and the last owner got a nice slice in her bow.

Remember this?
asgJ88u.jpg


Now look at this! Sorry that it is blurry. He added a lot of material. I am not complaining.

oYbnDV9.jpg


That's to my friend and his friends that tig weld the boat's solid as a rock. Both outside and on the inside.

LkqL0dH.jpg


close up.

xNeWCUl.jpg


Good group of guys and for 100 bucks plus the added bonus of fishing trips in the future. I feel I can't go wrong.
 
Last edited:

DirtyHarry83

Petty Officer 1st Class
Joined
Jun 5, 2012
Messages
305
Re: 180 SS New to the Forums.

Now to the Deck work.

Today the rough fit deck work was all done today. It was good working with Dad.

0Rp1lAm.jpg


and

Ls9nRsE.jpg


Leads to the creation of the deck.

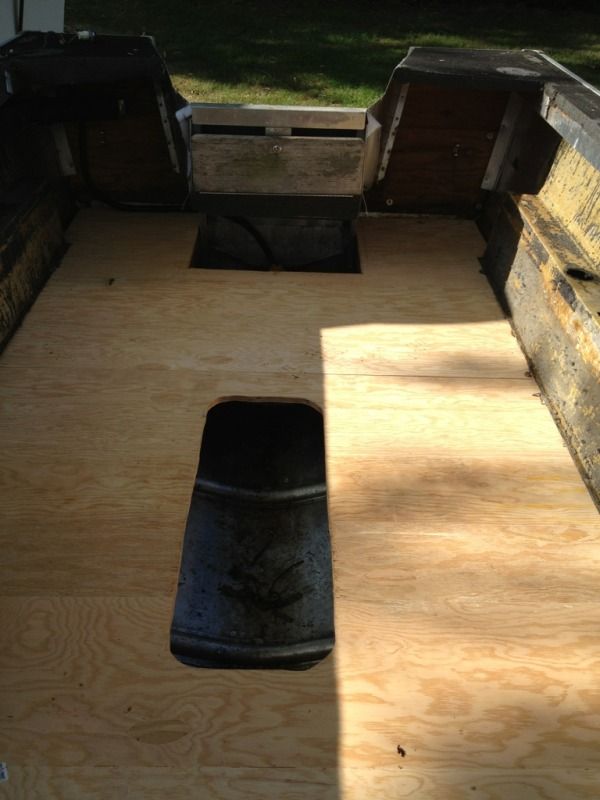
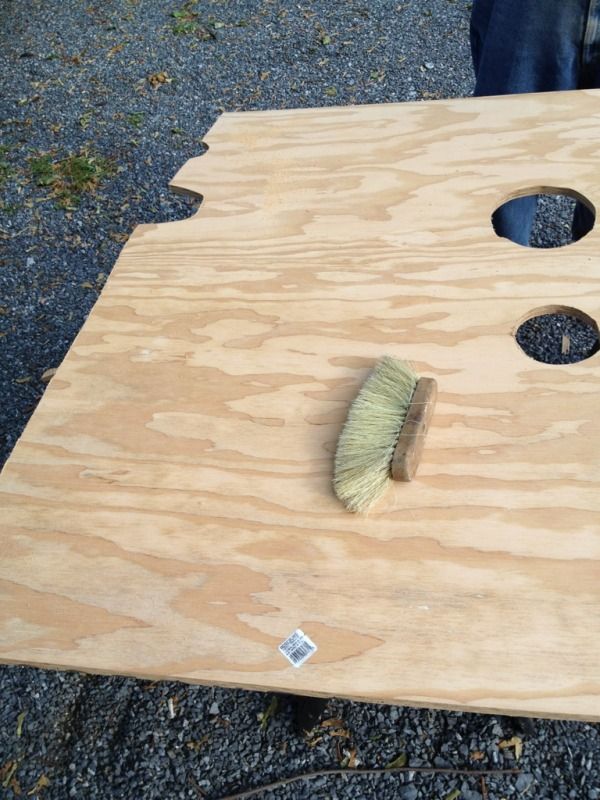
I kept some of the old pieces for the rough outline of what we'd need. As the old deck was ONLY 1/2 inch and flexed when a squrriel farted I was glad to have 3/4 inch goodness.

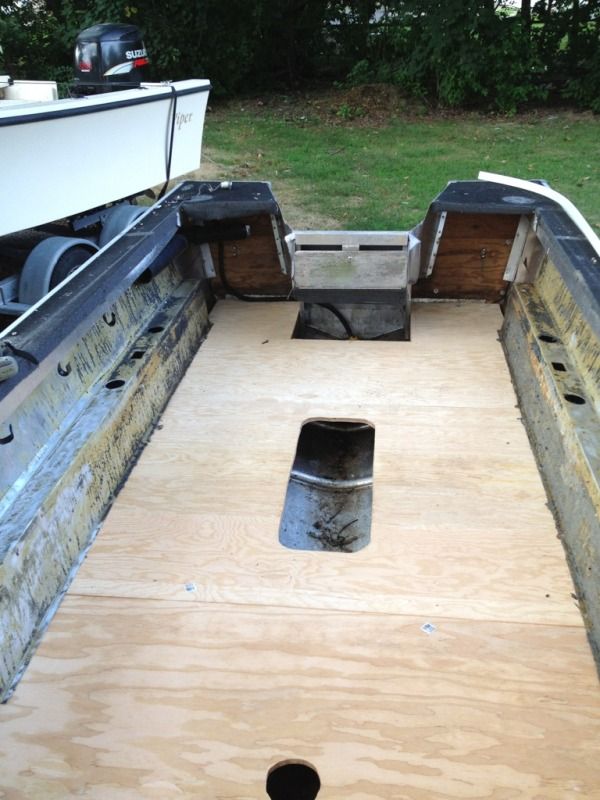
Stern with 24 inch gap for bilge access.

ThXiCmF.jpg


It's tricky to slide in with the aluminum floor soffits? Not sure what to call them

jfogfxd.jpg


Here we plan for the ski locker or as I'll use it for bumpers, small anchor, and dock line.
 
Last edited:

DirtyHarry83

Petty Officer 1st Class
Joined
Jun 5, 2012
Messages
305
Re: 180 SS New to the Forums.

Man is it tricky sliding under those soffits but I love the progress.

9abd0002.jpg


Here we cut the access plate holes for the sending unit and fuel lines. I am keeping my gas tank in it's original location. Especially if I decide to repower her and I'll want the weight balanced a bit more. Re powering equals more power in my book!

30626f5c.jpg


Looking good. Feeling like a kid in a Toys R us at this moment.

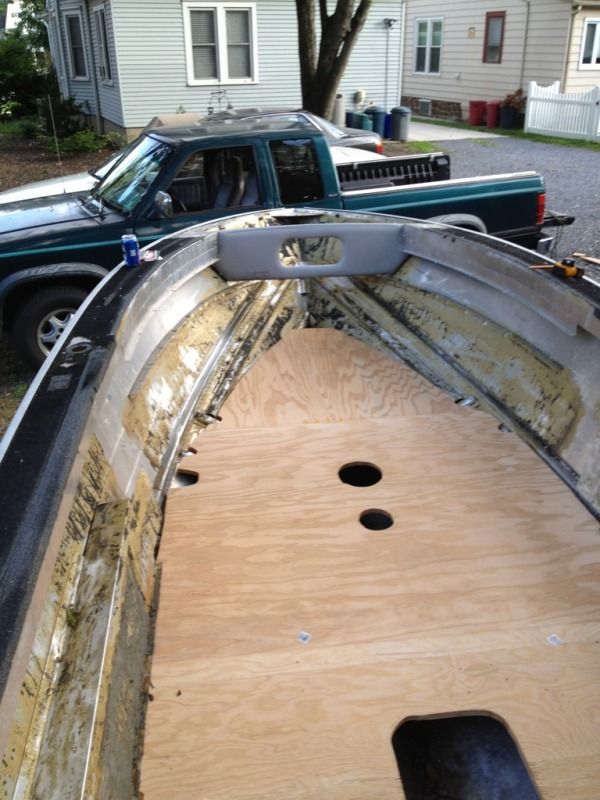
The bow section was a pain because the original 1/2 inch piece wasn't a good source. Dad and I made at least 10 test fittings to keep the deck from rubbing the hull. If I have to many gaps I may consider using a material similar to what holds automotive windshields to the automobile. Not sure yet though.

8b5dc06e.jpg


It felt good to stand at the bow and look back seeing this view

5f71772d.jpg


Tomorrow I'll take the 6 inch brass wheel Dad supplied and lay into that carpet glue. Then pressure wash again. Maybe by Thursday I'll have the coat it applied. Keeping Dad busy as he volunteered to be the epoxy expert. He does good work I'll keep him busy. :p
 
Last edited:

astor

2018's Starmada Splash Of The Year.
Joined
Jul 31, 2011
Messages
425
Re: 180 SS New to the Forums.

No knee brace visible in the center of the transom as in the picture of my boat (second picture) . Looks like yours has two braces for the transom at the edges of the splash well.

IMG_0527.jpg


9dfff7f6.jpg
 

DirtyHarry83

Petty Officer 1st Class
Joined
Jun 5, 2012
Messages
305
Re: 180 SS New to the Forums.

No I didn't have any braces. Just huge foam blocks. I will have to look through my pile of aluminum parts. It may have had a sheet on the outside but I'd hardly call that support.

I'll back mine with 3/4 inch epoxy sealed plywood. The shelves I'll add to hold my batteries may only be half inch to support the 3/4 which will tuck under. The layout will be a half inch sheet parallel to the gunnels so in our pictures you'd see the end grain facing us. I'll make a half notch with my shelf and make a half notch in the support, bolt and then epoxy them together. The battery turned more to the center for balance facing the OB engine well. If this sounds as confusing as how I just put it to words. Don't worry. I plan on taking lots of pictures with step by steps. I love to over engineer and customize when I can to suit what I am looking for in a boat.
 

DirtyHarry83

Petty Officer 1st Class
Joined
Jun 5, 2012
Messages
305
Re: 180 SS New to the Forums.

Ben when I really looked closely at your picture the similarities in hull equipment gave me a kick.

I still have and plan on using that same horn. I guess it came standard with our 180s.

I noticed that yours lacks the big black plastic pipe that guides wiring/steering/throttle cables. I plan on trying to hide mine a little more under the gunnels as I do not plan on adding the gunnel padding that hide the pipe before.

If you need a place online for 1 1/2 inch fuel line let me know. That stuffs expensive.

Do you plan on keeping the engine well teak cabinet? I am on the fence with mine given that I'd have no use for a small space that cannot keep the weather out. I would like to restore the teak for beauty though.
 

astor

2018's Starmada Splash Of The Year.
Joined
Jul 31, 2011
Messages
425
Re: 180 SS New to the Forums.

DH,
Yes they are very similar hulls, but some differences. I don't see a point to the rear teak cabinet, but will probably leave it as is. Mine didn't have a pipe for the steering cable or wires, they were just held up with tie straps.

I also removed the side shelfs with the cupholders to make it easier to do the floor.

Looks like you're making great progress. The TIG welds look good on the crack repair.

My interest in the knee brace that braces from the keel to the transom, is mine has cracks at the transom. Not sure how I'm going to fix yet. I was thinking of adding a couple of more braces to keep the transom from flexing. I will post some better pictures tomorrow.

Ben
 

barato2

Commander
Joined
Dec 7, 2010
Messages
2,956
Re: 180 SS New to the Forums.

DH, i like the plan....seems parents are more reliable workers than kids!
 

DirtyHarry83

Petty Officer 1st Class
Joined
Jun 5, 2012
Messages
305
Re: 180 SS New to the Forums.

Love working with Dad. It's always a great time and full of laughs.
 

DirtyHarry83

Petty Officer 1st Class
Joined
Jun 5, 2012
Messages
305
Re: 180 SS New to the Forums.

Progress! I feel the water getting closer.

Decks sealed with 2 coats of Progressive Epoxy. May squeak in a 3rd depending on how much I have left. I'll add I plan on glassing the seams and over every rivet I place.

Today I go to start the transom tear down. I take my handy dandy screw driver. Apply force to the first angle bracket bolt...
The head snapped off. :eek: I guess I don't know my own strength. End result. Time to use the vice grips

M0zKUuP.jpg


This happened 3 more times on this particular venture.

As I continued the tear down I had the joy of being reminding that the transom was built in 3 sections. :facepalm: Cheap bastards comes to mind. Here I am removing the swim platform and the many mounting bolts.

B8s4Y8q.jpg


My 1988 model didn't come with a knee brace. Just two mean pieces of aluminum tied into the stringers. I guess this works well because it spreads the forces and weight through the entire deck. This still doesn't make up for the fact MY TRANSOM WAS IN 3 SECTIONS! :facepalm:

7NGFMXk.jpg


Continued...
 
Last edited:

DirtyHarry83

Petty Officer 1st Class
Joined
Jun 5, 2012
Messages
305
Re: 180 SS New to the Forums.

Insect Damage? I don't know what you're talking about! Ants and their annoying empire. I'll push them out of tinopia for good!

WxCEqjt.jpg


Wow lovely. We removed a considerable amount of snap rivets, and at least 16 solid rivets to pull the engine well.
Just ti find more of this lovely untreated and unprotected mess.

PAHVUt7.jpg


This here felt like the ONLY bright spot. Not pictured but under here was a riddle of ant holes.

6rr0Vk6.jpg


Finally I can pull this well out and get down to business at the stern. Lots of cleanup and with the well in the way it's rough.
 
Last edited:

DirtyHarry83

Petty Officer 1st Class
Joined
Jun 5, 2012
Messages
305
Re: 180 SS New to the Forums.

We used the old transom as a template. Sorta. Lets just say putting in the new one could be interesting. As Dad and I joked we may be epoxying a few spots and that's okay. It just means that the boat will be that much more resistant to water, rot, and insects.

TXG6toL.jpg


Here is a somewhat better look of the other sections. NONE of this transom was treated with any real sealer. If I worked on this boat I would be embarrassed by this shotty job.

vMVG8k4.jpg


We used more of the 3/4 inch exterior grade fir, it's not marine grade but the epoxy compensates for the need for marine plywood.
The glue between the sheets won't see much exposure due to the penetration of the epoxy.
 
Last edited:
Top