New Journey

MNhunter1

Ensign
Joined
May 12, 2014
Messages
980
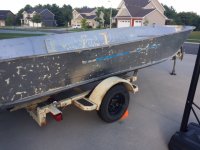
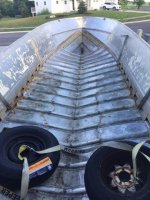
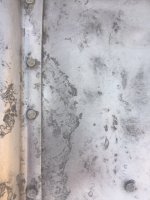
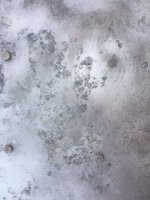
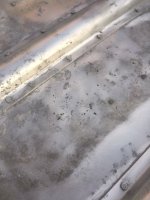
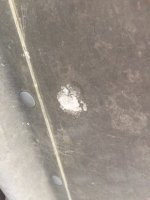
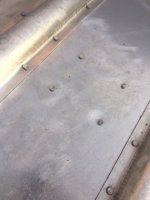
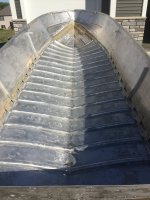
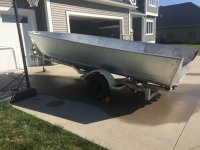
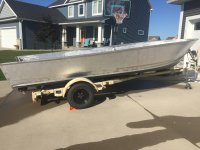
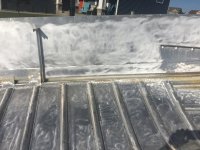
Made some progress on stripping the hull over the weekend. The Citristrip is actually working quite well, not as good as the old methylene chloride Aircraft Stripper I used in the past, but surprisingly better than I had expected. Not sure if the results would have been as good on multiple layers of paint, but this all looked to be original. I found around 45 minutes of set time to provide the best results. The best part is, no need for a respirator or elbow length rubber gloves. Sure makes the overall process and clean up a lot more user friendly. I still need to hit a few spots with another coat or two and deal with the last of the stubborn light blue decal stripe. Not sure why the rest of them came off so easily with the heat gun, but that light blue is cooked on pretty good.
Stripping1.JPGStripping2.JPGStripping3.JPG
 

MNhunter1

Ensign
Joined
May 12, 2014
Messages
980
Why are "brazier" rivet sets so much more than standard rivet sets? Just ordered my ATS 4X Pro gun and a bucking bar. Was planning on picking up a 5/32, 3/16, and 1/4 rivet set, but think I'll just stay with the 3/16 until I determine if I really need the others. Hammer time!
 

SHSU

Lieutenant Junior+Starmada Splash Of The Year 2019
Joined
Mar 8, 2017
Messages
1,665
Where you picking yours up at: ATS or JC Rivets?

SHSU
 

MNhunter1

Ensign
Joined
May 12, 2014
Messages
980
Where you picking yours up at: ATS or JC Rivets?

SHSU
Sorry about the delayed response. I picked up the ATS Pro 4X from Aircraft Spruce, along with a new bucking bar. I have a 3/16 Brazier head rivet set and some solids from my last build, but just improvised with an air hammer for the few I used in the splashwell, nothing below the waterline. I have yet to order any additional solids, but will be doing so once I determine what I'm actually going to need.
 

MNhunter1

Ensign
Joined
May 12, 2014
Messages
980
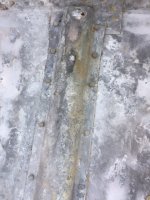
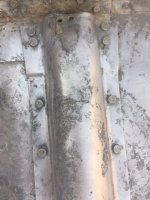
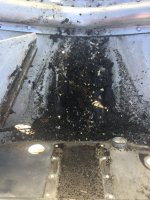
I love the lines of the smooth sides and shortened splashwell on this '84 MR180, but I'm starting to wish I had found an older model from the pre-pour-in floatation days. Man, as I continue to pick away at cleaning up this hull, I just keep uncovering more an more pitting from where the water was trapped between the hull and foam. Fortunately, it's all been pretty minor in regard to depth, just pretty wide spread across all areas where the foam had been poured. It's like night and day between the areas where the foam was absent. On top of that, it appears the "professional" re-decking that had been done by a reputable marine shop was completed using pressure treated wood. A few small areas where the wood had contact with the ribs up in the bow, as well as the tops of all the stringers, show pretty significant corrosion. I'll probably be looking at adding a piece of angle to the top of the stringers to get some structure back and get a nice grip for the deck fasteners/rivets.
Fortunately, I have only been able to locate one area where the pitting actually pin holed through the hull. Looks like I could probably just drill it out and pound a solid through it, unless there's an argument towards a more robust patch. Once I get everything cleaned up and neutralized, I'll be skimming over all the pitting with Marine-Tex before laying down Coat-it on the seams and rivets. Would you rough up the cured MT and hit it with the Coat-it as well?
Anyway, not much for pictures, but the hull is completely stripped and naked and I'll be looking forward to when I can finally but away these Nyalox cup brushes. Have some stainless cup brushes arriving today, so it'll be interesting to see how they compare to the orange and grey Nyalox, and the other generic nylon cup brushes I grabbed from HF(orange) and Menards(grey). It would be easy to call it good enough, slap on some Coat-it, and move forward, but this is really the entire reason we tear these things apart like we do.

One of the ribs before hitting it with the nylon cup brush, I had already hit the hull a bit where you can see the pitting:
Corrosion1.JPG

Different rib and some hull pictures after hitting it with the nylon cup brush. It's pretty consistent like this across all areas where the pour-in foam sat:
Corrosion2.JPGCorrosion3.JPGCorrosion4.JPG

Inside and outside of the through hull pinhole (interesting to see how the corrosion built up on the outside of the hull. Wonder if you'd be able to see it as easy if the hull had been painted/this was a bare bottom hull, never been painted below the spray rail):
Corrosion6.JPGCorrosion7.JPG

Where there was no foam:
Corrosion5.JPG
 

MNhunter1

Ensign
Joined
May 12, 2014
Messages
980
paralysis by (over)analysis... Am I compromising anything by going with a 6ply ACX 3/4" over a 7ply Marine Grade 3/4" for my transom build? My previous two boats I went with the ACX throughout. I picked up 1/2" Marine Ply for the deck on this one as the cost was a wash with the ACX at the current prices. Locally available ACX has since dropped, but Marine Ply has not. It would be a $60 difference for the one 4x8 sheet needed - is it worth it? Either option will be encapsulated with US Composites epoxy.
 

SHSU

Lieutenant Junior+Starmada Splash Of The Year 2019
Joined
Mar 8, 2017
Messages
1,665
I used 3/4 BCX and haven't had any issue. I did have a couple voids I filled with epoxy, but not anything I would be worried about structurally.

SHSU
 

MNhunter1

Ensign
Joined
May 12, 2014
Messages
980
Got some work done in between the family time this weekend. Figured I’d be hammering some solids anyway so might as well pull the knee brace. Glad I did...what a mess. Also helps with draining the hull with all the extra holes:) Think I’m finally done with all the scrubbing inside the hull. Hard to know when enough is enough when most of it will never be seen again. I’ve got to make some room in the garage, but next steps will be the Marine-Tex skimming of all the pitting, new transom, and Coat-it. Also hit all the areas to be painted with some 220 on the orbital. Will probably hit it again before paint, but wanted to clean up any residue from the paint stripping and give it a good wash down with the pressure washer.
02350C26-A3C8-4365-8588-96EC6D06BB71.jpegD316A9EB-9BFC-4919-9BE3-60E6454CFB58.jpegFB9C428E-86BF-4337-9F3E-9B9D45D1078C.jpegDCD5DD98-CE25-4D36-A4FB-9DE4F209AFA7.jpegC5EDEB4E-EC62-4A1C-9B65-78BF3DDD3107.jpeg
 

SHSU

Lieutenant Junior+Starmada Splash Of The Year 2019
Joined
Mar 8, 2017
Messages
1,665
I hate the location of the drain plug on these hulls. I moved mine under the knee brace so you can clean it completely out and not get all the crud caught up underneath.

SHSU
 

Watermann

Starmada Splash of the Year 2014
Joined
Jan 12, 2013
Messages
13,753
I use fir ACX for my transoms with Titebond III, nothing wrong with it at all.

That pitting isn't too bad, just needs cleaned up to stop it from progressing.
 

Watermann

Starmada Splash of the Year 2014
Joined
Jan 12, 2013
Messages
13,753
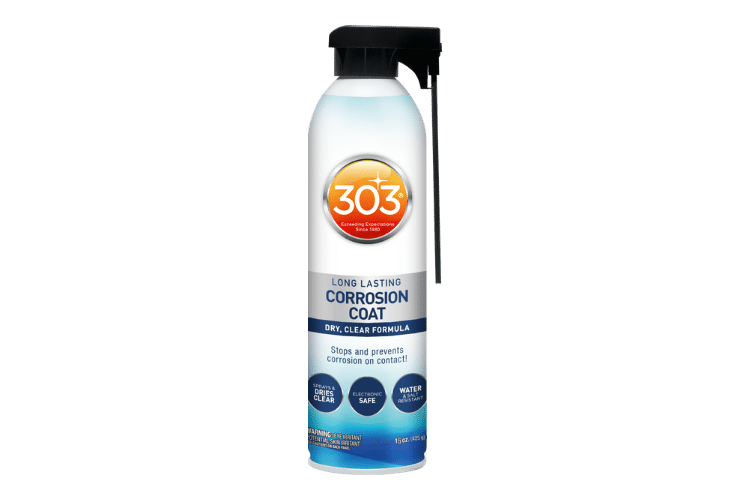
Oh yeah and I found this, will come in handy on the Islander I'm sure.

303-corrosion-coat-1-min.png


MNhunter1

Ensign
Joined
May 12, 2014
Messages
980
Oh yeah and I found this, will come in handy on the Islander I'm sure.

303-corrosion-coat-1-min.png


Good stuff right there, thanks! Do you think the "lubricates" properties would cause issues with the adhesion of Marine-tex? I was planning on skimming over any pitting. Some reviews say it dries clear with no residue, so that's promising. They also say it can be applied once a year, but I'm hoping for a one and done :)
 
Last edited:

Watermann

Starmada Splash of the Year 2014
Joined
Jan 12, 2013
Messages
13,753
Good stuff right there, thanks! Do you think the "lubricates" properties would cause issues with the adhesion of Marine-tex? I was planning on skimming over any pitting. Some reviews say it dries clear with no residue, so that's promising. They also say it can be applied once a year, but I'm hoping for a one and done :)

That's a good question, for MT epoxy to adhere properly, I personally would not use the 303 on substantial pitting that needs to have MT. What I would do is fill the deeper pitting with MT and then coat everything else with the 303. Corrosion should not continue under the MT as there is no oxygen or moisture. I'm planning to use the 303 on all the under deck surfaces of bare AL.
 

MNhunter1

Ensign
Joined
May 12, 2014
Messages
980
Just wanted to check in and keep the thread alive. Not much work done on the MR180 with the boys football seasons starting and hunting season quickly approaching. Got roped into assistant coaching 4th grade tackle and 3rd grade flag, so time has been somewhat limited. Been trying to get all the work done around the house that needs to get wrapped up before hunting season begins and the snow flies here in MN. My 10 year old will be tagging along with me on a few hunts this year, so the logistics of switching over from my solo style to a two man approach has been somewhat of an effort. Climbing stand to two man ladders, early and late season clothing needs for the boy, etc., so many things to prepare for.

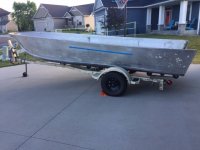
That being said. The hull is all stripped and found it's new place in the hanger(garage). I've been slowly picking away at all the other components needing to be stripped...gunnels, spalshwell, side panels, console/livewell, etc. The new transom is all fitted and will be drilling all the needed through holes before laying down the epoxy. New deck is cut, parts are slowly being ordered, baby steps... Goal is to get the hull painted before the weather turns and take the winter to get everything back together/built out.

Looking for feedback from the mob:

1) This model has a single splashwell drain on the starboard side. Would you add another on the port side similar to most of the other models, or stick with the solo splashwell drain?

2) I'll be adding a bow mounted trolling motor. Will I run into fitment issue with the standard/stock navigation light, or should I covert it over to a plug and removable 12" pole to clear the trolling motor?

3) Acid/vinegar wash - once I etch the bare aluminum, do I need to lay down the paint in a timely manner, or is it etched once its etched, i.e. can it sit for a few weeks/months before I actually lay down the paint? I'll want to rinse the hull and other parts needing paint with the pressure washer after the vinegar wash/etch, which would ideally be done outside before the weather turns. I can paint in my heated garage at anytime. Hoping I can get everything stripped and etched(now while it's warm), and just give a good wipe down with acetone prior to paint, even if it's weeks or months later and the dead of winter. My understanding is the chemical wash is creating a physical etch, which shouldn't necessarily have a hypothetical "expiration date". I'll also be sanding all surfaces to be painted with 220 as well.

Sorry about the lack of updates. I've been reading the threads everyday, just haven't had a whole lot of exciting progress to share of my own.

Cheers!
 

SHSU

Lieutenant Junior+Starmada Splash Of The Year 2019
Joined
Mar 8, 2017
Messages
1,665
Life happens and family comes first.

1) This model has a single splashwell drain on the starboard side. Would you add another on the port side similar to most of the other models, or stick with the solo splashwell drain?
Mine has two. don't think it makes much of a difference if properly sloped.

3) Acid/vinegar wash - once I etch the bare aluminum, do I need to lay down the paint in a timely manner, or is it etched once its etched, i.e. can it sit for a few weeks/months before I actually lay down the paint? I'll want to rinse the hull and other parts needing paint with the pressure washer after the vinegar wash/etch, which would ideally be done outside before the weather turns. I can paint in my heated garage at anytime. Hoping I can get everything stripped and etched(now while it's warm), and just give a good wipe down with acetone prior to paint, even if it's weeks or months later and the dead of winter. My understanding is the chemical wash is creating a physical etch, which shouldn't necessarily have a hypothetical "expiration date". I'll also be sanding all surfaces to be painted with 220 as well.
Etching has a shelf life. Oxidation starts once the raw aluminum is exposed to Air.

SHSU
 

Watermann

Starmada Splash of the Year 2014
Joined
Jan 12, 2013
Messages
13,753
The SW drains, 2 will drain out water twice as fast just makes sure you drill the hole with the transom out and laying flat so when installed it has that perfect 15 degree pitch when installed.

The nav light is way down the road in the finishing stages. I added LED strip lights on my SS when doing the wiring.

What you could do on the boat since it looks to have had a DA sander run over the surface is vinegar wipe down, rinse and then shoot the coat of SE primer. I've been shooting SE with the 1.4 tip that gives a nice even coat. There is not going to be a problem with the adhesion of the paint to the rough primer after that but if you let it sit around dust and debris will collect on the surface so you would need to tack cloth the surface before painting.
 

MNhunter1

Ensign
Joined
May 12, 2014
Messages
980
Spent a lot of time with the Citristrip and orbital sander over the weekend. These MR models have a lot more aluminum panels and pieces than what I had on my Nova and SS. I'm sometimes tempted to just slap some Nautolex over it and save myself the time, but I'm too OCD to cover a mess rather than eliminate it. Now on to patching holes and getting everything ready for paint.

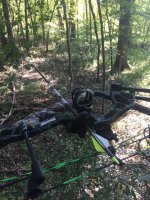
Bow season opened here in MN on Saturday, so after a long ten year wait, I finally got my oldest son out in the stand with me. Had a great evening sit with him coming to full draw on two separate bucks, but no good shot opportunity (brush and fading light). I think he's hooked now.

hunting.jpeghunting2.jpeghunting3.jpeg
 

Watermann

Starmada Splash of the Year 2014
Joined
Jan 12, 2013
Messages
13,753
Awesome to see your boy getting hooked on hunting early on. (y)

Next week is black power elk for me, really looking forward to getting out in the woods.
 

Moserkr

Chief Officer + Starmada Splash Of The Year 2021
Joined
Nov 23, 2020
Messages
834
Love it!!! Congratulations to your boy on his first buck, and archery on top of that!
 
Top