New Journey

DLNorth

Chief Petty Officer
Joined
May 26, 2016
Messages
432
Pretty - IIRC, that fitting is for a pressure tap. and FWIW, my "notes" indicate 82 was prop rated. I can't document this however.
 

MNhunter1

Lieutenant Junior Grade
Joined
May 12, 2014
Messages
1,058
Pretty - IIRC, that fitting is for a pressure tap. and FWIW, my "notes" indicate 82 was prop rated. I can't document this however.

So, what do I need to know about the pressure tap, do I just leave it alone? Looks like the 79-895288A01 Water Pressure Gauge Kit is the correct outboard model.

From (Arne Kjetil) – “Droll” https://forums.iboats.com/threads/mercury-tower-of-power-hp-question.358147/
"1982 Mercury start measuring the engine hp at the propeller, then 140hp becomes 115hp ( ARE some other minor difference too ), Mercury 115 hp engines ABOVE serial 5829464 are rated at the propeller."

A lot of other good info in that thread as well...
 
Last edited:

mattsteg

Petty Officer 2nd Class
Joined
Mar 25, 2019
Messages
177
Two is one, and one is none, right? Picked these two up yesterday, both 115hp, one a 1984 and the other a 1982 (although the skins/decals are the '84-'85 type). Came with three 6 gallon tanks, extra props, manuals, stands, and many extras. Looks like all the core electrical components are interchangeable, as well as many others. Based on my research, the '82 would still be crank rated, however I have also read that serial#'s over 5829464 were prop rated and essentially the old 140hp block. This '82 is serial# 6007313, so could potentially be prop rated as well. The '84 would be prop rated, so it'll be interesting to see where the differences are between the two. Racerone...may need you on this one:)
View attachment 342612

Any idea what this fitting is for? Something to do with cooling? Located between the top three and lower three plugs. It isn't currently attached to anything.
View attachment 342613
Time to ditch the 180 and find a 22 footer for your twins.
 

MNhunter1

Lieutenant Junior Grade
Joined
May 12, 2014
Messages
1,058
I'd love me a 22f'tr, but the 18' is much more suited to my use and fits nicely in my garage.
 

MNhunter1

Lieutenant Junior Grade
Joined
May 12, 2014
Messages
1,058
More importantly, where did you find these motors?
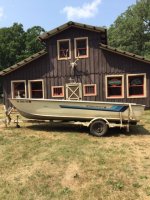
Little town in NWWI, just NE from the MPLS/STP metro across the river. There was a posting for a boat and trailer (old glasser) with a note in the details about two Mercury 115hps available. After a few messages and phone calls to inquire more about the motors, I cleared my calendar for the following morning to make the 5 hour round trip.

Never would have picked up the info on the motors if I had just skimmed passed the ad details, and they never popped up on any of my searches. Pure luck.
 

MNhunter1

Lieutenant Junior Grade
Joined
May 12, 2014
Messages
1,058
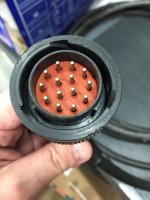
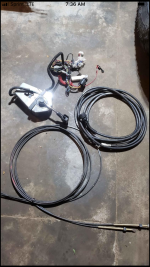
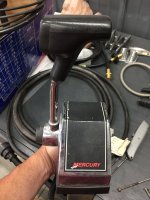
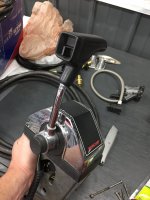
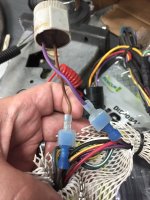
Received by top mount controls w/trim I found for a steal, complete with shift/throttle cables, ignition switch, kill switch, and 14 pin harness. Am I correct in assuming I can just leverage the 14 pin to 8 pin adapter cable to make the connection to the 8 pin motor harness? Will obviously need to make the appropriate trim switch connections as well.
C6DAFBF6-249B-4901-AEA4-698713AC2421.jpeg25EA6DEA-A6FD-42A5-A3EF-EDAA80FBEAB5.pngE82264A6-EB9F-4615-B7ED-F41D3FCB1DC0.jpegD0FA81D8-C317-4EDC-AA07-5FEB5B271D52.jpeg
 

MNhunter1

Lieutenant Junior Grade
Joined
May 12, 2014
Messages
1,058
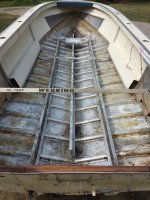
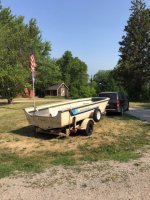
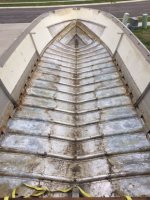
Took the kiddos north for the weekend to get some fall food plots in and drug the gutted hull 4 hours home. Managed to get all the foam dug out and a quick wash down before the trip to save a little mess back home. Now that she's home, I can get the rest of the tear down completed with the trim rails, gunnels, transom, and deck braces. Thinking I'll need to drill out the solid rivets attaching the lower side supports in order to fully address/clean the hull and ease the installation of the new deck.

IMG_0389.JPGIMG_0390.JPGIMG_0392.JPG
 

MNhunter1

Lieutenant Junior Grade
Joined
May 12, 2014
Messages
1,058
Had a little time after the kids went to bed to get the deck stringers, inside rub rail/trim, and end caps removed. Also drilled out all the rivets on the gunnels aside from what is under the outside rub rail. The nose piece is being a bit stubborn, and that needs to come off before I can remove the outside rub rail and the remaining rivets to remove the gunnels. This MR has the styro under the gunnels and it's packed in pretty tight, so I'm anticipating some challenges with the rub rail bolts as well. Was hoping to get the styro all removed and in the trash for pick-up day today, but I guess it'll have to wait for next week

Also got most of the hardware removed from the transom to prep for removal. Sorry, no pics todays.

For cleaning up the inside of the hull...is a vinegar wash and scotchbrite pads still the preferred method. Fine stainless steel wire wheel for the stubborn areas?
 

Mikesta

Petty Officer 3rd Class
Joined
Mar 15, 2018
Messages
86
I've been using the wire wheels from harbor freight to clean the inside of the hull. You can buy like 3 or 4 of them for the price of the ones at the big box stores and honestly i think they last 3 or 4 times longer.....go figure huh. I haven't been a big fan of the actual cup style wire wheels, they sell a flatter one that I like using much more. For any spots with deep corrosion that the wire wheels wont get out I use a dremel with a wood carving tip i think.
 

SHSU

Lieutenant Junior+Starmada Splash Of The Year 2019
Joined
Mar 8, 2017
Messages
1,741
Depends on how "clean" you want the hull to be. If you are just doing a dust/dirt scrub then vinegar with scotch brite should do fine. If you are looking for oxidation removal you will need to get something more aggressive.

I used the same wire brush for HF too. You just have to remember its steel so you have to be careful to not go overboard and do a thorough job of cleaning out the wires. You will find them every where.

SHSU
 

classiccat

"Captain" + Starmada Splash Of The Year 2020
Joined
Dec 20, 2010
Messages
3,412
For cleaning up the inside of the hull...is a vinegar wash and scotchbrite pads still the preferred method. Fine stainless steel wire wheel for the stubborn areas?
Nyalox orange cup brush in a drill is great for aggressively removing oxidation yet gentle on the underlying aluminum.
 

MNhunter1

Lieutenant Junior Grade
Joined
May 12, 2014
Messages
1,058
I'll try to get some pics over the weekend as I progress along, but two things:

1) I really miss the old methylene chloride aircraft stripper.

2) This transom was much more difficult to break loose than my previous two rebuilds.
 
Top