Rehab SportCraft 222 1983 deep V hull cuddy walkaround

zool

Captain
Joined
Aug 19, 2012
Messages
3,432
I cant see any pics either......looks like they took away ur pics as well as ur PM's....You must have done something wrong :rolleyes:

The transom is coming out great tho! :)
 

kcassells

Fleet Admiral
Joined
Oct 16, 2012
Messages
8,720
Thanks Zool. Yea I'm at work and the pic doesn't show up now. Another boat forum with some build info. I thought was cool to pass on. Oh well.
 

kcassells

Fleet Admiral
Joined
Oct 16, 2012
Messages
8,720
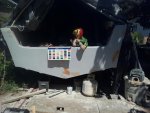
Put down 2 more coats this morning when I got home.
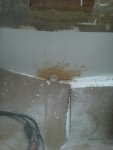
Picked up some 220 grit, better 6" roller pans, Also had to fill some pin holes that were not getting out of my head.
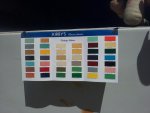
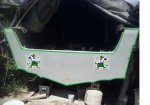
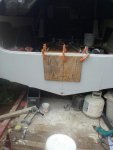
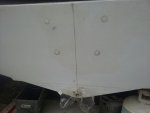
So that being said posted the color chart from Kirbys against the transom with some color selections to choose from. I brought out the Admiral to look and pick... {somewhat} Looks like I'm/we are going with the vintage selections and tying in Notre Dame color theme for my pop.
That sample chart are actual applied chips on there brochure.
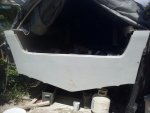
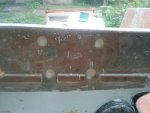
Did some wet dry sanding with the 220 and will throw another 2 coats on tom. and be done with it. You could spend the rest of your life nickpicking. Done then says I!
Gots some heat here for sure. Supposed to breal the next few days. Perfect weather finally.

trans 1 pin holes.jpgcolors 2.jpgwet dry sand 220.jpg
 

Woodonglass

Supreme Mariner
Joined
Dec 29, 2009
Messages
25,927
Hey Kev...JBCurt00 just reminded me on another post that...ACE Hardware makes their own Brand of "Rust Preventative Paint" (i.e. Rustoleum) and they will Tint it to any color you can think of!!! It's good stuff and the Hardener will work with it too. If you haven't bought your color coat paint this might be worth looking into. In Oklahoma it sells for $10 a quart. I think that KIRBY Paint is like $40 per quart. It might be worth the extra money I'm just not sure.
 

kcassells

Fleet Admiral
Joined
Oct 16, 2012
Messages
8,720
Thanks Mike !!! You are always on the lookout for me. I'll look into it. They just closed the Ace Hardware store near me.
Was close and conveinant, little higher $$ but was worht it.
 

kcassells

Fleet Admiral
Joined
Oct 16, 2012
Messages
8,720
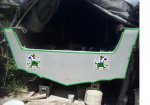
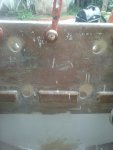
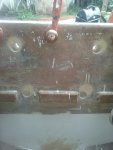
Good intentions, crappy results. So bought some drill bits, drill guide etc. to pop the holes in my transom for garboard drain and outboard bolts.
Took my time and aligned all the goods and marked off level/square. Nothing lined up with the predrilled already overdrilled filled epoxy holes.
Total cluster Duck.
Back to basics, repair and go at it again. Poop says I!
yuck yuck, Always repairable and always learning.

transom 1.jpgtransom 4.jpg
 

Attachments

  • transom 2.jpg
    transom 2.jpg
    140.8 KB · Views: 0
  • transom 3.jpg
    transom 3.jpg
    127.2 KB · Views: 0

zool

Captain
Joined
Aug 19, 2012
Messages
3,432
I dont see a major problem, if the holes are where they need to be, but just not totally in the pre-filled areas, then so be it. Take some thickened resin, coat the hole edges, and move on....
 

kcassells

Fleet Admiral
Joined
Oct 16, 2012
Messages
8,720
Thanks Guys the the moral support. I used that same wood template I made years ago. It showed up the other day. Forgot all about it. The bummer is only the time to redo.
Going back out to kick some boat ransom arse!;)
 

oldrem

Commander
Joined
Nov 7, 2013
Messages
2,002
Glad I've never had to redo anything. Well maybe except for that one time. Hmmm then there was that one = and that one. Oops, can't forget that one either. Well heck, Nevermind. You'll get 'er done right!
 

kcassells

Fleet Admiral
Joined
Oct 16, 2012
Messages
8,720
Thanks Sam and Rem,
That vid was great. So yup went back out with a clear head and knocked it out. Looking for any ideas to cap the transom. Almost contemplating sanding it down to grain, stain, eeepppooxxy clear coat. Or is it the other way around? UV rays?
Will be putting down some paint and puttin on the motor. That will let me do wiring fall/winter. In add'n Get dat floor down too.
There is a method to my madness. Stay awake for further adventures. :D

Click image for larger version  Name:	tr rep 1.jpg Views:	1 Size:	46.3 KB ID:	10647000Click image for larger version  Name:	tr rep 2.jpg Views:	1 Size:	115.2 KB ID:	10647001

On the garboard drain the hole was overdrilled. The unit has a @3/4" tailpc. that follows into the penetration. So I stuffed some poly on the inside for a type of stopper of the eeepppoooxxxy.
Filled flush on outside. Laid another poly over that loosely then pressed the drain into the open so in short making the wet eeePPPoooxxy conform to the shape. Will pull out as it sets up.
 
Top