You Guys Inspired Me!!!!

jbcurt00

Moderator
Staff member
Joined
Oct 25, 2011
Messages
24,995
Re: You Guys Inspired Me!!!!

Yes 2 pcs of 3/4" exterior plywood are glued up to make the 1.5" thick transom. Be sure to use waterproof glue when you laminate the 2 pcs of 3/4" plywood:
TiteBond III
Polyurethane glue (Gorilla, TiteBond, & others){foams & expands as it dries, so be sure pcs are well screwed &/or clamped together}
Epoxy
PL
 

lakelover

Rear Admiral
Joined
Mar 26, 2003
Messages
4,386
Re: You Guys Inspired Me!!!!

Too bad about the bow, but not a bad split. Are you going to have it welded? I'm not sure what I'd do i n a case like that, but I'd want the bow to be good & strong. I'd probably lean toward welding. Never had to deal with that before.
 

classiccat

"Captain" + Starmada Splash Of The Year 2020
Joined
Dec 20, 2010
Messages
3,411
Re: You Guys Inspired Me!!!!

Nice progress!!
 

InMotion

Commander
Joined
Nov 3, 2011
Messages
2,080
Re: You Guys Inspired Me!!!!

Nice progress CP... trailer looks good... Diddo on the 90... were you able to pick it up yet?

Sorry for the delay on the coils... but mine were a bit different design... but yes they were cracked like that but a whole lot worse. Generally, from what I have been told, a good idea to replace them once they begin to crack and split. Yours may be just fine still though.

J.
 

barato2

Commander
Joined
Dec 7, 2010
Messages
2,956
Re: You Guys Inspired Me!!!!

on the coils, these are a chronic old-OMC failure item, and yes, once they start to crack, replace em. they're cheap....absurdly so, if i recall right from when i was looking at identical motor and pricing parts. and since you have to pull flywheel to replace em, this is not one you can do at sea.

i'd for sure TIG weld the crack and maybe weld in/on some reinf for the area while you're at it....that area of bow has a hard life.

your progress is loooking great! your tin hull heaved a sigh of relief when you yanked that bowed tranny.
 

vandenburgh

Cadet
Joined
Aug 22, 2010
Messages
11
Re: You Guys Inspired Me!!!!

Good luck with the project, very satisfying to restore one of these classics. i trolled this site for inspiration a couple years ago and redid a Jetstar, wish i had documented my work to contribute like you are....

Anyways, an alternative to consider instead of epoxy for protecting the transom and deck floors is a 'moisture cured' coating sold under the name of Aluthane. The web store peddling this stuff coated a piece of plywood and submerged it for over a year in water and they claim it did not delaminate. It is a bit pricey, but very quick and easy to use, just don't get it on your skin because it really sticks. This stuff seems very durable. I used it on my jet star restore and was very pleased so far...will see if it stands the test of time. Not sure if anyone else on forum has used the product, just my two cents. I've used epoxy before and while it is the tried and true method, it was a lot more time consuming than applying the Aluthane and the Aluthane looks great, dries a nice gray color.

In addition to appearing to have sealed the plywood from water, It also seemed to withstand gasoline spill as I had a leaky fitting that let loose about two gallons of fuel inside the boat as tank pressurized from the summer heat, totally soaked the carpet and ate though the rubber backing, but left the Aluthane coated deck floor underneath unscathed, not even a stain or blemish. Will see how it does over the long haul, just thought I would throw that out there.

Another consideration, On the trailer, if using bunks vs rollers (rollers were out of my budget) topping the bunks with strips of HDP (I sliced a plastic cutting board from wallyword into strips as my source) instead of carpet works well...just be careful because the boat will slide right off - very slippery indeed!
 

cpdchap

Petty Officer 2nd Class
Joined
Mar 2, 2013
Messages
162
Re: You Guys Inspired Me!!!!

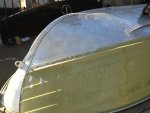
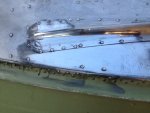
So I decided to start the paint removal off the bottom and realized that when they painted these things at the factory they knew what they were doing, so I sent an IM to InMotion and got some much appreciated advice, Thanks Jim! So I couldnt get the Safe Strip local so I went with aircraft stripper and so far it is going pretty well. I am about 1/3 done and couldn't resist doing a little test spot on the polishing. The polishing part is something I am much more familiar with, but I wanted to see how much I would be able to hide on this old hull, so I did a real quick test.
 

Attachments

  • aint stripping.JPG
    aint stripping.JPG
    104 KB · Views: 3
  • test polish.JPG
    test polish.JPG
    115.2 KB · Views: 3
  • test polish 2.JPG
    test polish 2.JPG
    110.3 KB · Views: 3

cpdchap

Petty Officer 2nd Class
Joined
Mar 2, 2013
Messages
162
Re: You Guys Inspired Me!!!!

Too bad about the bow, but not a bad split. Are you going to have it welded? I'm not sure what I'd do i n a case like that, but I'd want the bow to be good & strong. I'd probably lean toward welding. Never had to deal with that before.

I already talked to a guy I know and we are going to reshape it then TIG weld it.
 

lakelover

Rear Admiral
Joined
Mar 26, 2003
Messages
4,386
Re: You Guys Inspired Me!!!!

That hull is really gonna shine! I know a number of others have polished the aluminum hulls, how does the shine hold up? Does it require maintenance to retain the shine?
 

InMotion

Commander
Joined
Nov 3, 2011
Messages
2,080
Re: You Guys Inspired Me!!!!

So I decided to start the paint removal off the bottom and realized that when they painted these things at the factory they knew what they were doing, so I sent an IM to InMotion and got some much appreciated advice, Thanks Jim! So I couldnt get the Safe Strip local so I went with aircraft stripper and so far it is going pretty well. I am about 1/3 done and couldn't resist doing a little test spot on the polishing. The polishing part is something I am much more familiar with, but I wanted to see how much I would be able to hide on this old hull, so I did a real quick test.

Glad I could be of assistance man!!! Looks like you are really rolling along! Awesome stuff!

What is your technic for polishing... it looks terrific! :)

J.
 

odyssey350kc

Petty Officer 2nd Class
Joined
Jun 5, 2012
Messages
144
Re: You Guys Inspired Me!!!!

I hope you've got some time on your hands, it will look awesome polished, but Its gonna be alot of work.
 

InMotion

Commander
Joined
Nov 3, 2011
Messages
2,080
Re: You Guys Inspired Me!!!!

That hull is really gonna shine! I know a number of others have polished the aluminum hulls, how does the shine hold up? Does it require maintenance to retain the shine?

Hey LL.... I had a hard time telling the difference between when I did it and after sitting in the lake for the whole summer. It took me about 15 minutes to wipe off the water grime at the water line but once that was off --- it really still looks terrific. Think of it this way... it's a lot easier to clean a mirror than a concrete floor --- way less tiny pockets for the dirt/grime etc to get stuck in. The level of polishing I did was good enough to make it easy to clean up and not too many pockets for dirt/grime.

J.
 

classiccat

"Captain" + Starmada Splash Of The Year 2020
Joined
Dec 20, 2010
Messages
3,411
Re: You Guys Inspired Me!!!!

that would make a cool avatar pic! :cool:
 

cpdchap

Petty Officer 2nd Class
Joined
Mar 2, 2013
Messages
162
Re: You Guys Inspired Me!!!!

Remember guys I don't have the guts or should I say the testicular fotitude to do the whole boat like InMotion, I am just doing from the water line down and the one panel up the bow. The rest will be viper red up to the top lip and grey mist metalic on top rails and inside.

InMotion, as for the polishing, as I stated before in this thread, my father-in-law has had a body shop and been in the buisness for about 40 years and knows alot of little tricks. We had a pontoon a couple years ago and we polished the pontoons out like mirrors, everyone would comment on it. When polishing aluminum you use a buffing wheel and different colors of clay bars. Yesterday I did those spots in about 3 min with one color of clay (green) which is med. If you start with black and work your way through to white, it would look like the fuel tanks on a semi-truck. I don't plan on going that far. I plan on sanding it down with 400 and then going maybe to colors and I should be able to knock out the bottom in a good long Saturday. Also, you have 3 or 4 different size wheels to get around smaaler stuff like rivets. I will also do the top rails and other little trim parts. When I actually do it I will post good pics. of all the stuff. But in response to Odyssey, if it takes longer no problem I am having fun. We knocked out an 18' pontoon in a couple of evenings.
 

cpdchap

Petty Officer 2nd Class
Joined
Mar 2, 2013
Messages
162
Re: You Guys Inspired Me!!!!

Just a quick update, bottom line, no paint on the trailer today. I can tell all kinds of grand stories but the truth of the matter is I had an opportunity to make some good money in a short amount of time and have lived long enough to not pass it up. So next weekend it should happen, meanwhile I will finish stripping paint and polishing, if I can squeeze in some time. Hope everyone is having a great weekend!
 

GA_Boater

Honorary Moderator Emeritus
Joined
May 24, 2011
Messages
49,038
Re: You Guys Inspired Me!!!!

Ya gotta have dough for boat goodies. :D
 

barato2

Commander
Joined
Dec 7, 2010
Messages
2,956
Re: You Guys Inspired Me!!!!

the single most effective tool for boat resto----does EVERYTHING---is a small plastic rectangle :D
 

cpdchap

Petty Officer 2nd Class
Joined
Mar 2, 2013
Messages
162
Re: You Guys Inspired Me!!!!

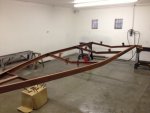
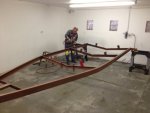
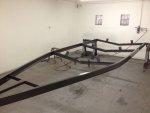
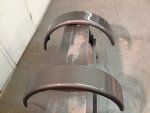
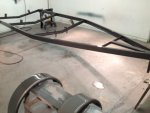
Unbelievable!!!!!!!! It finally happened!!! I have been so busy that I didn't even bother getting back on here with my excuses and update on what DIDN'T happen. So I had a couple hours free this morning and hooked up the trailer and hauled it out to my father-in-laws shop. He was all ready to go so we backed it in and dropped the axle wiped it down with cleaner and a tack cloth and started spraying. The gray metallic layed down super nice and dried up pretty quick. I waited a couple hours, bolted the axle back up and hauled her home. Now all I have to do is install the new rollers and recover my bunks and bolt them on and I am good to go.Hopefully my schedule slows down a little this week and I can get going on the bottom of the SS.
 

Attachments

  • TP1.JPG
    TP1.JPG
    90 KB · Views: 2
  • TP2.JPG
    TP2.JPG
    88 KB · Views: 2
  • TP3.JPG
    TP3.JPG
    90.6 KB · Views: 2
  • TP4.JPG
    TP4.JPG
    95.1 KB · Views: 2
  • TP5.JPG
    TP5.JPG
    100.3 KB · Views: 2
Top