Where do I belong? Alum Goods 1687, SS16 Clone?

renns

Petty Officer 1st Class
Joined
Dec 20, 2017
Messages
316
I checked HD stock. There seems to be plenty of stock in cottage country: Midland, Bracebridge, and beyond. I have a buddy who's passing through Bracebridge this weekend. If my under-splashwell pieces work out OK, I'm going to have him pick up a couple more quart cans. It's something like $22/quart. The label says it's specifically designed to adhere Dekmaster vinyl sheeting along critical edges.
 

ShoestringMariner

Lieutenant Commander
Joined
Apr 18, 2015
Messages
1,563
I checked HD stock. There seems to be plenty of stock in cottage country: Midland, Bracebridge, and beyond. I have a buddy who's passing through Bracebridge this weekend. If my under-splashwell pieces work out OK, I'm going to have him pick up a couple more quart cans. It's something like $22/quart. The label says it's specifically designed to adhere Dekmaster vinyl sheeting along critical edges.
Excellent.
 

SHSU

Lieutenant Junior+Starmada Splash Of The Year 2019
Joined
Mar 8, 2017
Messages
1,665
I wish I had done the testing you did. I used 3m 90 and was pleased with how it worked for the floors. Not thrilled with the sides.... It has been a battle in some areas to keep the Nautolex sticking to the sides.

SHSU
 

renns

Petty Officer 1st Class
Joined
Dec 20, 2017
Messages
316
I must admit this whole project has been far more involved, particularly from the 'research' side of things, than I'd expected at the outset. Of course, when I started this project, I figured all that was needed was to dress up the paint and fix the transom. I looked at these empty hull build threads, and thought - no way am I getting into something like that! Live and learn on that front!

I've just finished bonding the vinyl to the deck panels under the splash-well. I haven't wrapped the edges yet, but will hopefully get that done tomorrow night. The corner trimming, and stapling with stainless staples will be another learning curve for me.

I do like the dek-master trim adhesive product. The viscosity seems to be a good balance that allows decent penetration into the substrate, while leaving enough residue on the surface to get some purchase when the materials are joined. I've used about 1/3 quart so far, so it looks like two more quarts _should_ finish up the deck vinyl.
 

renns

Petty Officer 1st Class
Joined
Dec 20, 2017
Messages
316
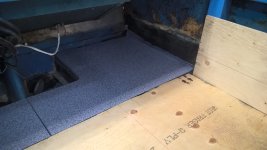
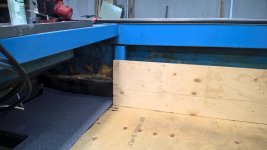
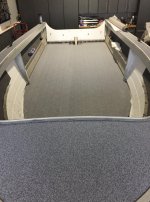
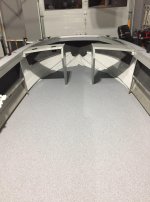
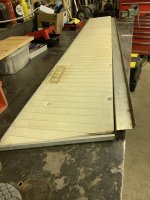
OK, got the rear two deck panels wrapped in vinyl. The edge folding and fiddling around the curve at the bilge hole was fiddly, but turned out OK. I left the outboard edge un-folded as mentioned previously. It needs to be trimmed back a bit so it can fit into the splashwell properly. Tomorrow night... Pop rivets are on order. Once they are in, the deck and foam can come out one last time for a final vacuum, and then get popped into place.
WP_20220117_16_40_29_Pro.jpg
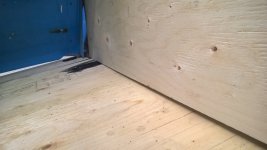
I also cut side panels out of 1/2 ply. The thinking at this point is to wrap them in pleated vinyl kinda like the many original boats of this era. At this point it looks like the deck panels under the consoles rise up just a bit, keep the side panels from sitting flush along the deck. I'm tempted to leave the deck alone, and trim the side panels to sit flush. It looks like it'll be less than 1/2" just up under the consoles. If I'm overlooking some other issue, hopefully someone will speak up!
WP_20220117_16_39_35_Pro.jpg
 

ShoestringMariner

Lieutenant Commander
Joined
Apr 18, 2015
Messages
1,563
Exciting stuff…I like the grey. Thought about that colour myself.

Do you still have the original side panels? On the StarCrafts, the panels stop short of the consoles. Not sure if my floor had a rise from the console forward but I don’t recall one. Perhaps someone can weigh in.
 

renns

Petty Officer 1st Class
Joined
Dec 20, 2017
Messages
316
The side panels that were in the boat were chipboard wrapped in vinyl. They did not look original and are now long gone. The panels I've cut are currently a full 8 ft from the back of the vertical support under the splashwell to the big angle you can see under the console. The Nautolex is the Storm Gray colour, which I was hoping would be a bit lighter than it actually is.
 
Last edited:

renns

Petty Officer 1st Class
Joined
Dec 20, 2017
Messages
316
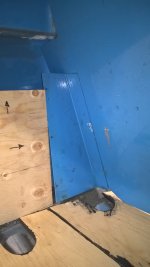
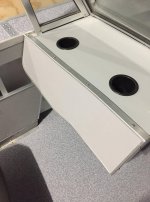
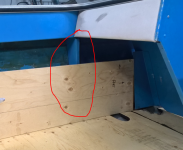
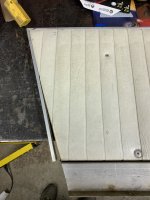
OK, question for any SS owners out there. The side panels - where do they end under the console? If back at the vertical member, is there a second 'kick panel' that covers the area forward of that under the console? I'm having trouble getting a nice fit with a single piece all the way from back to front. See below.WP_20220118_18_59_40_Pro.jpg

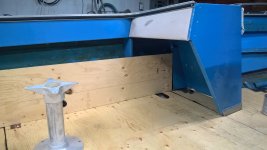
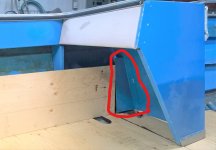
Here's another shot further back. The section going forward under the console doesn't fit nicely as the hull starts to bent inwards there, and the deck rides up a bit due to the foam fitment below.WP_20220118_19_02_13_Pro.jpg

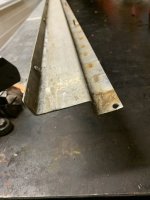
And here's how I have it lined at at the splashwell - flush with that vertical member. From a structural standpoint, the verticals front and rear, and whatever angle-brackets I rig up along the deck are it. All along that storage compartment is an aluminum strip held in place by the spray foam. On the inside there is a return bent down to accept fasteners from the side panel. On the hull side there doesn't appear to be any support other than the foam from below
WP_20220118_19_02_06_Pro.jpg
 
Last edited:

SHSU

Lieutenant Junior+Starmada Splash Of The Year 2019
Joined
Mar 8, 2017
Messages
1,665
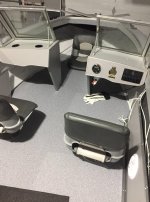
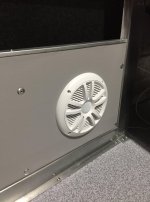
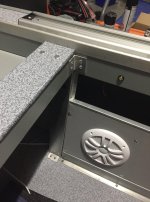
Mine terminated in the same area as @MNhunter1.

Capture.PNG

Also, for the gap at the bottom, I like the idea of a small one to allow water to flow through. Mine didn't sit flush for this reason.

SHSU
 

ShoestringMariner

Lieutenant Commander
Joined
Apr 18, 2015
Messages
1,563
The SC panels are angle cut at the consoles. Let me know if you need dims. If my Brothers boat is accessible I’ll see if I can get you pics. His is same as yours (alum goods)
 

renns

Petty Officer 1st Class
Joined
Dec 20, 2017
Messages
316
MN - thanks for those pics. There is no sign of any of that nice aluminum trim that contacts the side panels anywhere in my project. The side panels sat right on the deck (replacements from PO) were pushed up tight against the side hull spray foam, and held there with an aluminum angle screwed to the deck. A couple other screws along the top edge kept it from falling over. I'm not concerned with an 'original' restoration. I just want it to look tidy, and to be sure the mounting method is structurally adequate to provide the required hull stiffening. The only solid structure to attach it to is those verticals at each end. All along the length is an aluminum strip acting as the bottom of the shelf area. I has a flange bent down to receive fasteners from the side panel, but that is more to support itself than to support the panel.

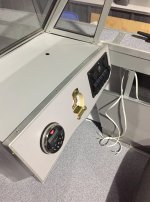
So in the SS, there is no 'kick panel' under the consoles along the side of the hull? Mine has these big aluminum angles affixed to the inside of the console that appear to have supported something of significance at some point. The previous owner had used pieces of plexiglass to make see-through storage bins in that area, but that was clearly an 'add-on' IMO.
1642590969105.jpeg

SSM - thx for the offer. If the boat is easily accessible, that'd be great. Not urgent though, as it's out of curiosity more than anything. This is not destined to be an 'original' restoration anyways.

SHSU - I was thinking opposite. Keep water on the deck and heading aft. That would keep under-deck area forward of the bilge hopefully drier?
 
Last edited:

ShoestringMariner

Lieutenant Commander
Joined
Apr 18, 2015
Messages
1,563
The StarCraft panels for a 16 foot boat are 13 inches from the floor total height. (From bottom of aluminum Z bracket to the top of the panel(. 77 1/2 inches long at the bottom and 82 1/4 inches long at the top.

the aluminum Z profile is 7/8 flange on the floor, up 2 inches then 3/4” x 1” offset at the top.
 

Attachments

  • 3FFC105D-04FF-4671-8127-C2751627CAB1.jpeg
    3FFC105D-04FF-4671-8127-C2751627CAB1.jpeg
    1.6 MB · Views: 7

renns

Petty Officer 1st Class
Joined
Dec 20, 2017
Messages
316
SSM - Thanks for those details! I cut my ply at 13" already, so looks like I guessed well. It'll sit slightly higher if I have a leg of angle underneath. I am tempted to talk to a fab shop about making up those angle pieces at the bottom of the SS panels though. They are a nice detail.
Interesting about the longer top dimension - are they square at the back, and angled at front only? Kinda looks that way from MN's pics. I was thinking of extending the top section of the starboard side under the console to provide a surface to mount my electrical/fuse box. I'm thinking that would be accessible enough, but also protected from weather and mechanical damage.
 

ShoestringMariner

Lieutenant Commander
Joined
Apr 18, 2015
Messages
1,563
SSM - Thanks for those details! I cut my ply at 13" already, so looks like I guessed well. It'll sit slightly higher if I have a leg of angle underneath. I am tempted to talk to a fab shop about making up those angle pieces at the bottom of the SS panels though. They are a nice detail.
Interesting about the longer top dimension - are they square at the back, and angled at front only? Kinda looks that way from MN's pics. I was thinking of extending the top section of the starboard side under the console to provide a surface to mount my electrical/fuse box. I'm thinking that would be accessible enough, but also protected from weather and mechanical damage.
Anytime. Yes, 90 degree or square At the transom. On StarCrafts they butt into a vertical channel that frames out the sliding door system.
I can bend them up for you if you don’t have anyone close by. I have to pick up some 5052 aluminum to rework my bow seats.

I editited the pics above z bar detail and I cleaned up my bench lol
 
Last edited:

ShoestringMariner

Lieutenant Commander
Joined
Apr 18, 2015
Messages
1,563
Sorry edit didn’t take
 

Attachments

  • A9CEF303-A0DB-4234-95EE-B083ACA69273.jpeg
    A9CEF303-A0DB-4234-95EE-B083ACA69273.jpeg
    1.3 MB · Views: 4
  • F3FA1FA6-CB7B-4A3C-A5BB-CC41DDC8BBE0.jpeg
    F3FA1FA6-CB7B-4A3C-A5BB-CC41DDC8BBE0.jpeg
    1.5 MB · Views: 4

renns

Petty Officer 1st Class
Joined
Dec 20, 2017
Messages
316
SSM - thanks for the further pics and generous offer! Will chat in PM's further.
I've read numerous comments about the side panels offering structural reinforcement for the hull. I'm wondering about that aspect, as perching the plywood up on a somewhat flexible aluminum z-profile would seem to reduce that effect? If I just fixed a 1x1 angle to the deck, and set my ply side panel down into it, that would seem to offer more significant support to the deck and ribs below? I wonder if @classiccat might comment? I saw his posts about hull loadings, reinforcement techniques, and the value of the side panels.
 

MNhunter1

Ensign
Joined
May 12, 2014
Messages
980
SSM - thanks for the further pics and generous offer! Will chat in PM's further.
I've read numerous comments about the side panels offering structural reinforcement for the hull. I'm wondering about that aspect, as perching the plywood up on a somewhat flexible aluminum z-profile would seem to reduce that effect? If I just fixed a 1x1 angle to the deck, and set my ply side panel down into it, that would seem to offer more significant support to the deck and ribs below? I wonder if @classiccat might comment? I saw his posts about hull loadings, reinforcement techniques, and the value of the side panels.
There's really not much flex in the trim piece once everything is tied together. The attachment to that shelf, attachment of the trim, trim secured to the deck, along with the attachment to the vertical supports on both ends really tightens things up. It's amazing to see how much flex you get when you start removing the splashwell, gunnels, bow caps, side panels, consoles, etc. and how it all tightens back up when you reinstall them with new rivets/hardware. It really is engineered as an overall system.

The aluminum angle would work just fine as long as you secure it both to the deck and the side panel.
 
Top