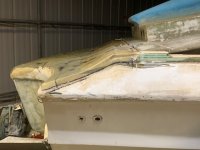
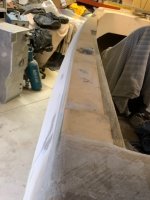
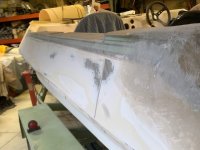
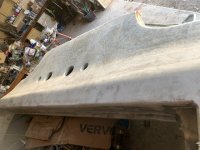
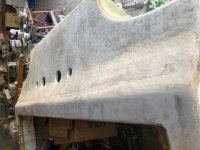
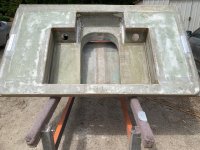
Stringer repair

bjf66

Chief Petty Officer
Joined
Dec 6, 2016
Messages
406
Hydraulic saginaw steering pump
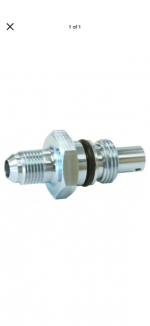
picked up the flow valve for steering pumping to reduce flow
the AN6 fitting is added
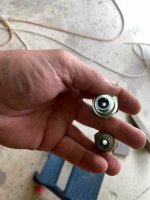
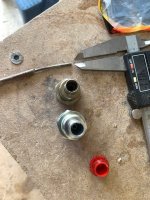
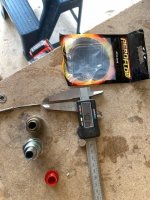
took a photo comparing the original GM Saginaw powerflow valve which is 4mm ID and flows approx. 4 gallons/min and the new aeroflow powerflow valve AF 64-2915
which is approx. 2.5mm ID as managed to get welding rod down the hole, so perhaps the actual hole is 2.6mm ID and is suppose to flow 2 gallons/min
 

Attachments

  • IMG_5482.PNG
    IMG_5482.PNG
    170.3 KB · Views: 0
  • IMG_5481.JPG
    IMG_5481.JPG
    49.9 KB · Views: 0
  • IMG_5480.JPG
    IMG_5480.JPG
    87.9 KB · Views: 0
  • IMG_5479.JPG
    IMG_5479.JPG
    93.5 KB · Views: 0

bjf66

Chief Petty Officer
Joined
Dec 6, 2016
Messages
406
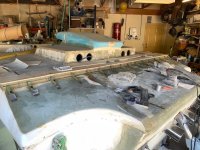
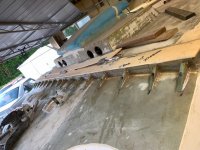
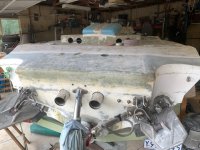
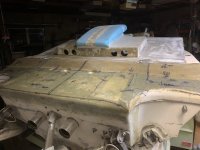
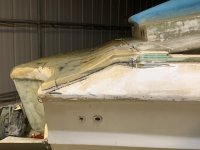
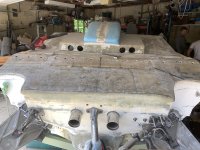
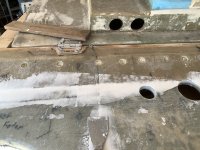
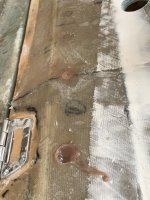
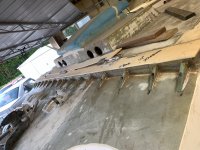
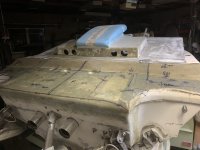
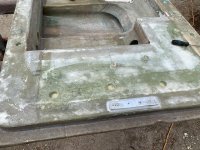
working on back of deck over weekend
laminated gussets out of gurit /Divinycell board 12mm then, cut 15 wedge shape the width of deck 2200mm and then glued and filleted with PB mix

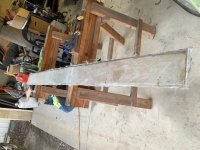
Then laminated up 2200x120mm x 6mm Divinycell board with 300 grm CSM/612 grm Biaxle cloth each side of board
Once glued and screwed down on to wedges this should be strong enough although thinking to foam underneath

Then can start to radius and lay the cloth over the new section of rear deck
Need it to be sturdy enough to walk on
 

Attachments

  • pic1.jpg
    pic1.jpg
    105.1 KB · Views: 8
  • pic2.jpg
    pic2.jpg
    105.1 KB · Views: 8
  • pic3.jpg
    pic3.jpg
    107.7 KB · Views: 8

bjf66

Chief Petty Officer
Joined
Dec 6, 2016
Messages
406
more grinding, filling, gluing, laminating
starting to now take shape
 

Attachments

  • 14.jpg
    14.jpg
    96.5 KB · Views: 5

bjf66

Chief Petty Officer
Joined
Dec 6, 2016
Messages
406
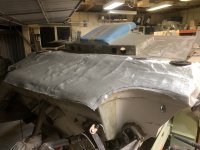
this afternoon managed to laminate 300grm CSM, and 612 Grm Biaxle cloth
needs a little filling
will lay another laminate of 300 grm CSM/ 612 grm Biaxle
then not to sure whether I should fill the cavity with foam to increase rigidity of the rear deck
a little more work, but at this stage it doesn't matter
 

Attachments

  • 16.jpg
    16.jpg
    75.3 KB · Views: 10
  • 17.jpg
    17.jpg
    63.8 KB · Views: 9

bjf66

Chief Petty Officer
Joined
Dec 6, 2016
Messages
406
POLYURETHANE FOAMING HULL
have been using GP330 PU 2 part foam sub floors, http://media.erapol.com.au/wp-content/uploads/files/products/foams/Rigid/GPFoam/Ecofoam GP330.pdf
This achieves density of 33- 40kg/M3, and 90% closed cell, and compressive strength of < 200 KPA.
Have filled in rear deck panel, and there is in built cavity. was thinking to fill with PU foam. However only need a small amount.
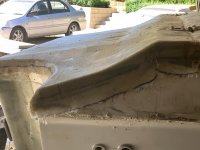
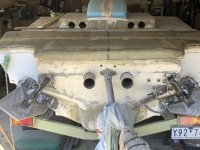
Do you think that using PU construction foam from Bunnings available in 500grm spray pack would achieve same result.
Seems the Bostik, https://2ecffd01e1ab3e9383f0-07db7b...duct/077be375-13c7-4400-a538-b726bca42c5c.pdf
or Sika PU foam https://aus.sika.com/content/dam/dms/au01/3/sika_boom_ap.pdf
is quite a lot lower in strength and 70% closed cell.
Not sure whether this is important as where the foam will be installed, it wont be swimming in water ......well it may do if I flip the boat
 

bjf66

Chief Petty Officer
Joined
Dec 6, 2016
Messages
406
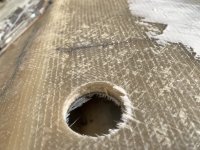
Drilled the holes 3/4” dia to pour foam in
Decided to stay with 2 part pouring foam GP330 as want to use something made for this purposes
Seems the builders PU foam in aerosol can needs to have moisture sprayed on layers to activate and saw this being impractical especial in deep pour to get the foam to the bottom of cavity

will fill the cavities in hatch as well as will have excess left over from 4kg kit as couldn’t find at 2kg kit locally

once frame filled tonight will lay another laminate of 225grm CSM / 612 grm to finish Off with peel ply to smooth surface

getting there
 

Attachments

  • 6397DD5F-BE67-43D4-BBF0-8717485567DE.jpeg
    6397DD5F-BE67-43D4-BBF0-8717485567DE.jpeg
    3.8 MB · Views: 5

bjf66

Chief Petty Officer
Joined
Dec 6, 2016
Messages
406
Drilled the holes 3/4” dia to pour foam in
Decided to stay with 2 part pouring foam GP330 as want to use something made for this purposes
Seems the builders foam pa led in aerosol can needs to have moisture sprayed on layers to activate and saw this being impractical especial in deep pour to get the foam to the bottom of cavity


will fill the cavities in hatch as well as will have excess left over from 4kg kit as couldn’t find at 2kg kit locally

once frame filled tonight will lay another laminate of 225grm CSM / 612 grm to finish Off with peel ply to smooth surface

getting there
 

bjf66

Chief Petty Officer
Joined
Dec 6, 2016
Messages
406
Dug out a little of the foam in pouring holes wetted the inside with acetone, mixed up PB, filled hole with PB, push in plug which was cut out, recess a little deeper than the surface and then fill with PB
All good
Now to clean up the laminate and prepare for another layer of csm/biaxle
 

Attachments

  • EA0BDB13-3E18-4D58-8BAB-D9209C829BEE.jpeg
    EA0BDB13-3E18-4D58-8BAB-D9209C829BEE.jpeg
    3.6 MB · Views: 6
  • 3A02FBC2-FDF7-4A6E-AE50-7059CA9FC2EE.jpeg
    3A02FBC2-FDF7-4A6E-AE50-7059CA9FC2EE.jpeg
    4.3 MB · Views: 6
  • D2B07F8D-8728-472B-A85E-E63771F0E225.jpeg
    D2B07F8D-8728-472B-A85E-E63771F0E225.jpeg
    1.8 MB · Views: 6

Scott Danforth

Grumpy Vintage Moderator still playing with boats
Staff member
Joined
Jul 23, 2011
Messages
49,538
its coming together now. if you can get it done in the next 4-5 weeks, you can splash yet this year
 

bjf66

Chief Petty Officer
Joined
Dec 6, 2016
Messages
406
scott, was thinking I might paint the boat first
yes getting closer
 

bjf66

Chief Petty Officer
Joined
Dec 6, 2016
Messages
406
Up tomorrow morning early to lay the last laminate on rear deck 2300x900mm
225 CSM / 612 grm biaxle
Short on peel ply
Will have to make it work
 

Attachments

  • DAEEE786-5773-4BF4-80E0-6954A818A632.jpeg
    DAEEE786-5773-4BF4-80E0-6954A818A632.jpeg
    3.8 MB · Views: 7

bjf66

Chief Petty Officer
Joined
Dec 6, 2016
Messages
406
1.5 hrs to mix, lay smooth out the laminate
Glad that’s finished
Temperature on the rise today expecting 30c
Happy with result
Some smoothing around edges to take place and will need to skim the surface with microcell mix to fill the glass as it will be. A little rough to take the 2 pak primer
Before and after pic

this afternoon will take of hatch and fill that with foam
May need that as last resort to help float the hull if it flips

now need to turn attention to gunwale sanding, filling, fibreglassing
 

Attachments

  • A405C5B5-EA89-490A-A185-901BC9349C9F.jpeg
    A405C5B5-EA89-490A-A185-901BC9349C9F.jpeg
    3.8 MB · Views: 13
  • 4FEE2D44-96D5-47F5-968F-DAC6379847D1.jpeg
    4FEE2D44-96D5-47F5-968F-DAC6379847D1.jpeg
    3.4 MB · Views: 12
  • AE756B1C-8D24-45DD-8954-2D5C60F52D47.jpeg
    AE756B1C-8D24-45DD-8954-2D5C60F52D47.jpeg
    2.3 MB · Views: 12
  • D799C9C3-0C3D-417C-9542-C6F562F8E54F.jpeg
    D799C9C3-0C3D-417C-9542-C6F562F8E54F.jpeg
    1.9 MB · Views: 12

buxmj

Petty Officer 1st Class
Joined
Jun 9, 2018
Messages
294
That is an impressive build you have, thanks for sharing!
 

bjf66

Chief Petty Officer
Joined
Dec 6, 2016
Messages
406
Buxmj
Thanks, I don’t know whether I planned it this way or it just evolved
However due to COVID and no international travel have been getting a few things sorted.
anway it’s something different and learning a few skills as we go
Cheers Brett
 

bjf66

Chief Petty Officer
Joined
Dec 6, 2016
Messages
406
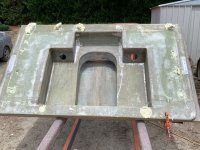
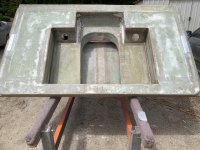
Busy weekend on boat
took the hatch off, so could finish grinding
  • filled some blemishes in glass
  • drilled holes in each compartment of the hatch using 1" hole saw
  • filled with GP330 2 part foam
  • repositioned the core that was taken out and PB back into hatch
  • levelled off and sanded
  • needed a little more CSM/biaxle laminate under the scoop as was a little thin where I have been grinding on top in one place, so add some more cloth underneath
  • all good now
 

Attachments

  • 20.jpg
    20.jpg
    121.6 KB · Views: 6
  • 19.jpg
    19.jpg
    110.9 KB · Views: 6
  • 18.jpg
    18.jpg
    111.2 KB · Views: 6

bjf66

Chief Petty Officer
Joined
Dec 6, 2016
Messages
406
Rear Deck: sanded the rear deck which was glassed last week
need a skim of filling as texture of the biaxle cloth is rough
 

Attachments

  • 17.jpg
    17.jpg
    63.8 KB · Views: 4

bjf66

Chief Petty Officer
Joined
Dec 6, 2016
Messages
406
sanding and shaping the port gunwale and cap. After the sanding was thinking its starting to look like it should be there now
managed to get most of the gunwale and cap sanded up to where the passenger seat/screen starts

working now of the inside of the boat where the hatch would sit
should be in position to lay some CSM/Biaxle latter this week
 

Attachments

  • 22.jpg
    22.jpg
    89.5 KB · Views: 4
  • 21.jpg
    21.jpg
    65.6 KB · Views: 4

bjf66

Chief Petty Officer
Joined
Dec 6, 2016
Messages
406
back into work and travelling last week, the borders of Victoria open, in car driving 1000kms up over border into NSW, i feel like Mel Gibson in Braveheart shouting FREEDOM

Anyway back to boat
picked up new set of 280 k-plane bottom plates for US$150, what a steal,
was thinking of playing around extending the trim plates, as have been looking for a set of 380 (28") but seem difficult to come by, and at the price of US$1100 for a pair of bottom plates, think I can extend the 280 plates with 1/2" plate
anyway that is sometime off, however thought I would grab the plates as never know when you will see them again, and if I stuff it up have the other plates to fall back to
 

Attachments

  • K-planes new NSW.jpg
    K-planes new NSW.jpg
    50.5 KB · Views: 1

bjf66

Chief Petty Officer
Joined
Dec 6, 2016
Messages
406
22c in Mt Martha today
mowed the lawns and then into boat
blended and sanding the rear cap /deck transom part where it was built up
coming along nicely, need a little fill to fill pores of biaxle cloth, but expected that. However the profile seems to be okay
 

Attachments

  • rearcap_transom #2.jpg
    rearcap_transom #2.jpg
    89.8 KB · Views: 3
  • rearcap_transom #1.jpg
    rearcap_transom #1.jpg
    95.3 KB · Views: 3

bjf66

Chief Petty Officer
Joined
Dec 6, 2016
Messages
406
managed to pick up a boat dolly for US$65, need to be widen and length slightly and add few more caster wheels put on, another US$150 will see it right
 

Attachments

  • boat dolly.jpg
    boat dolly.jpg
    111.2 KB · Views: 3
Top