Steam Launch parts acquired

sphelps

Supreme Mariner
Joined
Nov 16, 2011
Messages
11,468
Every part of this build is so cool !
‘Thanks for the updates !
 

seikeinlemming

Petty Officer 2nd Class" & 2020 Splash of the Year
Joined
May 23, 2011
Messages
140
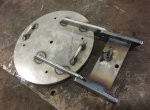
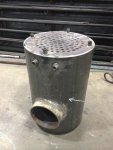
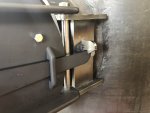
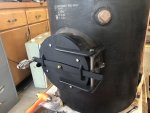
Another update! Just got the fire door welded together. These pieces were laser cut and then machined a bit to open a few clearances. The round part is the door, and then it connects via the hinge to the piece which will be welded to the boiler. You can see the opening that it will cover on the second photo, attaching to the side of the short round opening towards the camera.
 

Attachments

  • photo294931.jpg
    photo294931.jpg
    214 KB · Views: 3
  • photo294932.jpg
    photo294932.jpg
    113 KB · Views: 3

boedekerj

Seaman
Joined
Jul 24, 2017
Messages
71
The nerd in me can't help but point out that your hatch looks like USS Reliant from Wrath of Khan... Sorry...can't....help...it....
 

seikeinlemming

Petty Officer 2nd Class" & 2020 Splash of the Year
Joined
May 23, 2011
Messages
140
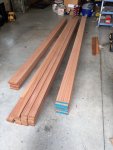
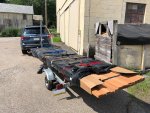
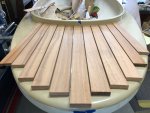
Wood delivery of 944 linear feet of Mahogany, milled to width and thickness so all we have to do is cut to length and craft it to fit the hull. Now things will start to move fast in terms of interior construction, as soon as I get a Saw-Stop table saw.
 

Attachments

  • photo297682.jpg
    photo297682.jpg
    414.7 KB · Views: 2
  • photo297683.jpg
    photo297683.jpg
    626.5 KB · Views: 2

seikeinlemming

Petty Officer 2nd Class" & 2020 Splash of the Year
Joined
May 23, 2011
Messages
140
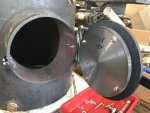
Firebox door has been bolted to the boiler. I need to correct myself on a previous post, the door is not being welded to the boiler because that would be considered a modification and then the boiler needs reinspected, so it has been bolted.

Picture 1 - hinge mechanism with door closed.

Picture 2 - Door open showing the material that will take the majority of the heat from the fire.

Picture 3 - The door locks in the open position so that as waves or other things that rock boats come along they do not cause it to slam shut.
 

Attachments

  • photo298135.jpg
    photo298135.jpg
    149.8 KB · Views: 5
  • photo298136.jpg
    photo298136.jpg
    168.6 KB · Views: 5
  • photo298137.jpg
    photo298137.jpg
    187.9 KB · Views: 5

seikeinlemming

Petty Officer 2nd Class" & 2020 Splash of the Year
Joined
May 23, 2011
Messages
140
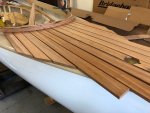
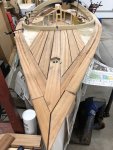
The mahogany is starting to take shape. In the photos below you will see the bow and stern with planks rough cut to length and fitted to the hull. We will be steaming planks that will follow the edge of the the hull. Hopefully that will start in the next week.
 

Attachments

  • photo299222.jpg
    photo299222.jpg
    778.6 KB · Views: 1
  • photo299223.jpg
    photo299223.jpg
    638 KB · Views: 1

seikeinlemming

Petty Officer 2nd Class" & 2020 Splash of the Year
Joined
May 23, 2011
Messages
140
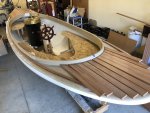
Cleaned up the shop today and got the hull positioned to be able to build everything out faster. We ended up dropping the boiler into the boat to see how it would fit and while we were at it, put the test seats and steering wheel in - it was quite neat to see so much stuff in real life instead of just imagining it.

In the picture of the hull, you will see strips of mahogany wood that run the length of the boat. We will run a few more pieces like this to add layers.

Here's a question - the wheel was finished with (lots and lots of coats) of Man o' War Spar Varnish. Given that this wood could potentially hit docks (hopefully not too hard!) should we finish these pieces with the varnish or something more solid like West System with 207 Special Clear Hardener? No one will really be walking on these decks, they are simply decorative. Some wood will come out over the edge and form a rubrail of sorts.

Thanks in advance!
 

Attachments

  • photo302344.jpg
    photo302344.jpg
    460.3 KB · Views: 1
  • photo302345.jpg
    photo302345.jpg
    1.4 MB · Views: 1

sphelps

Supreme Mariner
Joined
Nov 16, 2011
Messages
11,468
No expert here but I think I would just stick with the varnish ...I may be wrong but would think it would be easier to repair as normal maintenance.. strategic fender placement would help also ..
Ok, now fess up .. How much time did you spend making motor boat sounds at the helm ? :D
‘Now I’m trying to imagine how verbal steam engine sound would sound like ..:lol:
 

seikeinlemming

Petty Officer 2nd Class" & 2020 Splash of the Year
Joined
May 23, 2011
Messages
140
sphelps- Thanks for the idea - I didn't think about repair when we do get an issue with it.

I confess, my dad and I did sit on the seats, look out over the bow, and make a little bit of the steam engine sounds... for about 5 seconds... then we decided we had to take everything apart so we could keep working on it!.
 

seikeinlemming

Petty Officer 2nd Class" & 2020 Splash of the Year
Joined
May 23, 2011
Messages
140
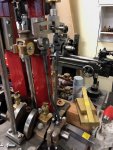
Two quick updates. We have test-assembled the links that will move the valve for the high-pressure cylinder. You will see the eccentrics on the crankshaft (outside of the baseplate) and two rods that connect up towards the valve. The part that looks like it slides is what will be moved to put the engine in forward and reverse.

On the photo of the bow, you will see some of our steamed mahogany in place. The rub-rail is 2.25" wide by 3/4" thick, and was steam-bent in a plastic bag to get it to take the shape we needed. You will see two pieces of wood running parallel to it on the inside. Some of the pieces are not yet fastened, and you will see gaps that look rough, right now they are just being test-fit in place.

One of the hidden 'magic' parts of this is that there are magnets in the center board, spaced at 1' centers. Basically, we decided that when we were at shows, we wouldn't necessarily want the registration numbers present destroying the look of the era, so there are some rare-earth magnets embedded in there that allows us to add and remove the registration plate when necessary with no visible screws. There will be many other little things like this added that will make the boat more than what it looks on the outside.
 

Attachments

  • photo305772.jpg
    photo305772.jpg
    420.5 KB · Views: 3
  • photo305773.jpg
    photo305773.jpg
    383 KB · Views: 3

seikeinlemming

Petty Officer 2nd Class" & 2020 Splash of the Year
Joined
May 23, 2011
Messages
140
We hit a major milestone today: running half the engine on compressed air. You can follow the YouTube link below to see a 14 second clip of the high pressure cylinder providing power to the engine.

There is a lot of background noise from the air compressor and tools rattling on the table etc. This engine will be much quieter than this video for various reasons including the fact that there are still a lot of open holes where air escapes creating excess noise.

Now that this cylinder is running, we turn our attention to the second cylinder and getting it to the same point. You will also note that the engine starts off strong and gradually slows down to the end of the video, this is due to the fact that our air compressor can’t keep up with the air required to keep the engine going, and is not a fault with the engine itself. We let it charge up, run the engine for a bit to see how it goes, and once the tank is depleted it comes to a stop for now - that won’t be a problem once we have an endless supply of steam.

And now, here’s the video!

https://youtu.be/zkzCAsbCyu4


Aside from this, woodwork continues on the hull at a rapid pace, as parts of that get complete I will post those photos.
 
Top