Starcraft 1971'? 16' to Duck Boat Rebuild

ShoestringMariner

Lieutenant Commander
Joined
Apr 18, 2015
Messages
1,593
Okay, what you said regarding rivets is what i gleaned but i wanted to be sure. I like option A as well, just can work as far ahead before i have to get it water for the initial test. But i got alot of other things i can work on before i get it wet, like this transom, cutting/fitting/epoxying deck pieces, and malting out the flush seat mount and installing backer board.

Speaking of transom…. I have some of this left over from building up a subfloor before laying hardwood (remodeling a house we just moved into in nov), it is poly i believe. Would this work for laminating the 2x-3x stacked transom? Doing some searches it appears people have used similar products including gorilla glue w success. Not adverse to getting anything else, just makes it easier if i have it or i can get it from Home Depot. I’m there so often they think I’m a contractor lol.
I’d like to hear the pros chip in but I think that looks like a decent product. Polyurethane-based, exterior use. More than likely intended to see damp/humid conditions, temperature fluctuations etc.
 

SHSU

Lieutenant Junior+Starmada Splash Of The Year 2019
Joined
Mar 8, 2017
Messages
1,721
Can't comment on the Loctite for this application. I used Titebond III. No issues with failure on any wood project, boat or other, where I have used this stuff.

SHSU
 

danimal045

Petty Officer 3rd Class
Joined
Feb 18, 2022
Messages
88
Can't comment on the Loctite for this application. I used Titebond III. No issues with failure on any wood project, boat or other, where I have used this stuff.

SHSU
After obsessing on the minutia and poking around many threads, I went and picked up the TitBond III for the transom.

I was hoping to get it cut out of my 2 pieces of 3/4 CDX ply and glued this past weekend, but 3 seals on my Front Loader leaking changed that, as well as my wife really wanted the trim put back down in the house.

Hopefully tonight I'll get the pieces cut out, a little bigger then needed, glued and clamped with the Titebond III, then cut down to actual size with my table saw and miter saw by saturday. I only have the one curved cut on top of the Transom, imagine using a Jigsaw to do that will be the best. Then I plan to give it a light sanding, make everything smooth, fit it, drill my bolt holes, then figure out what epoxy to coat it in.

I have been down so many dark holes regarding what epoxy to use....
 

danimal045

Petty Officer 3rd Class
Joined
Feb 18, 2022
Messages
88
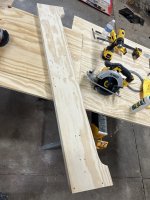
Transom? Damn near killed em. I didn’t have nothing heavy to sit on top, but i puttered both insides, and squeezed glut out around all sides. I cut it big so i can trim off about 3/4 the whole way around before i cut the exact shape, do some sanding, fit it, and drill my holes
 

Attachments

  • 03057C2B-A718-4442-B292-47AE8CDCBDA3.jpeg
    03057C2B-A718-4442-B292-47AE8CDCBDA3.jpeg
    2 MB · Views: 6

SHSU

Lieutenant Junior+Starmada Splash Of The Year 2019
Joined
Mar 8, 2017
Messages
1,721
Transom? Damn near killed em. I didn’t have nothing heavy to sit on top, but i puttered both insides, and squeezed glut out around all sides. I cut it big so i can trim off about 3/4 the whole way around before i cut the exact shape, do some sanding, fit it, and drill my holes

Looks like you made it work. I just screwed it together and then backed out the screws later. Filled that with epoxy when I coated it.

SHSU
 

danimal045

Petty Officer 3rd Class
Joined
Feb 18, 2022
Messages
88
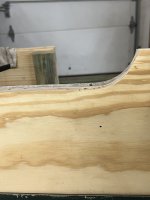
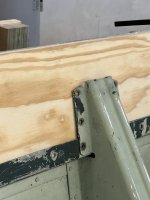
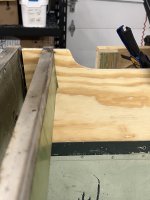
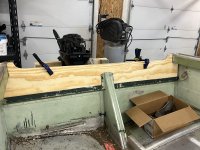
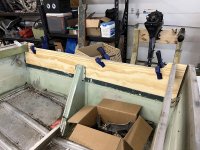
Alright boys, I’m back. Just fitted the transom and the port side it is a little low, as bad as 1/4” from center to starboard it is dead nuts level with the top of sheet metal. There is a cap that goes on top of transom. Here’s the question. Do i leave it as is, no motor will be on that side, shim it at the bottom and sand it to fit, or should i make a another one? I would rather not make another one lol. Next is drilling holes, epoxying, fitting the rear piece, drilling, and epoxying, then i can get the gunwales back together and flip her
 

Attachments

  • 3BE24DE2-E11F-4122-91E6-60DD778321CF.jpeg
    3BE24DE2-E11F-4122-91E6-60DD778321CF.jpeg
    1.3 MB · Views: 5
  • FF72D45F-75E3-4575-A99E-B0BB54B8BE1A.jpeg
    FF72D45F-75E3-4575-A99E-B0BB54B8BE1A.jpeg
    1.3 MB · Views: 5
  • C405D7BA-0E49-4B17-AEEB-EB3FC3391FAF.jpeg
    C405D7BA-0E49-4B17-AEEB-EB3FC3391FAF.jpeg
    1.2 MB · Views: 5
  • 95C4462C-20FE-4A12-91B1-0EAB3B216371.jpeg
    95C4462C-20FE-4A12-91B1-0EAB3B216371.jpeg
    3.4 MB · Views: 5

Moserkr

Chief Officer + Starmada Splash Of The Year 2021
Joined
Nov 23, 2020
Messages
869
Id just leave it, or add some epoxy to make up that 1/4” difference. Epoxy adds more than you’d expect to the overall size. Want to say my 2 coats with glass added 1/8” all around, so 1/4” maybe between 2 sides. Being slightly undercut isnt a bad thing if you are yet to epoxy. I may have done the same thing as you with one side… haha. My jigsaw was wonky that day. Just taped it off and added more epoxy to finish it.
 

danimal045

Petty Officer 3rd Class
Joined
Feb 18, 2022
Messages
88
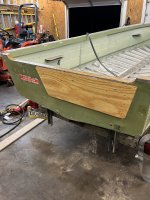
Got the transom fitted and drilled, used a bit guide and drilled form outside to inside, and everything lined up perfect. I don’t know what you call the outter wood part of the transom, but i doubled its length and ran it longer to the right so that i can put a kicker on and tiller steer if needed on limited horsepower lakes. I need a longer bit and all new screws bc i also doubled the thickness of the outer Transom. Epoxy time tomorrow. Hopefully. 10E44E4A-3CEB-4F6A-9B04-DBE7AF165BA3.jpeg
 

Attachments

  • 3F8F8461-4C03-48C9-BEE5-54367AADBB1D.jpeg
    3F8F8461-4C03-48C9-BEE5-54367AADBB1D.jpeg
    1.9 MB · Views: 7
  • 6AF81E8F-6603-440C-A0BC-5B78BF75365C.jpeg
    6AF81E8F-6603-440C-A0BC-5B78BF75365C.jpeg
    4.2 MB · Views: 7

danimal045

Petty Officer 3rd Class
Joined
Feb 18, 2022
Messages
88
So what did i do wrong? I got some West System 105 epoxy w 205 fast dry hardener. Instructions say it is fine to apply and will cure above 35 degrees. I applied 1 coat every 2 hours (i thought it was tacky enough) on 5/6 sides, and it took a solid 5 days to completely dry.

I followed instructions for mixing and application.

Should i give it a light sand and do another 2-3 coats before i do the back then flip and do 5-6 coats after it drys?

Opinions/criticism welcome.
 

MNhunter1

Lieutenant Junior Grade
Joined
May 12, 2014
Messages
1,053
So what did i do wrong? I got some West System 105 epoxy w 205 fast dry hardener. Instructions say it is fine to apply and will cure above 35 degrees. I applied 1 coat every 2 hours (i thought it was tacky enough) on 5/6 sides, and it took a solid 5 days to completely dry.

I followed instructions for mixing and application.

Should i give it a light sand and do another 2-3 coats before i do the back then flip and do 5-6 coats after it drys?

Opinions/criticism welcome.
Sounds to me like you might have recoated too soon, especially if your temps were low. I used the US Composites 3:1 medium cure and it called for a recoat/set time of 3-4 hours at 80 degrees.

"All working times(pot life) are based upon an optimum working temperature of about 80 degrees F. Temperatures variations will greatly affect curing times, and when below 65F can sometimes double curing times. Other factors that affect epoxy curing can be moisture and humidity, as well as the thickness of lamination."
 

SHSU

Lieutenant Junior+Starmada Splash Of The Year 2019
Joined
Mar 8, 2017
Messages
1,721
What temperature did you apply it in? Once epoxy starts to kick it usually cures faster, not slower. Did you mix enough hardener and for long enough? I would do a test sample with your spare epoxy to see if you have a bad batch.

SHSU
 

danimal045

Petty Officer 3rd Class
Joined
Feb 18, 2022
Messages
88
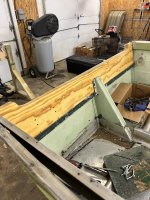
Well i figured out my error with the epoxy… it says 5 to 1 epoxy to hardener… i failed to read the pumps are already metered, so it’s 1 to 1 pumps… i had to scrape what didn’t cure off, clean with acetone, and do start again. Spring clean up and home renovations took priority, and i had to order appropriate sized bolts with the beefed up outter transom, but finally ready to be bolted on and the gunwales go back together! With 4 coats of epoxy, it still fits great and the pre drilled holes line up perfect. I’m to put some marine caulking on the bolts before i put them in, correct?
 

Attachments

  • 01018CA6-4B57-4748-A2A9-696A30C5D460.jpeg
    01018CA6-4B57-4748-A2A9-696A30C5D460.jpeg
    1.9 MB · Views: 7
  • 8FC5E5E8-3571-4FAF-B79D-DA67266D5656.jpeg
    8FC5E5E8-3571-4FAF-B79D-DA67266D5656.jpeg
    2.3 MB · Views: 7

Moserkr

Chief Officer + Starmada Splash Of The Year 2021
Joined
Nov 23, 2020
Messages
869
Looks good! Glad you figured out the error. Yup cover bolts with 5200 and she should be water tight.
 

danimal045

Petty Officer 3rd Class
Joined
Feb 18, 2022
Messages
88
Hey anyone still following been a while. Honey do lists and home renovations and 2 kids under three and summer took up a lot of time, but just wrapped up some big house projects and duck season is knocking on the door… back onto the boat!

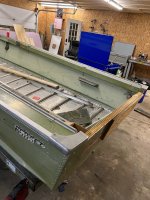
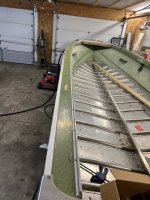
I got the gunwales put back together, and it’s time to take her naked down to a lake down the road and float test her for any obvious leaks, but things look good. After that it is time for paint and getting the flotation down.

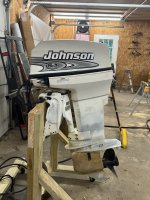
A client happened to mention at lunch they were upgrading their pontoon to a 110hp, and i asked them what they were taking off, a 2001 Nohnson 50hp that has been winter stored and marina mainted since they got it in 2001. They told me they would sell it to me for whatever the marina offered, so Saturday AM i pick up the 50hp and all controls for 1k even. Pretty pumped.

I don’t know if I’m going to be able to make the controls work, i think the pontoon it’s coming off is 20ft to my StarCraft 16ft. But I’ll try to make anything i can work.

I got marine vinyl flooring (nautolix?), question. Should wrap each individual sheet of marine ply then fasten down, in which case the rivets or screws will be visible, or do i lay out all the decking then glue down? I plan on counter sinking the seat mounts into the floor scabbing out the ply underneath for reinforcement so they are flush.

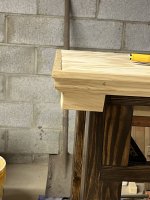
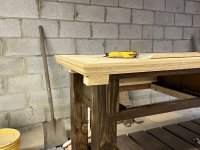
Any input appreciated. You all have been very helpful. Some pics of the reattached gunwales and some of a reloading bench I’ve also been working on between house projects, i got sick of never being able to find ammo lol…. I’m a glutton for punishment..
 

Attachments

  • E9918B7B-ED19-4384-A8B6-F3C9A716FC9F.jpeg
    E9918B7B-ED19-4384-A8B6-F3C9A716FC9F.jpeg
    2.2 MB · Views: 10
  • 8B2612DD-5922-4FD3-9FB1-80B2F85707FF.jpeg
    8B2612DD-5922-4FD3-9FB1-80B2F85707FF.jpeg
    1.9 MB · Views: 9
  • 73F8B8D5-1C38-4B08-AD8B-08A9FE5A2EEF.jpeg
    73F8B8D5-1C38-4B08-AD8B-08A9FE5A2EEF.jpeg
    1.4 MB · Views: 8
  • 41350798-2228-42A7-9198-88D32FF5A737.jpeg
    41350798-2228-42A7-9198-88D32FF5A737.jpeg
    3.4 MB · Views: 10

SHSU

Lieutenant Junior+Starmada Splash Of The Year 2019
Joined
Mar 8, 2017
Messages
1,721
That is a sweet deal for a motor!!

SHSU
 

danimal045

Petty Officer 3rd Class
Joined
Feb 18, 2022
Messages
88
Check out my Johnson! 50hp Model J50VLSIG. They gave me a ton of stuff i have to figure out what it all is. I believe it is the throttle controls, it is a 2 stroke and has a seperate oil reservoir. I’m trying to research and find out what i need to hook up steering. Resealing all the seams on the bottom this week
 

Attachments

  • 431BDFE8-4728-40D6-A826-E139E4B64F0C.jpeg
    431BDFE8-4728-40D6-A826-E139E4B64F0C.jpeg
    1.8 MB · Views: 3

SHSU

Lieutenant Junior+Starmada Splash Of The Year 2019
Joined
Mar 8, 2017
Messages
1,721
Steering should be the normal tilt tube steering arm. Also you going to delete the oil reservoir and premix your own fuel or trust the oil pump?

SHSU
 

danimal045

Petty Officer 3rd Class
Joined
Feb 18, 2022
Messages
88
Steering should be the normal tilt tube steering arm. Also you going to delete the oil reservoir and premix your own fuel or trust the oil pump?

SHSU
I was going to use the reservoir, is that a bad idea? And yeah, normal tilt tube. Have to get new steering set up, looks like i should need about 16’ for steering cable. I was looking at a few differently branded rotary kits
 

danimal045

Petty Officer 3rd Class
Joined
Feb 18, 2022
Messages
88
Steering should be the normal tilt tube steering arm. Also you going to delete the oil reservoir and premix your own fuel or trust the oil pump?

SHSU
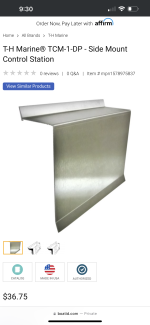
Going through the controls that were given to me, the throttle is an OMC Top Mount. The old control on the StarCraft was a side mount. Googling and searching, i can’t seem to find a top mount bracket, do they sit in the dash or some sort of console?

I was able to find this, would this be a good option for mounting the top mount on? I see it’s for side mount, but may be able to make it work, or bend something similar with a wider shelf? Any input is appreciated
BF8D7536-318A-4973-BFAF-D30CD0EE98A4.png
 
Top