Well, could have been worse, lol. My key is stuck in the ignition. One day I’ll get a new tumbler, yet I also thought of a switch. One hidden under the dash, just to keep it safe from a kid or weekend thief.
Glad you got out we’re tactical enough to have a boat to use. I didn’t put those dash or wiring pictures up, but if you want them let me know and I’ll do so. I can take a pic of the rest of the harness also. Yet it’s pretty basic. Battery to panel, and another to the motor. Both I’m guessing 8 gauge, maybe 10.
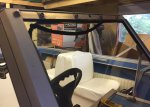
Mid guess under a dozen wires up to the dash from the panel. 2 go past to bow nav light. 4 go back to nav light and bilge pump. I have a tach wire, but no tach. $150 at Princess would replace it all, panel and wires.
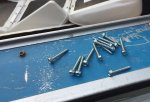
My panel is loose now since I didn’t put the corner pieces under the SW in.
Which pieces under the SW? The door jambs?
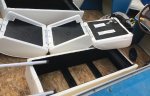
I insulated 12 inches up the hull under the SW and clad with an aluminum panel. I figure this is where I’ll put the disconnect.
Some of the original wiring to the dash was so thin it look like it came out of an old telephone. I don’t want to skimp on wiring quality. I made a set of cables for my front troller from a set of cheap booster cables but the wire quality is junk (likely copper coated aluminum strand) and so soft that my lugs broke off within weeks. I’ve got a bunch of PA wire in various gauges which will be fine for lighter stuff. 12v USB power, bilge pump etc.
I want to add a tach, Speedo, hidden lighting and power for sonar. And better switches
The big thing is, where do I put a fuse block and disconnect out of the rain?
Dont go to any trouble posting pics unless you really want to.
and I’m not worried about theft. Locks are for honest people. If some goof really wants it, there’s not much I can do...hooking things up to 600v is illegal around here.
But good idea about the kids messing around. A hidden toggle or lock is a good idea. I wonder if disconnect switches are lockable or have removable knobs etc