Restoring a 1990 Larson

todhunter

Canoeist
Joined
Sep 15, 2020
Messages
1,308
You do very nice work, and you appear to be moving very quickly. I feel you about blowing through materials. I've burned through 9 gallons of resin in the last 3-4 weeks.
 

Meames1

Petty Officer 2nd Class
Joined
Dec 14, 2020
Messages
157
You do very nice work, and you appear to be moving very quickly. I feel you about blowing through materials. I've burned through 9 gallons of resin in the last 3-4 weeks.
Coming from you that's a pretty big compliment. Thanks.
 

Meames1

Petty Officer 2nd Class
Joined
Dec 14, 2020
Messages
157
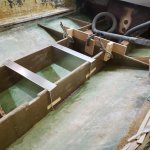
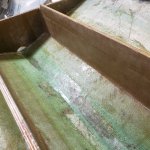
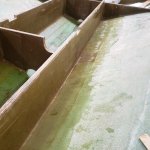
Almost 4 hours straight of grinding yesterday :mad:. Got the last of the stringers and center bulkhead out and the hull completely ground and ready for the new stringers. I also added two additional bulkhead / supports one on each side of the completed engine mount area. The hull adjacent to the rear stringers / engine mount show some stress where the rollers from the trailer sit. So, I figured adding the new supports would help this, plus I'm adding a layer of 1708 over the stress areas hoping it will help support the hull while on the trailer. Pics tonight once I get my mess from grinding cleaned up. US composites order of more resin should be here today.
As a sidebar, I got the new long-block, Carb, Intake, Gimball rebuild kit (switched to Gen II) , and a bunch of other parts in last week. I hope to have the floors in by the end of February and can start assembling the vroom vroom parts.
 

todhunter

Canoeist
Joined
Sep 15, 2020
Messages
1,308
Yeah, grinding was definitely my least favorite so far. Once I finish the boat I'm going to have to do a serious deep clean of the garage from the rafters down to get all the leftover dust out. I'm also looking forward to the mechanical side of things. What's it take to go from an Alpha One Gen 1 to a Gen 2? Why the change?
 

Meames1

Petty Officer 2nd Class
Joined
Dec 14, 2020
Messages
157
Yeah, grinding was definitely my least favorite so far. Once I finish the boat I'm going to have to do a serious deep clean of the garage from the rafters down to get all the leftover dust out. I'm also looking forward to the mechanical side of things. What's it take to go from an Alpha One Gen 1 to a Gen 2? Why the change?
I was being lazy and stupid when I did the first batch of grinding and didn't tent the boat or protect the garage. Ugh, deep cleaning is an understatement. After that first time, I now tent the boat and hook up 2-6hp shop vacuums to a plate I made to go over the keyhole.

Being that I switched from a V-6 to a V-8 I was in need of changing the drive to a 1:47 ratio. Add to that my gen I lower was all chewed up I decided and budgeted to buy an all new SEI assembly. I found a guy selling a Gen II transom assembly and gimble in perfect shape cheap, so I figured while it's out anyway I'll replace with the Gen II and get the gear oil bottle feature.
As far as what it takes...the only difference I have found in the transom plate is that it's has an oblong cut-out next the the water inlet tube to account for the gear lube hole in the transom / gimball assembly. But technically, the transom plate, gimball housing, and rams are different for a gen II drive.
 
Last edited:

Meames1

Petty Officer 2nd Class
Joined
Dec 14, 2020
Messages
157
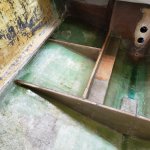
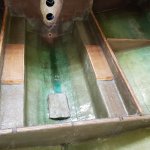
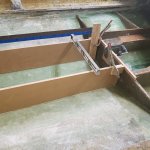
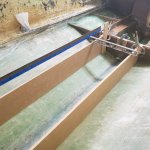
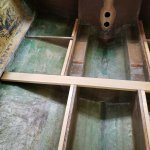
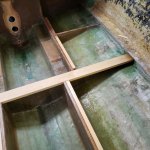
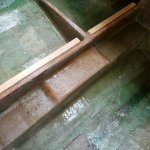
Pics as promised. It's been vacuumed but still needs to be washed out. The new braces I put in need to be tabbed. You can see the stress areas I mentioned where the hull sets on the wheels of the trailer (the white spots), going to add some reinforcing 1708 in these spots. Also added the additional pieces on top of the engine mounts, yet to tab.
 

Attachments

  • 20210208_200030.jpg
    20210208_200030.jpg
    6.4 MB · Views: 45
  • 20210208_200036.jpg
    20210208_200036.jpg
    6.4 MB · Views: 45
  • 20210208_200042.jpg
    20210208_200042.jpg
    6.4 MB · Views: 43

Meames1

Petty Officer 2nd Class
Joined
Dec 14, 2020
Messages
157
Stringers in !
Whew, a lot of work. I made some quick aluminum spacers on our CNC plasma table today just because I do better with metal than wood (lol).
I underestimated the time to bed in 2, 8' stringers and mixed the first batch of PB too hot and ended up losing over half the mix...grrrrr.
Tomorrow, finish the fillets and start the tabbing. Looks to be a long day, gotta remember Valentine's dinner or else. ;)
 

Attachments

  • 20210212_193037 (1024x1024).jpg
    20210212_193037 (1024x1024).jpg
    565.1 KB · Views: 37
  • 20210212_193044 (1024x1024).jpg
    20210212_193044 (1024x1024).jpg
    568 KB · Views: 36
  • 20210212_202634 (1024x1024).jpg
    20210212_202634 (1024x1024).jpg
    539.8 KB · Views: 40
  • 20210212_202636 (1024x1024).jpg
    20210212_202636 (1024x1024).jpg
    539.2 KB · Views: 41
  • 20210212_202629 (1024x1024).jpg
    20210212_202629 (1024x1024).jpg
    546.8 KB · Views: 40

kcassells

Fleet Admiral
Joined
Oct 16, 2012
Messages
8,715
Stringers in !
Whew, a lot of work. I made some quick aluminum spacers on our CNC plasma table today just because I do better with metal than wood (lol).
I underestimated the time to bed in 2, 8' stringers and mixed the first batch of PB too hot and ended up losing over half the mix...grrrrr.
Tomorrow, finish the fillets and start the tabbing. Looks to be a long day, gotta remember Valentine's dinner or else. ;)
Everyone makes those hockey pucks sooner or later.
 

Meames1

Petty Officer 2nd Class
Joined
Dec 14, 2020
Messages
157
I got the stringers tabbed. Starting to make the cleats and the cross braces next. I found the boat has a small amount of twist in it. I'm assuming this is from the factory, but maybe it is from the old rotten structure ? The rear portion / bulkhead / engine mount area is very square and level. The bow twists upward on port side about 1/4-3/8" over the full width of the beam, so over 87 inches width. The reason I'm thinking it's been there all along is that I never tore the bow section out and it still has the "floor" in that area intact and is very structurally sound. The supports I made when I started are still intact and have the same full contact with the hull. Due to the stringers being basically rotted away for the first 2-3 inches, I couldn't get good measurements down the center of the boat. Anyway, pics below.
 

Attachments

  • 20210215_180037.jpg
    20210215_180037.jpg
    617.7 KB · Views: 25
  • 20210215_180007.jpg
    20210215_180007.jpg
    468.4 KB · Views: 25
  • 20210215_180116.jpg
    20210215_180116.jpg
    533.1 KB · Views: 25

Meames1

Petty Officer 2nd Class
Joined
Dec 14, 2020
Messages
157
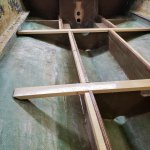
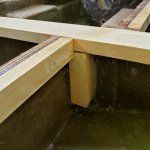
Not many updates this week as I kept forgetting to take pics.
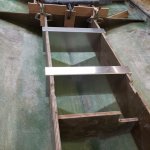
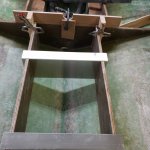
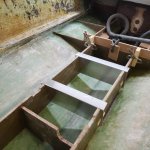
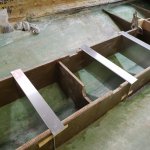
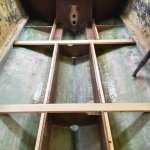
It's almost ready for floors now . Cleats installed and cross bars. Finished a bunch of tabbing here and there, finished the last of the 1708 on the engine mounts. A couple more braces to install and some CSM and I'm ready to start cutting the floors.
 

Attachments

  • 20210221_185043 (1024x1024).jpg
    20210221_185043 (1024x1024).jpg
    640.2 KB · Views: 27
  • 20210221_185045 (1024x1024).jpg
    20210221_185045 (1024x1024).jpg
    609.7 KB · Views: 26
  • 20210221_185057 (1024x1024).jpg
    20210221_185057 (1024x1024).jpg
    740.4 KB · Views: 26
  • 20210221_185110 (1024x1024).jpg
    20210221_185110 (1024x1024).jpg
    659 KB · Views: 25
  • 20210221_185149 (1024x1024).jpg
    20210221_185149 (1024x1024).jpg
    637.3 KB · Views: 27

Meames1

Petty Officer 2nd Class
Joined
Dec 14, 2020
Messages
157
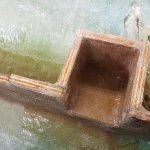
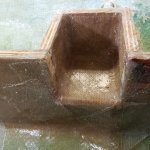
I also built this 5"x6" box and installed it where the fuel-fill hose goes through the deck. Larson only cut a hole in the deck and the 5x6 cut out of the stringer. Any water that got splashed in there or from the bow storage boxes would run into the foam below. Of course the foam in this area was saturated and the stringer rotted. By having this box and sealing it to the floor, any water will run to the inside of the stringer into the ski locker and ultimately to the bilge. Still have some smoothing up to do on it and it'll get gel-coated with the ski locker.
 

Attachments

  • 20210221_185121 (1024x1024).jpg
    20210221_185121 (1024x1024).jpg
    576.2 KB · Views: 21
  • 20210221_185129 (1024x1024).jpg
    20210221_185129 (1024x1024).jpg
    649.2 KB · Views: 21

Meames1

Petty Officer 2nd Class
Joined
Dec 14, 2020
Messages
157
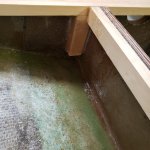
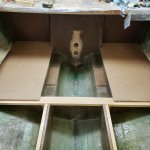
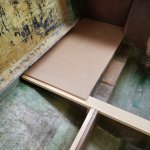
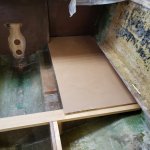
I added a couple braces where the stringers tie into the bulkhead as there was one on the factory design, also I can screw the cross brace into it without screwing into the bulkhead. I adhered them with PB last night and tonight went back over them with 2 layers of 1708.
I cut the two rear floor pieces, I was quite happy when I cut out the first one and trimmed to fit, flipped it over and it fit perfectly on the opposite side. Made it easy to trace and cut the second one. All my years of fabbing race cars as a hobby has paid off in accurate measuring, lol.
Pretty awesome to be standing on solid material for the first time since buying this boat !
 

Attachments

  • 20210224_163229 (1024x1024).jpg
    20210224_163229 (1024x1024).jpg
    463 KB · Views: 26
  • 20210224_182520.jpg
    20210224_182520.jpg
    1.7 MB · Views: 25
  • 20210224_182551 (1024x1024).jpg
    20210224_182551 (1024x1024).jpg
    518.5 KB · Views: 26
  • 20210224_182603 (1024x1024).jpg
    20210224_182603 (1024x1024).jpg
    576.8 KB · Views: 27
  • 20210224_182606 (1024x1024).jpg
    20210224_182606 (1024x1024).jpg
    466.4 KB · Views: 27
Last edited:

todhunter

Canoeist
Joined
Sep 15, 2020
Messages
1,308
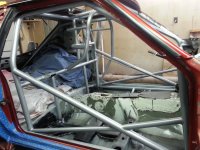
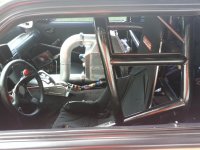
You build race chassis? Tube welding is something I always wanted to get into. I've got the welder, just need a bender and a notcher. Do you still do anything with race cars? I do import 1/4 mile drag racing as a hobby.
 

Meames1

Petty Officer 2nd Class
Joined
Dec 14, 2020
Messages
157
You build race chassis? Tube welding is something I always wanted to get into. I've got the welder, just need a bender and a notcher. Do you still do anything with race cars? I do import 1/4 mile drag racing as a hobby.
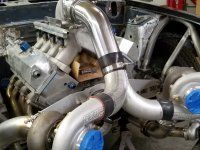
Oh Boy, we would have to start a new thread on probably a different forum to go through all the cars I've built, LOL.
 

Attachments

  • 1926295_612580932122517_1212207907_o.jpg
    1926295_612580932122517_1212207907_o.jpg
    307.9 KB · Views: 24
  • 10494444_669871593060117_8834648671081495688_o.jpg
    10494444_669871593060117_8834648671081495688_o.jpg
    295.5 KB · Views: 23
  • 24313240_1458735884173680_7635809795621053069_o.jpg
    24313240_1458735884173680_7635809795621053069_o.jpg
    193.6 KB · Views: 26
  • 10428263_701208303259779_7436471541038508768_o.jpg
    10428263_701208303259779_7436471541038508768_o.jpg
    337.1 KB · Views: 23

adam619

Cadet
Joined
Jul 9, 2018
Messages
27
OK, I'm looking for a little advice from the group. I hope I can explain this right. My boat has two "shelfs", or compartment bottoms that are glassed into the sides of the hull around 6-8' long. The purpose (or at least main purpose) of these is that they make up the bottom of the integrated storage pockets that run along the gunnels from the helm to the rear seats @ the transom. These are approximately 1" thick and 4" wide. They are glassed to the hull and very sturdy. I'm 260lbs and can stand on them (obviously I don't, but hopefully you get the picture.
The problem is, the floor attaches to the hull only about 3" under these "shelfs" lets call them. I'm worried when it's time to tab the new floors in I'll have two issues, #1 the new tabbing will only go up the hull a few inches, and #2 the difficulty tabbing in a such a small area under these.
I've attached some pictures that hopefully helps to understand what I'm saying.
I'm thinking about running the new floor to the hull as usual and attach with PB. Then adding an additional vertical piece from the new floor to the shelf again with PB. Basically closing-in the shelf area to floor. Then I will be able to tab several inches up the hull and down the shelf and onto the new flooring. The existing shelf stops about 12" from the transom and basically about 12" from the helm. I would extend the stern end of the shelf to the transom and taper the front edge to the area next to the helm as the floor also tapers to the bow at this point. Finally, I would cut a few circles in the shelf and fill the cavity with foam when I do the floors.
I really don't want to remove these shelfs and re-glass them later, plus I'm unsure if they also are designed to lend support to the hull.
Please see pics and my rough drawing, hopefully I explained everything correctly. Comments ??? TIA !
Looks good , this build is very similar to what I just did with a 1993 Larson SEI 180 , transom slightly different but was made the same with 1/2'' sheet stapled over 1'' larger area of the transom, i replace it with 2 x 3/4" for the whole area. As for what you call the shelves , since they are only holding in place with some chopped strand on top and one layer on spray foam with a bit more chop gun, i was inclined to think not structural. The only explanation I had was in my boat they were only there to provide a level bottom surface for the storage on the side. I had enough room underneath to tab in new floor but from the shelf to stern I had to cut and remove this layer of chop gun and spray foam to get proper tabbing to hull. If you check my last post Larson SEI 180 Complete Rebuild | Boating Forum - iboats Boating Forums you can see how I covered it, not sure if it good or not but could not think of other solutions. As for the gas tank cover, to avoid screwing in the stringers, which are all covered with 6oz cloth and epoxy, I epoxied pieces of 1/2'' ply to stringers that I can screw into, if rot gets in them it will be isolated from structural members as long as they can hold those screws life is good. Boxing in that shelf may not be a great idea, it may change dynamics on how the hull flexes laterally, causing higher stress in an area not designed for it. Again just an opinion probably be fine but I would hate seeing the gel coat spidercrack at that exact location along the hull. Sorry I don't have many pictures posted can look for more if you need em.


Good luck
 

Meames1

Petty Officer 2nd Class
Joined
Dec 14, 2020
Messages
157
Looks good , this build is very similar to what I just did with a 1993 Larson SEI 180 , transom slightly different but was made the same with 1/2'' sheet stapled over 1'' larger area of the transom, i replace it with 2 x 3/4" for the whole area. As for what you call the shelves , since they are only holding in place with some chopped strand on top and one layer on spray foam with a bit more chop gun, i was inclined to think not structural. The only explanation I had was in my boat they were only there to provide a level bottom surface for the storage on the side. I had enough room underneath to tab in new floor but from the shelf to stern I had to cut and remove this layer of chop gun and spray foam to get proper tabbing to hull. If you check my last post Larson SEI 180 Complete Rebuild | Boating Forum - iboats Boating Forums you can see how I covered it, not sure if it good or not but could not think of other solutions. As for the gas tank cover, to avoid screwing in the stringers, which are all covered with 6oz cloth and epoxy, I epoxied pieces of 1/2'' ply to stringers that I can screw into, if rot gets in them it will be isolated from structural members as long as they can hold those screws life is good. Boxing in that shelf may not be a great idea, it may change dynamics on how the hull flexes laterally, causing higher stress in an area not designed for it. Again just an opinion probably be fine but I would hate seeing the gel coat spidercrack at that exact location along the hull. Sorry I don't have many pictures posted can look for more if you need em.


Good luck
Thanks, yeah I've pretty much ruled out boxing in the "shelfs". I'm thinking of getting the floors in so I can get accurate measurements and just bite the bullet and remove the "shelf" and foam so I can tab the floor into the hull and then replace the shelf. It's only time and money right ???...
 

todhunter

Canoeist
Joined
Sep 15, 2020
Messages
1,308
Oh Boy, we would have to start a new thread on probably a different forum to go through all the cars I've built, LOL.
Much respect! I'm nowhere near as fast and have half the cylinders, but racing is great fun, and the sport is full of great people.
 

Meames1

Petty Officer 2nd Class
Joined
Dec 14, 2020
Messages
157
Much respect! I'm nowhere near as fast and have half the cylinders, but racing is great fun, and the sport is full of great people.
That it is, that it is.
My orange car I ran in X275, ran 4.68 @ 158 in the 1/8 and 7.20's @ 193 in the 1/4 all at 3,350 lbs due to race rules. All with a little home built 5.0 ltr mod motor ;)
 
Top