Restoring 1986 Sea Nymph SS155 (pics)

Piece715

Senior Chief Petty Officer
Joined
Jan 26, 2009
Messages
757
Re: Restoring 1986 Sea Nymph SS155 (pics)

Well just rub it in!!! HAHA... its all good... We'll deal with this later Bouttime!

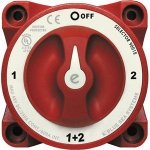
Oh and I have the battery switch ordered... 31+zWWd6qlL._SL500_AA300_.jpg
 

bouttime007

Chief Petty Officer
Joined
Apr 21, 2007
Messages
546
Re: Restoring 1986 Sea Nymph SS155 (pics)

Well to be honest, you put more overall effort and a heck of alot more $$$ into your Nymph than I did Piece.

I just went for a light re-do with a few upgrades so I could get back on the water. I will have to do more in depth restoring next year, where you will be cruising around!
 

Piece715

Senior Chief Petty Officer
Joined
Jan 26, 2009
Messages
757
Re: Restoring 1986 Sea Nymph SS155 (pics)

Well i want to be on the water too *sniff* :( *sniff*.... Good thing I have friends with boats or I'd be one grumpy person... although the boat would prob be done by now if that was the case :facepalm:...

But anyways was tryin to finish buying all the wiring parts... Was wondering if this wire would work http://gregsmarinewiresupply.com/Zen/index.php?main_page=product_info&cPath=4&products_id=15.... I was thinking bout going with that... its the same price as individual primary wiring may $2 more but i wouldn't have to by the black tape to seal it or twist it together... Thoughts?
 

bouttime007

Chief Petty Officer
Joined
Apr 21, 2007
Messages
546
Re: Restoring 1986 Sea Nymph SS155 (pics)

Well you would still need to twist it together and seal it.

Only difference from regular wire is its tin shielded from interference. It would work fine.
 

Piece715

Senior Chief Petty Officer
Joined
Jan 26, 2009
Messages
757
Re: Restoring 1986 Sea Nymph SS155 (pics)

Even though its already together in sheath.. it would still need to be twisted?
 

bouttime007

Chief Petty Officer
Joined
Apr 21, 2007
Messages
546
Re: Restoring 1986 Sea Nymph SS155 (pics)

No not the wire itself, the connections/splices.

Most runs wont have splices since youre running all new wiring, but if you end up needing one you can just twist the ends together and tape them. (liquid tape would be better) Its not "proper ettiquette" by perfectionists, but works for me for the time being. Most of the wiring is high and dry under the dash and gunwales anyway, and none of the 20 year old wiring that was there when I bought the boat had any issues of corrosion done this way.
 

ezmobee

Supreme Mariner
Joined
Mar 26, 2007
Messages
23,767
Re: Restoring 1986 Sea Nymph SS155 (pics)

That's a steal for sure.
 

Piece715

Senior Chief Petty Officer
Joined
Jan 26, 2009
Messages
757
Re: Restoring 1986 Sea Nymph SS155 (pics)

I want a 70hp yamaha too :( and an extra 2 ft of room!!

and mines not even in the water:facepalm:
 

bouttime007

Chief Petty Officer
Joined
Apr 21, 2007
Messages
546
Re: Restoring 1986 Sea Nymph SS155 (pics)

Hey Piece, did you have any flat aluminum sheeting running down the center keel about 4 inches under your floor? I didnt see any in your tear down pics.

(Roughly 2-3 feet aft of your consoles) Mine has a plate/sheet under there and Im not really sure what it would be for. Maybe to keep the pour in foam from closing off the drainage.
 

Piece715

Senior Chief Petty Officer
Joined
Jan 26, 2009
Messages
757
Re: Restoring 1986 Sea Nymph SS155 (pics)

Nope I sure didn't... The only piece of aluminum aluminum that was in there was about 2-3 feet aft of consoles but it was a square like 12"x12" in center of boat above keel... It was attached to the underside of the floor if memory serves me correct. The PO had drilled pole holders through the floor and one went right through that aluminum sheet so it was pretty chewed up. I couldn't figure out what it was for....
 

Piece715

Senior Chief Petty Officer
Joined
Jan 26, 2009
Messages
757
Re: Restoring 1986 Sea Nymph SS155 (pics)

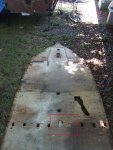
Here's the best picture i could find... You can see part of the plate... its attached to the underside of the floor

Floor out of boat 3.JPG
 

Huron Angler

Admiral
Joined
Apr 7, 2009
Messages
6,025
Re: Restoring 1986 Sea Nymph SS155 (pics)

I've never seen thru-deck rod holders before:facepalm:

I would love to have that 70hp Yammie.:D
 

bouttime007

Chief Petty Officer
Joined
Apr 21, 2007
Messages
546
Re: Restoring 1986 Sea Nymph SS155 (pics)

That looks about like the piece under my floor, I wasnt sure if it ran the length of the center line or not. Mine isnt connected to the plywood though, the PO replaced the aft-most section of ply and probably didnt put it back the way it was.
 

bouttime007

Chief Petty Officer
Joined
Apr 21, 2007
Messages
546
Re: Restoring 1986 Sea Nymph SS155 (pics)

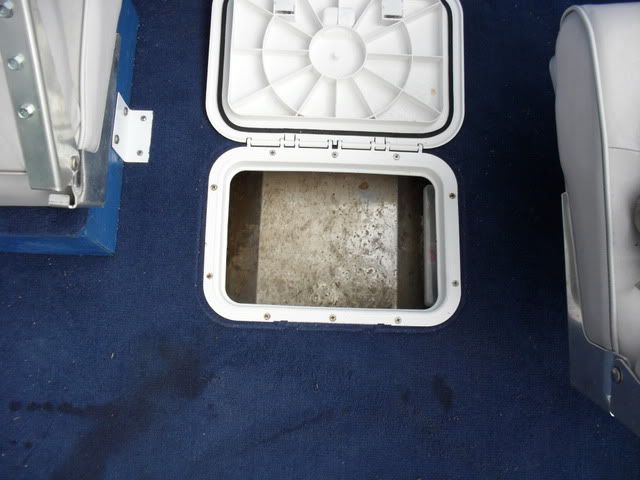
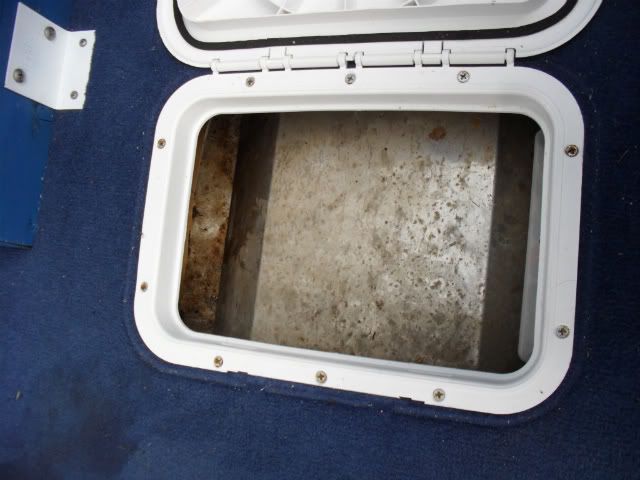
When I cut the hole for my hatch to through bolt my helm seat I found the plate.

When I redo the floor decking and foam I'll probably do away with the plate.

EricsMisc036.jpg


EricsMisc037.jpg
 

Piece715

Senior Chief Petty Officer
Joined
Jan 26, 2009
Messages
757
Re: Restoring 1986 Sea Nymph SS155 (pics)

HA: Ya Mike it was a mess.... there was a piece of 2x4 mounted to the gunnel of the splashwell with notches in it to rest the poles against... there were spliced into extension cords as wiring, a 120 plug on a 12v system, and the kill switch has been epoxied shut so ill have to bypass it and install another... and that's what i can remember off hand.

Bouttime: I have no clue what that plate was for.... the more i look at it the more confused i get in what it could have been for... wonder if any of the SC mob ran into anything like that; our boats are so similar... if i had to guess im thinking support for stringers due to the one being cut for livewell plumbing....
 

aparis

Seaman Apprentice
Joined
Jul 14, 2010
Messages
41
Re: Restoring 1986 Sea Nymph SS155 (pics)

You convinced me to go with a cedar deck as well! How did you fasten the boards onto the stringer and in the splash well?
 

Piece715

Senior Chief Petty Officer
Joined
Jan 26, 2009
Messages
757
Re: Restoring 1986 Sea Nymph SS155 (pics)

I used stainless steel deck screws that I bought from Lowes. They also make rustoleum coated decking screws that are guaranteed not to rust for life, also at Lowes. Both were used on my boat.

When it comes to the screws here are some things that I would do if I had to replace the floor again. First you want the threads on the screw to be close together. Try to stay away from wide thread screws as they don't grip as well. Also you want the thread to go all the way to the head of the screw so the board will tighten down. I suggest predrilling a pilot hole for all the screws even self tapping. Finally be careful when countersinking the screws cedar is very soft.

If you have any questions just give me a shout I'll do my best to answer. This installation was pretty easy. It was my first true woodworking project. Just remember to measure twice and cut once. Templates never hurt either. Take your time and it'll come out great!
 

aparis

Seaman Apprentice
Joined
Jul 14, 2010
Messages
41
Re: Restoring 1986 Sea Nymph SS155 (pics)

Thanks for the tips. Nice posts and awesome project.
 
Top