Rehab SportCraft 222 1983 deep V hull cuddy walkaround

kcassells

Fleet Admiral
Joined
Oct 16, 2012
Messages
8,715
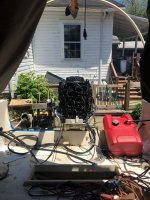
let's see hmmm..... Put new magnets in the flywheel, working on refurbished cracked, chipped upper lower motor cowl, installing thermostats, fuel line from tank and seperator, another new/used BRP remote...the Chinese stuff is/was junk.. and on it goes.
All good.
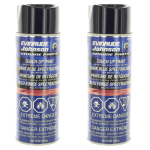
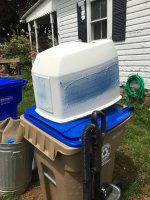
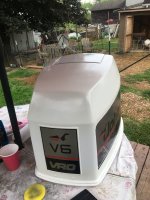
So here's a question for the day. I rattled can after repairs for the cowling with rustoleum build up primer. Johnson/Evenrude paint for the year of the make etc...It's turning out ok. I probably could have rolled and tipped for a better finish vs rattle but the way it is.
So the question is that I see alot of the utubers doing a CLEAR COAT at finish. I've read sooo many times on this forum that its a pia for touch up if its scratched up at any point down the lane.
Yes? No? Opinions surely welcomed.
Tx... pics poos coming.
 

buxmj

Petty Officer 1st Class
Joined
Jun 9, 2018
Messages
294
Hey Kev, just chiming in with my .02, I just finished putting KBS Diamond clear on my whole outer hull. I didn't want to always be touching up paint scratches so wanted to give it some protection. I brushed it on and did 3 coats. It looks great but need to cut and buff out some runs and imperfections. I haven't posted any pics yet but will do that after it cures and then I do some work on the clear. Right now I am happy I took the time to do this, prolonging the splash...

Buck.
 

kcassells

Fleet Admiral
Joined
Oct 16, 2012
Messages
8,715
hey thanks Buck. Just looked at it seems pretty durable. I just bought a mini cut/polish set. Going to try it later this week on the cowl paint job.
 
Last edited:

kcassells

Fleet Admiral
Joined
Oct 16, 2012
Messages
8,715
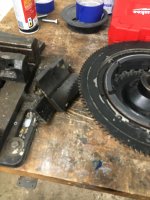
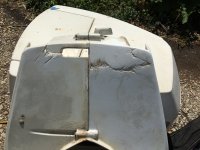
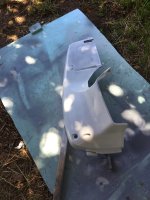
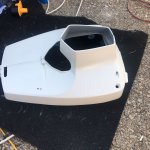
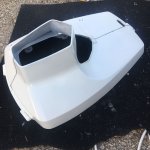
Replaced 6 magnets on flywheel with OMC kits. Turned out well. Then also working on cracked cowls lower/upper. Used Rusto sandable primer on lower and Rusto 2x primer on upper cowl. 2x laid down nice. Weather was perfect.
For pant on all pcs. I used

Goes on extremly thin. Spray nozzle was difficult. I eneded up bying a pistol grip for the spray cans that worked pretty good. Also ordered a cut/buff kit to polish up all the paint pcs.
1683551725456.pngIMG_3579.JPG IMG_3536.JPG

View attachment IMG_3581.MOV

IMG_3586.JPG IMG_3591.JPG
View attachment IMG_3595.MOV

IMG_3605.JPG IMG_3603.JPG
 

kcassells

Fleet Admiral
Joined
Oct 16, 2012
Messages
8,715
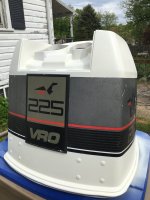
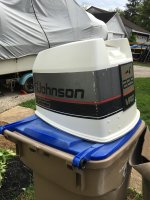
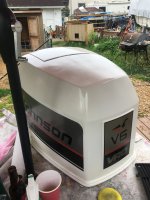
Had a busy 2 weeks. After painting the cowls went to cutting and polishing. Mechanic came by 1st time and evaluated the engine. Pretty straight forward marine mechanic. Well stocked truck, very professional.
Had carbs soaked in sonic cleaner, rebuilt, put new magnets in flywheel, changed out 2 plugs, new fuel pump, ran new fuel line and separator from under deck fuel tank, changed out thermostats, new starter.
Motor kicked off 1st attempt and ran like a champ.
Still working on other loose ends.
View attachment Engine Freakin doing its job 5 16 23.MOV


hood 1.jpg hood 2.jpg


lower cowl done.jpg

lower cowl 2 done.jpg
 

mr300z87

Senior Chief Petty Officer
Joined
Sep 15, 2010
Messages
694
You are making some great progress. Love the sound and smell of 2 strokes, brings me back to my teen years. When is the official splash?
 

kcassells

Fleet Admiral
Joined
Oct 16, 2012
Messages
8,715
Hey Kev, just chiming in with my .02, I just finished putting KBS Diamond clear on my whole outer hull. I didn't want to always be touching up paint scratches so wanted to give it some protection. I brushed it on and did 3 coats. It looks great but need to cut and buff out some runs and imperfections. I haven't posted any pics yet but will do that after it cures and then I do some work on the clear. Right now I am happy I took the time to do this, prolonging the splash...

Buck.
Pics man pics!
 

kcassells

Fleet Admiral
Joined
Oct 16, 2012
Messages
8,715
I ended up having starting issues on the motor last weekend. Being GREEN and all with outboards kinda looked like a daunting task for this ole fart.
Concerns were;
My wiring, batteries and CA {cold amp start power} solenoid, lanyard kill switch etc. I grabbed one of these units for testing the batteries. It'll read/analyze the battery and test in place.
Actual volts were fine but CA could also be a problem.
After ahile of back and forth my neighbor Pete stopped over. We ran another series of checks and the batteries were fine, solenoid fine...
Ended up being the brand-new Sierra starter. Go figa. Tested the old stater and it turned fine. Getting another starter as it was under warranty.


zool

Captain
Joined
Aug 19, 2012
Messages
3,432
I ended up having starting issues on the motor last weekend. Being GREEN and all with outboards kinda looked like a daunting task for this ole fart.
Concerns were;
My wiring, batteries and CA {cold amp start power} solenoid, lanyard kill switch etc. I grabbed one of these units for testing the batteries. It'll read/analyze the battery and test in place.
Actual volts were fine but CA could also be a problem.
After ahile of back and forth my neighbor Pete stopped over. We ran another series of checks and the batteries were fine, solenoid fine...
Ended up being the brand-new Sierra starter. Go figa. Tested the old stater and it turned fine. Getting another starter as it was under warranty.

There's nothing I hate more, than installing a new part, still not solving a problem, and checking everything else, only to realize the "known good" NEW part was crap.
 

kcassells

Fleet Admiral
Joined
Oct 16, 2012
Messages
8,715
So I've been moving along with the engine electrical. Have a new phone so not sync in yet on my laptop, no pics.
Turns out the #5 and #6 carburetors were pulling in fuel and forcing lockout compression. As I took out the related plugs to carbs fuel poured out. OK.
Flywheel was moving freely now.
I began looking closer to the Motor harness wiring and have found a lot of questionable connections as well as connectors used. Some wires simply pulled out of the existing connectors upon inspection or were basically weak
and rotted . Some have serious heat/temp burns leaving me to believe a soon nutter nightmare.
Took apart power packs, rectifier and other areas for inspection. There is work to be done in those areas as I also need to begin putting the lipstick on the cuddy interior.
Certain wire areas were hard to get to with regular crimp fittings. Grabbed a nice solder tool that really does a nice job. Knocked out a lot of issues with that today and yesterday.
Moving along.
 

kcassells

Fleet Admiral
Joined
Oct 16, 2012
Messages
8,715
@chevymaher Look what ya made me do now! I finally got the phone synced
with da puter. Pouring here at the moment.
So deliveries finally arriving. Just received new rectifier and gasket, quicksilver fuel line connectors, Engine harness on the way and omc harness for gauges. May not need that but looks like a dummy like me can do it.
Like I said on earlier post, I'm finding soft, brittle, charred wiring and wiring that just pulls apart.
 
Last edited:
Top