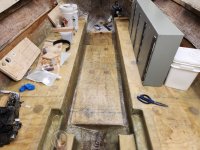
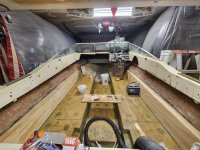
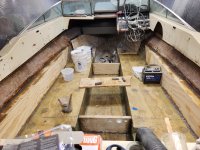
My 84 4winns horizon 195 project.

Pmt133

Chief Petty Officer
Joined
Jan 6, 2022
Messages
564
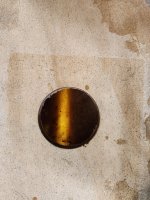
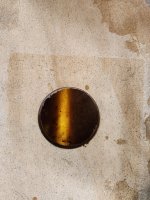
So I've been thinking about this... this is the bow area where it would rub if beached. I have a very bright light underneath. The area is just starting to rub through the gelcoat. I don't beach it often as I typically need too much to float at most beach spots so I anchor out. One ramp without a dock has a spot to beach so that's typically what I'll do while parking the truck. I'm figuring I'll rough it up on the outside and feather a coat of marinetex and just reapply bottom paint.... I don't think it's worth worrying about?
20240720_131851.jpg
 

Pmt133

Chief Petty Officer
Joined
Jan 6, 2022
Messages
564
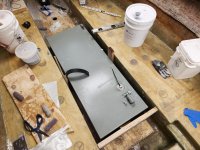
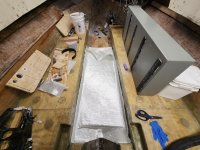
Today is a short day... Glassed in the floor for the fuel tank and test fit the bulkheads for it. We're going to see a show so I'm taking it easy for the rest of the day. Cleaned up the mess in the garage... Calm day.
20240720_124449.jpg20240720_131624.jpg
20240720_131851.jpg
20240720_145910.jpg
20240720_145919.jpg
 

Pmt133

Chief Petty Officer
Joined
Jan 6, 2022
Messages
564
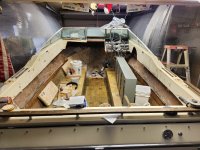
today was a not much got done but it looks like it day. Bulkheads are in and I glued in the side boxes. I hate to be that guy but since they basically only serve the purpose of holding the side panels in place.... I really don't care how they come out lol. I am planning to finish up the boxes then set the fuel tank in place and forget about it...
20240721_164615.jpg20240721_185330.jpg
Not my neatest work but... I wanted to get something done...
 

TripleJGraffis

Chief Petty Officer
Joined
Jan 18, 2024
Messages
415
So I've been thinking about this... this is the bow area where it would rub if beached. I have a very bright light underneath. The area is just starting to rub through the gelcoat. I don't beach it often as I typically need too much to float at most beach spots so I anchor out. One ramp without a dock has a spot to beach so that's typically what I'll do while parking the truck. I'm figuring I'll rough it up on the outside and feather a coat of marinetex and just reapply bottom paint.... I don't think it's worth worrying about?
View attachment 400699
I personally would have added a couple layers of 1708 to the inside as well as done something to beef up the outside such as a keel guard as recently suggested.

Looking real good though!
 

TripleJGraffis

Chief Petty Officer
Joined
Jan 18, 2024
Messages
415
today was a not much got done but it looks like it day. Bulkheads are in and I glued in the side boxes. I hate to be that guy but since they basically only serve the purpose of holding the side panels in place.... I really don't care how they come out lol. I am planning to finish up the boxes then set the fuel tank in place and forget about it...
View attachment 400756View attachment 400757
Not my neatest work but... I wanted to get something done...
Are those boxes fully enclosed? I may have already missed it, but could you utilize that space for pouring more flotation foam?
 

Pmt133

Chief Petty Officer
Joined
Jan 6, 2022
Messages
564
I personally would have added a couple layers of 1708 to the inside as well as done something to beef up the outside such as a keel guard as recently suggested.

Looking real good though!
Looking back I jumped the gun on glassing in the front false floor... I could cut it out but again... For it not even really being through the gelcoat It probably will be fine as is. I measured out the hull up by the bow eye to see roughly how thick the glass may be in that area and I'm coming up with 3/4 an inch which may be right? I think I'll build back up the outside paint it, run it for the rest of the season and see how much rub I actually get. If it doesn't get through the paint I'll just leave it alone but if it goes quick I'll be installing a keel guard.... Also it did take a flood lamp to make that visible. Daylight isn't visible through it.
Are those boxes fully enclosed? I may have already missed it, but could you utilize that space for pouring more flotation foam?
I could. But per my math I'll have about 2400 lbs of floatation by the time I am done with all the other boxes... Is the extra 200 I'd get from foaming them worth it? And they would have to be sealed on the ends if I were to do it.
 

TripleJGraffis

Chief Petty Officer
Joined
Jan 18, 2024
Messages
415
Looking back I jumped the gun on glassing in the front false floor... I could cut it out but again... For it not even really being through the gelcoat It probably will be fine as is. I measured out the hull up by the bow eye to see roughly how thick the glass may be in that area and I'm coming up with 3/4 an inch which may be right? I think I'll build back up the outside paint it, run it for the rest of the season and see how much rub I actually get. If it doesn't get through the paint I'll just leave it alone but if it goes quick I'll be installing a keel guard.... Also it did take a flood lamp to make that visible. Daylight isn't visible through it.

I could. But per my math I'll have about 2400 lbs of floatation by the time I am done with all the other boxes... Is the extra 200 I'd get from foaming them worth it? And they would have to be sealed on the ends if I were to do it.
Your plan for the hull light shining through seems ok.
If the boxes are not sealed, then leave them be. I read you stating that you basically didn't care how they turn out. Were you just going to leave them alone? They will just rot out sooner. I would glass them over just to have that added water proof coating, or will you be adding something else to them? I very well could have misread your post.
 

Pmt133

Chief Petty Officer
Joined
Jan 6, 2022
Messages
564
Your plan for the hull light shining through seems ok.
If the boxes are not sealed, then leave them be. I read you stating that you basically didn't care how they turn out. Were you just going to leave them alone? They will just rot out sooner. I would glass them over just to have that added water proof coating, or will you be adding something else to them? I very well could have misread your post.
Mimicking the original. I just rolled a coating of resin on the back side and they get glassed to the structure on the front. The whole visible side will be glassed in and I'll cover the edges. Me not caring how they turn out is because they're completely hidden by the interior upholstery. I tried uploading a photo of what they looked like but I'm having server issues right now.
 

TripleJGraffis

Chief Petty Officer
Joined
Jan 18, 2024
Messages
415
Mimicking the original. I just rolled a coating of resin on the back side and they get glassed to the structure on the front. The whole visible side will be glassed in and I'll cover the edges. Me not caring how they turn out is because they're completely hidden by the interior upholstery. I tried uploading a photo of what they looked like but I'm having server issues right now.
Gotcha....Uhoh...Hopefully it isn't a part of that Microsoft bug. We are still impacted by that at work.
 

Pmt133

Chief Petty Officer
Joined
Jan 6, 2022
Messages
564
Did a marathon amount of glassing yesterday. Bulk heads and boxes and deck. Maybe I'll add another layer of glass to the bulk heads (double up the 1708 and tabbing) but I'm feeling 1 layer of CSM is more than adequate for the side boxes which only got csm.. That's all that was there originally. I took the mat across the deck into the bilge to smooth out everything too. As an aside, I'm burning through resin quick. I'm down to my last 10 gallons but I'm also about done with glassing... some pieces in the cabin are left. I also foamed the false floor up front. I got some creaking and cracking from that one. Seems to have bowed the far end of the floor a tiny bit but I didn't know how far back the pour was. Came out the relief hole with no pressure. No cracking outside seems to have just been a little on the floor.

If I could upload photos I would but still can't. I also laminated the center hatch support with CSM rather than peanut butter. Seemed to be the better move and I'll glass them to the stringers in the same way and then use 1 layer of 1708 to tab to the floor. Then I'll set in the tank and that's all I can do as I'm out of half inch wood to finish the cabin. I found some exposure 1 locally but exterior that isn't pressure treated is either insanely expensive or unavailable... sucks.

Is the appearing with csm and pressure adequate for an unstressed component only loaded in shear with tabbing?
 

Pmt133

Chief Petty Officer
Joined
Jan 6, 2022
Messages
564
So I have to ask... is 1 layer of 1708 adequate for water resistance and strength in non structural components?

I ask because I see mixed responses. I have a tab of 6 inches of 1708 on the bulk heads in the fuel tank area with a full up and over wrap to encapsulate it. All those really do is hold the weight of the center hatch when someone is standing on it and locate the fuel tank fore/aft. I'm considering adding another set for safe measure but they really don't do much.

Second, I should probably do 2 layers of CSM on those side boxes, correct? While not structural, I don't feel 1 layer is enough for adequate water proofing....

Finally, the deck.... This has had me losing some sleep at night but again.... I think it's being over thought. 2 tabbed in layers of 1708 with one going continuously down to the stringers and the other being an extra tabbing layer followed by a top coat of 3.5oz CSM. More than good enough? And I keep thinking I didn't use enough screws but the real strength should be the peanut butter to the cleats and stringer tops.... It's obviously too late to go back and fix if so but I think I'm just "looking" for a problem.... Not working on it is bad. Getting things done makes it easy.

And finally the center hatch supports themselves... peanut butter and then clamping them to the stringers until cured with a tab in on the bottom should be more than enough to support a couple hundred pounds of people walking over it... right? I was thinking PL would be too weak in shear and just laying a piece of CSM on the stringer wetting it out then pressing the support to it wouldn't be strong enough...

Sorry if this seems like a lot. There seems to be a lot of conflicting info on specific things and my setup is a little odd in that the fuel tank remains easily removable. I liked the feature but it honestly seems to be causing me a large amount of stress lol.
 

Pmt133

Chief Petty Officer
Joined
Jan 6, 2022
Messages
564
1. I always do 2
2. 1708 2
3. Overthinking
4. Notch out stringers
10-4
What does this mean?
I think, and not being able to attach pictures still is getting annoying, he means to do something like this but on the stringer.... This is the post of my original fuel tank set up from earlier in the thread, you'll need post #14 . My current plan is to more or less duplicate that because I really don't want to notch out my nice sealed and glassed stringers. :cry: but if you suggest otherwise @kcassells I'll do it.
 

kcassells

Fleet Admiral
Joined
Oct 16, 2012
Messages
8,715
The fuel tank floor area needs super support whereas it is usually the spot of weight and foot traffic consistently. The "notch" allows you to set your supports onto a ridged base.
Alternatively, if you have the space, you could install a cleat around the perimeter and set your supports on that. I did not have enough side structure to do that.
Hey I'm hoping anyone else would chime in. :]
 

Pmt133

Chief Petty Officer
Joined
Jan 6, 2022
Messages
564
The fuel tank floor area needs super support whereas it is usually the spot of weight and foot traffic consistently. The "notch" allows you to set your supports onto a ridged base.
Alternatively, if you have the space, you could install a cleat around the perimeter and set your supports on that. I did not have enough side structure to do that.
Hey I'm hoping anyone else would chime in. :]
Well that's more or less what I am doing. Two sandwiched pieces of ply to make it a tad over an inch thick on both of the two long sides notched for cross supports spaced on 10 inches and then the front and back of the hatch are resting on the 1.5 inch thick bulkheads. The rest of the structure will have the 1 inch lip on the edge and the 10 in on center studs running across. :)
 
Top