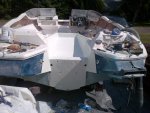
my 1991 capri rebuild

bleedblue94

Petty Officer 1st Class
Joined
Oct 11, 2010
Messages
272
Re: my 1991 capri rebuild

HA! I bought a waverunner too this season so I have SOMETHING to play with while I restore the Capri!

we bought these at the end of last year. on an impulse we decided to look for some and i found these two w the trailer and got them for $1080. they needed a solid cleaning and one had a small FG crack which took 2 hours to completely fix. we took them out and they ran great accept one had a water exhaust gasket that was leaking ever so slightly but sprayed right on one of the plugs, so it would cut out. changed the gasket on both machines since i figured the other would be in poor shape as well. just need to let some seafome sit in the carbs for abit, clean the plugs and we will go to the lake for a day to relax ha. might take my 18' capri out as well just to do it, but i fear everyday i spend on the lake now will be a day of work lost on this project..... augh
 

vdubspeed

Cadet
Joined
May 8, 2012
Messages
11
Re: my 1991 capri rebuild

well I just read the whole thread. THANK YOU for the lessons and the motivation. I'm real worried about how to remove and keep the seat bases but you seem so nonchalant about everything. I need that!!!

My Capri is a 2050 BR with an I/O but 80% of our boats are the same.

Thanks again,

Jason
 

bleedblue94

Petty Officer 1st Class
Joined
Oct 11, 2010
Messages
272
Re: my 1991 capri rebuild

well I just read the whole thread. THANK YOU for the lessons and the motivation. I'm real worried about how to remove and keep the seat bases but you seem so nonchalant about everything. I need that!!!

My Capri is a 2050 BR with an I/O but 80% of our boats are the same.

Thanks again,

Jason

Allot of this stuff is intimidating at first look but most of it is simple, think it out basic structural concepts. I've never done anything on this scale w glass, but its not that bad. Its just that everything takes longer to do "right" but that's ok to me. It will be rewarding. I certainly don't have the expertise that others on this site have but I certainly have a familiarity now with this boat and as you say our boats are very simalar so feel free to ask any questions. Ill be glad to help if I can
 

93bayliner1800

Petty Officer 1st Class
Joined
May 9, 2011
Messages
239
Re: my 1991 capri rebuild

LOL! I went out on Memorial Day with some friends on the lake, and all I could think about was getting home to work on the boat!! I just wish I didnt have to spend hrs sitting in the boat designing and planning how to finish. I bet I have rebuilt mine in my head a bazillion times!!
 

bleedblue94

Petty Officer 1st Class
Joined
Oct 11, 2010
Messages
272
Re: my 1991 capri rebuild

well i havent posted almost all month. upon getting back from vacation things became a mess. we were going to take the skis out to enjoy a day at the lake, and one has a bad starter bedix gear, and the other has developed an air leak in a crank seal. so a decision needed to be made on priorities, and nice i still have my old 18' to take to the lake, the skis have been put on hold. all parts were ordered and are waiting, but they will continue to wait. i had my knee surgery on the 6th and was back outside doing limited work on the 9th. unfortunately while i was in recovery we got at call that my girls 6 year old border collie needed to be put down bc of a pancreatic mass. so surgery day became a more difficult day. anyways, i have been working on the boat while still recovering so ill try to get this thread updated to a point....
 

bleedblue94

Petty Officer 1st Class
Joined
Oct 11, 2010
Messages
272
Re: my 1991 capri rebuild

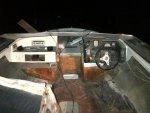
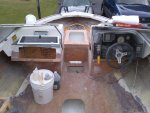
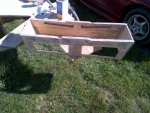
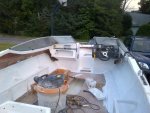
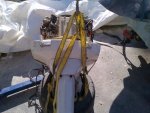
used a bunch of junk in the garage to get the helm to sit level, which makes things much nicer to look at then the droopy helm i had
IMG-20120527-00425.jpg

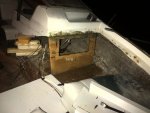
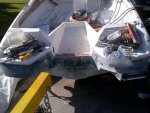
got the first panel screwed and glassed on so i could get proper measurements of the remaining pieces
IMG-20120528-00446.jpg

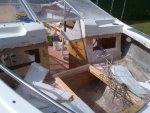
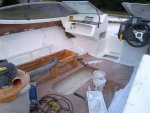
slowly coming together
IMG-20120613-00461.jpg

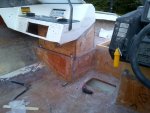
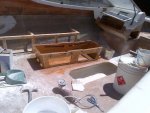
and the main helm storage boxes are done with drain holes
IMG-20120613-00462.jpg
 

bleedblue94

Petty Officer 1st Class
Joined
Oct 11, 2010
Messages
272
Re: my 1991 capri rebuild

i got talked into going to the lake so we took the 18' and we took one of my dogs along who took over his seat
IMG-20120617-00467.jpg

me and my buddy ha
IMG-20120617-00470.jpg

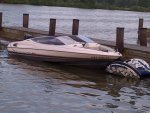
just my other boat. 18' version of what im building now. i dont like most bayliners but for some reason love this design
IMG-20120617-00474.jpg
 

bleedblue94

Petty Officer 1st Class
Joined
Oct 11, 2010
Messages
272
Re: my 1991 capri rebuild

back to the 20'

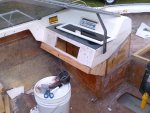
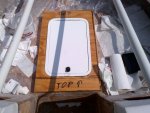
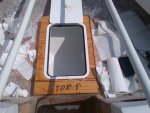
instead of using the crappy glove box design for this storage i wanted to build a larger storage area where i could keep everything i would need dry and also have room to set up chargers ect. i found a nice looking hatch with a black plexi window that would work but i would need to extend the front panel no matter what hatch i used. the stock front panel had a trim piece over it so once the trim was removed the area exposed was crooked, so i had to glass a straight piece on now. here it is dry fitted
IMG-20120615-00464.jpg

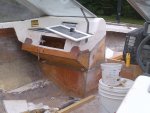
and here is everything glassed together. just needs a good sanding

IMG-20120618-00481.jpg

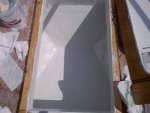
i then gelcoated my bow storage area and used the pva stuff as recommended by us composites to avoid the tacky finish
IMG-20120620-00483.jpg

i then screwed and glassed on the top for the storage and here have the hatch fitted
IMG-20120620-00484.jpg

plenty of access
IMG-20120620-00485.jpg
 

bleedblue94

Petty Officer 1st Class
Joined
Oct 11, 2010
Messages
272
Re: my 1991 capri rebuild

here is a pic of the new storage opening cut open for the hatch to fit, the bow storage piece on and sanded, and also a filler piece put in the bow around where the anchor will be stored
IMG-20120622-00489.jpg

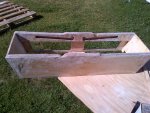
my girl friend and i built this replacement seat box together the other day
Vestal-20120623-00493.jpg

made some cutouts for storage. who knows.... used towels??
Vestal-20120623-00494.jpg

and here it is glassed in with 1708
Vestal-20120623-00496.jpg
 

bleedblue94

Petty Officer 1st Class
Joined
Oct 11, 2010
Messages
272
Re: my 1991 capri rebuild

and now we finally started this gelcoating process of the deck
Vestal-20120623-00497.jpg

Vestal-20120623-00498.jpg

so weird to see with color...
Vestal-20120623-00499.jpg
 

bleedblue94

Petty Officer 1st Class
Joined
Oct 11, 2010
Messages
272
Re: my 1991 capri rebuild

now i see i will have some pits and issues with the coat, so im thinking of mixing some cabosil into a couple batches of gelcoat to make a past to fill the noticeable pits. after that i will sand down any high spots and then roll a final coat or two on top. im curious how many coats do you guys usually recommend for a deck and seating area? 2, 3, 4?
 

93bayliner1800

Petty Officer 1st Class
Joined
May 9, 2011
Messages
239
Re: my 1991 capri rebuild

Hey brother, glad to see ya posting again! Looking good on the boat. Most threads I have read has said 2coats unwaxed and a third waxed. My theory would be coat until it is completely covered well....however many coats that took....then a final waxed coat.

I have decided to go back with carpet in mine. After a layer of csm then 1708 on the deck...that is twice as much as from the factory's they had only coated bare wood. I hope your seat boxes went easier than mine. That was the hardest thing I have done on my boat to date! Lol
 

bleedblue94

Petty Officer 1st Class
Joined
Oct 11, 2010
Messages
272
Re: my 1991 capri rebuild

They were fun for sure but not horrible. I did them both my own way and not necessarily the same as factory for various reasons. To cover some of the pits I mixed cabosil in w some gelcoat and it really helped with imperfections. I'm just starting to become my worst critic and expecting this to look like it came out of a mold or something.
 

93bayliner1800

Petty Officer 1st Class
Joined
May 9, 2011
Messages
239
Re: my 1991 capri rebuild

I am expecting your's to look better than a mold! LOL I worry more about structural issues than cosmetic...I mean I want it to look nice, but I have this horrible recurring dream of the boat hitting a large wake and exploding into a million pieces all because I forgot to sand one tabbing!!!! :facepalm:
 

bleedblue94

Petty Officer 1st Class
Joined
Oct 11, 2010
Messages
272
Re: my 1991 capri rebuild

I am expecting your's to look better than a mold! LOL I worry more about structural issues than cosmetic...I mean I want it to look nice, but I have this horrible recurring dream of the boat hitting a large wake and exploding into a million pieces all because I forgot to sand one tabbing!!!! :facepalm:

Hahaha. I have that same dream. I'm afraid ill put it in the water and the first time I hit the throttle the whole thing will split and sink. Ill do something stupid like forget the boat plug or something bc I'm gonna be so nervous...
 

bleedblue94

Petty Officer 1st Class
Joined
Oct 11, 2010
Messages
272
Re: my 1991 capri rebuild

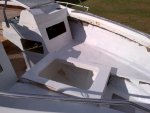
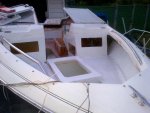
Well I ran into some issues with how to mount the motor which I will expand about later.

Quick question: with an outboard staeering system you have a cutout on one side with the steering cable and electrial cables come through the cable boot, but on the opposite side there is sometimes a cutout with a cup looking piece that acts like a relieve to allow the steering arm and cable to fully extend. If its not clear what I mean, then I will try to get a picture later. I need to know if there is a "technical" term for the cup that creates the recess/relieve that will allot the steering arm and cable to fully extend through the cap if necessary. Thanks
 

93bayliner1800

Petty Officer 1st Class
Joined
May 9, 2011
Messages
239
Re: my 1991 capri rebuild

Yep...would like to see a pic of it. Mine has a hole cut across from the steering arm, but it is for my battery cables to come thru.
 

bleedblue94

Petty Officer 1st Class
Joined
Oct 11, 2010
Messages
272
Re: my 1991 capri rebuild

well here are some updates. i continued with painting and was moving along
Vestal-20120625-00505.jpg

Vestal-20120625-00506.jpg

and then got stuck deciding what i wanted to do with the colors, so i changed my focus to the inevitable task of mounting the motor, and this is when all hell broke loose for abit

here is the new powerplant: 1983 175hp johnson
Vestal-20120627-00511.jpg

and this is where its new home was to be....
Vestal-20120627-00510.jpg

however bc of the molded swim platforms and the 90 degree motor, the motor was not able to fully swing without hitting the platforms. after yelling several choice words i took a step back and figured out a remedy
 

bleedblue94

Petty Officer 1st Class
Joined
Oct 11, 2010
Messages
272
Re: my 1991 capri rebuild

i decided a jackplate would make a good addition both performance wise and also to solve the issue. i was scared the 6" or 8" plate would not give enough setback to allow the motor to clear so i got the 10" to be safe. in retrospect the 8" would have worked fine but oh well. this is allot of setback for this boat so i also order a set of smart tabs, and bc of the swim platforms i needed to order the stainless steel series (but that will be covered later on). anyways...

while i was waiting for the jackplate i decided to fully close any and all openings in the rear end for the cables, steering relief, and also the hull to cap gap on the transom. i also had to sand down the paint that was added on top of the gelcoat.

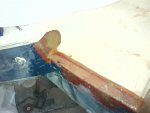
here is the port side steering relief closed up. i used csm on the backside, filled with PB, and then csm and 1708 on the side pictured
Vestal-20120707-00525.jpg

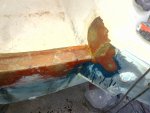
on the starboard side i closed the stock fuel hose cutout, steering and cable cutout, and also the stock fuel tank vent hole. again, csm on the backside, filled with PB, and then csm and 1708 on the side pictured
Vestal-20120707-00526.jpg

i plan to paint the full extirior of this boat next summer, but i did not want to have to remove the jackplate and all that again, so i marked off an area to freshly gelcoat, making sure i sanded to that point, but did not remove the stock gelcoat off the area around it. i then painted it off as nicely as i could and rolled a few coats of white on the area and the splashwell. i was pretty happy with how it came out honestly. you can see the holes drilled for mounting the jackplate and also for the splashwell drains
Vestal-20120708-00527.jpg

this being a full rebuild, and a heavy rearend, i was very worried about potential water or rot on my new transom, so i needed a good way to coat the holes with resin befroe i used the 5200 on them....

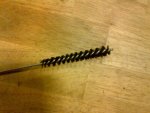
this worked perfect for coating the holes with resin first. after they cured, i loaded up with a ton of 5200 in all the holes and mounted the jackplate and splashwell drains
Vestal-20120711-00542.jpg
 
Top