MFG rebuild getting started pics

sphelps

Supreme Mariner
Joined
Nov 16, 2011
Messages
11,468
Re: MFG rebuild getting started pics

Nope left the gun how it was but I did use the 1.8 tip and lots of reducer in the primer It went on ok but could have been better. I am gunna shoot the colors on the trim piece set up how I think it should go and see what happens before I shoot the cap again..
 

jbcurt00

Moderator
Staff member
Joined
Oct 25, 2011
Messages
25,072
Re: MFG rebuild getting started pics

"Duhh, make sure it's reading right at the gun SP~WoodOnGlass";)


I know enough to fill a thimble about hvlp guns:) My trouble spraying was too much pressure at the gun, turned it down to the range you're using & worked great.

These came up in a google search of: paint orange peel troubleshooting hvlp
[FONT=&quot]Problem[/FONT][FONT=&quot]

[/FONT]
[FONT=&quot][/FONT]
[FONT=&quot]Cause[/FONT][FONT=&quot][/FONT]
[FONT=&quot]Solution[/FONT][FONT=&quot][/FONT]
[FONT=&quot]Orange Peel.[/FONT][FONT=&quot][/FONT]
[FONT=&quot]1. Material drying too fast.[/FONT][FONT=&quot][/FONT]
[FONT=&quot]Slower solvent.[/FONT][FONT=&quot][/FONT]
[FONT=&quot]2. Gun too far from surface.[/FONT][FONT=&quot][/FONT]
[FONT=&quot]Move gun closer to surface.[/FONT][FONT=&quot][/FONT]
[FONT=&quot]3. Material too thick.[/FONT][FONT=&quot][/FONT]
[FONT=&quot]Thin material per thinning instructions.[/FONT][FONT=&quot][/FONT]
[FONT=&quot]

[/FONT][FONT=&quot][/FONT]
[FONT=&quot]Topic: Orange Peel with HVLP gun[/FONT][FONT=&quot] (Read 3454 times)[/FONT][FONT=&quot][/FONT]
[FONT=&quot] [/FONT]
[FONT=&quot]Jhonny[/FONT][FONT=&quot]
Guest


[/FONT][FONT=&quot][/FONT]
[FONT=&quot]Orange Peel with HVLP gun[/FONT][FONT=&quot]
[/FONT][FONT=&quot]? [/FONT][FONT=&quot]on:[/FONT][FONT=&quot] Sep 28[SUP]th[/SUP], 2004, 10:00am ?[/FONT][FONT=&quot][/FONT]
[FONT=&quot]
[/FONT]​
[FONT=&quot]From what I have read it seems that orange peel with HVLP spray gun is the most common problem with novice painters. I just recently sprayed my car and have some major orange peel. What is the best way to fix the problem? What is the best way to avoid having it happen with the next coat of paint?
I guess I'm applying to much paint, but if a go lighter it doesn't seem to "flow" and looks like paint splatter with large droplet size. Should I just leave the large droplet size and then assume the paint will flow after I move on?

Thanks in advance [/FONT][FONT=&quot][/FONT]
[FONT=&quot] [/FONT]
[FONT=&quot]PaintMasterB
[/FONT][FONT=&quot]YaBB Administrator[/FONT][FONT=&quot]

[/FONT][FONT=&quot][/FONT]
[FONT=&quot]Re: Orange Peel with HVLP gun[/FONT][FONT=&quot]
[/FONT][FONT=&quot]? [/FONT][FONT=&quot]Reply #1 on:[/FONT][FONT=&quot] Sep 28[SUP]th[/SUP], 2004, 12:30pm ?[/FONT][FONT=&quot][/FONT]
[FONT=&quot]
[/FONT]​
[FONT=&quot]Hi, thanks for posting!

Yep, that's the biggest problem with learning an HVLP gun.
There are a few things that can cause orange peel. The wrong fluid tip size, under-reduction, air pressure, and spray technique are most common. If you are used to a conventional gun then it's most likely technique. You have to shoot much closer to the panel with an HVLP than with a conventional. So close that it's scary, try six inches or so. That low pressure makes it glob on if you are too far away. Practice on a scrap piece or fender or something. You'll see the clear goes on smoother at closer range. Just adjust your speed and volume control to avoid runs. If you still get orange peel, then try a little more reduction.

Now, you already have the peely finish. You can try color sanding and buffing. But if it's really bad, just sand with 600 grit and recoat with clear. No matter how good you are, you are going to get some texture so you'll have to color sand and buff if you want the slick show look. But less orange peel makes sanding way easier.
Good Luck!

Larry [/FONT][FONT=&quot][/FONT]
[FONT=&quot] [/FONT]
[FONT=&quot]Re: Orange Peel with HVLP gun[/FONT][FONT=&quot]
[/FONT][FONT=&quot]? [/FONT][FONT=&quot]Reply #2 on:[/FONT][FONT=&quot] Sep 29[SUP]th[/SUP], 2004, 12:42pm ?[/FONT][FONT=&quot][/FONT]
[FONT=&quot]
[/FONT]​
[FONT=&quot]Thanks for the response. I'm not going to clear-coat the Acrylic Enamel. So I guess my best bet is to sand some/most of the ripples out with 600 grit and then respray? On small parts I can get it "right" most of the time. It is just a problem when shooting large parts or a car. I'm thinking that I get overwhelmed with a large job and put the paint on way to thick? Meaning it looks good as I shoot it but orange peels later. Some of my inside panels that I just sprayed quick and then ignored didn't cover 100% but came out smooth, shiny, and clean. Should I just be spraying a light coat and then move on for 10 minutes. When I did this before it looked bad and orange peeled, but when I cam back later is smoothed out just fine. Is this a common effect with HVLP. FYI I'm using a medium reducer and 1.4 mm tip.

Thanks again for all the advice. [/FONT][FONT=&quot][/FONT]
[FONT=&quot]
Ask the Expert Question-and-Answer Archive[/FONT][FONT=&quot]
[/FONT][FONT=&quot]by Ron Joseph [/FONT][FONT=&quot]
[/FONT][FONT=&quot]October, 2005[/FONT][FONT=&quot]
[/FONT][FONT=&quot]Orange Peel Paint Defect with HVLP Spray Gun [/FONT][FONT=&quot]
[/FONT][FONT=&quot]Q. I am trying to spray my truck but can't get rid of the orange peel effect. I am using an HVLP gravity feed gun. I am spraying with NASON Urethane paint. The paint calls for 8-parts paint 1-part catalyst and 2-parts reducer. I am spraying at 10 lbs pressure. I have heard a couple of different ways to possibly eliminate the problem but nothing has worked yet. I could really use your advice. Thanks . [/FONT][FONT=&quot]
[/FONT][FONT=&quot]A. You are probably using way too little air pressure. I assume that when you say that the atomizing pressure is 10 lbs you are referring to the pressure that you read on the pressure gauge at the handle of the spray gun? Well, if that it so then I'm not surprised that you are getting orange peel. I don't know which HVLP spray gun you are using, but you are permitted to increase the atomizing pressure so that it reads 10 lbs per square inch (psig) at the CAP of the gun ... not at the handle. Special pressure gauges can be purchased from the spray gun vendor to measure the pressure at the CAP. If you refer to the spray gun manual it will tell you what the maximum pressure is at the handle of the gun to give you 10 psig at the cap.

By increasing the at atomizing pressure without increasing the fluid (paint) flow rate, you will significantly improve the finish. On the other hand, if you over atomize the paint you will get dry spray, so I suggest that you experiment with the air pressure until you get the best atomization.

By the way, within the next few weeks I will be selling a CD that provides step by step methods for setting up an HVLP spray gun.[/FONT][FONT=&quot][/FONT]
[FONT=&quot] [/FONT]
[FONT=&quot]Regards,

Ron Joseph [/FONT][FONT=&quot][/FONT]

Among others

Sorry to not to be of much more assistance
 

sphelps

Supreme Mariner
Joined
Nov 16, 2011
Messages
11,468
Re: MFG rebuild getting started pics

Thanks jbc , Wood said that all guns act a little different so you will have to play with the settings to get it right . I got a pretty good feeling the filter is most of the problem . When I shot the hull and the cap the first time I did not use that filter. I was getting moisture or contaminants causing fish eye's that's when I started using it.
I sure ain't gunna let it whip me though !
 

Decker83

Commander
Joined
Apr 5, 2011
Messages
2,593
Re: MFG rebuild getting started pics

I think its the filter to. Alot was said about to low of atomizing presure in the above statements. You may try to put a water filter at the compressor instead of at the gun.
Sounds like a good plan on the trim peice. I bet it works out better for you.
 

sphelps

Supreme Mariner
Joined
Nov 16, 2011
Messages
11,468
Re: MFG rebuild getting started pics

Yep and I do have a water filter at the compressor..
 

sphelps

Supreme Mariner
Joined
Nov 16, 2011
Messages
11,468
Re: MFG rebuild getting started pics

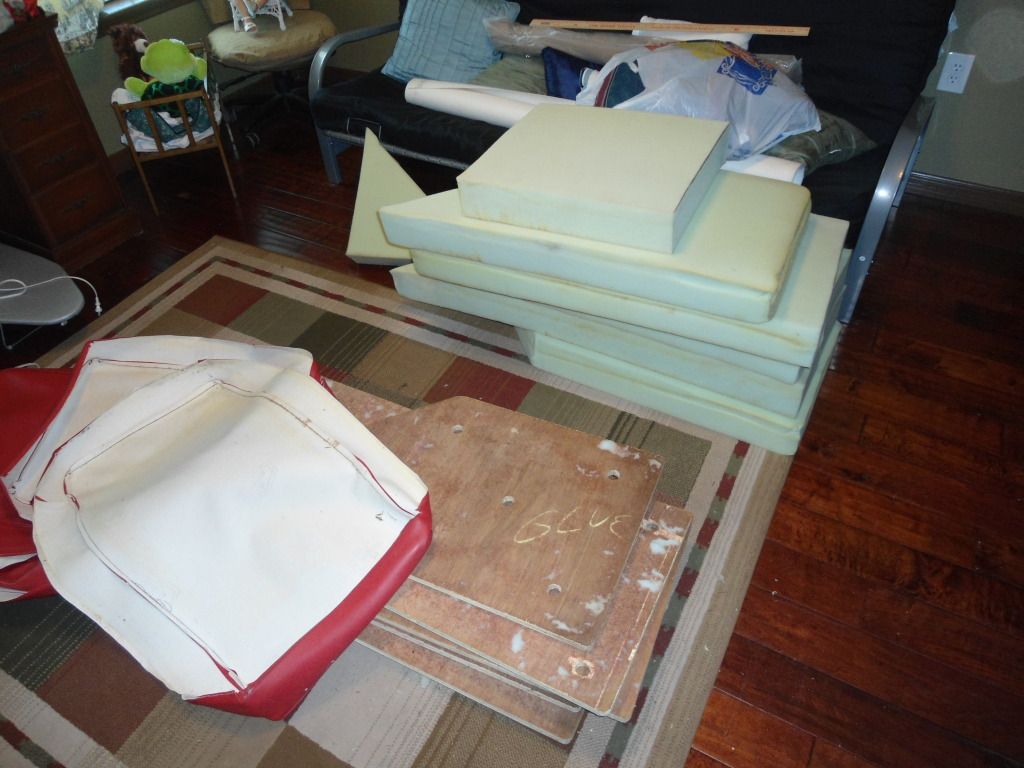
It's kinda warm out side so I hung out in the AC and stripped the donor seats down.
DSC00714.jpg

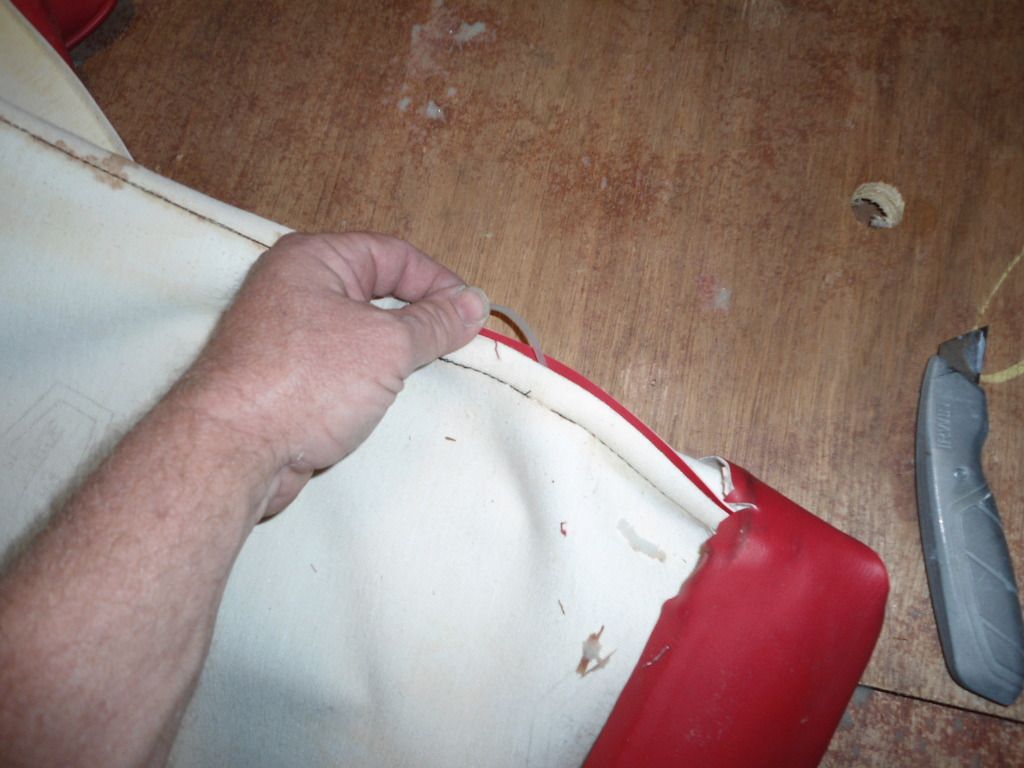
While doing that I got the idea to maybe reuse the piping off the donors.
DSC00715.jpg

I should be able to just slice the stitch and pull it out . It's made from some type of plastic. It should work ok I think.
 

sphelps

Supreme Mariner
Joined
Nov 16, 2011
Messages
11,468
Re: MFG rebuild getting started pics

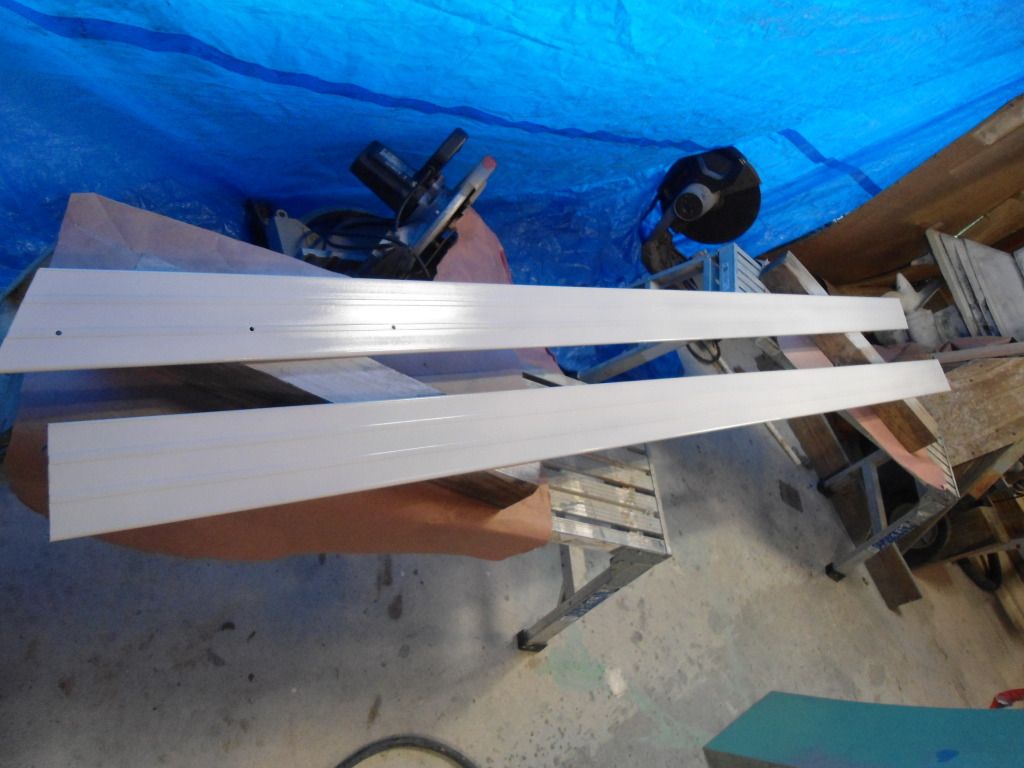
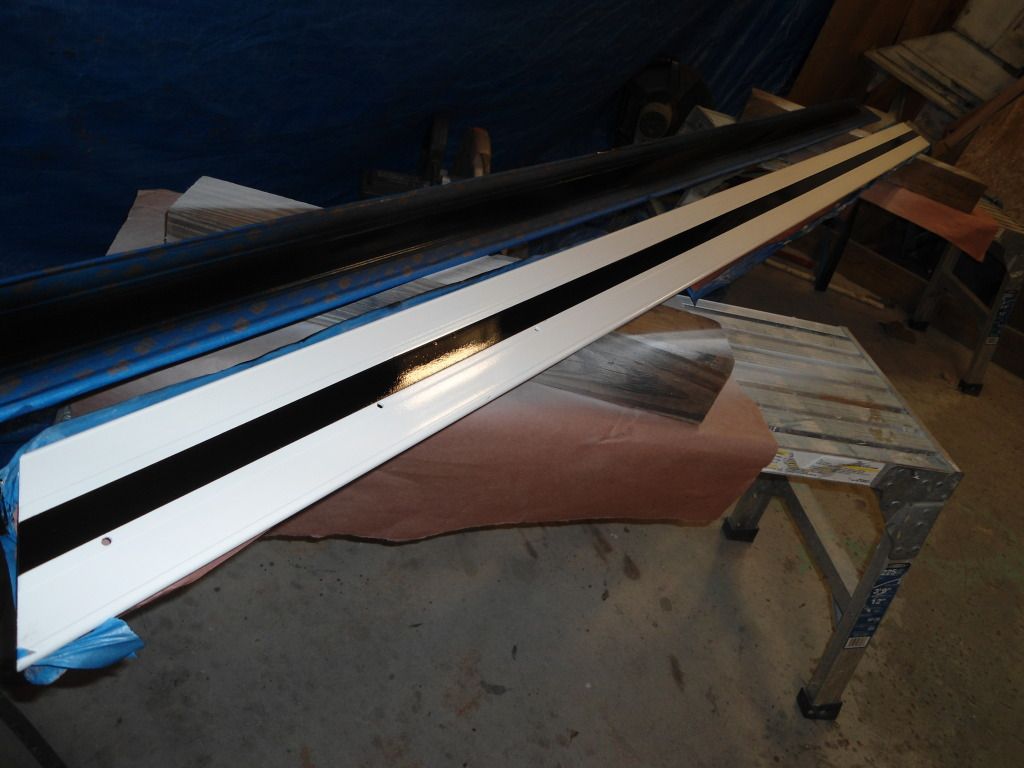
Had to work today and tomorrow so boat work will be limited this weekend.. I did manage to spray a little white paint on the gunnel pieces .
DSC00716.jpg

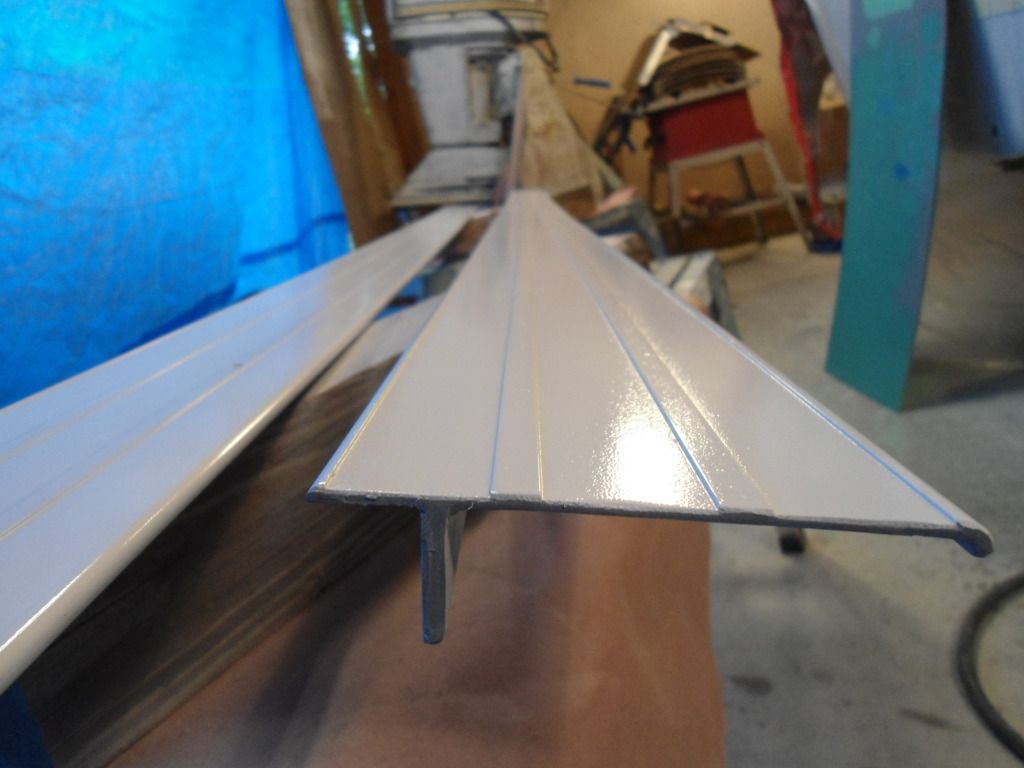
I used the small hvlp .. Had a slight bit of orange peel but not to bad..
DSC00717.jpg

The heat down here has been kinda bad 95 deg in the workshop when I shot it . I will shoot 2cnd coat then mask off the center and shoot a 3rd coat then It gets a black stripe down the center. This will match the original colors..
 

Trooper82

Commander
Joined
Nov 21, 2011
Messages
2,648
Re: MFG rebuild getting started pics

That looks good to me SP. I may have missed it, where did the donar seats come from?

The tubing should be fine to reuse, only thimg is if the patterns are the same (old/new) then it might be a little tough with the finallength being the same. That made sense to me but not sure I got down in words the way I was thinking of it :(
 

sphelps

Supreme Mariner
Joined
Nov 16, 2011
Messages
11,468
Re: MFG rebuild getting started pics

Donor seats came with the donor boat . The guy I got the Legend boat from had saved the red cushions from a job at a restaurant that was headed to the dumpster . He was going to build seats for the Legend with them.. Not sure if it will yield enough piping yet but if not I can use some of the rubber screen spline to finish up..
 

sphelps

Supreme Mariner
Joined
Nov 16, 2011
Messages
11,468
Re: MFG rebuild getting started pics

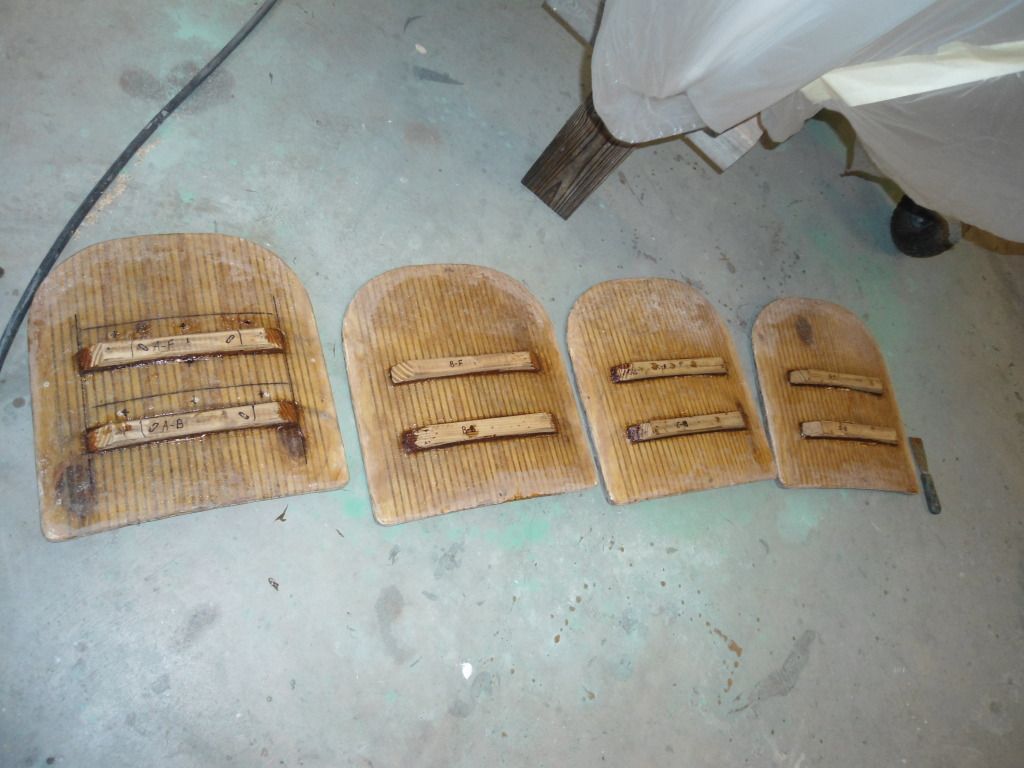
Put coat #2 on gunnel trim and pb'd my seat mount brackets to the bottom of the seat backing..
DSC00718.jpg

A little at a time maybe can get this thing splashed before the end of the year ..
I have seen a lot of seat bottoms where they have holes drilled in the wood I guess to allow air to escape.
Wonder if I should do that to mine ..
 

jbcurt00

Moderator
Staff member
Joined
Oct 25, 2011
Messages
25,072
Re: MFG rebuild getting started pics

I think those holes may be for the foam to 'exhale' as you sit on it, esp if the foam is 'bagged' to waterproof it. Sealed, the seat vinyl might split when the bagged foam ballooned in the heat.... Or remain 'crushed' when you stand up, as the air slowly got pulled back into the foam....The seats & mount brackets look great!
 

sphelps

Supreme Mariner
Joined
Nov 16, 2011
Messages
11,468
Re: MFG rebuild getting started pics

Yep , prolly a good idea to add some . I think I'll drill 4 or 5 1/2 " holes and coat with some 5200 or resin . Gunna glue the foam to the wood and cover with plastic ..
 

jbcurt00

Moderator
Staff member
Joined
Oct 25, 2011
Messages
25,072
Re: MFG rebuild getting started pics

WOG's plastic water 'barrier' discovery under his original seat vinyl is one of my favorite pix on iboats:eek:

I think the Admiral is right once again, MBS is only 1 of many of my ailments/afflictions:facepalm:
 

GT1000000

Rear Admiral
Joined
Jul 13, 2011
Messages
4,916
Re: MFG rebuild getting started pics

Hi S.P.,
Just checkin in...everything is looking great...as per your usual excellent craftsmanship...

Yeah, I agree with putting a couple of "breather holes" in the seat bottoms...I have seen where they use what look like little metal screens that are "grommeted" into the vinyl fabric along the edges, for this purpose...you might look into those also for the back rests...If I can find the link I'll post it up, if not, you might ask JDA...he might know what I am talking about...

BTW, I don't know if you got my response the other day when you posted in my thread about the sand paper sticking...

Use some dish soap to lubricate the water you are using for the wet sand...you can use as much or as little as you feel you need to...just rinse the area off frequently with fresh water, to help flush away the contaminants and to check your progress...
 

sphelps

Supreme Mariner
Joined
Nov 16, 2011
Messages
11,468
Re: MFG rebuild getting started pics

Yep ,GT I saw the response and have started using soapy water . It does help a lot . One problem I have is that my water at the moment is really bad with Iron . I had a water softener but disconnected it because it was a piece of carp .. I have to install a new well before I get another filter system . I have been bringing in bottle water to drink and wet sand . The rust in the water makes the white paint not so pretty!:eek:
 

jbcurt00

Moderator
Staff member
Joined
Oct 25, 2011
Messages
25,072
Re: MFG rebuild getting started pics

Yep ,GT I saw the response and have started using soapy water . It does help a lot . One problem I have is that my water at the moment is really bad with Iron . I had a water softener but disconnected it because it was a piece of carp .. I have to install a new well before I get another filter system . I have been bringing in bottle water to drink and wet sand . The rust in the water makes the white paint not so pretty!:eek:

Do wally worlds there have fill stations for filtered water? In LV they were everywhere, just buy 1 large(5gal) bottle of water then refill it. In LV it was $0.25/gal, $1/5gal. Even at double that price, it's way cheaper then 'normal' 16-20oz I used it for taking water to the dog park & 1gal/day for me at work. The tap water at the condo was mucho HARDO & had a metallic aftertaste, yummy:( NOT!
 

sphelps

Supreme Mariner
Joined
Nov 16, 2011
Messages
11,468
Re: MFG rebuild getting started pics

We have been filling up gal jugs with filtered water from the inlaws. They are just down the road so it's not to much trouble.. The first wet sand with the bad water I was thinking WHAT HAVE I DONE ! Rust lines running down the hull !:eek: I caught em quick with some polishing compound and they came right out thankfully...
 

jbcurt00

Moderator
Staff member
Joined
Oct 25, 2011
Messages
25,072
Re: MFG rebuild getting started pics

I had a pix in my head of you using case after case of those little 11oz bottles.:facepalm: I have absolutely no idea why....
 

sphelps

Supreme Mariner
Joined
Nov 16, 2011
Messages
11,468
Re: MFG rebuild getting started pics

Maybe cuss I said I was bringing in bottle water ..:rolleyes::facepalm:

Got the last coat of white on the gunnel trim . Probably spray first coat of black on the stripe tomorrow. I also drilled 4 , 11/16 holes in the seat bottoms and gave them a good coat of 5200 to seal them up ..
 

sphelps

Supreme Mariner
Joined
Nov 16, 2011
Messages
11,468
Re: MFG rebuild getting started pics

We have black stripes ..
DSC00720.jpg

Prolly should have bumped the thinner up a little but acceptable I reckon..
2 more coats and will call that small project done..:)
I need to start thinking about seat bases.. Alright hamster time to jump back on the wheel !
 
Top