Here I go again!! 1995 Sea Ray 220 Signature Deck and Stringer Restoration SPLASHED!

Woodonglass

Supreme Mariner
Joined
Dec 29, 2009
Messages
25,927
Re: Here I go again!! 1995 Sea Ray 220 Signature Deck and Stringer Restoration

Re: Here I go again!! 1995 Sea Ray 220 Signature Deck and Stringer Restoration

What ARE you scared of????
 

Friscoboater

Captain
Joined
Jul 3, 2009
Messages
3,095
Re: Here I go again!! 1995 Sea Ray 220 Signature Deck and Stringer Restoration

Re: Here I go again!! 1995 Sea Ray 220 Signature Deck and Stringer Restoration

What ARE you scared of????

The weight. I really have not keep very good track of all that has been added.

Lets lay this out.

Went from 1/2" Stringers to 3/4"
Added 6 outer bulkheads made of 3/4"
5/8" Deck instead of 1/2"
Around 35 gallons of resin once waste is taken out. That sounds normal to me for a boat this size.

It does not seem like alot extra to me. If anything she should ride real smooth.
 

Woodonglass

Supreme Mariner
Joined
Dec 29, 2009
Messages
25,927
Re: Here I go again!! 1995 Sea Ray 220 Signature Deck and Stringer Restoration

Re: Here I go again!! 1995 Sea Ray 220 Signature Deck and Stringer Restoration

We talked about this before, so Based on Your boat size and my calculations I would say your NET weight gain MIGHT and I say MIGHT be in the 100# range.
 

Friscoboater

Captain
Joined
Jul 3, 2009
Messages
3,095
Re: Here I go again!! 1995 Sea Ray 220 Signature Deck and Stringer Restoration

Re: Here I go again!! 1995 Sea Ray 220 Signature Deck and Stringer Restoration

We talked about this before, so Based on Your boat size and my calculations I would say your NET weight gain MIGHT and I say MIGHT be in the 100# range.

Your right. I am getting a case of the second guesses.

I had a rough day today. Nothing went right at all, and so my attitude is not the best right now. Maybe tomorrow will be better.
 

archbuilder

Vice Admiral
Joined
Sep 12, 2009
Messages
5,697
Re: Here I go again!! 1995 Sea Ray 220 Signature Deck and Stringer Restoration

Re: Here I go again!! 1995 Sea Ray 220 Signature Deck and Stringer Restoration

Jay you actually made the boat lighter, think of the wet foam you took out! You won't even notice the weight you "added".
 

Woodonglass

Supreme Mariner
Joined
Dec 29, 2009
Messages
25,927
Re: Here I go again!! 1995 Sea Ray 220 Signature Deck and Stringer Restoration

Re: Here I go again!! 1995 Sea Ray 220 Signature Deck and Stringer Restoration

It's been a LONG ROAD. But... You have one of the Absolute BEST resto's on the forum. And that's a FACT!!! I know your butt has to be draggin and your Brain has to be fried, but when you hit the water on that SAAAAWWWEEEEEEETTTTTTT Boat you will be surprised how all this will be a distant memory. Have another Beer and Celebrate ALL the acomplishments you have!!!!! And there ARE A LOT!!!!!!
 

Friscoboater

Captain
Joined
Jul 3, 2009
Messages
3,095
Re: Here I go again!! 1995 Sea Ray 220 Signature Deck and Stringer Restoration

Re: Here I go again!! 1995 Sea Ray 220 Signature Deck and Stringer Restoration

Thanks guys. If I can just get these interior panels glassed in tomorrow, I will be happy! Then I can worry about getting the gimble housing painted.

Crap, I forgot to order new studs for the bravo gimble housing.
 

NickAndJena

Petty Officer 2nd Class
Joined
Mar 1, 2009
Messages
102
Re: Here I go again!! 1995 Sea Ray 220 Signature Deck and Stringer Restoration

Re: Here I go again!! 1995 Sea Ray 220 Signature Deck and Stringer Restoration

Crap, I forgot to order new studs for the bravo gimble housing.

It's good to know you are human like the rest of us...

I agree with Archbuilder above, you removed the wet foam and we all know that stuff weighs a lot. You're also modifying the exhaust on that huge engine, which should pump out a few extra horse power. That sweet boat is going to last for a long time, and it's going to be a head turner (even without the side-outs).

Didn't mean to invoke second guesses, I'm just happy to be gleaning knowledge from watching this project move so fast...

I REALLY like "Sea Jay" for her name, what does your Mom think about that one?

Nick
 

parrisw

Ensign
Joined
Jun 8, 2009
Messages
985
Re: Here I go again!! 1995 Sea Ray 220 Signature Deck and Stringer Restoration

Re: Here I go again!! 1995 Sea Ray 220 Signature Deck and Stringer Restoration

I should be around 150 pounds heavier.


I only put down two layers. You have to remember this is a really big boat. Most of the complete stringer jobs on here are smaller boats, and do not require as much reinforcement.

Now you guys have me scared... :eek:

I have always read 2 layers of 1708 on the stringers, one layer to tab the deck to the hull, and 2 layers of CSM on the deck.

I'd say your more then good to go Jay. I tabbed my deck with CSM the Woven then CSM, then 2 layers of CSM on the deck, and my boat is nothing compared to yours.
 

ezmobee

Supreme Mariner
Joined
Mar 26, 2007
Messages
23,767
Re: Here I go again!! 1995 Sea Ray 220 Signature Deck and Stringer Restoration

Re: Here I go again!! 1995 Sea Ray 220 Signature Deck and Stringer Restoration

My new interior is a heck of a lot heavier than the stripped nothing that was in there previously and it didn't effect my top speed really at all. With that big block I certainly wouldn't worry about it.
 

jb33

Cadet
Joined
Jun 12, 2011
Messages
7
Re: Here I go again!! 1995 Sea Ray 220 Signature Deck and Stringer Restoration

Re: Here I go again!! 1995 Sea Ray 220 Signature Deck and Stringer Restoration

+1 on the weight issue. How was she on your test ride? just think, when you put her back in the water it will probably be 500lbs lighter than it was with all that soggy foam and wood!

Oh, Awesome work and I feel your pain. I just returned from North Carolina to Iowa with my new Formula 242 that I knew was going to be a minor project. the engine and outdrive needed installed and the rear seat/sunpad reupholstered but "the hull is in great shape" needless to say the transom is needin it the stringers have already been shoddily repaired the fuel tank was "upgraded for more fuel storage" from a 105gal to a 75gal tank which is taller eliminating the ski locker, the gelcoat was PAINTED with some crappy auto paint...etc etc etc...I have been through this before and every time when I am done I say man I wish I at least had before and after pics.

Your relentless documentation is inspiring! Your threads have been a great read and have got a fire burnin under my butt right now! I need to get to work! I will be trying to at least get pics of my progress this time. One saving grace on my boat is its got a fiberglass cockpit liner so no floor work needed but if it did, I would do what you are doing, looks wonderful.
 

bear_69cuda

Commander
Joined
Oct 10, 2008
Messages
2,109
Re: Here I go again!! 1995 Sea Ray 220 Signature Deck and Stringer Restoration

Re: Here I go again!! 1995 Sea Ray 220 Signature Deck and Stringer Restoration

Boss,

I'm sure the weight will not be an issue with the 454/Bravo drive. I bet the boat will weigh less significantly than the sea trial with wet foam!

You can always drop a 496 MPI in that bilge! =-)
 

clockwatcher

Petty Officer 1st Class
Joined
Nov 8, 2009
Messages
289
Re: Here I go again!! 1995 Sea Ray 220 Signature Deck and Stringer Restoration

Re: Here I go again!! 1995 Sea Ray 220 Signature Deck and Stringer Restoration

Extra weight or not, this rig is going to ride far nicer than it ever did new. And last forever. And clean up a whole lot easier. And smell better. And give you the satisfaction of knowing that it can take a pounding and keep your family safe...
 

polarstar

Cadet
Joined
Mar 1, 2009
Messages
7
Re: Here I go again!! 1995 Sea Ray 220 Signature Deck and Stringer Restoration

Re: Here I go again!! 1995 Sea Ray 220 Signature Deck and Stringer Restoration

Man, you have nothing to second guess yourself on. You have much improved the structural integrity of the hull and you have absolutley nothing to worry about with rot. I noticed with your postings that you are a perfectionist and I thought you might keep records. Your grand kids will be driving you around in this boat! I just finished refurbishing a 1973 Starcraft 18' American with an 888 and I wish that I had your videos and information when I started it 2 years ago. The end is in sight! When your on the lake enjoying the family with a cold beer you will be smiling from ear to ear knowing nothing and I mean nothing was left undone. Keep the faith, we all support you and look forward to your updates. Scott..
 

mfsb

Seaman
Joined
Apr 23, 2011
Messages
70
Re: Here I go again!! 1995 Sea Ray 220 Signature Deck and Stringer Restoration

Re: Here I go again!! 1995 Sea Ray 220 Signature Deck and Stringer Restoration

Jay, I am one of the many lurkers on this site. I want to tell you that your project has helped me tremendously and motivated me to even attempt my own repower. I really appreciate all the hard work and quality job you are doing! I haven't taken pictures or done write ups, I figure switchin from a 305 vp to a 350 cp " chevy Penta" has been done once or twice and I have used that info myself as I do this. I love watching your videos and hope you keep up the great work.
 

Friscoboater

Captain
Joined
Jul 3, 2009
Messages
3,095
Re: Here I go again!! 1995 Sea Ray 220 Signature Deck and Stringer Restoration

Re: Here I go again!! 1995 Sea Ray 220 Signature Deck and Stringer Restoration

Thanks for the encouragement guys. It is so tempting to just throw the engine back on and hit the water. I have to keep saying, slow down and do it right.
 

69rrvert

Petty Officer 1st Class
Joined
May 9, 2010
Messages
211
Re: Here I go again!! 1995 Sea Ray 220 Signature Deck and Stringer Restoration

Re: Here I go again!! 1995 Sea Ray 220 Signature Deck and Stringer Restoration

Jay,

The Ray is lookig great. I wish I could say the same about mine. I just sent you a PM and wanted to talk to you about a few things that I found on my boat. It has my number, so if you don't mind give me a call after 17:00. Thanks, Steven
 

kpiazzisi

Petty Officer 2nd Class
Joined
Jun 19, 2005
Messages
164
Re: Here I go again!! 1995 Sea Ray 220 Signature Deck and Stringer Restoration

Re: Here I go again!! 1995 Sea Ray 220 Signature Deck and Stringer Restoration

Jay,

I know how you feel. I don't know if you have seen my post, but I have been working on mine for almost a year now (on and off). It get's discouraging at times. You are doing an awsome job. Being able to Gelcoat right over PE is so sweet and a major drawback to epoxy. I have to paint my epoxy floor and hope it holds up to wear and tear. I would not worry about the weight for reasons already stated.

If you had to do it all over would you consider Coosa board? It's light impervious to water, and requirs little glass/resin since it's already structural and doesn't need to be sealed.
 

archbuilder

Vice Admiral
Joined
Sep 12, 2009
Messages
5,697
Re: Here I go again!! 1995 Sea Ray 220 Signature Deck and Stringer Restoration

Re: Here I go again!! 1995 Sea Ray 220 Signature Deck and Stringer Restoration

I hear you, I was trying to force things this afternoon...took a step back and called it a day. Sometimes you have to do that, otherwise you regret it later. Keep up the great work!
 

Friscoboater

Captain
Joined
Jul 3, 2009
Messages
3,095
Re: Here I go again!! 1995 Sea Ray 220 Signature Deck and Stringer Restoration

Re: Here I go again!! 1995 Sea Ray 220 Signature Deck and Stringer Restoration

Well after everything not going to planned this weekend, I actually hit my goal. I am ready for Gel Coat and final assembly. I had to stop pushing everything this weekend and just let it happen. I kept thinking about July 4th and it was really messing with my mind. I had to forget about it, and accept the fact that I might not make it, and that is ok.

I still need to build the engine mounts, battery tray, trim pump tray, and bilge pump tray, but those will be easy. We will do that as we mock the engine in next weekend. I have to make sure we have clearance for the corsa side exhaust.

Anyway here is a BUNCH of pictures and video.

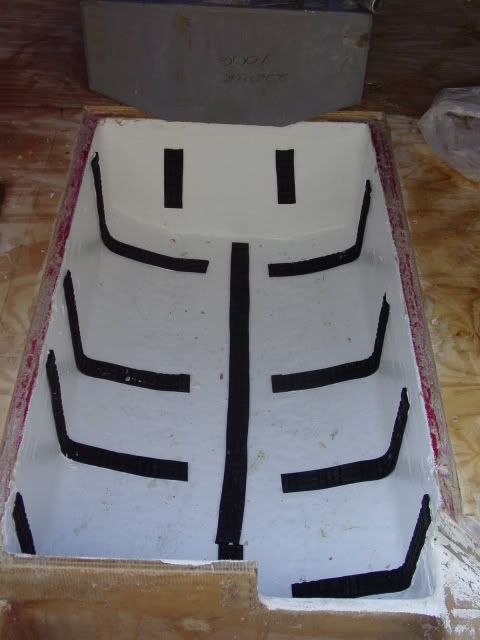
Here are my recycled tire door mat from HD for my tank strips. I just cut it down and glued it in.

DSC00865.jpg


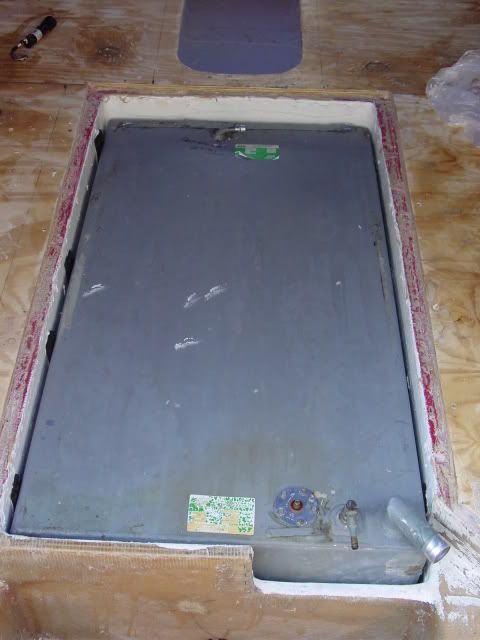
All snug

DSC00866.jpg


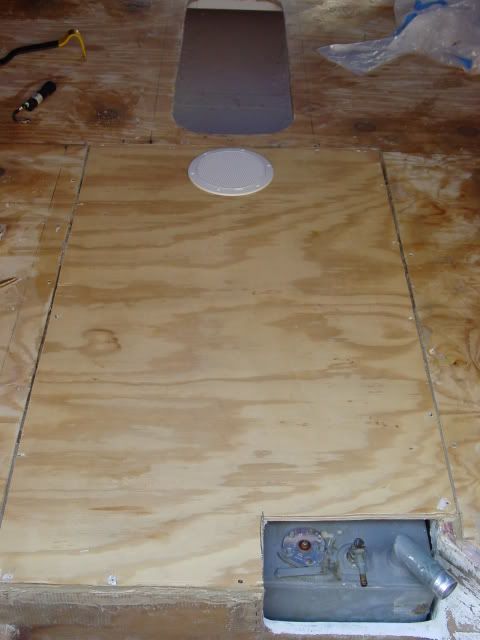
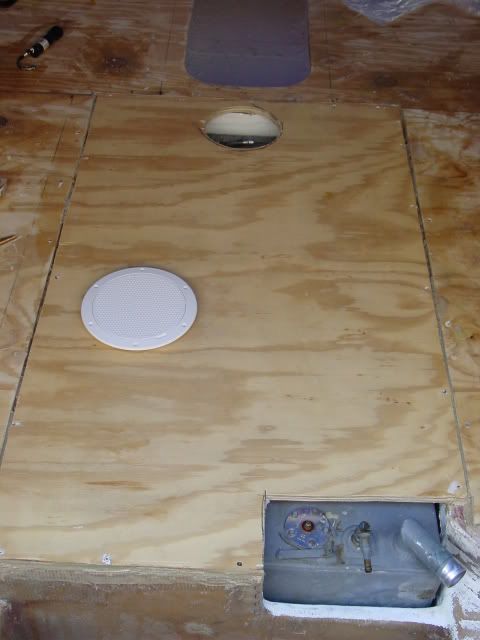
Tank cover fit and access panel cut out.

DSC00867.jpg


DSC00868.jpg


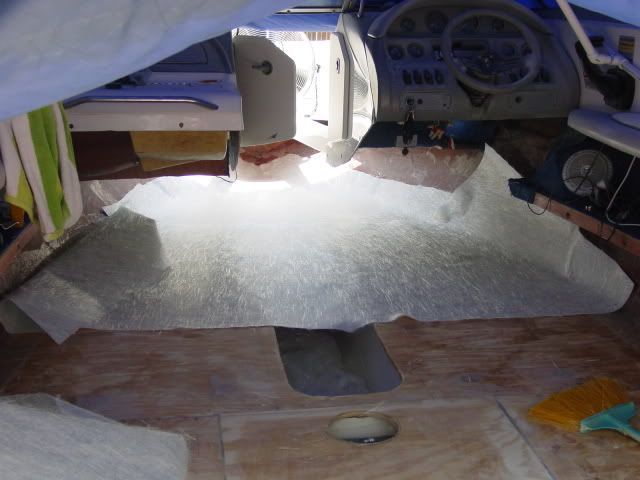
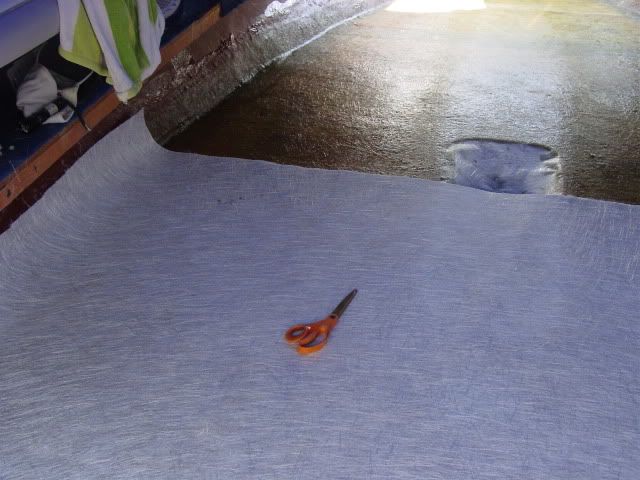
Laying down the first of two layers of CSM

DSC00869.jpg


DSC00870.jpg
 
Top