Formula 330SS Bulkhead Replacement

bvetter

Petty Officer 1st Class
Joined
Jun 2, 2013
Messages
263
Re: Formula 330SS Bulkhead Replacement

Forward progress! Must feel good after such a crappy winter!

Out of curiosity, what kind of foam did you use, was it in a compressed can, similar to Great Stuff? Or did you mix up some of the 2-part you bought in the 10 gallon kit?
 

tpenfield

Moderator
Staff member
Joined
Jul 18, 2011
Messages
18,092
Re: Formula 330SS Bulkhead Replacement

Forward progress! Must feel good after such a crappy winter!

Out of curiosity, what kind of foam did you use, was it in a compressed can, similar to Great Stuff? Or did you mix up some of the 2-part you bought in the 10 gallon kit?

Yea, actually this Spring seems to have warmer days in my area than last Spring . . . so far.

For little areas , like a gap fill or to adhere something, I just use Great Stuff. So that what I used under the ribs of the storage compartment structure. I'm saving the 2-part stuff for after the floor goes on and I am filling the cavities. The 2-part will also be used on the fuel tank bay.
 

tpenfield

Moderator
Staff member
Joined
Jul 18, 2011
Messages
18,092
Re: Formula 330SS Bulkhead Replacement

Big day with fiberglassing . . .

Well I did not run in the Boston Marathon . . . not that I would . . . so, it was a continuation of fiberglassing today.

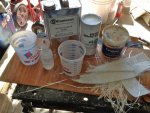
I made my first batch of "Peanut Butter" (PB) !!!
IMG_4066.jpg

I needed some to fill in the gaps around the storage compartment floor. very exciting :)

Here is the floor all resin'ed in along with PB along the edges.
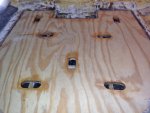
IMG_4065.jpg

That will have to set up overnight . . . So, it was onto the main bulkhead. Lots of tedious prep work, but finally towards mid-afternoon, I got to tabbing in the fuel bay side of the bulkhead. I elevated the bulkhead about 1/4" up off the hull to match the existing structure.

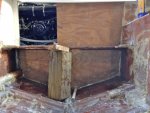
Here is the main bulkhead tabbed in . . .
IMG_4074.jpg

I had to prop up the cross member in the middle as it was sagging a little. I did not have a whole lot of 1708 cloth and I wanted to double up on the thickness of the tabbing. So, I used 1708 on the first layer and some 24 oz woven roving on the second layer of tabbing. WR is a real pain to work with, because it unravels as you are working with it. Makes a huge mess in the resin tray.

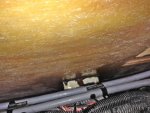
I used some CSM on the face of the center engine mount stringer where it meets the bulkhead. Then, I sunk a few SS screws into it from the other side of the bulkhead to snug it up tight . It will also get tabbed when I do the engine room side of the bulkhead. . . . Probably will be in the plan for tomorrow.
IMG_4083.jpg

Just for kicks, I put my reproduction label on the fuel tank. It is ready to go back in the boat.
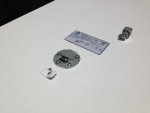
IMG_4069.jpg

I won't be putting the tank back in right away, as I have to help my FIL relocate back to the northeast (from Florida) . . . he is a 'snowbird' as we call then in the northeast. So, I'll be doing that next weekend.

I have 1 more day to work on the boat, then probably not until the first weekend in May. I better check my schedule.
 
Last edited:

tpenfield

Moderator
Staff member
Joined
Jul 18, 2011
Messages
18,092
Re: Formula 330SS Bulkhead Replacement

Some detail work on the engine room side of the bulkhead . . .

A couple of improvements that I wanted to make with the bulkhead replacement are:

(1) Add a 'mini' bilge along with the fuel bay thru-hull - this would isolate the thru-hull from the main bilge in case the main bilge had some water in it (which is often does). Even though there will be a stopper in the thru-hull, water can get by it if it is not tight enough, etc. So, the mini bilge would allow a thru-hull to be there, yet isolate it from the main bilge.

IMG_4088.jpg


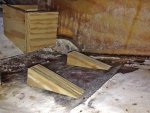
(2) Re-engineer the stand-offs for the shower bilge - The original shower bilge mounting pad somewhat obstructed the forward drains and also trapped moisture and crud below it. So I came up with a new approach that would provide a mounting pad to screw the shower bilge into, yet allow water to easily get around it. As you can see, it also leaves the forward drains clear.

IMG_4084.jpg

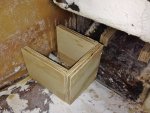
These pieces will be glassed in once the bulkhead edges are tabbed into the hull.
 
Last edited:

tpenfield

Moderator
Staff member
Joined
Jul 18, 2011
Messages
18,092
Re: Formula 330SS Bulkhead Replacement

Another update . . .

I got the other side of the bulkhead tabbed in this afternoon. So, that will do it for a week or two.

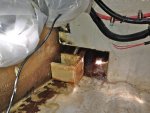
Here are a few pictures . . . the area was very cramped to work in, but I planned out my layup pieces well, so it was not too bad. I wrapped all of the conduits, hoses, etc that run across the bulkhead area in plastic so that they would not get trashed during the process.

Here is the port side . . .
IMG_4093.jpg

I used the same layup schedule for the tabbing as I did on the other side of the bulkhead (1708 + 24 oz WR). I was able to use 2 layers of 1708 on the sides, since I had enough cloth for doubling up those areas. The 1708 + the WR was used along the hull.

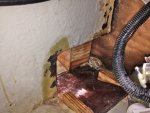
Here is the starboard side . . .
IMG_4095.jpg

I just tacked the wood pieces for the mini bilge and the shower bilge mounts in place. Those will have to get glassed over separately once everything else has cured.

I'll be back at it on the first weekend in May (hopefully). My schedule is not quite holding up as the preparation for glassing is taking more time than I had anticipated. I do have a couple of extra days off coming up in June, so maybe I can still make a mid-June launch. We shall see.

TTFN
 
Last edited:

tpenfield

Moderator
Staff member
Joined
Jul 18, 2011
Messages
18,092
Re: Formula 330SS Bulkhead Replacement

Regardless of the opportunities for improvement that I am finding, I am also seeing that the boat is built better than most production boats.

Agree, I'm right there with you. Only thing I found when I bought my Formula is now I'm stuck with buying Formulas from here on. If I never would have owned one I could have picked up another models for less money. Now it will always cost me more to replace the one I have "if" I ever choose to replace it.


Just to get back to your comment AllDodge . . . This is my second Formula, I owned a 242ss prior to this boat and the thing was awesome. Built like a tank and great in the chop. I still miss it.

So, you are right, once you have one, it is hard to contemplate another brand.
 

bigdirty

Senior Chief Petty Officer
Joined
Oct 4, 2013
Messages
652
Re: Formula 330SS Bulkhead Replacement

Hey man, looking good.. about the 'formula' stigma.. :lol: My buddy had a 292fastech, was awesome, but then last year bought his 31pc.. has had an offer of almost TWICE what he paid, wont sell it. Loves the boat, overall says it is the 'best' you're gona get with a boat that size with twin 454's and the only way up for him is to go 40 something ft and twin diesels. :p
 

tpenfield

Moderator
Staff member
Joined
Jul 18, 2011
Messages
18,092
Re: Formula 330SS Bulkhead Replacement

Hey man, looking good.. about the 'formula' stigma.. :lol: My buddy had a 292fastech, was awesome, but then last year bought his 31pc.. has had an offer of almost TWICE what he paid, wont sell it. Loves the boat, overall says it is the 'best' you're gona get with a boat that size with twin 454's and the only way up for him is to go 40 something ft and twin diesels. :p

Yea, if I ever get a second boat, it would probably be the 292 Fastech.
 

tpenfield

Moderator
Staff member
Joined
Jul 18, 2011
Messages
18,092
Re: Formula 330SS Bulkhead Replacement

On to the next challenge for this project. . .

I have been thinking about the foaming process that I will need to do once the fuel tank is back in the boat and before I seal up the storage compartment floor. I have got approximately 10 gallons of 2-part, 4 lb density foam (5 gallons of each part). I should yield about 20 cubic feet of foam. The expansion rate of the 4 lb foam is about 15:1.

So, I calculated the amount of volume in the storage compartment floor to be around 1.4 cubic feet and around the fuel tank to be about 12 cubic feet. I should have plenty of the foam liquid to go around.

I will have to pour small amounts of mixed foam into the 7 holes in the storage compartment floor and get them in the correct amounts for each of the 'chambers' that the ribs and floor have formed. Then I will have to get the correct amounts of foam liquid poured under and along the sides of the fuel tank.

The challenge to the foaming process - is that you have only about 45 seconds to mix and 'pour' the foam. This works fine for open areas, but not so good for pouring into smaller areas and into the holes. I have seem a video or two about mixing and pouring the foam, but it is done into an open container, which is pretty much a slam dunk, versus trying to get it into more confined areas.

I have been thinking about trying use a 'mixing nozzle', similar to those used on epoxy dispensing guns, etc. to provide a continuous mixing of the 2-parts, rather than mixing the foam with containers and in small amounts.

Thoughts or ideas on the foaming process?


The only other foaming that I have done was on my 242, and the results were OK, but not great.
 
Last edited:

tpenfield

Moderator
Staff member
Joined
Jul 18, 2011
Messages
18,092
Re: Formula 330SS Bulkhead Replacement

All the new structural work looks great!
Don't know if you have seen my vid on foaming...
Not at all scientific or professional and a bit long in the tooth, but might give you some insight and a laugh or two...;)
https://www.youtube.com/watch?feature=player_detailpage&v=cec0jMn5wGc

Excellent. :thumb: I also found Frisco (Jay's) video of foaming the deck of his Sea Ray. It seems that the storage compartment floor on my boat has lots of small areas to fill that will be challenging to get the right amount of liquid into each.

Perhaps I'll stay 'low tech' on this and just use a whole bunch of containers to measure specific amounts for specific areas. In terms of the storage compartment floor, I am better to overfill than under fill.

Around the tank, I just need to make sure I distribute the foam evenly, not trap any 'air pockets', and get plenty in behind the stern end of the tank. Perhaps if I work from the stern and go forward that might be my best approach :noidea:
 

JASinIL2006

Vice Admiral
Joined
Feb 10, 2012
Messages
5,682
Re: Formula 330SS Bulkhead Replacement

It can be tricky to mix the foam and get it where you want it before it starts foaming. I found it easiest to start on the largest cavities first, where you have the most margin of error. That gives you a chance to get a feel for how the foam is reacting given the temps in your workplace. Then, when you get to the smaller cavities, you'll have a much better idea of how much to mix so you don't over/under fill.

It also helps to drill some extra 1/2" relief holes to help you monitor how the cavities are filling and to allow foam to pop up if you get too much in there. After foaming, the holes can be cleaned out with a 1/2" bit and PBed over.

Good luck!

Jim
 

Woodonglass

Supreme Mariner
Joined
Dec 29, 2009
Messages
25,928
Re: Formula 330SS Bulkhead Replacement

What MEKP ratio are you using with the VE resin? What are your temps when you're doing the glass work?
 

tpenfield

Moderator
Staff member
Joined
Jul 18, 2011
Messages
18,092
Re: Formula 330SS Bulkhead Replacement

What MEKP ratio are you using with the VE resin? What are your temps when you're doing the glass work?

Hey Wood-

The temps are about 60 F and I am using a 2% ratio, based on my prior experience with VE. I usually wait until the afternoon hours to do the fiberglass work as the mornings start out cold. I find that if I go to a 1.5% ratio, then the cure time really extends.
 
Last edited:

Woodonglass

Supreme Mariner
Joined
Dec 29, 2009
Messages
25,928
Re: Formula 330SS Bulkhead Replacement

Yup, 2% was the # I was hoping for. Ya Dun Rite Good!!!! I'll go back to lurking!!!!:D
 

tpenfield

Moderator
Staff member
Joined
Jul 18, 2011
Messages
18,092
Re: Formula 330SS Bulkhead Replacement

Yup, 2% was the # I was hoping for. Ya Dun Rite Good!!!! I'll go back to lurking!!!!:D

Lurking and inputs are always welcome :thumb:

Another thing I wanted to mention is that I am using resin withOUT wax, so the top surface stays 'open'. When I am done with the glassing & foaming, I'll have to coat all the exposed surfaces with a 'top coat' so that the top surface of the resin cures.
 

Woodonglass

Supreme Mariner
Joined
Dec 29, 2009
Messages
25,928
Re: Formula 330SS Bulkhead Replacement

Uhmmm, that's really NOT necessary. It may take a bit longer but...it will eventually cure and become tack free. If its below deck and in areas where you won't be applying any kind of a final finish then I personally wouldn't worry about it. Sorry, I Un-Lurked!!!!:eek:
 

tpenfield

Moderator
Staff member
Joined
Jul 18, 2011
Messages
18,092
Re: Formula 330SS Bulkhead Replacement

An interesting thing is that I did a minor repair last year on the boat with some VE (sans Wax) and it stayed tacky for months!!! About 6 months later, I coated the repair area (still tacky) with some white polyurethane paint and it solidified right up.

I'll paint the areas of the engine room and the storage compartment that will show to 'final cure' the VE and let time take care of the rest.
 

bvetter

Petty Officer 1st Class
Joined
Jun 2, 2013
Messages
263
Re: Formula 330SS Bulkhead Replacement

Hey Ted, doing a little "lurking around" myself.

On the foaming, which I had the pleasure of working with this week, how much room would you say you have between the fuel tank and the stringers? Enough room to get your mixing up down in there? Getting the foam to "pour" and settle into place below the tank will most likely be an issue unless you can somehow direct it right underneath the tank. You can maybe also try cooling the 2-parts of liquid before mixing, only for the batches beneath the tank. You won't get the full expansion, but it will likely stay "liquid" a little longer to give it time to settle beneath the tank before setting up. When I did my pouring this week, I preheated the liquids with a space heater. I noticed it really set up faster when it's warmed up, started foaming in under 20 seconds or so, when that happens, it tends to stay where it lands and doesn't settle into low spots as well. You can also experiment with the mixture a little. I noticed in my kits, they sent a little less Part A than Part B. I was mixing exactly 50/50 until I nearly got to the bottom of the gallon containers, then noticed the imbalance in volumes they sent. So I started mixing closer to 60-B/40-A for a couple small batches and it really kicked fast, I can't notice a difference in the finished density of the foam after it's cured. Don't know if the opposite ratio would have the opposite effect, and not likely recommended, but a thought none the less.
 

tpenfield

Moderator
Staff member
Joined
Jul 18, 2011
Messages
18,092
Re: Formula 330SS Bulkhead Replacement

BV- thanks for your insight. There is 4" along the sides of the tank and about 2" of clearance along the v-belly portions. About 6" at the stern and maybe 3" at the bow end. Like you say my concern is getting the foam in its liquid state far enough down the sides so that it still wants to run down the belly and start expanding once it reaches the keel. Another challenge is that the hull has ribs built into it every foot or so which don't allow to foam to expand in a forward direction. Most boats don't have the ribs in the hull so the foam can expand in all directions once it reaches the keel.

This means that I have to get the amount of material fairly evenly distributed along the sides of the tank. The ribs essentially form chambers where the foam will expand. If I overfill one rib section versus another the expanding foam of the overfilled section could overflow once it reaches the side of the tank and cause an air pocket in the adjacent section.

There was evidence of this having happened when I removed the tank and foam originally, a few months ago. Maybe I should plan enough foam on a first pour so that it expands up along the belly of the tank, but not too much up the sides. Then I can get the sides on a second pour with less risk of an air pocket.
 
Top