Formula 330SS Bulkhead Replacement

tpenfield

Moderator
Staff member
Joined
Jul 18, 2011
Messages
18,092
Re: Formula 330SS Bulkhead Replacement

Sunday Update:

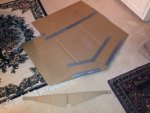
I made some templates out of cardboard to that I can cut out the new wood pieces.

IMG_4008.jpg

A test fit and some tweaking . . .
IMG_4014.jpg

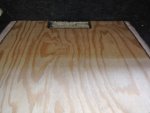
Main Bulkhead Template . . .
IMG_4010.jpg

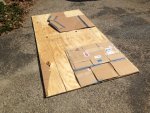
I went to Lowes this morning and found some Exterior grade plywood, so I got a 4 x 8 sheet. Here are the cardboard templates laid out on the plywood.
IMG_4016.jpg

Continued on Next Post . . .
 
Last edited:

tpenfield

Moderator
Staff member
Joined
Jul 18, 2011
Messages
18,092
Re: Formula 330SS Bulkhead Replacement

Then I cut out the pieces and test fit everything into place. . .

Storage area floor structure . . .
IMG_4018.jpg

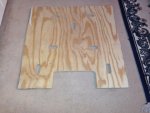
The floor piece with the hatch opening . . .
IMG_4028.jpg

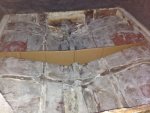
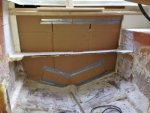
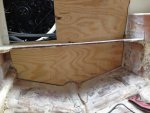
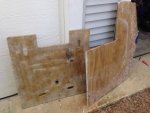
Here is the bulkhead fit into place. It needed a bit of adjustment, since I did not cut the edges of the old bulkhead all that straight. . .
IMG_4023.jpg

So, the wood pieces are pretty much all set. Just some sanding on the lower edges, etc.

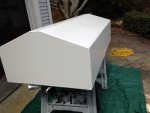
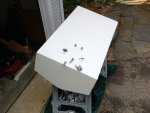
I also got a first coat of paint on the fuel tank . . .
IMG_4026.jpg

I'll put 2 or possibly 3 costs of paint on it.
 
Last edited:

zool

Captain
Joined
Aug 19, 2012
Messages
3,432
Re: Formula 330SS Bulkhead Replacement

That all looks great..youre cranking along!
 

GT1000000

Rear Admiral
Joined
Jul 13, 2011
Messages
4,916
Re: Formula 330SS Bulkhead Replacement

Outstanding progress, T!
If you keep cranking it at this pace you should make a nice appearance in the wet stuff sooner than you think!
 

alldodge

Moderator
Staff member
Joined
Mar 8, 2009
Messages
42,345
Re: Formula 330SS Bulkhead Replacement

Great work thanks for keeping the pics coming.
 

tpenfield

Moderator
Staff member
Joined
Jul 18, 2011
Messages
18,092
Re: Formula 330SS Bulkhead Replacement

Thanks guys, I made some good progress this weekend. I feel like I am turning the corner and transitioning to putting things back together. :thumb:
 

bvetter

Petty Officer 1st Class
Joined
Jun 2, 2013
Messages
263
Re: Formula 330SS Bulkhead Replacement

Holy smokes! That's some progress! Now on to the the icky stuff!
 
Last edited:

Scott Danforth

Grumpy Vintage Moderator still playing with boats
Staff member
Joined
Jul 23, 2011
Messages
49,889
Re: Formula 330SS Bulkhead Replacement

Great work Ted.
 

tpenfield

Moderator
Staff member
Joined
Jul 18, 2011
Messages
18,092
Re: Formula 330SS Bulkhead Replacement

Thanks BV and Scott . . . I am expecting a delivery of the "icky stuff" today. I'm keeping all of the wood pieces in the house so that the moisture content of the wood would be as low as possible just prior to glassing them.

I gotta get new 'cartridges' for my chemical respirator . . . I'll be working with VE resin (not poly) and that stuff has really intoxicating fumes, probably the worst of all the resin choices.
 
Last edited:

tpenfield

Moderator
Staff member
Joined
Jul 18, 2011
Messages
18,092
Re: Formula 330SS Bulkhead Replacement

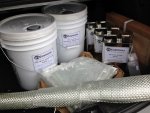
The 'icky stuff' arrived today. . .

3 Gallons of VE resin . . .
Some Extra MEKP . . .
2 5-Gallon Pails of 2-Part Urethane Foam

I have got it all loaded in the trunk of my car along with the fiberglass that I already have. I think that I will have just enough cloth. Gonna be heading out early in the morning to Cape Cod to work on the boat for the next 2 days. Today, I had to have some oral surgery done because my teeth have become a horror show lately. :rolleyes: I just hope it does not slow me down too much.

IMG_4030.jpg

I also got my 'Spanner Wrench' that I ordered from iBoats :thumb: So, I can work on the outdrive, in case I get bored of the structural work.
 
Last edited:

tpenfield

Moderator
Staff member
Joined
Jul 18, 2011
Messages
18,092
Re: Formula 330SS Bulkhead Replacement

Fiberglass prep work . . .

I started fiberglassing today . . . just the prep work before installing the wood pieces into the boat.

First I had to make the holes in the storage compartment floor so that I can pour the foam into the various chambers of the storage compartment floor structure. I made 7 oblong cut-outs in the plywood floor piece.

IMG_4032.jpg

Then it was on to putting the CSM on the contact edges of the stringer & bulkhead pieces as well as the underside of the floor.

I forgot to bring my resin roller with me today, so I had to use a brush to apply the resin. The large area of the flooring came out a bit 'lumpy' but it is on the under side.

IMG_4033.jpg

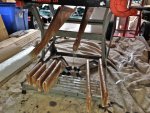
Here is a picture of the floor structure pieces

IMG_4035.jpg

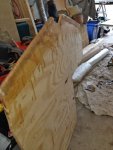
And here is the bulkhead piece . . .

IMG_4036.jpg

I mixed the VE resin in small batches, about 16 Fl oz each batch. Since it is a bit cold, I used 2% MEKP so that the resin would 'kick' OK. To do all the pieces shown, I mixed 2 16 oz batches, a 10 oz batch and finally an 8 oz batch . . . So, about 50 oz of resin total.

Today was wicked windy, but around 55-60 F degrees. Tomorrow is going to be only around 45 degrees F . . . So, I'm not sure if I will get to install any of the pieces in the boat until the weekend.

I also put another coat of epoxy paint on the fuel tank and started to work on the outdrive. Still waiting for my dial torque wrench to arrive, so I can fix the drive shaft seal. :rolleyes:
 
Last edited:

GT1000000

Rear Admiral
Joined
Jul 13, 2011
Messages
4,916
Re: Formula 330SS Bulkhead Replacement

Nice work on the fabrication of the new pieces and application of resin...it is always amazing to me how much resin it takes to do even the smallest of jobs...at first you think aww heck that wasn't that much resin, then you get going and before you know it, you've used up your first 36 gallons...;):laugh:
 

tpenfield

Moderator
Staff member
Joined
Jul 18, 2011
Messages
18,092
Re: Formula 330SS Bulkhead Replacement

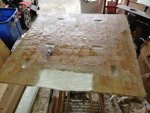
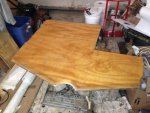
34 degrees (F) and snow flakes in the air this morning . . . So, fiberglassing the wood components into the boat was not in the cards for the day. I did manage to add a layer of 2 oz CSM to the bulkhead piece. So here is a picture of the CSM wetted out.
IMG_4037.jpg

I am finding that the VE resin is taking a good 4 hours to cure to a solid consistency, even though I am using about 2% MEKP catalyst. My previous experience with VE was similar . . . took a long time to cure versus poly resin. The only good thing about the longer open time is you have a lot more time to work with the resin. I was planning on coating both sides of the bulkhead panel, but that did not happen, since much of the day was taken by the cure time.

I mixed a 32 oz batch to cover the bulkhead side that you see above. So, my panel prep work in total is going to take about 1 gallon of resin. GT - you are right about the resin consumption of these projects. i was thinking that I would be fine with 3 gallons, but the way things are going it may be just enough.

I did a bit more grinding and cleaning up in the boat . . . of course the grinding dust has gone everywhere. That's the tough part about repair glassing work versus full restoration . . you tend to get the rest of the boat pretty messy.

With some extra time that I had today, I decided to take a 'look' inside the center engine mount stringer. I had originally thought that it was a solid lamination of plywood glassed over, but I came to realize it is hollow when I drilled into it last year.

So, I drilled a hole in the junction face of the stringer, where it meets the bulkhead so I could do a little bit of 'inspection' inside it.
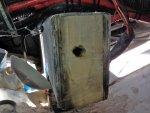
IMG_4038.jpg

I used my Ryobi Inspection Camera/Borescope to look inside the stringer.
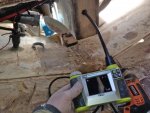
IMG_4040.jpg

Nothing too exciting, The wood surfaces look OK, but a little bit of mold growing on some areas. So, I squirted some Ethylene Glycol into the stringer just to ward off any rot, etc.

Anyway. I'll be back at it again this weekend and into the first part of next week.
 
Last edited:

bigdirty

Senior Chief Petty Officer
Joined
Oct 4, 2013
Messages
652
Re: Formula 330SS Bulkhead Replacement

Wow man, you are moving right along! Nice work, and at this rate you should be in the water this season no prob :)
 

tpenfield

Moderator
Staff member
Joined
Jul 18, 2011
Messages
18,092
Re: Formula 330SS Bulkhead Replacement

Wow man, you are moving right along! Nice work, and at this rate you should be in the water this season no prob :)

Thanks BD . . . The thing is that I have my regular maintenance work to do once the boat is back together.
 

tpenfield

Moderator
Staff member
Joined
Jul 18, 2011
Messages
18,092
Re: Formula 330SS Bulkhead Replacement

A few more pics . . .

I did some more prep work today in hopes of glassing in the new pieces tomorrow. We will have to see, as it is going to be a bit colder than I'd like.

Here are the floor and bulkhead pieces all set to go into the boat.
IMG_4046.jpg

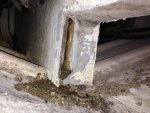
I found a little bit of rot in the crack that is in the center engine mount stringer. It seemed to be fairly isolated, so I ground out the soft stuff and sprayed the area with 'chemotherapy'.
IMG_4050.jpg

I also put a third coat of paint on the bottom and sides of the fuel tank . . . then I flipped the tank over and got a first coat on the top side.
IMG_4047.jpg

I have Monday and Tuesday off from work. So, I hope to get a fair amount done over the next few days. :)
 
Last edited:

alldodge

Moderator
Staff member
Joined
Mar 8, 2009
Messages
42,345
Re: Formula 330SS Bulkhead Replacement

Sure hope Formula is looking at what your finding, may help them design a bit better. One thing your boat is going to rock solid when your done.
 

tpenfield

Moderator
Staff member
Joined
Jul 18, 2011
Messages
18,092
Re: Formula 330SS Bulkhead Replacement

Sure hope Formula is looking at what your finding, may help them design a bit better. One thing your boat is going to rock solid when your done.

Yes, Scott Smith at Formula is aware of my thread(s) (here and on OSO), so I'm sure they are looking :)

Regardless of the opportunities for improvement that I am finding, I am also seeing that the boat is built better than most production boats.
 

alldodge

Moderator
Staff member
Joined
Mar 8, 2009
Messages
42,345
Re: Formula 330SS Bulkhead Replacement

Yes, Scott Smith at Formula is aware of my thread(s) (here and on OSO), so I'm sure they are looking :)

Regardless of the opportunities for improvement that I am finding, I am also seeing that the boat is built better than most production boats.

Agree, I'm right there with you. Only thing I found when I bought my Formula is now I'm stuck with buying Formulas from here on. If I never would have owned one I could have picked up another models for less money. Now it will always cost me more to replace the one I have "if" I ever choose to replace it.
 

tpenfield

Moderator
Staff member
Joined
Jul 18, 2011
Messages
18,092
Re: Formula 330SS Bulkhead Replacement

Happy Easter :)

The Easter Bunny did not leave any treats in the boat, oh well . . .

I did some test fitting of the bulkhead and then glassed in the storage compartment floor structure.

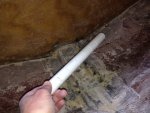
Here is my thru-hull for the bulkhead . . . The slits will face down toward the hull.

IMG_4054.jpg

Here is the bulkhead set in place for a test fitting and also showing the position of the thru-hull.
IMG_4052.jpg

The bulkhead fits OK. My plan is to tab it in to the hull with 1708 cloth on the fuel bay side, then press peanut butter into the gaps all along the edges from the engine room side. then I'll go around the seam with a layer of 1708.

It was onto the storage compartment floor . . . Here is the structure pieces set into place. I used a bit of urethane foam in the gap between the structure pieces and the hull, which you see below. I packed it into the gaps before it really had a change to expand and harden; that way I can get the tabbing to go in at a right angle.

IMG_4057.jpg

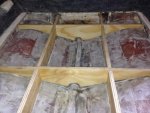
Here is the floor structure tabbed into the hull. The space is really confined, so it got a little messy, but the glass is pretty well wetted out. I used a combination of 1708 and 18 oz WR. I did not have enough 1708, and wanted to save it for the bulkhead, so the WR is probably the next best thing for this particular situation.

IMG_4059.jpg

That will sit for the night and harden up, then I can trim the 'hairs'.

Next steps will be to glass in the bulkhead and put the Storage floor piece over the structure.
 
Last edited:
Top