Custom Fiberglass Extended Swim Platform

kcassells

Fleet Admiral
Joined
Oct 16, 2012
Messages
8,737
I dink I would suggest a trial run with the concept and prototypes. Too much hard work to run it 1x and go ...POOP!
Most you could lose are resins and a chunk of foam.
 

AShipShow

Lieutenant Commander
Joined
Jul 8, 2016
Messages
1,802
Next saturday, you can try vacuum bagging some maple syrup onto a big pancake... it will prove the theory, and make the admiral happy!
 

tpenfield

Moderator
Staff member
Joined
Jul 18, 2011
Messages
18,085
Thanks for the advice and words of caution . .

I could probably do a trial run with a spare piece of foam. I got plenty of epoxy to coat it and then could set up a 2' x '3 piece and use about 1 qt of resin to infuse it around the perimeter, pulling vacuum from the middle. I could also see how quickly the resin propagates through the CSM/cloth.

Merry Christmas (to those who celebrate it) and Happy New Year to all. :)
 

tpenfield

Moderator
Staff member
Joined
Jul 18, 2011
Messages
18,085
Update (Dec 29, 2018)

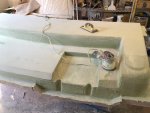
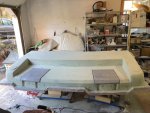
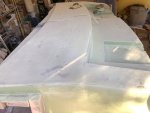
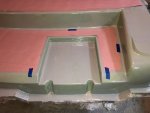
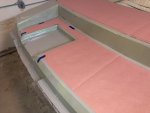
Lots and lots of sanding . . . not my favorite thing to do, but it needs to be done. Here are a few pictures of the sanding.

Click image for larger version  Name:	IMG_1881.jpg Views:	1 Size:	148.6 KB ID:	10691647
.
Click image for larger version  Name:	IMG_1882.jpg Views:	1 Size:	109.9 KB ID:	10691646
.
I had some 40 grit disks for my orbital sander. So I used those and then went over everything with 100 grit mesh. There are still a few touch up spots, and I have to do the fairing compound on the ladder hatches.

The thing about fairing compound is that you sand off most of what you put on. :rolleyes:

After the touch-up and final sanding, my plan is to put a top coat of epoxy that will be wet sanded and polished to a shine.
 

Attachments

  • IMG_1882.jpg
    IMG_1882.jpg
    109.9 KB · Views: 2

kcassells

Fleet Admiral
Joined
Oct 16, 2012
Messages
8,737
Nice to see someone moving along. I've got myself tied up in other winter thingys.
 

tpenfield

Moderator
Staff member
Joined
Jul 18, 2011
Messages
18,085
Epoxy Top Coat . . .

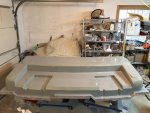
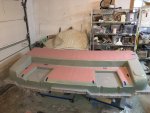
I did some final sanding and then an acetone wipe down in preparation for the epoxy top coat. This is just straight epoxy, no filler. Hand brushed on and now letting it cure.

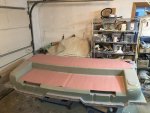
Here is a picture of the plug.
.
IMG_1884.jpg .
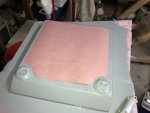
I am still working on the ladder hatches. I plan on adding a flange to those pieces and then will do a final sanding and top coat.
 

kcassells

Fleet Admiral
Joined
Oct 16, 2012
Messages
8,737
th
 

tpenfield

Moderator
Staff member
Joined
Jul 18, 2011
Messages
18,085
Wow! Learning a lot from this...

Me too :D . . . I tend to learn by doing. Just hope I don't learn not to try this again :) .

My game plan for next weekend is to finish off the hatches and then measure/cut the non-skid pattern. I am going to make paper templates, using some 30" width 'red rosin paper', and cut out the non-skid material from the templates.

The non-skid material is actually a thin (1/8") pyramid pattern floor runner. I have the material laid out flat (14' x 4') for the next 5 days or so, as it came in a roll and I want to make sure any 'curl' is taken out of it. The back side of the non-skid is textured and I am hoping that I can get it to stick to the plug my using epoxy. I am not sure what the non-skid material is exactly (rubber/plastic/vinyl). . . It feels more like plastic than rubber.

I'm figuring I can give the underside of it a good wipe with acetone prior to applying the epoxy. I have some spray adhesive, but that tends to make a mess and does not allow for the material to be 'positioned' once you set it in place . . . it has to be right the first time, which I figure will be nearly impossible to do. My hopes are the epoxy will allow me to 'float' the non-skid on the plug and adjust the positioning, then allow the epoxy to cure.

Any thoughts on this?
 

Scott Danforth

Grumpy Vintage Moderator still playing with boats
Staff member
Joined
Jul 23, 2011
Messages
49,850
Bag the non skid in place to evenly compress and secure (like they do with large teak installs)
 

tpenfield

Moderator
Staff member
Joined
Jul 18, 2011
Messages
18,085
Bag the non skid in place to evenly compress and secure (like they do with large teak installs)

Another great idea . . . :thumb: . . . thank you !!!

I guess I don't need to use my collection of old disc brake rotors to weight the material down. :)
 

Scott Danforth

Grumpy Vintage Moderator still playing with boats
Staff member
Joined
Jul 23, 2011
Messages
49,850
you could use old rotors, etc, however you would have round indents where the epoxy was squished and bubbles everywhere else.
 

tpenfield

Moderator
Staff member
Joined
Jul 18, 2011
Messages
18,085
Jan 5th (2019) Morning Update:

I was up before the sun today to get a jump on the swim platform plug work.

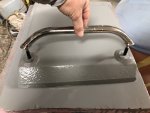
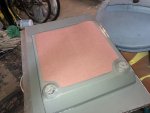
I have been working on the hatches to form raised areas around where the grab handles will attach. These areas will provide a bit of extra strength and form a pocket on the underside of the hatches to provide additional clearance for the fasteners (nuts/washers)
.
IMG_1897.jpg
.
IMG_1900.jpg
.
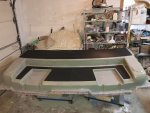
Now it is a matter of positioning the templates on the non-skid material and cutting the non-skid sections out.

Stay tuned . . .
 

Attachments

  • IMG_1889.jpg
    IMG_1889.jpg
    110.9 KB · Views: 0
  • IMG_1890.jpg
    IMG_1890.jpg
    141.1 KB · Views: 0
  • IMG_1898.jpg
    IMG_1898.jpg
    103.1 KB · Views: 0
  • IMG_1899.jpg
    IMG_1899.jpg
    132.5 KB · Views: 0
  • IMG_1895.jpg
    IMG_1895.jpg
    147.4 KB · Views: 0

tpenfield

Moderator
Staff member
Joined
Jul 18, 2011
Messages
18,085
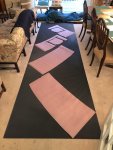
I got the non-skid templates laid out on the material . . .
.
IMG_1904.jpg
.
IMG_1906.jpg
.
IMG_1907.jpg
.
Now to work on the adhesion process. I am going to go with Scott's suggestion of vacuum bagging to provide uniform pressure on the non-skid sections while the epoxy cures.

I still have some finish work to do on the hatches, so those will get done afterwards.
 

Attachments

  • IMG_1902.jpg
    IMG_1902.jpg
    160.3 KB · Views: 2
Top