Custom Fiberglass Extended Swim Platform

tpenfield

Moderator
Staff member
Joined
Jul 18, 2011
Messages
18,085
Just watching football . . . Bears vs. Lions :)

In terms of the height of the platform above the waterline, the existing swim platform is about 15" above the water line, so I figured dropping down the extension about 6" would provide enough height above the waterline.

Here is the model with some water added. It comes out to be about 5" clearance to the water. I'm not sure how that will play out in a getting 'out of the hole' situation :noidea:
.
SwimPlatform5.png
.
Back to the game :)
 

Scott Danforth

Grumpy Vintage Moderator still playing with boats
Staff member
Joined
Jul 23, 2011
Messages
49,847
Skin the bottom and it would help you out of the hole if it hits the water
 

mickyryan

Rear Admiral
Joined
Apr 18, 2016
Messages
4,214
Skin the bottom and it would help you out of the hole if it hits the water

at least skinned bottom would keep water from ripping it off , however i do believe of you take the boat make a model scale all down you would be able to see what the bow riding up would do to the platform,the trim tabs would help as would a whale tail on lifting the rear at all times keeping it from squatting and yes there are lots of folks who use both , wail tail does lifting while the trim tabs balance boat.
 

tpenfield

Moderator
Staff member
Joined
Jul 18, 2011
Messages
18,085
A few updates. I did some measuring today. The 3D model is pretty accurate. I'm chasing about 3" of difference in one dimension, but it looks like 15-1/4" above the water line is accurate as the existing platform height. The boat draws about 25", so the total height of the platform up from the keel is abut 40".

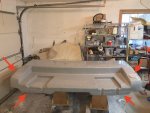
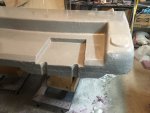
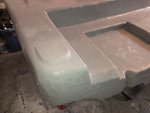
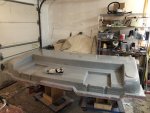
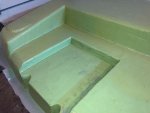
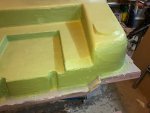
I did a bit more work on the plug . . . here are a few pics of the latest.
.
IMG_1789.jpgIMG_1786.jpg
.
I made the surrounding areas for the cup holders and add some reinforcing in the area of the swim ladders, figuring that the struts are going to support the outer area of the platform at the edges. So, the entire outer rim needs to be a bit stiffer than normal.

Next steps are fairing compound and lots of sanding. :rolleyes:
 

Attachments

  • IMG_1787.jpg
    IMG_1787.jpg
    1.7 MB · Views: 1
  • IMG_1787.jpg
    IMG_1787.jpg
    1.7 MB · Views: 0

tpenfield

Moderator
Staff member
Joined
Jul 18, 2011
Messages
18,085
I completely agree with the need for cup holders!:)

Yes, cup holders are important :D

I have finished up the 3D model, based on the latest changes and verifying dimensions (+/- an inch or two :) )

Here is a pic of the design . . .
.
Swimplatform12.png
.
Here is a quick video showing a 'walk-around' of the 3D model.
.

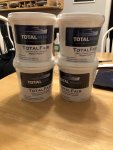
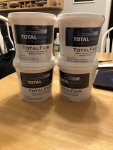
I'm trying to figure out how much fairing compound to buy . . . my rough calc's indicate about 2 gallons, which seems like a lot. I was thinking of getting the 2 quart fairing kits from "TotalBoat" . . . maybe get 2 of them to have a gallon of fairing compound. :noidea:

I've been thinking about how I should attach the section that goes over the existing swim platform. Probably have to use fasteners of some sort, but maybe some adhesive as well. I'm also thinking that I will want/need to remove the rear seat/engine hatch for better access to the internal area of the existing swim platform/step (which is basically a fiberglass clam shell with about 3" of open space between the 'shells' . . . ) This would be so that I can fasten through-bolts, etc.
 

tpenfield

Moderator
Staff member
Joined
Jul 18, 2011
Messages
18,085
Quick Update . . .

I got the fairing compound, so maybe I'll have a chance to apply it to the plug this weekend.
.
IMG_1801.jpg
.
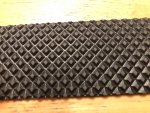
I think this is going to work out and be about the same as the OEM pattern, or close enough to it while staying within a budget. I think the rubber material is going to run about $125 for 30 sq. ft (+/-).
 

Attachments

  • IMG_1800.jpg
    IMG_1800.jpg
    130.8 KB · Views: 0
  • IMG_1800.jpg
    IMG_1800.jpg
    130.8 KB · Views: 0
  • IMG_1803.jpg
    IMG_1803.jpg
    157.2 KB · Views: 0

Grub54891

Admiral
Joined
Jun 17, 2012
Messages
6,097
^^ But the points will be down. You need a reverse pattern if you are using that for a mold.^^ ?
If you are using it for the nonskid itself, will it be to hot on the feet? Just some early morning coffee thoughts.
 

tpenfield

Moderator
Staff member
Joined
Jul 18, 2011
Messages
18,085
^^ But the points will be down. You need a reverse pattern if you are using that for a mold.^^ ?
If you are using it for the nonskid itself, will it be to hot on the feet? Just some early morning coffee thoughts.

The pattern is for the plug, not the mold. So the plug is a positive image and the mold that is made from it will be the negative image that you spoke of.
 

tpenfield

Moderator
Staff member
Joined
Jul 18, 2011
Messages
18,085
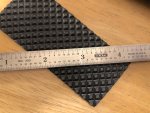
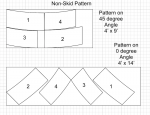
I ordered the rubber mat (vinyl :noidea: ) material last night. In figuring out how much I would need, I took the pattern into consideration. The pyramid pattern is laid out at a 45 degree angle to the material, as shown in the sample. My boat's OEM non-skid pattern is laid out square to the centerline of the boat.

So, I figured that my options are to either use the material as is on its 45 degree angle, which would be different than the rest of the boat . . . or . . . Cut the patterns out from the material on a 45 degree angle, thus making it 'match' the orientation of the rest of the non-skid on the boat.

The layouts for both options are shown below.
.
nonskid1.png .
I figured it was best to cut out 'half panels for material utilization considerations and orientation options. "1 & 2" are the patterns for the upper portion of the platform that goes over the existing swim platform. "3 & 4" are the patterns for the lower 'extended' portion of the platform.

I ordered 14 feet ( x 4' wide) of the rubber mat material, so I could go with either option. It seemed like the least amount of material to order would be 9 x 4 feet. The cost was a bit more than I had planned ($150), but probably worth it, since I can come close to the existing non-skid pattern.

Next steps are to apply the fairing compound, then sand smooth, and then apply the non-skid material. I'll probably then coat the plug with a final layer of 'thinned' epoxy to get a shiny surface, which should make the plug pretty much ready to use for the mold.
 

tpenfield

Moderator
Staff member
Joined
Jul 18, 2011
Messages
18,085
Update:

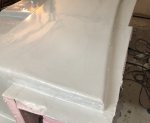
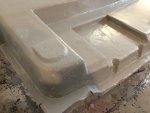
After a bit of research, I decided to add a flange to the plug, which will in turn add a flange to the mold. I figure it will add some stiffness to the perimeter of the mold and help with releasing the part from the mold, etc. The flange is 2-3" all the way around.

Here are a few pictures of the flange . . .
.
Click image for larger version  Name:	IMG_1818.jpg Views:	1 Size:	117.3 KB ID:	10686270
.
Click image for larger version  Name:	IMG_1822.jpg Views:	1 Size:	154.4 KB ID:	10686269
.
Plug is getting a wee bit heavy, but I can still lift it OK, if I get under it.

Once the epoxy cures, I will be sanding everything down and apply the fairing compound.

In other news, I got the non-skid material that I ordered. So that will be after the fairing is sanded and I apply a light coat of epoxy. I am wondering if I should attached the non-skid pattern material with epoxy or an adhesive spray, like the 3M 77 ( I think it is called) :noidea:
 

Attachments

  • IMG_1819.jpg
    IMG_1819.jpg
    94.6 KB · Views: 0
  • IMG_1818.jpg
    IMG_1818.jpg
    117.3 KB · Views: 0
Last edited:

tpenfield

Moderator
Staff member
Joined
Jul 18, 2011
Messages
18,085
Sunday update . . .

I sanded down the plug this morning and then applied the fairing compound.
.
Sanding . . .
IMG_1828.jpg
.
The 1 gallon of. fairing compound was about right, I still have a little bit left.

Next steps are to sand down the fairing compound after it cures. Then, I anticipate that I'll have some fairing touch-up spots.
 

Attachments

  • IMG_1827.jpg
    IMG_1827.jpg
    132.6 KB · Views: 3
  • IMG_1824.jpg
    IMG_1824.jpg
    149.5 KB · Views: 3
  • IMG_1823.jpg
    IMG_1823.jpg
    164.6 KB · Views: 3
  • IMG_1823.jpg
    IMG_1823.jpg
    164.6 KB · Views: 3

tpenfield

Moderator
Staff member
Joined
Jul 18, 2011
Messages
18,085
Another update, as I watched the Patriots blow a lead and lose on the last play of the game :facepalm:
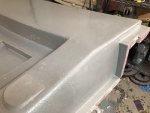
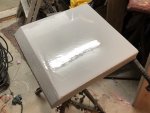
I sized the swim ladder hatches and coated them with epoxy/glass filler mix. Here is one of the hatches . . .
.
IMG_1829.jpg
 

tpenfield

Moderator
Staff member
Joined
Jul 18, 2011
Messages
18,085
Planning ahead a bit . . . with my Project Management hat on, I have four 'phases' to this project.

1) Fabricate the Plug

2) Fabricate the Mold

3) Fabricate the Part (i.e. swim platform)

4) Fitting and Hardware

I started on this 'adventure' in August (2018), and here I am a little bit over 3 months into it and I'm on 'Phase 1'. I think that is the longest phase and the other phases will go quicker. I did lay out a project schedule to make sure I am finishing up in time to allow for the Spring 2019 boat prep work. Target date to be done needs to be in April 2019, giving me about 1 month for the normal boat prep work. I think I'll need to spend 4-5 days per month working on the platform, giving me about 15 days of work ahead.
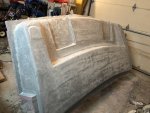
Anyway, I digress a bit . . .

One question I have as I look towards 'fabricating the mold' is how thick to make the mold, i. e., how much fiberglass & resin ? :noidea: I was thinking about 3 layers of 2 oz CSM and maybe 1 layer of 1708 . . . not sure if the 1708 would be needed ??? It looks like the 3 layers of 2 oz CSM would drink up about 4 gallons of resin.

My plan is to use Vinyl Ester resin with a vacuum bagging / resin transfer, so the mold will be pretty 'tight' as far as glass/resin.

Thoughts? How many layers would be enough for the mold? :noidea:

When I get to the fabricating of the part itself, I'm planning on shooting for about 3/16" thickness . . . with some additional thickness in stress areas, but for now, I'm thinking about the mold itself.
 

chevymaher

Commander
Joined
Mar 29, 2017
Messages
2,924
You dont need 1708. I do bodywork with glass all the time. CSM is more than you need for holding shape. 1708 is alot harder to work with doing all those details. Just ask my durango rockers LOL.
 

tpenfield

Moderator
Staff member
Joined
Jul 18, 2011
Messages
18,085
You dont need 1708. I do bodywork with glass all the time. CSM is more than you need for holding shape. 1708 is alot harder to work with doing all those details. Just ask my durango rockers LOL.

Thanks :thumb: How many layers of 2 oz CSM should I plan on to make a decent mold? Not overkill, but not wobbly either.
 

chevymaher

Commander
Joined
Mar 29, 2017
Messages
2,924
I would use 2. Then add braces to it, just wood gussets glued on. To keep it from twisting. It is going to be pretty stout tho.
 

dezmond

Senior Chief Petty Officer
Joined
Jul 21, 2010
Messages
760
We had molds for little spinners on hobby built air craft. They were around 12” in diameter. The moulds were about 3/16” thick and braces very well. One of the most important things is bracing. You dont want any twisting or bowing when you make your part. Tear up a lot of your CSM as well when you are making your mold. Will be a lot easier to lay it especially corners etc.

Nice work on the plug thus far. :)
 
Top