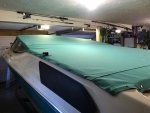
Chaparral 2000 SL Sport floor, and more?? [SPLASHED Sept 2017]

Baylinerchuck

Commander
Joined
Jul 29, 2016
Messages
2,726
This is what I'm doing on mine too... I read too many novels of frustration to even bother trying the exhaust bellows. I don't mind a little extra noise and its so much easier.

Frustration is correct. This boat had the exhaust tube when I bought it, and really with the 4.3L is not really that much louder. I just don’t like the exhaust smell burping up under my swim deck, lol. Been struggling to keep a bellow on since I switched from the tube. I think this manufactured lip is the ticket. So far it worked well.
 

Baylinerchuck

Commander
Joined
Jul 29, 2016
Messages
2,726
Man, this is a great looking boat. I just re-read a bunch of your early pages to get re-familiar with it. You guys will certainly enjoy it this year. I love see the "after" the restore pics. We all spend months looking at them torn apart, and then we don't spend enough time sharing and seeing them being used as they should be. Enjoy!

Thanks Tim!! We really are enjoying it!! A few more updates and I’ll be caught up!
 

Baylinerchuck

Commander
Joined
Jul 29, 2016
Messages
2,726
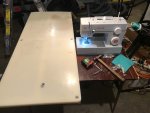
Fast forward to the winter......what man gets excited when his wife buys him a sewing machine for Christmas? This guy.....

E2A44290-0761-425A-B83C-CB4E178E8E67.jpeg

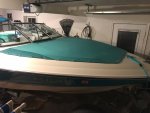
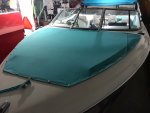
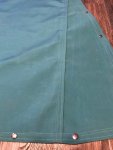
I always wanted the factory mooring covers, but would never pay to have them custom made. With the snap studs already installed.....how hard could it be??? So, I ordered Sunbrella, the heavy thread, and basting tape from sailrite. I also ordered stainless steel snap sockets and good setting tools. After watching several videos I got up the nerve and jumped in.

BE268C1E-889F-425F-8DC8-3100D2F1CA4F.jpeg
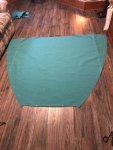
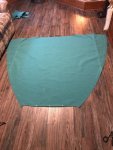
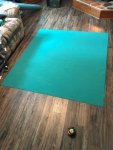
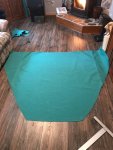
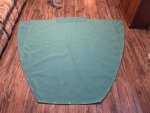
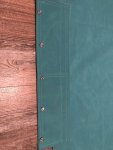
I used the snap locations to measure and cut then hem the final shape of the bow cover.
 

Attachments

  • BE268C1E-889F-425F-8DC8-3100D2F1CA4F.jpeg
    BE268C1E-889F-425F-8DC8-3100D2F1CA4F.jpeg
    474.9 KB · Views: 3
  • 52F1401D-EDCE-4742-A53F-24758A22A65C.jpeg
    52F1401D-EDCE-4742-A53F-24758A22A65C.jpeg
    507.1 KB · Views: 3
  • 897598A6-2A2B-4BE2-8DBC-92908F3DA446.jpeg
    897598A6-2A2B-4BE2-8DBC-92908F3DA446.jpeg
    452.3 KB · Views: 3

Baylinerchuck

Commander
Joined
Jul 29, 2016
Messages
2,726
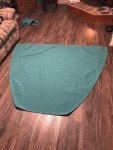
Now my poor sewing machine could get through two layers of Sunbrella with basting tape in between, any more than that and I had to manually turn the wheel. That wasn’t a problem, but took time and made my wrist sore. My biggest obstacle to overcome was fighting the urge to over manipulate the fabric into the shoe. I just needed to guide it, not fight it.

910F20DD-6D2D-4960-A210-167163F61A7D.jpeg
D9A6959B-140A-41F9-A86A-4C453956FE21.jpeg

I made the fit a little tight knowing it’ll stretch a little in time. Sunbrella is really fabulous material to work with!! Now how the heck am I gonna get the aft cover through my machine?? So much fabric, such a small machine!!!
 

Attachments

  • A9A218A4-3918-4523-9FCD-A1E8687A811F.jpeg
    A9A218A4-3918-4523-9FCD-A1E8687A811F.jpeg
    567.2 KB · Views: 4
  • EA978113-3ED5-4EE7-A9CA-64D94D8D093A.jpeg
    EA978113-3ED5-4EE7-A9CA-64D94D8D093A.jpeg
    493.2 KB · Views: 2
  • DC9C77EF-6597-4B07-B9D7-136D589F8088.jpeg
    DC9C77EF-6597-4B07-B9D7-136D589F8088.jpeg
    486 KB · Views: 2
  • 597BA1E1-0E94-4AC8-BEFB-0AAD4CE3AA02.jpeg
    597BA1E1-0E94-4AC8-BEFB-0AAD4CE3AA02.jpeg
    497.2 KB · Views: 3

JASinIL2006

Vice Admiral
Joined
Feb 10, 2012
Messages
5,673
Looks really nice. Are you going to put a pole or something in the center to tent it up? Otherwise, without any pitch, the rain will pool in the center of the cover and stretch out the fabric (and cause it to mold, eventually).
 

AShipShow

Lieutenant Commander
Joined
Jul 8, 2016
Messages
1,792
That looks really good chuck. I agree tho, you'll need some kinda support pole... I actually had a thought a long time ago that I would integrate support poles into my new floor with like a flush mount sorta configuration and on a hinge so it could pivot into position...

Kinda gave up on it tho cuz I wasnt sure how to drain the recess and I didnt want it to hold water.
 

JASinIL2006

Vice Admiral
Joined
Feb 10, 2012
Messages
5,673
I would add that my cockpit cover, even with a pole in the center, still allows water to pool. We put an inflatable ring under the cover to prop up the low spot. Once water starts to collect, it just gets worse...

Nice work with the cover, though!
 

Baylinerchuck

Commander
Joined
Jul 29, 2016
Messages
2,726
Looks really nice. Are you going to put a pole or something in the center to tent it up? Otherwise, without any pitch, the rain will pool in the center of the cover and stretch out the fabric (and cause it to mold, eventually).

Lol, I knew someone would ask about that. The answer is yes, I added a support pole for the bow cover with a snap to hold it in place. That came a bit later in the install. Even though this is a garage dwelling trailer queen, wind from trailering can reek havoc on these covers. The more support the better.
 

Baylinerchuck

Commander
Joined
Jul 29, 2016
Messages
2,726
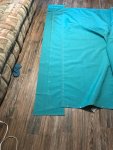
Well after staring at the aft area of my boat where a cover should be, I came up with a plan. I figure it would be easier for me to build the cover width wise, than to attempt a much longer length wise installation. I chose this mainly because of the table it would take to properly lay out a cover that is 15’ long.

89D02A03-4054-40B0-95CA-DFF404F9D29C.jpeg

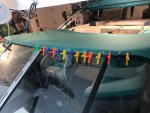
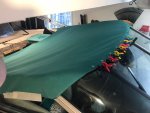
I started at the center of the windshield and hemmed the edge. I didn’t mention this before, but I am doing a 1-1/4” fold, then holding the fold with basting tape. I am sewing three stitches along that fold for strength. Once the center was hemmed I installed my first three snaps. From that starting point, I can pull and stretch the Sunbrella to form the curved edge of my cover. I use tons of spring clamps to hold that shape, then mark the edge and snap studs with soap stone.

F8098E73-D3F6-4E0F-989F-67C664D10C11.jpeg

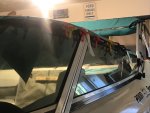
I keep working around the arc of the window, pulling wrinkles as I go. I use masking tape to secure the Sunbrella to the window tucking the excess under.

F6D98A1C-4446-493E-B808-8DC643E62C50.jpeg

I work from side to side marking as I go.
 

Baylinerchuck

Commander
Joined
Jul 29, 2016
Messages
2,726
Once I get all the clamps on and edge plus snap locations marked, I pulled the cover off and laid it on my “man cave” floor. I begin to trim the excess fabric ensuring I have a 1-1/4” fold. The arc in the windshield meant that I had to slit the fabric in several places to form relief for the fabric to lay flat. I took the cover out to the boat numerous times to ensure my marks were dead on. Once I got all the relief slits, or darts where I was happy with the fit, I started adding basting tape. 6C0B9851-9420-4ABE-A0A8-6B26BA8555BE.jpeg
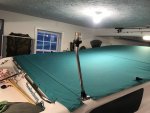
Running all this fabric through my little Singer proved to be challenging. Once the stitching was complete I started adding the snaps. This took some time since I only would add a few then put the cover on. Mark the next snaps, burn the holes, install the snaps, put the cover on. Repeat. The result was worth it.

217226BA-ECB1-47EA-AFA3-CC23AE7F480C.jpeg

I added added a few extra snaps to the window because I wanted a tight seal. The original cockpit cover did not have this many snaps.
 

Baylinerchuck

Commander
Joined
Jul 29, 2016
Messages
2,726
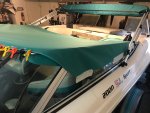
I used a plastic grip clamp and a bunji cord to help pull the center of the fabric toward the back of the boat. This helped keep the fabric centered and tight. I joined the next section of fabric and fabricated it much the same as described previously. The picture below is a good illustration of how I joined all three panels and how it’s overlapped like a cascade to prevent water intrusion. The basting tape also helps to water proof the seams.

D3E5204C-7519-4504-91DB-3EF0E1632E65.jpeg

You can can see how I built it a section at a time and adding a lot of stitching for increased strength. There was a lot of climbing in and out of the boat.
 

strokendiesel002

Petty Officer 1st Class
Joined
May 15, 2012
Messages
283
Thanks for the updates and tips! Glad you solved it!

Awesome job on the cover! What size singer did you use? I've been thinking of learning how to sew as I have quite a few older toys that could really use a better cover and interior upgrades, but it's awful hard shelling out multiple thousands per toy

Thanks again for sharing and she's beautiful!
 
Last edited:

Baylinerchuck

Commander
Joined
Jul 29, 2016
Messages
2,726
Thanks for the updates and tips! Glad you solved it!

Awesome job on the cover! What size singer did you use? I've been thinking of learning how to sew as I have quite a few older toys that could really use a better cover and interior upgrades, but it's awful hard shelling out multiple thousands per toy

Thanks again for sharing and she's beautiful!

Thanks man. The one I have is a Singer Heavy Duty 4423. I really don’t need all the extra stitches, so really a 4411 would be fine and they are around $100.00. I haven’t tried sewing vinyl with this machine yet. I’ll keep you posted if it’s heavy duty enough for that. Over three layers of Sunbrella was a struggle.
 

Baylinerchuck

Commander
Joined
Jul 29, 2016
Messages
2,726
The rest of the snaps were installed a few at a time, then checking fit.

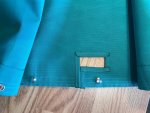
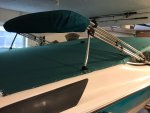
The next picture is how I used binding tape to finish the edges of cutouts for my stern light and Bimini top. I store my Bimini top low enough that I can back my boat into my garage without taking it off.

10C6A629-2F2A-4CB6-9012-6238A6AE3B3C.jpeg

You can can clearly see all three panels.

9B91C45F-A404-4A6F-B2FC-38C3FBDF465E.jpeg

The bimini is stored in a low position with cutouts in the mooring cover for the brackets.
 

Attachments

  • 4AB92623-C67D-4912-A87B-65BE2FA6A4E1.jpeg
    4AB92623-C67D-4912-A87B-65BE2FA6A4E1.jpeg
    869 KB · Views: 4
  • 11A15331-E9F6-4B65-BE9D-CB43B39C8CD7.jpeg
    11A15331-E9F6-4B65-BE9D-CB43B39C8CD7.jpeg
    370.5 KB · Views: 4
Top