'97 Tracker Pro Deep V Facelift

Status
Not open for further replies.

Striper Holic

Recruit
Joined
Oct 25, 2013
Messages
5
Re: '97 Tracker Pro Deep V Facelift

Thanks for the reply JNG! I hope to use the existing decking as the seller indicated that he replaced it! :rolleyes:
Hopefully it will still be sound. There are no soft spots that I have noticed. I am a big puppy also, and there is no give anywhere in the boat. I figured that I would wrap around the back of the decking, but I appreciate the picture that you showed confirming that you also did that! Is the Weldwood contact cement water proof??
I will post some before and after pics once I have gotten into the project! Just trying to get everything listed that I will need to start it! It looks like you used a carpet roller on the vinyl also, would that be correct?
Thanks--SH
 

jigngrub

Fleet Admiral
Joined
Mar 19, 2011
Messages
8,155
Re: '97 Tracker Pro Deep V Facelift

If doing that could I drill back up through the existing screw holes on the original flooring, before wrapping, so that I can use the existing holes in the stringers! TIA

I forgot about this part in my last post^^^^^^

I don't recommend using screws with vinyl covered decking, the screw head will twist the vinyl as the screw is driven flush with the decking. I used 1/4" diameter pop rivets instead.

As for using the same holes, I didn't worry about that. The factory screws that were holding down the carpeted decking were haphazardly driven with no thought to uniform spacing because they didn't show with the carpet, the carpet knap hid them.

I laid out my rivets inline and evenly spaced from fore to aft and port to starboard for a uniform appearance.
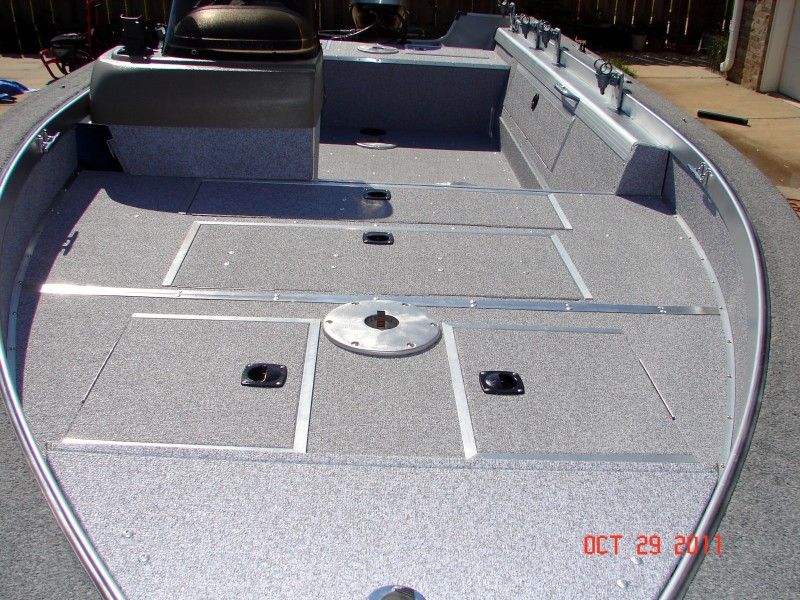
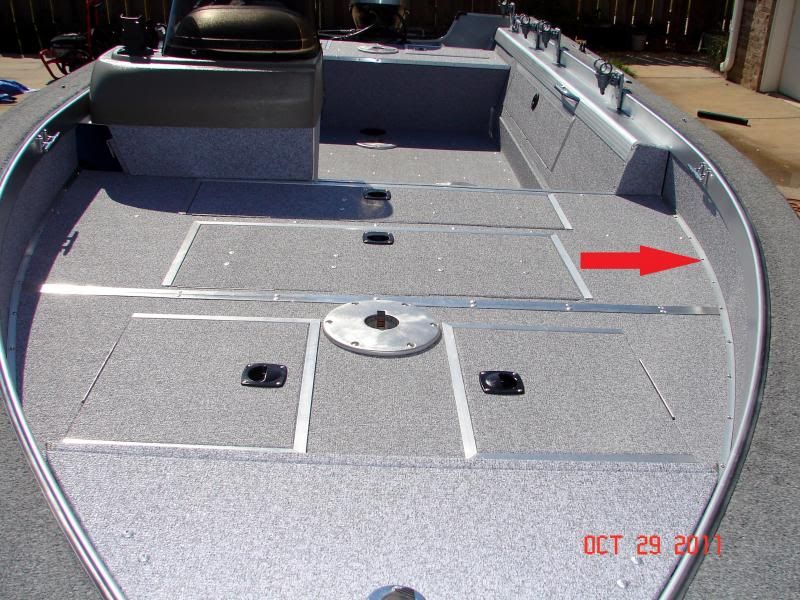
You might be able to tell a little bit about it in these 2 pics:


People never ask my why I riveted my decking down when they're in the boat, they always want to know why I had to rivet my vinyl down.:laugh:
 

jigngrub

Fleet Admiral
Joined
Mar 19, 2011
Messages
8,155
Re: '97 Tracker Pro Deep V Facelift

I hope to use the existing decking as the seller indicated that he replaced it!

Oooooo! You're in for a real treat!!! Sanding that old carpet adhesive off of the plywood is some kind of fun!:rolleyes:
I reused my decking and sanded the adhesive off too. I used a belt sander with a 30 grit belt and it took a while.

The only reason I reused my decking is because it's a very good grade of wood. Check and see what grade of wood your decking is before sanding it, hopefully there will be a stamp on the back of one of the pieces that will say what it is. If it isn't a real good grade you'll be lots of time and filth ahead to just buy new decking and install it... or if you want to save money and have plenty of time and like to get filthy sand it.

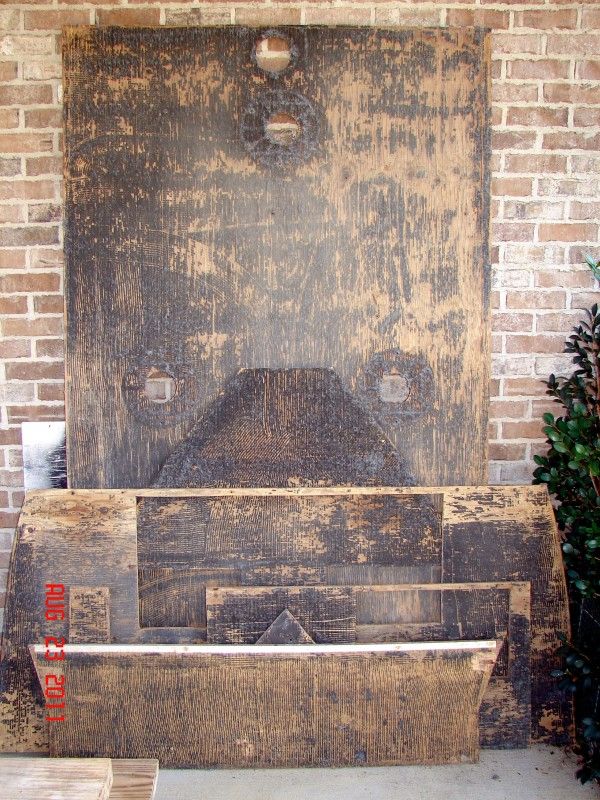
These are my deck and side pieces before sanding:


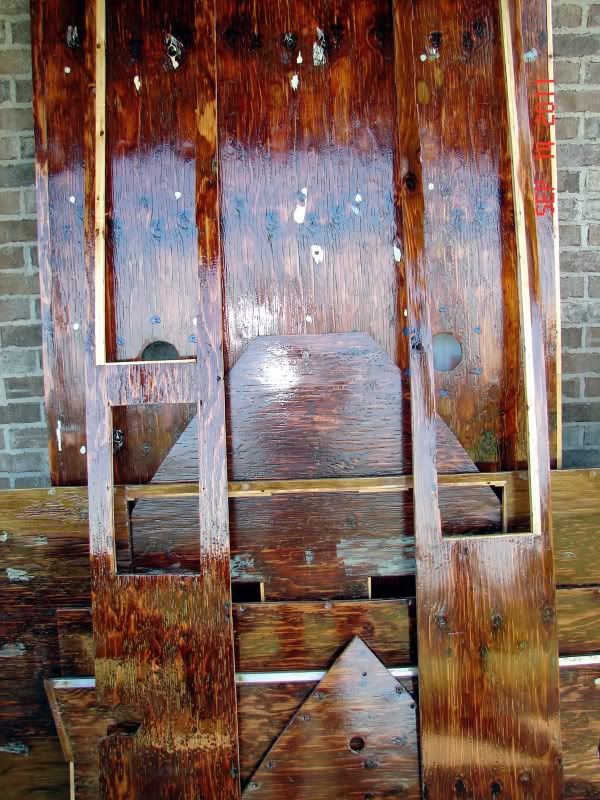
... and after sanding and the second coat of epoxy resin sealer:


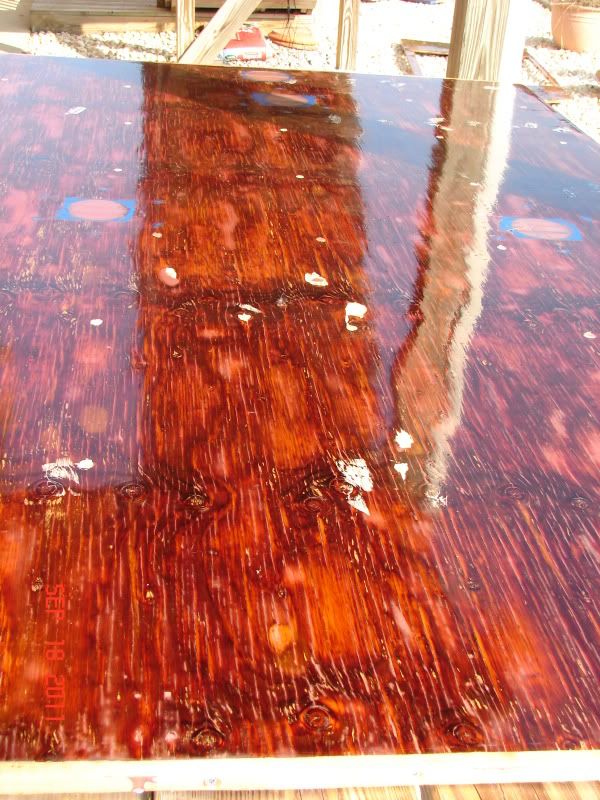
... and after the fourth coat of epoxy resin sealer:


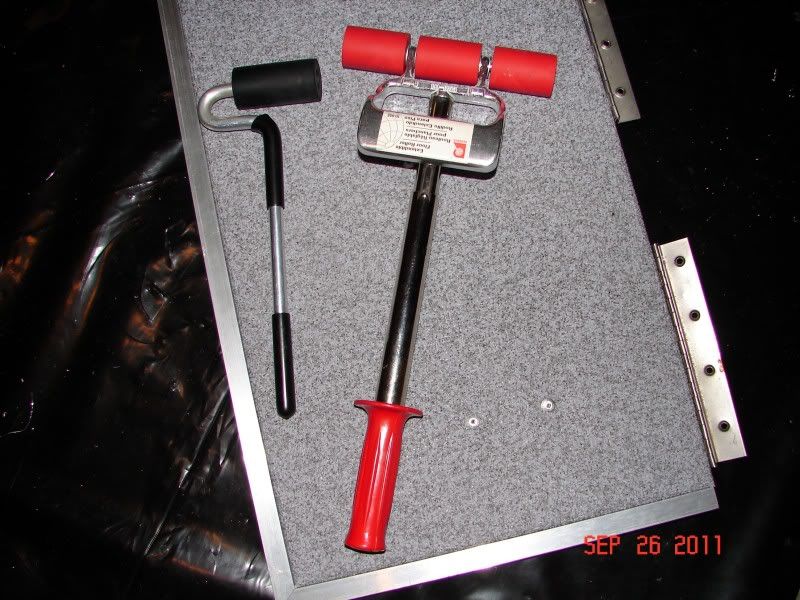
Carpet rollers are a must for a quality vinyl installation:

... and since you're a "big puppy" you can put lots of pressure on them and embed the back of the vinyl into the adhesive real good.
 

Striper Holic

Recruit
Joined
Oct 25, 2013
Messages
5
Re: '97 Tracker Pro Deep V Facelift

Thanks JNG all good pointers for sure! So if you used rivets to put the deck back down, and you need to take a piece off for access to wiring, gas tank, etc., won't you have to drill out the rivets again? Seems like a lot of work if needed. Just a thought! Anyway all very good information here. and thanks again for the helpful pointers! Wish me luck, I am going to need it! I may have to rent a storage shed for this project as we have already had snow here, and it is getting cold. :blue:
SH
 

Watermann

Starmada Splash of the Year 2014
Joined
Jan 12, 2013
Messages
13,798
Re: '97 Tracker Pro Deep V Facelift

With the hatches closed:

DSC02252.jpg

Hey Jig, I'm interested in the trim you have along the seam of the front deck between the decking and the hull. My Chief is going the way of the vinyl flooring as well, hard to the beat the look. Did the trim come with the boat? Thanks.
 

jigngrub

Fleet Admiral
Joined
Mar 19, 2011
Messages
8,155
Re: '97 Tracker Pro Deep V Facelift

Hey Jig, I'm interested in the trim you have along the seam of the front deck between the decking and the hull. My Chief is going the way of the vinyl flooring as well, hard to the beat the look. Did the trim come with the boat? Thanks.


That trim is 1/2"x1/2"x1/16' thick aluminum angle I bought in 8' sticks at Home Depot.

None of that trim in the pic came with the boat and was all purchased at HD.
 

Watermann

Starmada Splash of the Year 2014
Joined
Jan 12, 2013
Messages
13,798
Re: '97 Tracker Pro Deep V Facelift

Thanks! It looks to me like you used it to cover the gap between the two pieces and put the angle down inside the gap. Pretty clever and inexpensive way to seal that gap up, I have a couple applications in mind for that method.
 

jigngrub

Fleet Admiral
Joined
Mar 19, 2011
Messages
8,155
Re: '97 Tracker Pro Deep V Facelift

Thanks! It looks to me like you used it to cover the gap between the two pieces and put the angle down inside the gap. Pretty clever and inexpensive way to seal that gap up, I have a couple applications in mind for that method.

That's the whole idea behind trim eh! Cover up an unsightly gap, crack, or joint and dress it up a little. What you're covering up may not be that ugly, but it'll look better with something a little nicer covering it up.

That vertical piece that the angle is against is just a 6" tall piece of sheet metal that hides the inside of the gunwale. When the boat was carpeted there wasn't a gap there, but when I changed over to vinyl the thickness difference between the carpet and vinyl left a 1/4" gap at the bottom... so I installed the angle trim to hide it and it looks a lot better than a 1/4" gap.
 

jigngrub

Fleet Admiral
Joined
Mar 19, 2011
Messages
8,155
Re: '97 Tracker Pro Deep V Facelift

I see the dreaded red banner has popped back up on this thread, so this is a bump in case anyone is interested in the Nautolex vinyl.
 

nalegtx

Cadet
Joined
Apr 10, 2012
Messages
14
jig i am currently doing the same replacement on ym 99 pro deep. i used Tuff Coat spray liner. I guess i am just not following how you mounted the angle on the lids. are you attaching the angle to the verticle side of the lid edge so there is one flat piece horizontal with the deck and the verticle part goes down perpendicular to the deck inside the lid? sorry, i guess its just not cliciking for me...i;m a visual learner...lol hahaha....almost done with ym boat all i have left is putting on the lids and attaching the deck. i plan on doing the same trim as u had mentioned to me in the last PM
 

nalegtx

Cadet
Joined
Apr 10, 2012
Messages
14
Jig i am currently doing the same replacement on my 99 pro deep. i used Tuff Coat spray liner. I guess i am just not following how you mounted the angle on the lids. are you attaching the angle to the vertical side of the lid edge so there is one flat piece horizontal with the deck and the vertical part goes down perpendicular to the deck inside the lid? sorry, i guess its just not clicking for me...i;m a visual learner...lol hahaha....almost done with my boat all i have left is putting on the lids and attaching the deck. i plan on doing the same trim as u had mentioned to me in the last PM
 

nalegtx

Cadet
Joined
Apr 10, 2012
Messages
14
sorry for the repeated post....kept saying server error.....looks like it did post after all
 
Last edited:

jigngrub

Fleet Admiral
Joined
Mar 19, 2011
Messages
8,155
jig i am currently doing the same replacement on ym 99 pro deep. i used Tuff Coat spray liner. I guess i am just not following how you mounted the angle on the lids. are you attaching the angle to the verticle side of the lid edge so there is one flat piece horizontal with the deck and the verticle part goes down perpendicular to the deck inside the lid? sorry, i guess its just not cliciking for me...i;m a visual learner...lol hahaha....almost done with ym boat all i have left is putting on the lids and attaching the deck. i plan on doing the same trim as u had mentioned to me in the last PM


Maybe this will help:
 

nalegtx

Cadet
Joined
Apr 10, 2012
Messages
14
OOOOHHHHH!!!!!....yes very helpful. I got the 1", do your lids close and sit on the aluminum framing before the channel hits the framing or, did you get the 3/4" and avoid that problem. I ask because my 1" would sit slightly higher han my lid level due to the fact that the wood is 5/8" and the angle is 1" so to make the angle flsuh with the lid there would be a bit of over hang ( the gray line would hang down lower than black line...... vertical lines that is.
 

jigngrub

Fleet Admiral
Joined
Mar 19, 2011
Messages
8,155
That 1" angle won't work, you'll have to use the 3/4"x!/8" like I did or you can use 1/2"... but the 3/4"x1/8" will work best.
 

JoshuaFisher

Seaman Apprentice
Joined
Jun 21, 2013
Messages
30
Hey jig looked great what ya did. As some others im considering going the same route in my 95 17 deep V. Seeing as how its been a couple years since you've done yours i was wondering how everything was holding up and if you had anything you might have done differently? Contact cement still holding well too?
 

nalegtx

Cadet
Joined
Apr 10, 2012
Messages
14
awesome thanx a lot Jig......i'm going to get some 3/4 angle this week and try and finish up
 

jigngrub

Fleet Admiral
Joined
Mar 19, 2011
Messages
8,155
Hey jig looked great what ya did. As some others im considering going the same route in my 95 17 deep V. Seeing as how its been a couple years since you've done yours i was wondering how everything was holding up and if you had anything you might have done differently? Contact cement still holding well too?

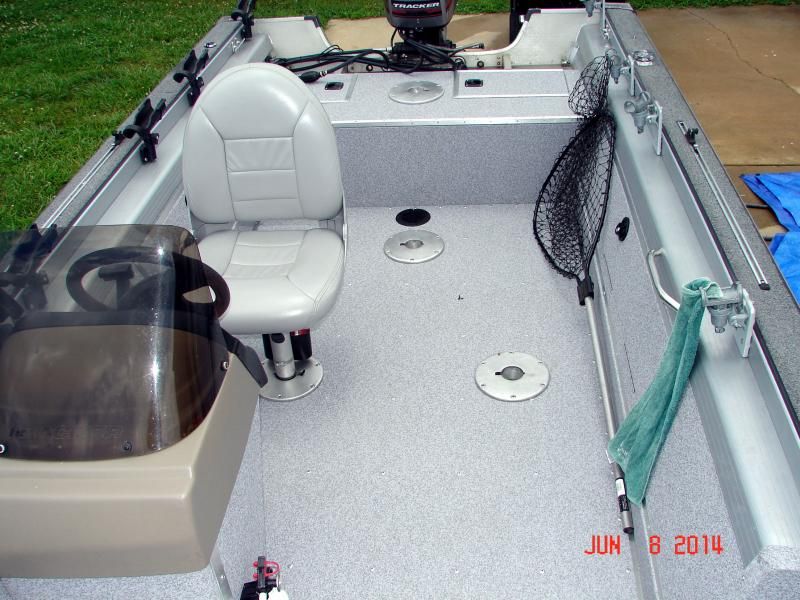
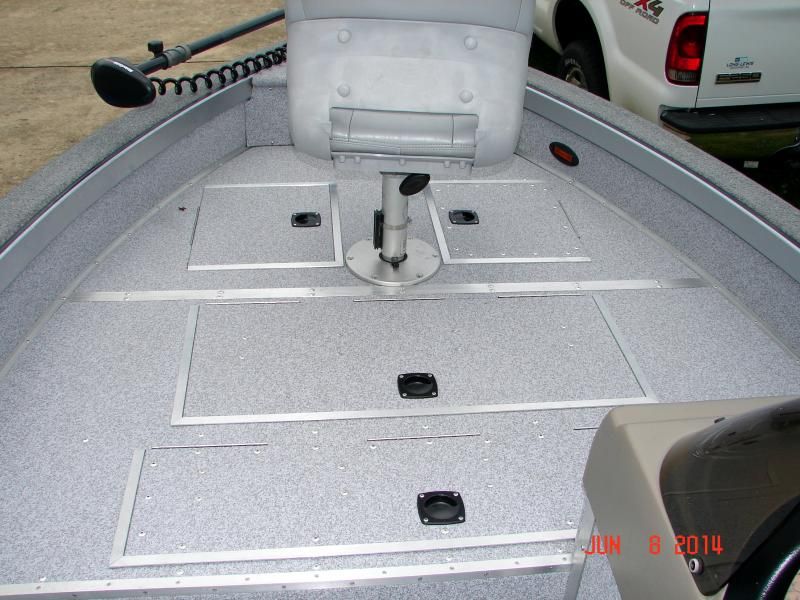
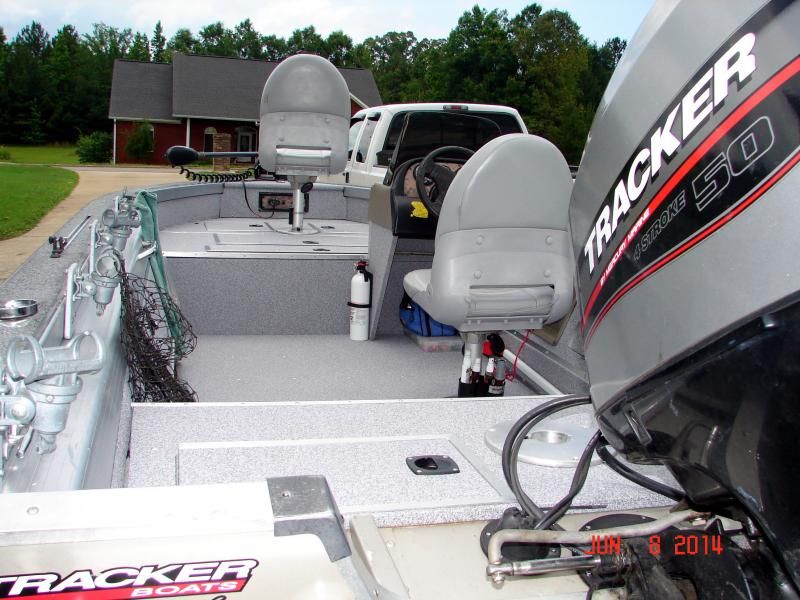
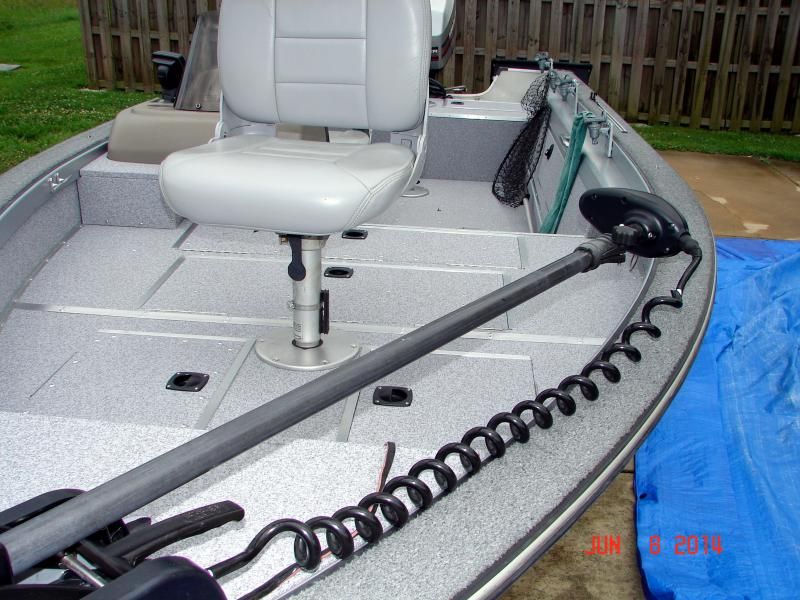
Well, since you mentioned it I went out and took a few pix:


No stains, rips, tears, or holes in the vinyl... not even a pin-hole. As you can see for yourselves it still looks new too.

As far as doing anything different on the installation, I wouldn't mess with the Nautolex 88 adhesive like I did at the start. I'd go with all contact cement.

Working with the contact cement takes a little getting used to, but if you start with your smallest pieces first it's easy.
 

JoshuaFisher

Seaman Apprentice
Joined
Jun 21, 2013
Messages
30
man that is fantastic! Im still working through the mistakes of the PO and about 75% of the screws on the floor are stripped out and painted over, best way to deal with all the stripped screws?
 

jigngrub

Fleet Admiral
Joined
Mar 19, 2011
Messages
8,155
man that is fantastic! Im still working through the mistakes of the PO and about 75% of the screws on the floor are stripped out and painted over, best way to deal with all the stripped screws?


If it's the Phillips head that's stripped out, that's a real pita.

Sometimes you can take a nice new #2 Phillips head bit and put it on top of the screw head and tap it a couple of good hits and then put the tip in a screw gun and back it out. If that doesn't work you may be able to get ahold of the screw head with a pair of vice grips and back it out. The last resort is to drill the heads of the screws off and pry the plywood up with a good pry bar. If the screws are stainless you'll want to drill them slowly and dip your drill bit in water to keep it cool.

I don't know why all these people insist on covering up their decking fasteners in an aluminum boat??? Maybe they're closet glasser wannabes. There are fiberglass boat owners out there that would give their left yarble to have an easily removable deck!
 
Status
Not open for further replies.
Top