93 Wellcraft 196 SC - Bare hull rebuild

kcassells

Fleet Admiral
Joined
Oct 16, 2012
Messages
8,720
You can use most adhesives whereas the transom will be glassed in as encapsulated. Alot of guys make peanut butter out of their resins to sandwich the plys together, then screw or clamp the plys tight. Dries fastest and a great sealant/adhesive.

If your're using a glue like pl5200 then that type of adhesive like most needs @ 2 weeks to gure and gas off. You can't glass it until it's gassed off.
http://www.shop411.com/shopping?qsr...00 adhesive sealant&dqi=&am=broad&an=google_s
 

gsxrdan

Petty Officer 1st Class
Joined
Aug 28, 2016
Messages
317
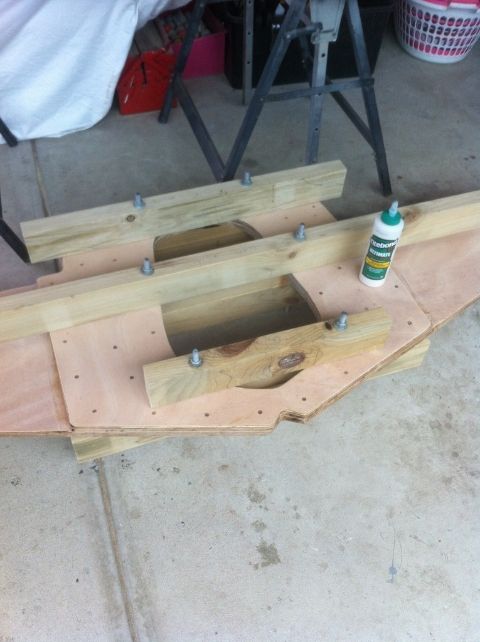
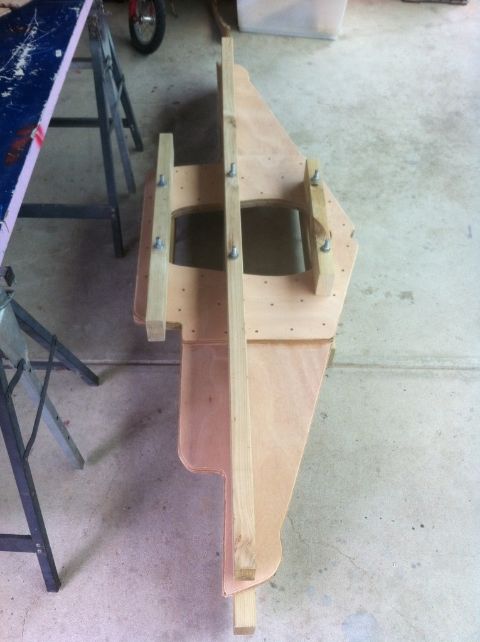
I've seen a few builds use pb - i feel a little 'in limbo' wondering which of 6 ways to go; Ive made big timber clamps already for laminating the transom, and gluing it into the hull, now just need to "eeni meeny miney moe, out u must go!"

Dont want to wait, so no to pl glue, leaning towards pb... i think that'l do!
 

gsxrdan

Petty Officer 1st Class
Joined
Aug 28, 2016
Messages
317
Right, I re-read WoG's guide to transoms and stringers and realised he coats the timber in resin AFTER laminating with the Titebond (I have read it 4 or 5 times, but also read and watched 20 something hours of instructional - and not so - guides with very conflicting info at times!!) So here goes with the transom first


gsxrdan

Petty Officer 1st Class
Joined
Aug 28, 2016
Messages
317
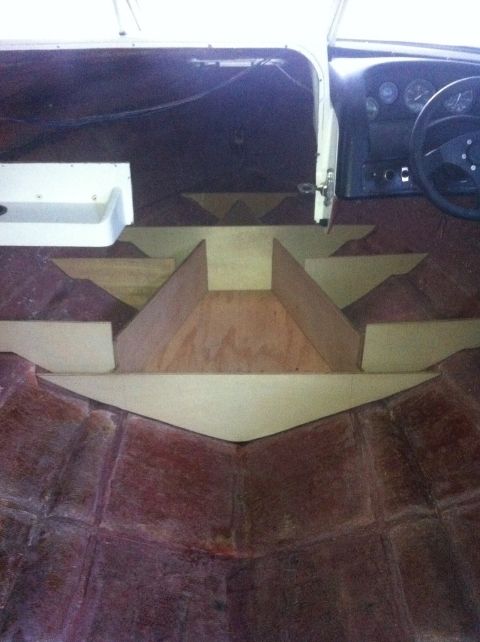
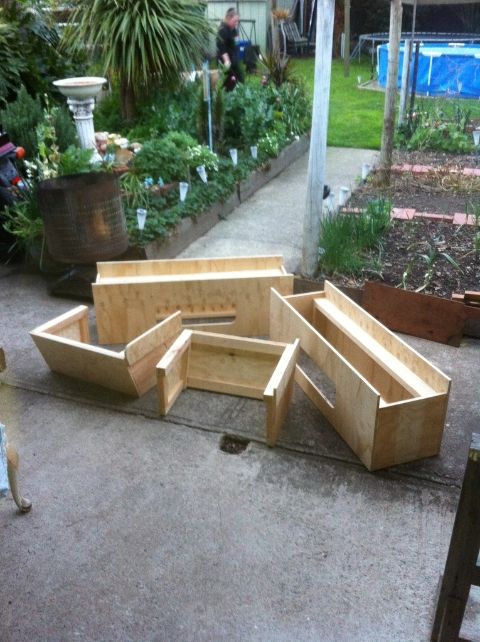
And while STILL wait for the resin to arrive (fingers impatiently drumming the desk...) I finished the timberwork - front bulkheads and seat formers now trimmed to fit That front sole/deck is just a temporary brace, everything else is all marine hardwood ply And since i had a spare few hours the other day, heres the new seat bases! ​
 

kcassells

Fleet Admiral
Joined
Oct 16, 2012
Messages
8,720
Looks awful.....NICE!! Remenber to keep the woods off the hull thereby eliminating "HARD SPOTS". In regards to stringers and bulkheads below deck. Yup this part is kinda exciting now that all that grinding is done. A famous man once said...."Easy Peasy" now. :joyous:
Let the games begin.
 

Pete_a

Petty Officer 3rd Class
Joined
Sep 10, 2016
Messages
76
Looks awful.....NICE!! Remenber to keep the woods off the hull thereby eliminating "HARD SPOTS". In regards to stringers and bulkheads below deck.

Could anyone elaborate on this? Thank you I am thinking I'll be do at least a transom in my 88 donzi ragazza so I'm trying to learn. I've read keeping a 1/4" clearance is recommended. What I don't understand is if this clearance is filled with pb wouldn't the pb be harder than the ply and just behave the same as if the ply were touching? Thanks again and great restoration thread. Please keep pics and updates coming
 

mickyryan

Rear Admiral
Joined
Apr 18, 2016
Messages
4,214
Could anyone elaborate on this? Thank you I am thinking I'll be do at least a transom in my 88 donzi ragazza so I'm trying to learn. I've read keeping a 1/4" clearance is recommended. What I don't understand is if this clearance is filled with pb wouldn't the pb be harder than the ply and just behave the same as if the ply were touching? Thanks again and great restoration thread. Please keep pics and updates coming

there is no way you could get the plywood to perfectly touch bottom of boat all the way up so the pb is a filler that completes it so you don't get a firm spot then non firm spot
 

ondarvr

Supreme Mariner
Joined
Apr 6, 2005
Messages
11,527
It doesn't make much of a difference in how you space the plywood off the hull, or what the gap is, as long as it doesn't touch you're fine. Some people use a caulk, some use putty, others foam, removable spacers, or nothing. In most small boat construction the stringers are just set in place right on the hull, they don't leave a space under the stringer, rarely is there an issue, on larger boats it's far more common to leave a gap.
 

gsxrdan

Petty Officer 1st Class
Joined
Aug 28, 2016
Messages
317
good to know, thanks for the insight... i can just slap some pb in there and get on with glassing
 

kcassells

Fleet Admiral
Joined
Oct 16, 2012
Messages
8,720
Cool Great answers...I hope they helped out. Just got in from work so glad the Gaps got filled in with replies. :)
 

kcassells

Fleet Admiral
Joined
Oct 16, 2012
Messages
8,720
Don;t forget to resin all your cut edges first to protect them and fill any voids and resin them. I usually wet out the whole pc. of wood prior to setting then hit them again to put on my glass.
 

Pete_a

Petty Officer 3rd Class
Joined
Sep 10, 2016
Messages
76
And I like mickyryan's build where he routed a radius on the stringer edges to let glass wrap gradually. Prob not needed? If you have a router, be quick to do.

I noticed the op never took cap off. Can't blame ya🙄the idea intimidates me. What is the purpose of decapping? Just easier access to transom?
 

Pete_a

Petty Officer 3rd Class
Joined
Sep 10, 2016
Messages
76
Gsxrdan, just went through your pics and gotta say truly inspiring for a beginner like me to see another newcomer dive right in, nice work. Motor mount building sounds scary for obvious reasons, but they appear to be just simple boxes with supports. Please show pics of glassing the mounts and tabbing them in.
 

gsxrdan

Petty Officer 1st Class
Joined
Aug 28, 2016
Messages
317
Thanks Pete, nothing like learning at the deep end! I was a bit cautious about the motor mounts, but after seeing some fairly flimsy factory jobs (on this here forum) I now figure the glasswork must be stronger than i give credit for.
 

gsxrdan

Petty Officer 1st Class
Joined
Aug 28, 2016
Messages
317
Re decapitating this thing - forget it! dont have the space to store it, and it plain scares me! But there was no need with this rebuild, plenty of space to get around, and the transom just slides in (it has a conforming shape). However i will replace all the rivets holding cap to hull, since 15 or so have sheared off anyway, but will replace a section at a time, so there wont be too much flexing going on.
 

gsxrdan

Petty Officer 1st Class
Joined
Aug 28, 2016
Messages
317
Oh, and i used the flappy discs to radius all the edges, easier than getting the router out (and less intimidating than the router too!!)
 

mickyryan

Rear Admiral
Joined
Apr 18, 2016
Messages
4,214
ehehe flappy disks work too, I did glean that info from this forum wog, or ondarvr, but it made going over the top less frustrating for sure! I know its a mindset but kinda like after you get a car wash it seems to run smoother? I swear my boat feels like a tank now and when jumping around in it working I have never once heard anything stress crack I'm rocking the gq esk figure of 2fitty so I'm definitely " field testing" it every day. :)
 

gsxrdan

Petty Officer 1st Class
Joined
Aug 28, 2016
Messages
317
Good work mick, aye shes a mighty fine tank!

So have now glued up the stringers and motor mounts, and been assured my glass will be here day after nxt... pix to come.

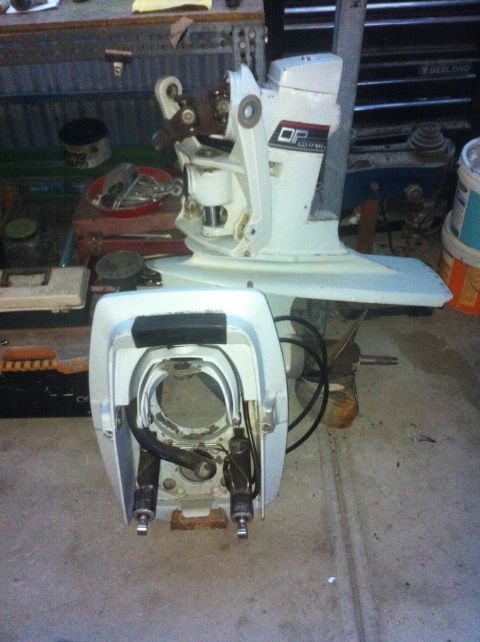
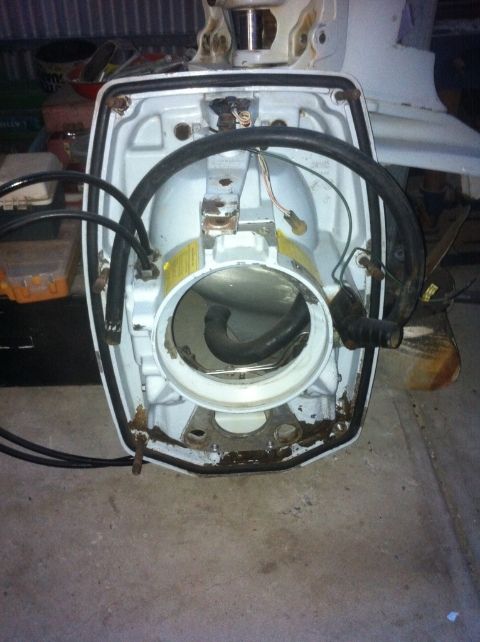
In the meantime, i have a few issues to cover with the I/O. Its 1 of these...


gsxrdan

Petty Officer 1st Class
Joined
Aug 28, 2016
Messages
317
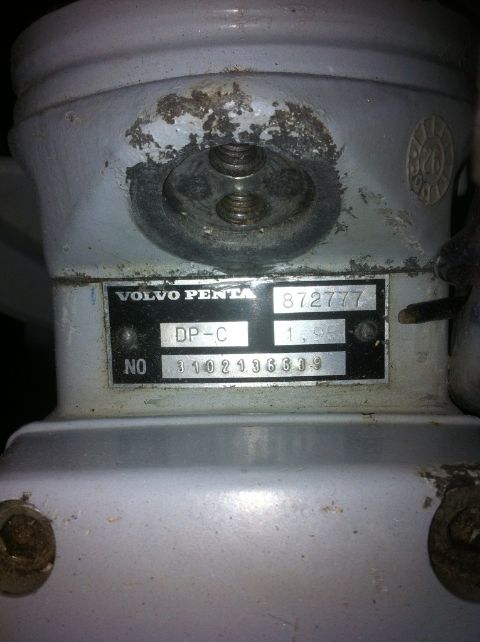
I think im missing an inner transom shield bracket - something to mount the flywheel cover onto, as in, rear engine mount... does this model DP utilise such a bracket?? All i know is its a DP C, made in 92, coupled to a 5 litre chev, also made in 92. I see no markings calling it a 280 or 290 or some such; so when looking up parts, what do i call it?
 

gsxrdan

Petty Officer 1st Class
Joined
Aug 28, 2016
Messages
317
Front prop is stuck fast (of course) and no 'holes' thru the hub to thread steel cable, (as ive seen in the removal vids ive watched) Can I make a relief cut along the side of the prop to get rid of it? (no hope of saving these rock busters anyway)
 
Top