86 Sea Ray Restoration [Splashed Oct 2017]

Rick Stephens

Admiral
Joined
Aug 13, 2013
Messages
6,118
I just did my transom install. I used Coppercoat, just a fancy rubber cement, and glued the big seal into the gimbal housing. Then I used 4200 on the outside 1/2 inch of the bottom aluminum carriage bolts. All the rest of the bolts just got greased up with 2-4-C and nothing else.

I don't like that there is just that little teensy rubber washer for that carriage bolt. And the ones I pulled out were corroded really bad. Hence I sealed the outer 1/2 inch. Mercruiser puts em in dry.

I built brand new motor mounts since I am going from a 4 cylinder to a 6 cylinder. So I know just what you mean about motor mounts being right. When you get your transom plate installed, take a 6 foot string and run it up through both motor mount holes across underneath. Then cross them so the loose ends go to opposite motor mount. If the mounts are equal height, the strings will just touch in the center where they cross.

On overall height, well, it is always better to be low than too high. That always sucks.


Got my fingers crossed for you.

Rick
 
Last edited:

ahmincha

Lieutenant Commander
Joined
Jul 21, 2012
Messages
1,512
Hey goldie all holes I drill through my transom I over drill 1/4" fill with pb then redrill with the correct size. Then i also use 3m 4200 or 5200
 

JASinIL2006

Vice Admiral
Joined
Feb 10, 2012
Messages
5,682
I coated the holes, too, where the penetrate the transom core.

I use a little bellows cement to hold that round foam rubber gasket in place before bolting the assembly to the transom. I did not use any sort of caulking or adhesive between the transom assembly and the boat. The manual instructios are for it to be installed dry, so that is what I did.

Good luck!
 

WOEISMEIGOTTA470

Petty Officer 1st Class
Joined
Aug 31, 2012
Messages
375
Good to hear your getting closer Goldie. I'm with Rick - only I used a few dabs of black RTV in key spots to tack the transom seal in place in it's groove. RTV only took 30-mins or so to set-up. Seal is meant to be installed dry, however I also decided to use "O-ring lube" a silicone based synthetic formula designed to lubricate rubber o-rings. It's purpose is to keep the seal from drying out (extend life) and aid installation. I got it from mcmaster here:
www.mcmaster.com/#9463k33

Otherwise, goop up those lower alloy bolts good like everyone else has said, I also wouldn't solely rely on those rubber washers...
Good luck!
 

Brickie

Seaman
Joined
May 15, 2013
Messages
59
Just checked your rebuild site out, nice work on your project and great job on videos! You'll be casting for small mouth off that Sea Ray before you know it. Sea Rays are nice boats. I'll definitely be following your progress. I just mounted my transom plate and only put a little bellows adhesive on the groove to hold in foam seal. I used all new bolts and the bottom ones had rubber seals . I didn't use any sealer as it had none on it from factory and figured it lasted 30 years. If i had to do it
over again I would probably throw some 4200 on them for insurance. Sometimes i get following manual and forget the advice from the Guys on the Forum. Good luck Goldie!
 

Goldie627

Lieutenant Junior Grade
Joined
Oct 28, 2013
Messages
1,010
Thanks for all the help guys. For the past three weekends its rained so I haven't got much done. However, in the interim I've cleaned the garage and laid out all of my parts. I'm kinda glad i did because i found that i had forgot to order a few bushings.

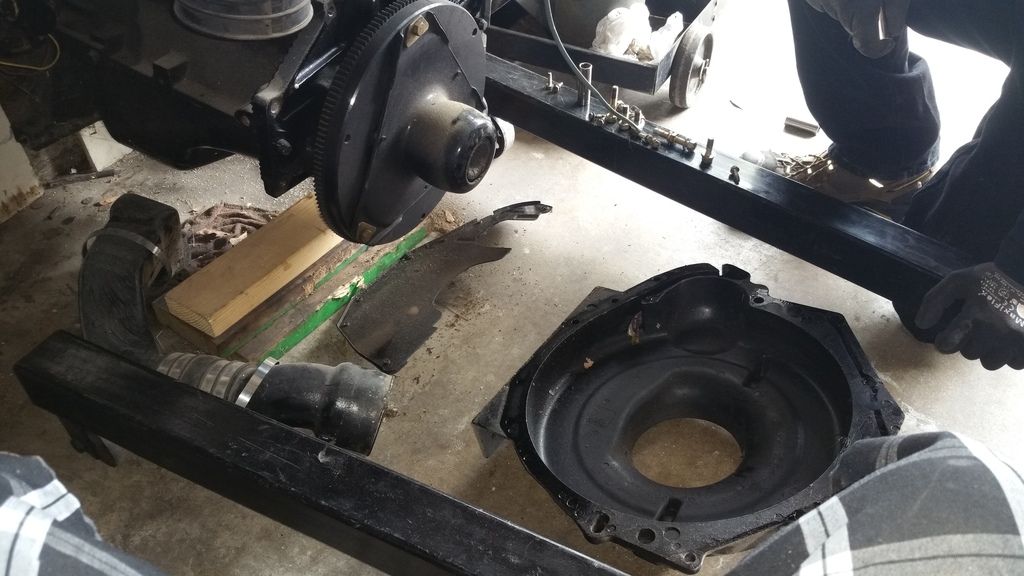
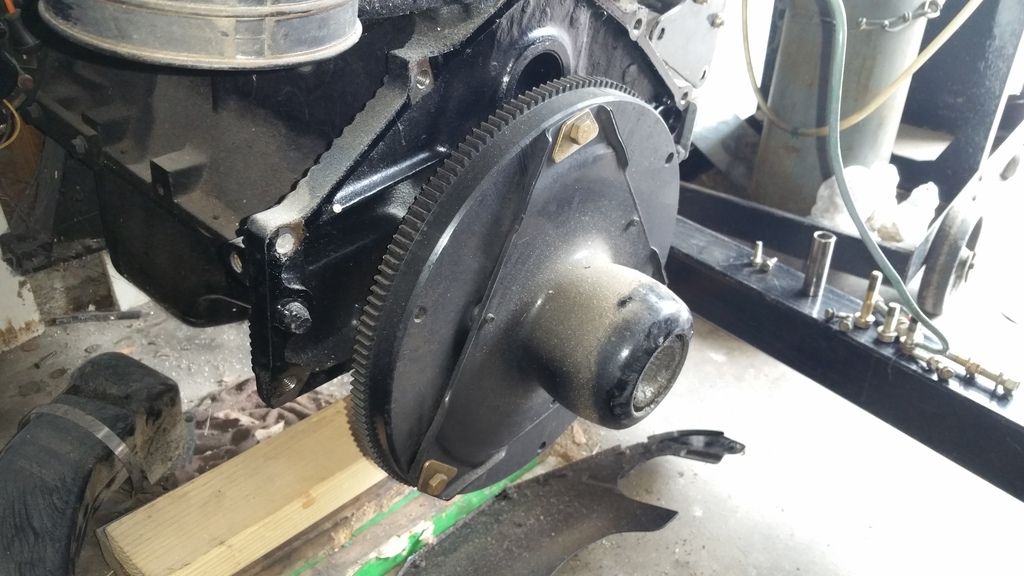
Because it was raining and i couldn't work outside so i decided to do the engine coupler. This is where the circus begins :facepalm:

Mercruiserparts.com shows two couplers for my motor. 25 and 28

I have the mercruiser 140 GM 181 I/L4 1982-1986 - 6229718 THRU 0B450800.

http://www.mercruiserparts.com/bam/subassembly/5643/963/300

Here's the deal, before i removed my coupler I ordered this:

http://www.ebay.com/itm/SIERRA-18-21...-/330544257513

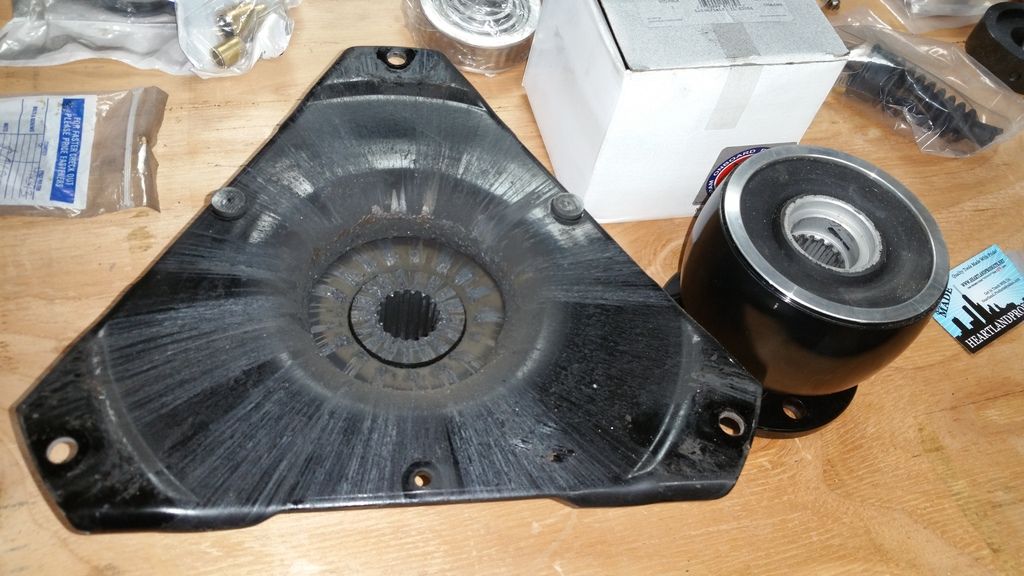
So today I took the old coupler off and was surprised it was the triangular 3 bolt coupler. Heres were it gets tricky, according to mercruiserparts.com i can use 25 or 28. But today i noticed the vender that sold me 25 states that the sierra 18-2171 is not compatible with the three bolt coupler. This is so confusing. Will it work if i get number 24? (the flywheel to engine coupling studs?)

A side note, unlike 28, my current coupler does not have the lube addition and my yoke doesn't have the 3rd o ring near the splines. I guess the parts have been improved from the original versions.

20160320_1230071_zpsiuwfnxvr.jpg


20160320_1230011_zpsbo3mmrdh.jpg


20160320_1437001_zpsllmgafzm.jpg
 

Goldie627

Lieutenant Junior Grade
Joined
Oct 28, 2013
Messages
1,010
I almost forgot, on my lower transom bolts there is a rubber washer with a round OD and a square ID. I cant find this rubber washer anywhere. Any ideas?
 

WOEISMEIGOTTA470

Petty Officer 1st Class
Joined
Aug 31, 2012
Messages
375
What's up Goldie...I'll take this one. ;)
You can use the coupler you got, item #25. But you'll need six of items 24,26, & 27 for it to work. I'm running the same coupler. Basically, you need six Grade-8, 7/16-20 threaded studs along with 7/16 lock washers and nuts. They will replace the current hex bolts holding your flywheel in place. Remove flywheel and reinstall with the studs & coupler. Use red loctite (262 or equivalent) on the threads into the crank when installing new studs. Using a torque wrench on those 7/16 nuts may prove difficult/impossible since the geometry of the coupler will be in the way. I think I just used an open end wrench to tighten them using the torque wrench God gave me... (torque spec says 35ft-lbs). I also used blue loctite (#243 removable type) for the nuts. Good luck!

(the link you provided to "mercruiserparts" didn't work for me...attaching the one below for parts diagram reference)
https://www.perfprotech.com/mercury...ump140-30l181-cid/assembly/963/300?model=1778
 

Goldie627

Lieutenant Junior Grade
Joined
Oct 28, 2013
Messages
1,010
Thanks WOE!!! really really good info. Unfortunately, last night I ordered 28. :facepalm: I was in a position where on compatibility most didn't know, some said it would and some said it wouldn't work. Mercuiserparts.com lists it as working but the vender that i purchased it from said it wouldnt. My rational was do i spend 60 bucks on the flywheel to coupler stud kits (each kit comes with stud, washer and nut) and take a chance on having to take the motor back out if it didn't work or pay 189.00 (very good deal) for number 28, gaining a grease fitting and new drive yoke. Last night the choice was pretty clear but honestly had i known it did in fact work i would have just rolled with 25. Well atleast now i know and have a backup :D i just gotta keep my old yoke. I like the idea of the grease fitting but that 3rd o ring on the coupler side of the yoke just seems like a added possible failure point. I guess you cant have your cake and grease it too!! :rolleyes: plus if i ever upgrade the motor i'll have the stronger 25 coupler already in stock :D

Fixed link

http://www.mercruiserparts.com/bam/subassembly/5643/963/300


The gimbal housing bolt washer in the illustration looks like the ID is round but should be square. when i search on ebay for (part #20) 12-32620 all of the pictures show the ID as round, im lost on this one... :faint2:

http://www.mercruiserparts.com/bam/subassembly/5633/2203/40

Im so excited! if it would just stop raining on my off days i'd be a happy fisher ;) well actually, a happy motor installer! :D

Parts are in transit, ill be posting videos and pictures soon.

Thanks again woe and also thanks to bondo who helped me in another thread.
 

WOEISMEIGOTTA470

Petty Officer 1st Class
Joined
Aug 31, 2012
Messages
375
Hey Goldie! Any updates? I was just going through your painting videos, I'm gearing up to paint the outdrive and related parts soon on mine. Just got the bell housing blasted, need to work on prepping the outdrive and gimbal housing next. :)
 

Rick Stephens

Admiral
Joined
Aug 13, 2013
Messages
6,118
Hey Goldie! Any updates? I was just going through your painting videos, I'm gearing up to paint the outdrive and related parts soon on mine. Just got the bell housing blasted, need to work on prepping the outdrive and gimbal housing next. :)

I'm gonna bump Woe's post - how is it all coming???
 

Goldie627

Lieutenant Junior Grade
Joined
Oct 28, 2013
Messages
1,010
Hey Goldie! Any updates? I was just going through your painting videos, I'm gearing up to paint the outdrive and related parts soon on mine. Just got the bell housing blasted, need to work on prepping the outdrive and gimbal housing next. :)
That was so funny!!! but the cold part is you were exactly on the money!!! LOL i was kinda going through the motions the best i could caught in the bellows abiss!!!! :D

Well... after paint... if you assemble your gimbal off the boat you are very suceptibale to jacking up your nice new pretty paint job.. (just trust me on this) but, if you install the gimbal housing onto the boat then install everything else your paint is less likely to get damaged buy everything is waaaaay harder to access for reassembly. So its a balance, pick your poison. I really screwed up my beautiful paint job primarily because i sorta fumbled through the reassembly process. The bellows kicked my but like i stole something but i came out victorious in the end! Actually the damage to the paint wasnt too too bad considering I replaced every part in Gimbal and bell housing except for the bushing in the very top of the gimbal. Everything else is all new. After its on the boat I'll repaint it. I did everything by the book except i didnt put bellows adheasive on the aft side of the exhaust bellow becasue the first two times i tryed to install it the adheasive would dry before i could get the bellow all the way up the flange. so i cleaned off the bellows adheasive with acetone and installed that one end dry. I had the tool and put a second coat of adheasive for slipperyness but no joy. All said and done im happy and confident in the work i did. :joyous:

If you tore your gimbal down completey like i did you can go to a clutch and break supply house, the should ave just about everything you need to capp off all the holed for paint. dont use chewing gum!!! LOL

I recorded some video and pictures but didnt post anything, nobody wants to here me cussing and fussing at bellows!!! LOL :D

I'll try to put together some tips, just lil stuff like the TOP FWD and TOP AFT ujoint bellow markings are under the clamp, order of installation that worked for me etc.

let me know if you have any questions about anything
 

Goldie627

Lieutenant Junior Grade
Joined
Oct 28, 2013
Messages
1,010
I'm gonna bump Woe's post - how is it all coming???
Hey Rick, yea when the rivercats first came to sac i thought it was going to be kinda like a prelude or test to eventually bring a major leaugue team. A while back I heard rumors of the A's coming to sac. Some people say that raley field could be a major leauge stadium if they just added more seats. It was exciting. We have a new basketball arena being built just blocks from the capitol, i think kevin johnson (retired nba player/mayor) helped that happen. Alot of changes and expansion going on around the capitol, some parts you may not even recognize :joyous: but its all good changes

Thanks for that heads up on the bellhouse bushings, the new ones are a huge improvment, the design is wayyyy better
 

Goldie627

Lieutenant Junior Grade
Joined
Oct 28, 2013
Messages
1,010
Hey guys, i cant find my old bilge pump, can anybody recommend one that they like?

my boat - 19 foot searay seville open, bow 4 cylinder GM - alpha one

i gotta do some research and find out what the recomended gallons per hour is

I might as well do that now because the motor is going in next weekend... fingers crossed
 
Last edited:

Goldie627

Lieutenant Junior Grade
Joined
Oct 28, 2013
Messages
1,010
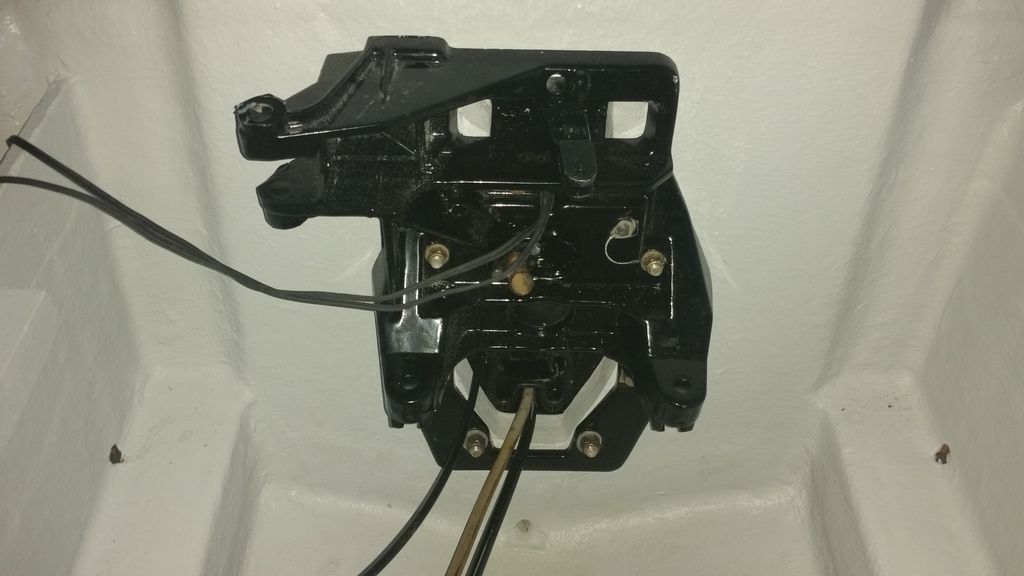
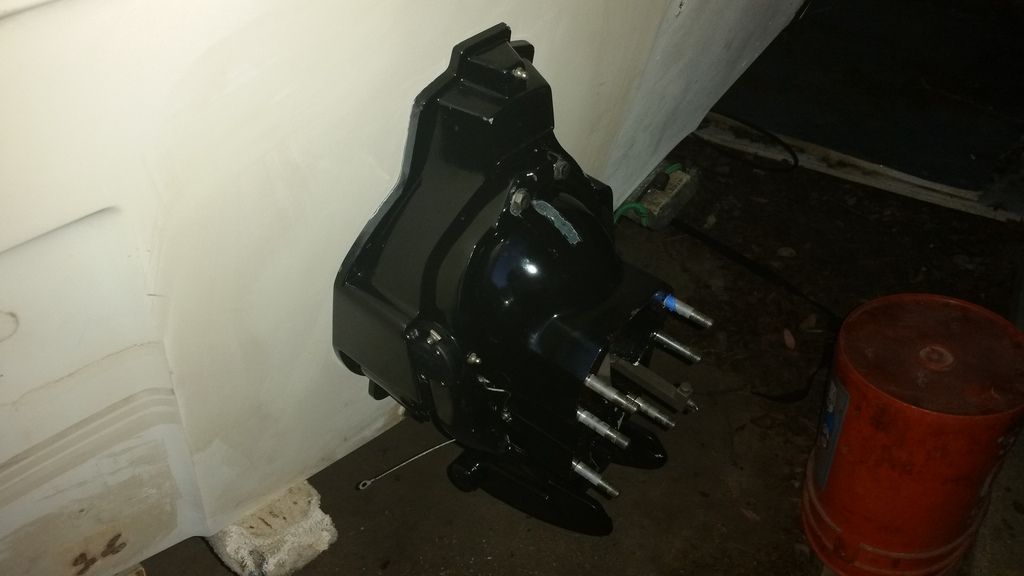
Transom plate installed, undecided on replacing hydralic lines...
20160417_195943_zpsmrqhtqtx.jpg


You can see the carnage where i damaged the paint on the top of the bell housing during assembly... I'll fix it.. no worries..
20160417_195657_zps0uatpq4t.jpg
 
Top