'83 Lund "Sirius" total gut and rebuild

nurseman

Lieutenant Junior Grade
Joined
Jun 2, 2013
Messages
1,045
All coming together now ! I think I saw the bucket tipping contraption over on Deckers deck boat restore ..
Ahhh, that could be where I saw it. At any rate, I used it tonight,and it was pretty slick!
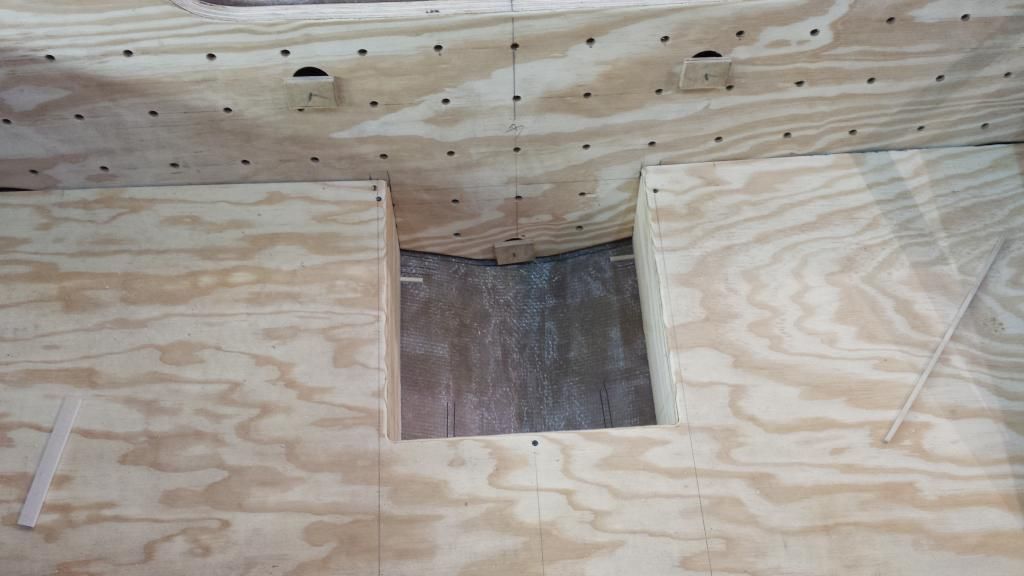
I worked almost all day on this thing, but don't have a ton of progress to show.:grumpy: Took the stringers out and rounded the tops over, cut the backers for the deck seams (although I didn't take any pics, so I may not have), cut a bulkhead for the bilge, and made a piece for the bow eye reinforcement.
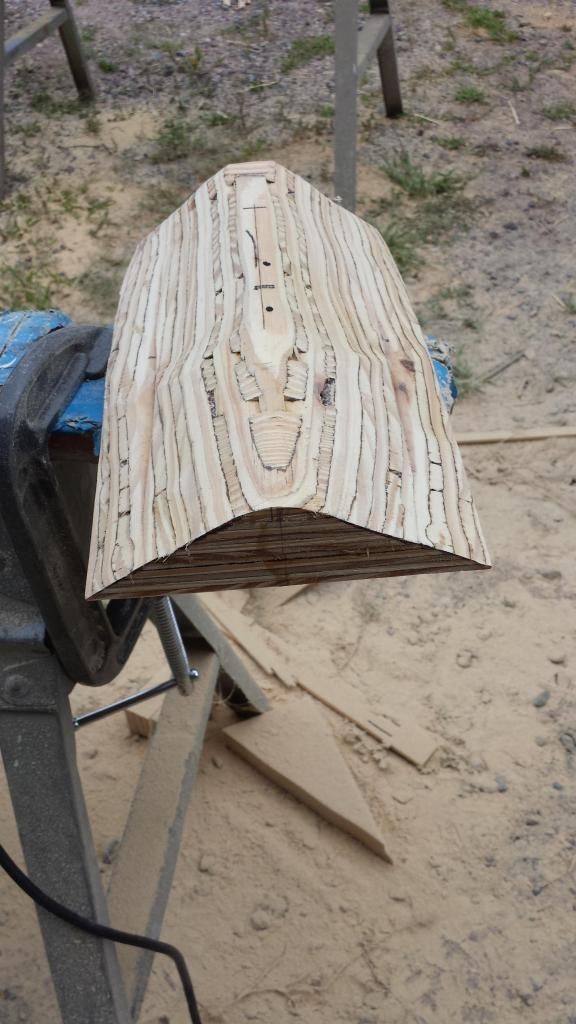


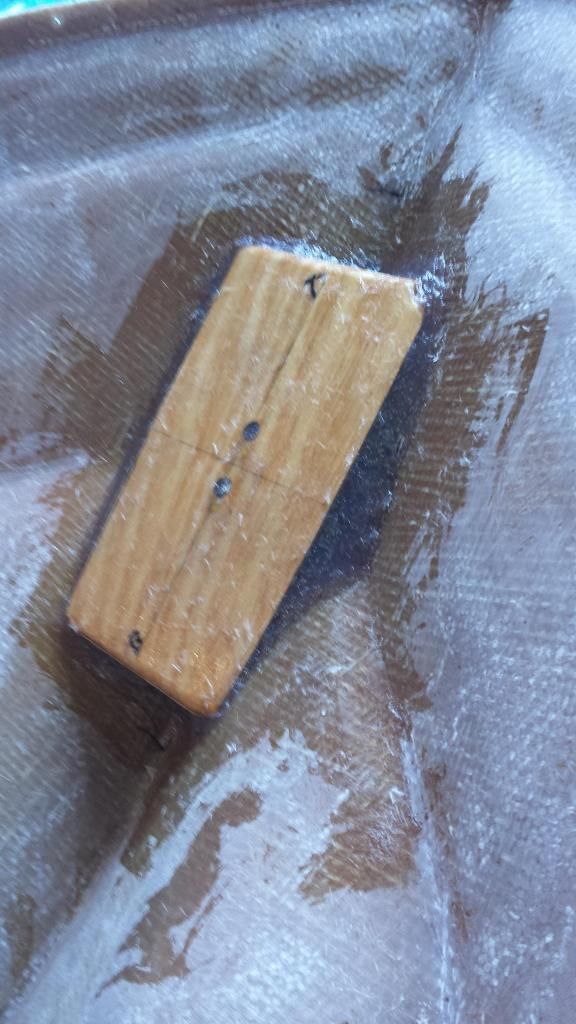
Then, because I wanted to mix some PB to get a feel for it, I decided to mount the bow eye backer. I mixed 100mL at .75% coated the block and let it soak.
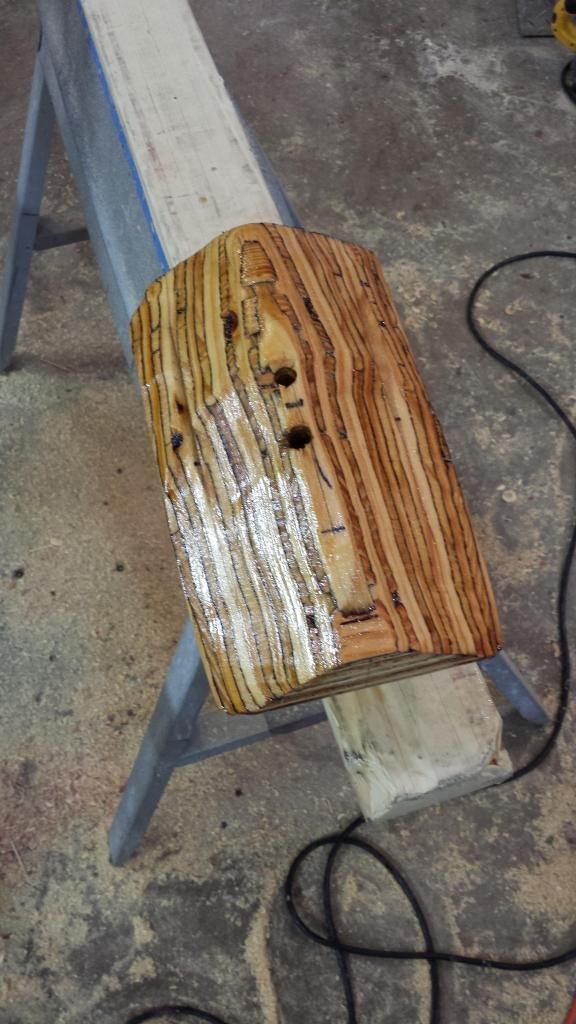


Then mixed up 500mL of PB and mounted the block.
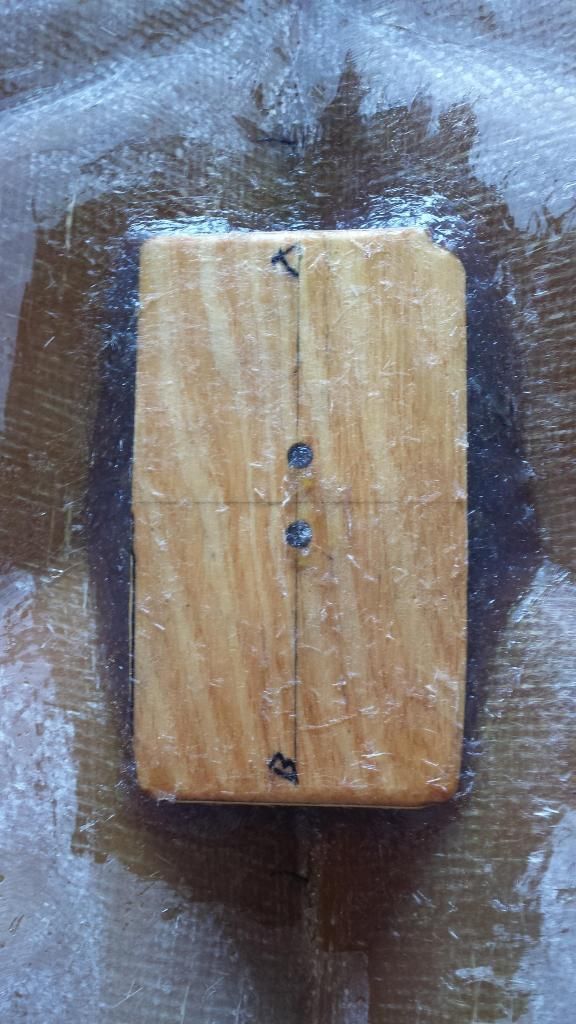


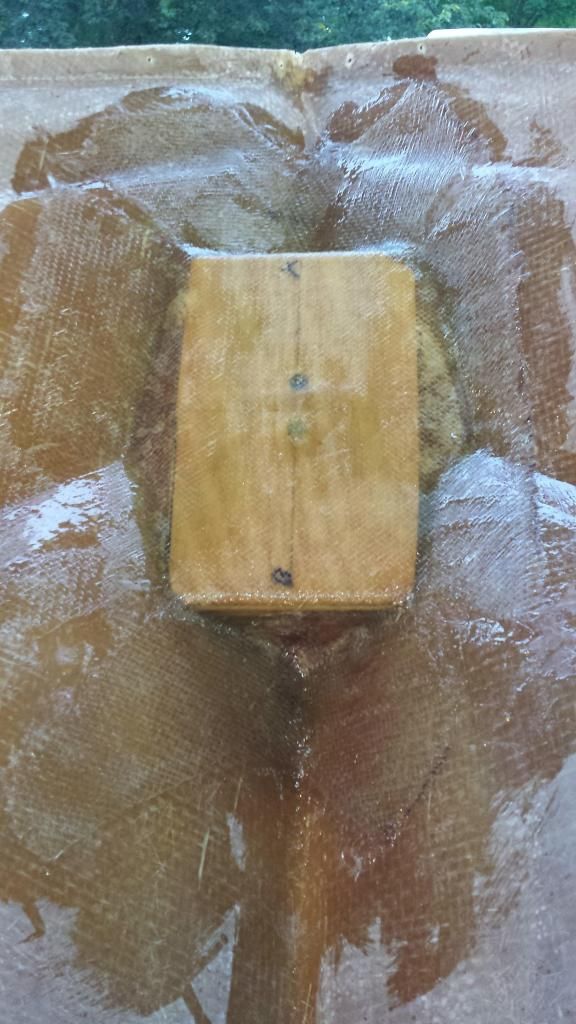
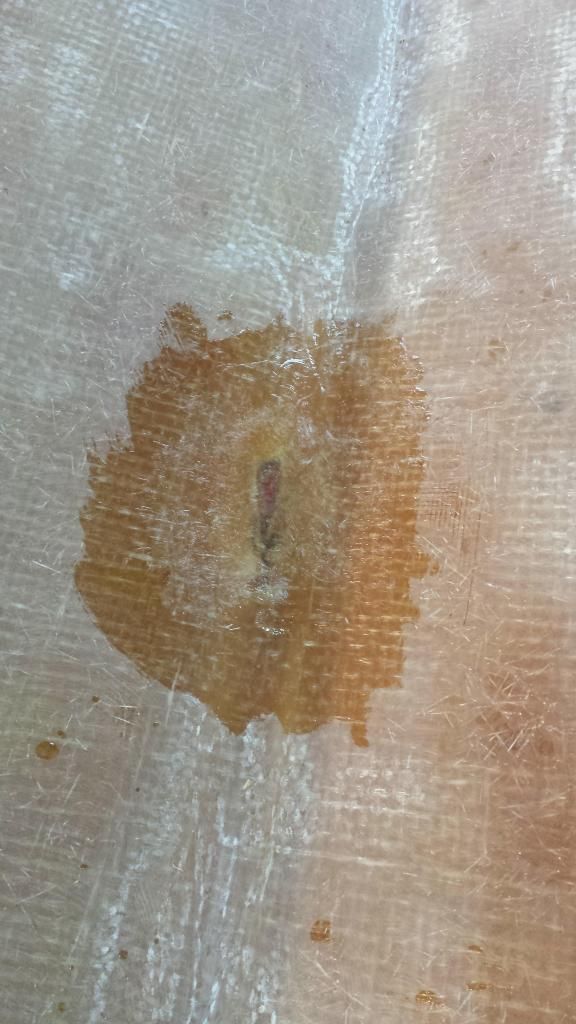
Then I wanted to try laying some cloth, so I cut a layer of CSM and a layer of 1708 to go over the mounting block, as well as three pieces of CSM to go over a hole in the keel.


nurseman

Lieutenant Junior Grade
Joined
Jun 2, 2013
Messages
1,045
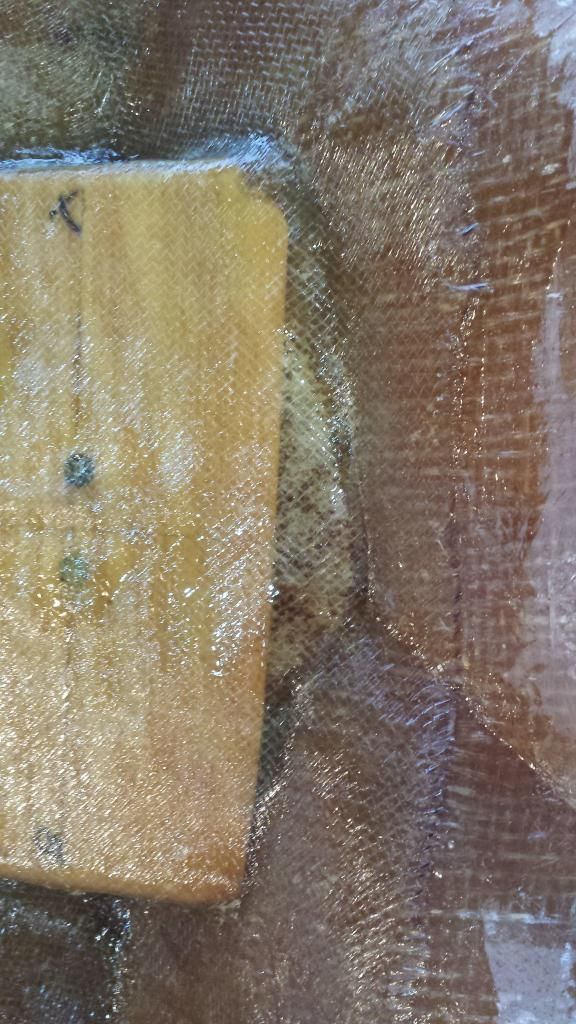
I am not completely thrilled with how the cloth went down on the block. It would seem that I got air in the cloth over where the PB was


Now, since this was my very first time with anything fiberglass, I may have screwed up somewhere. I put the PB under the block, and then filleted the edges. While that was setting, I mixed some resin and started laying the CSM. The PB was still soft while I was doing this, was this an error? Should I have let the PB harden before laying over it? I laid the 1708 as soon as the CSM was down. I don't understand the air in there, because the CSM was completely wetted out, with no air showing, but after I put the 1708 over it, then the air showed up. Perhaps not enough resin?
I just want to figure things out before I do the transom and stringers.
 

zool

Captain
Joined
Aug 19, 2012
Messages
3,432
That looks fine, just grind out the bubbles and spread some pb in the gaps if you like. I like to let the pb set hard before laminating, because I use only a chip brush, I need to dab out the air thru the edges. With the tacky pb, it prolly just sealed the edges, trapping the air..1708 is thick and tough on contours...You get a feel ofr it as you keep going, you will find your groove...that's one stout eye ring backer lol...
 

Rickmerrill

Senior Chief Petty Officer
Joined
Mar 13, 2014
Messages
686
As Zool said, as you practice it just comes together but it's hard to explain in words exactly what is going on. As a novice I may be way off but here is what I think. The PB is just not smooth enough and where the whiteish spots are seem to "line up" with rough spots in the PB. Look at the high spot in the top left corner (post 101 picture 3) about an inch down, at the edge of the wood, it looks like a nib or high spot, then look at the glassed over pic in post 102 picture 1. You can almost see the dry area starting at that spot in the PB. The hills and valleys make it hard to get the resin to fill in when the 1708 wants to bridge the gaps. The mat conformed but the 1708 wasn't able to. Did you smooth out the PB with a spoon dipped in acetone? I think once you have smoother fillets this problem will go away.
 
Last edited:

friderday

Chief Petty Officer
Joined
Apr 1, 2012
Messages
463
Yeah, not wet enough and quite possibly a rough edge or two. Personally, I am a fan of wet layups. I always do fillet and tabbing all at once if possible. This way I don't have to worry about any "nibs" to poke my cloth. In addition, I wet out the first layer of 1708 on another scrap, clean piece of wood or cardboard so I don't have to move it around too much and displace the PB. Try it some time. You may like it after you catch on with the technique. It just saves a sanding step of some pretty tough stuff in prep for cloth. Looks stout, though. Just grind out that white spot a little and fillet a bit more, and maybe a couple layers of cloth, one bigger than the first. It'll be fine.
 

sphelps

Supreme Mariner
Joined
Nov 16, 2011
Messages
11,462
I would say with all the different slopes and angles ya got going on such a small area you did a great job ! We all have trouble with bubbles at first but then start to get a feel for it .. Cut about a 1/2" off tip of your chips brush .. Dab..dab...dab . from the center out ..
The bow eye ain't going nowhere ! Great job !
 

Corjen1

Lieutenant Junior Grade
Joined
Aug 24, 2013
Messages
1,237
Great work Nurseman!!! Everything so far is top quality!!
 

nurseman

Lieutenant Junior Grade
Joined
Jun 2, 2013
Messages
1,045
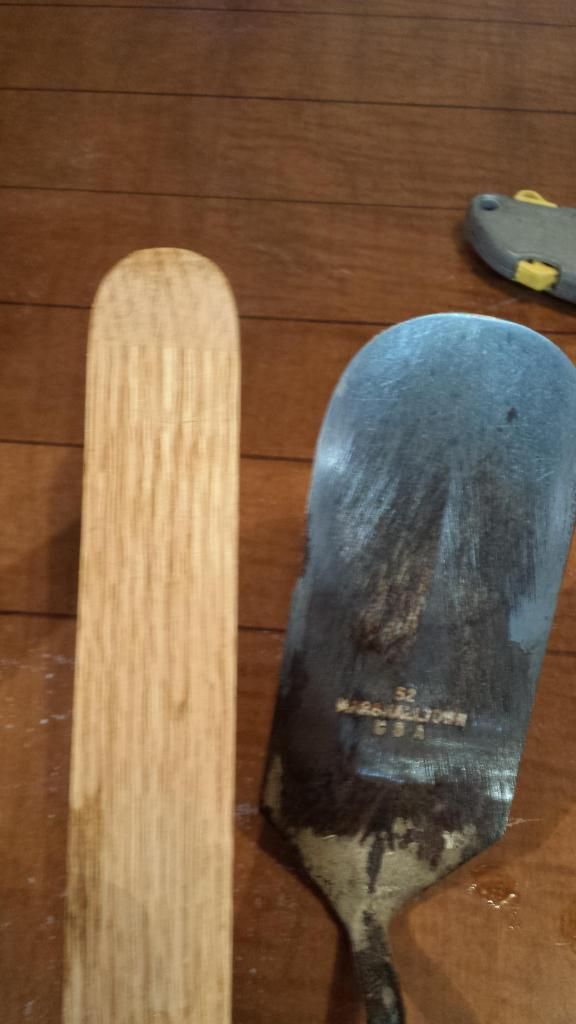
This is what I was using to smooth the fillets, mostly the piece of wood, dipped in acetone.


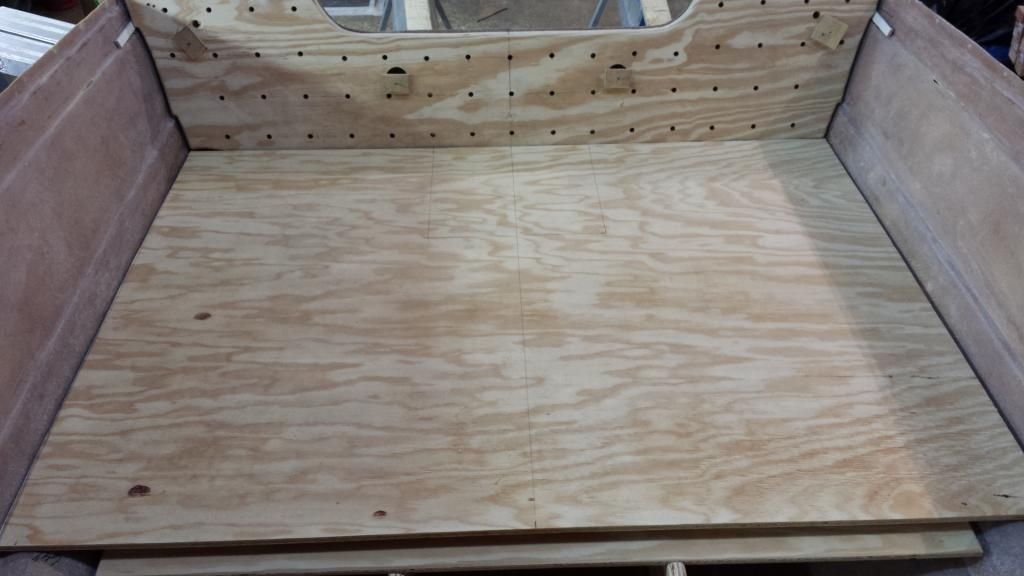
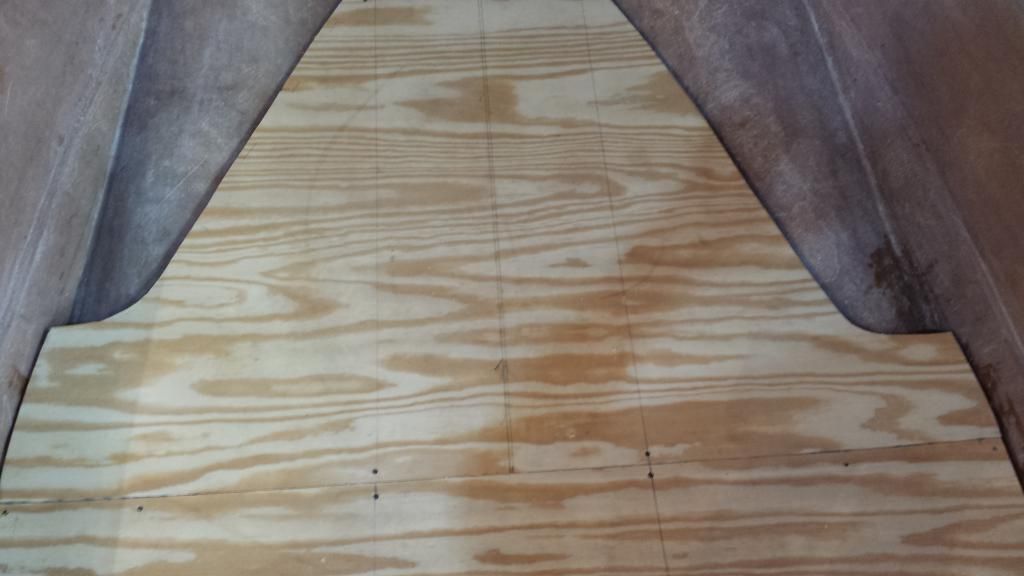
I did some work on cutting the floor today, got this piece cut and fit, and the next one forward as well


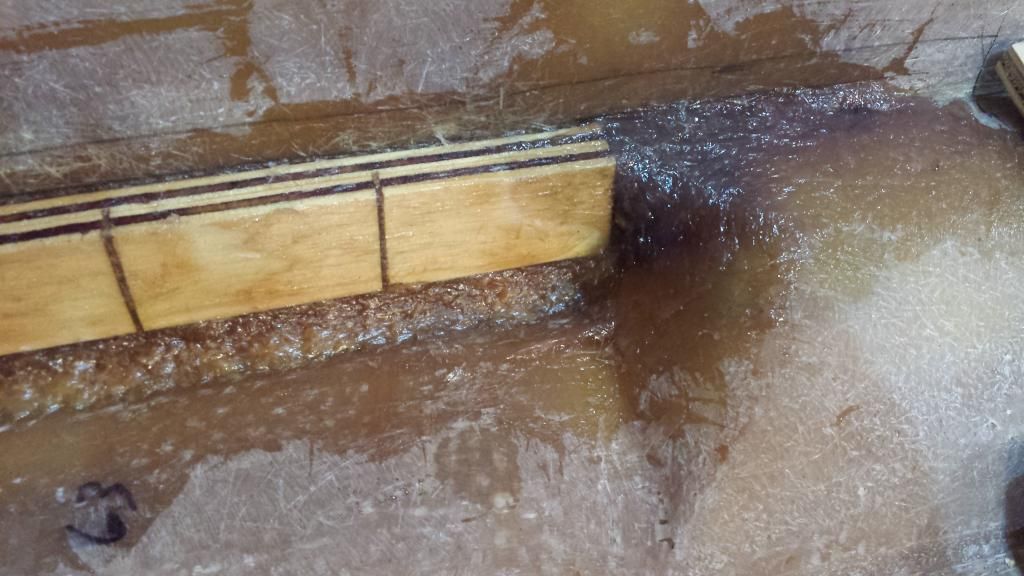
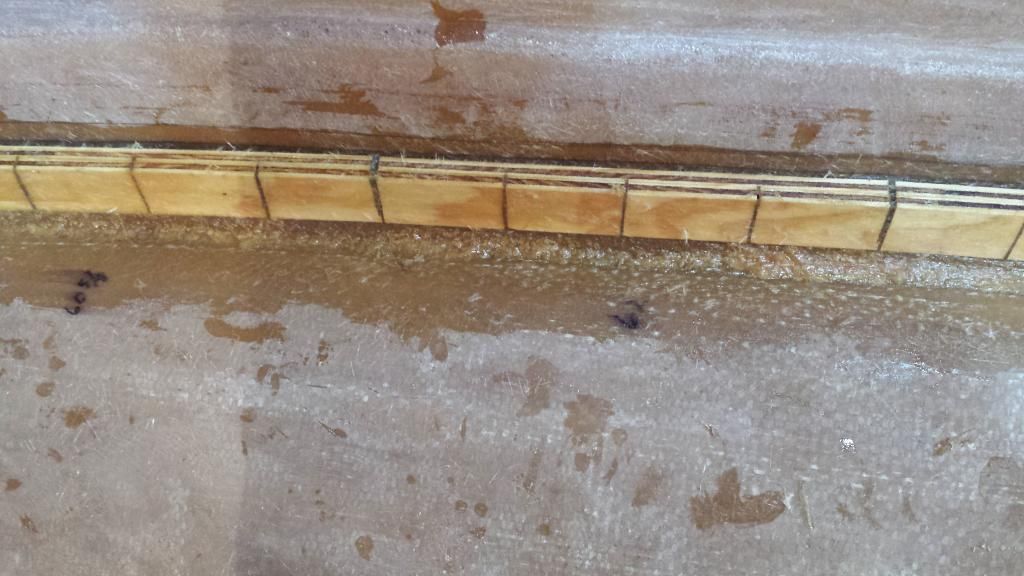
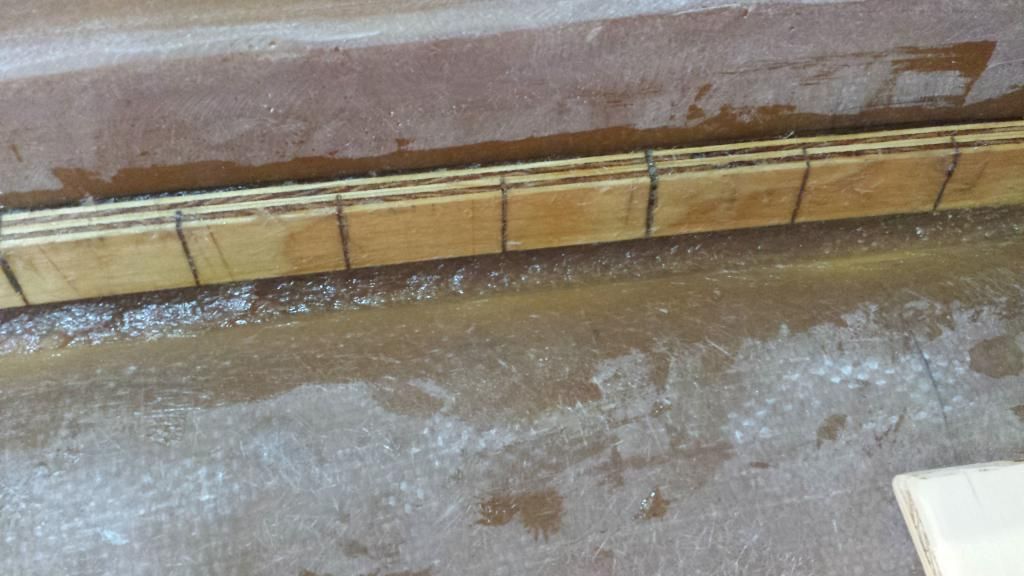
I ended up having to glue a support onto the sides of the hull for the second piece of floor to rest on, so I mixed some hairy PB and stuck them on. I noticed as the PB was kicking off that the same light colored spots were showing up in my fillets. There shouldn't be any air in the PB should there? Does dipping my filleting stick in acetone affect the PB? I am kinda puzzled by the odd color change. I know that the resin changes color when it kicks off, but what would make it look like there is air in it? The fillets feel hard and solid, not hollow like if there was air in them.


another shot of wet PB


and kicked off


Sorry for all of the noob questions.
 

nurseman

Lieutenant Junior Grade
Joined
Jun 2, 2013
Messages
1,045
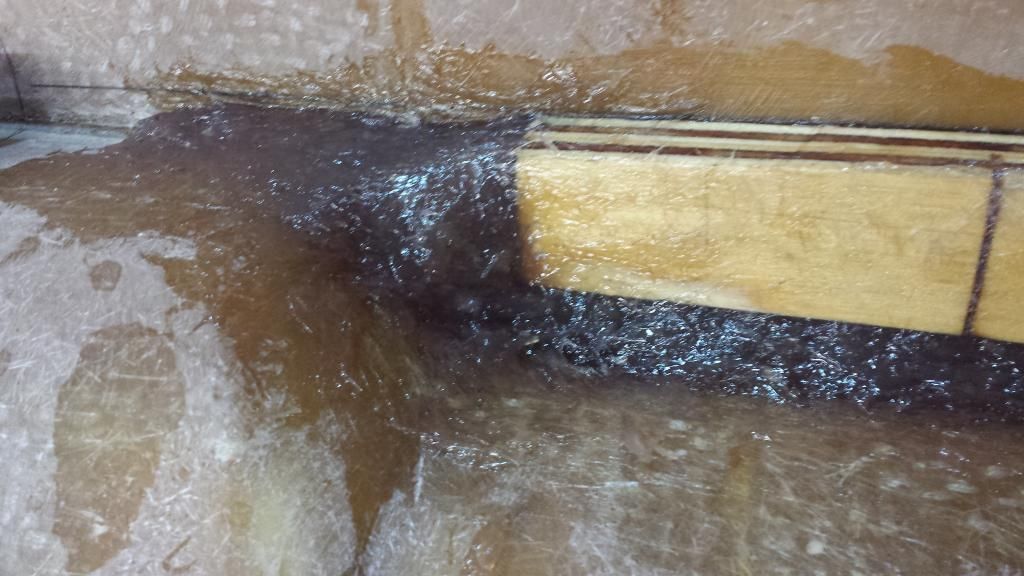
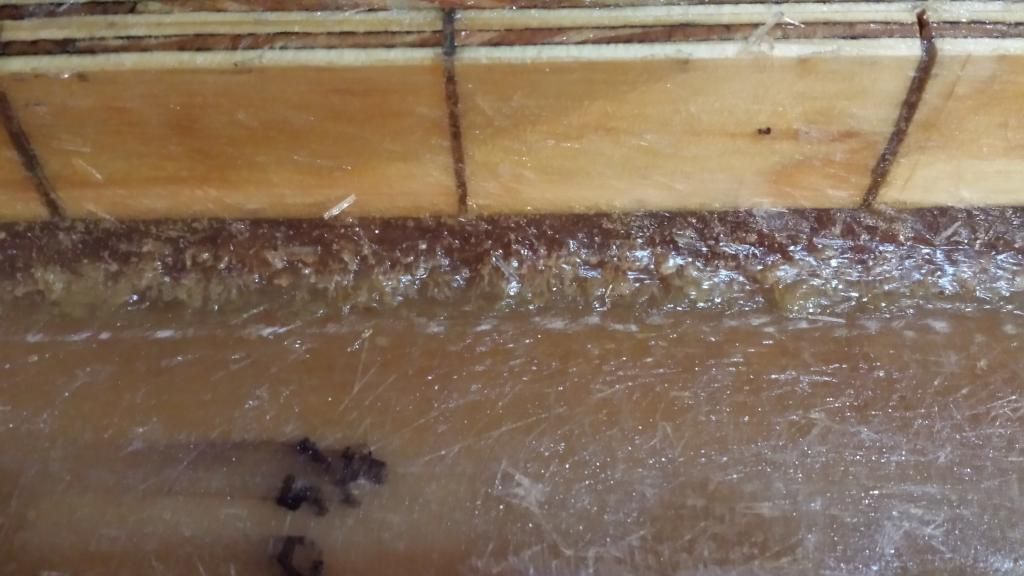
Ok, so I think I may have it figured out. I just went back out and checked it, and the first side I tooled the fillets quite a bit, trying to get them nice and smooth, but the second side I didn't tool them as much. Here are the two sides to compare

Side one (starboard) This is the same side that I showed in the previous post


And now the port side


Both sides were kicked off and nice and hard, but the side that I tooled less is much more uniform in color. It seems to me that the extra tooling on the starboard side is the culprit, because that is the only variable between the two sides. Any thoughts?
 
Last edited:

Rickmerrill

Senior Chief Petty Officer
Joined
Mar 13, 2014
Messages
686
The noob questions are great and many learn from them. Can you tell us what ratios of resin/cabosil/chopped fibers/MEKP you are using, in what order you added the ingredients, the timing between adding each ingredient and how you mixed it? Also what prep did you do to the surface before applying the PB? As long as you have a light film of acetone on your spreader, just to help it slide across better, I haven't seen acetone cause any problems. It won't help with this problem but try to match the size of the tool used for spreading to the size of the fillet you want to create. For example a large plastic serving/mixing spoon for the bottom fillet and a bondo spreader for the larger mass of PB on the end. I use tongue depressors, tea spoons, table spoons, serving spoons and bondo spreaders depending. You want that PB pretty smooth.
 
Last edited:

jigngrub

Fleet Admiral
Joined
Mar 19, 2011
Messages
8,155
As usual, your work looks great!

You may want to consider adding a cheap stainless steel tablespoon and teaspoon to your filleting tool collection.
 

sphelps

Supreme Mariner
Joined
Nov 16, 2011
Messages
11,462
Did you use the same amount of fibers in the pb or was this all from the same batch ? It all looks pretty good from th pics ..
 

Woodonglass

Supreme Mariner
Joined
Dec 29, 2009
Messages
25,927
Your fillets don't have to be all that big but they do need to be smooth. Don't want any nubs sticking up when it's time to lay the glass. Putting your PB in a ZipLoc and cutting off a corner really helps give you a uniform squeeze out and makes it easier to fillet. A teflon spoon is My Weapon of choice followed up with a bondo spreader to knock of the ridges and nubs. In the beginning you WILL tend to overwork things. Just try to lay it down, smooth it out and move on. Confidences will bring faster results. I'm not seeing anything that's of concern. If your working times are working for you then keep on keeping on.
 

wango

Cadet
Joined
Jul 24, 2011
Messages
8
I don't know anything about fiberglass, but you got some mad skills nurseman! Great work and I am jealous of the clamps
 

nurseman

Lieutenant Junior Grade
Joined
Jun 2, 2013
Messages
1,045
The noob questions are great and many learn from them. Can you tell us what ratios of resin/cabosil/chopped fibers/MEKP you are using, in what order you added the ingredients, the timing between adding each ingredient and how you mixed it? Also what prep did you do to the surface before applying the PB? As long as you have a light film of acetone on your spreader, just to help it slide across better, I haven't seen acetone cause any problems. It won't help with this problem but try to match the size of the tool used for spreading to the size of the fillet you want to create. For example a large plastic serving/mixing spoon for the bottom fillet and a bondo spreader for the larger mass of PB on the end. I use tongue depressors, tea spoons, table spoons, serving spoons and bondo spreaders depending. You want that PB pretty smooth.

I have been starting with 500mL of resin, adding 1/2 cup of 1/4" chopped fibers, let it sit for about 10 min to get wet. I have been mixing at 1% ( 5mL) MEKP. Then I add 2 cups of cabosil to get to the PB consistency. I have to admit that the stuff is pretty (very) hairy!!!! Perhaps less chopped fibers? I was under the impression that for things structural, hairy was is what you want.

As usual, your work looks great!

You may want to consider adding a cheap stainless steel tablespoon and teaspoon to your filleting tool collection.

Thanks Jig, it appears that a trip to the dollar store is in order to score some cheap utensils!

Did you use the same amount of fibers in the pb or was this all from the same batch ? It all looks pretty good from th pics ..

Thanks sphelps, yep, I measure each batch out the same.

Your fillets don't have to be all that big but they do need to be smooth. Don't want any nubs sticking up when it's time to lay the glass. Putting your PB in a ZipLoc and cutting off a corner really helps give you a uniform squeeze out and makes it easier to fillet. A teflon spoon is My Weapon of choice followed up with a bondo spreader to knock of the ridges and nubs. In the beginning you WILL tend to overwork things. Just try to lay it down, smooth it out and move on. Confidences will bring faster results. I'm not seeing anything that's of concern. If your working times are working for you then keep on keeping on.

I will definitely try the Ziploc next time I give it a go, You say a teflon spoon is pretty slick? Is it within iboats protocol to "borrow" one from the Admiral? :rolleyes:
 

nurseman

Lieutenant Junior Grade
Joined
Jun 2, 2013
Messages
1,045
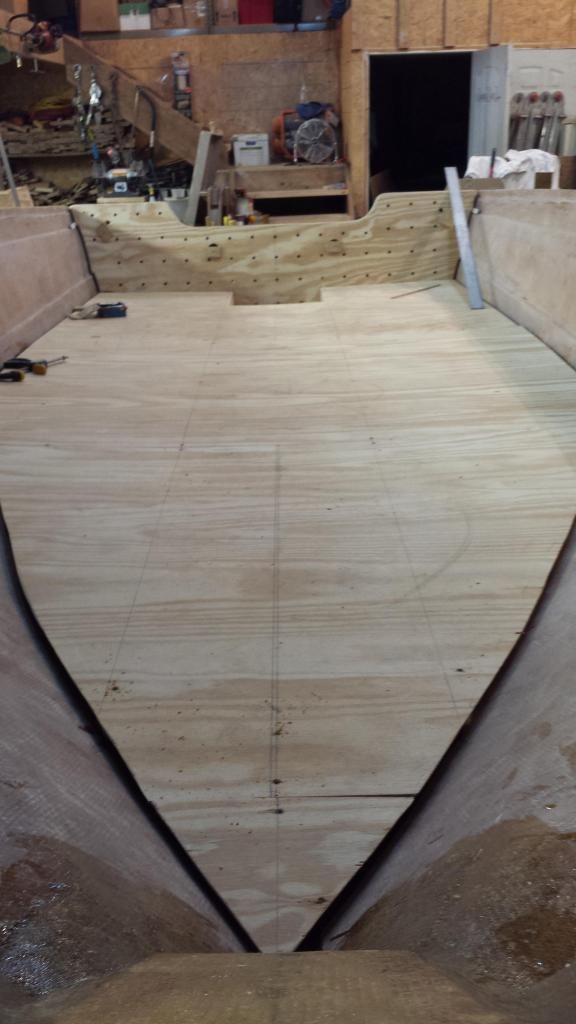
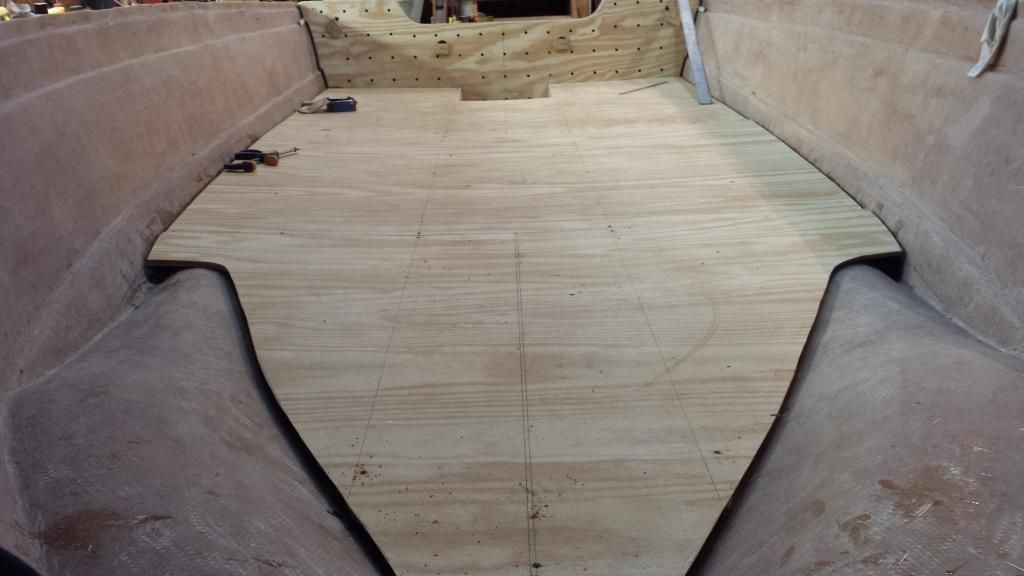
Got the rest of the deck cut and fitted. Not too bad until I got into the bow,


I was truly surprised at how different one side is from the other side.


Tomorrow I am going to cut tabbing for the transom and stringers, if nothing else demands my attention when I get home from work!
 

nurseman

Lieutenant Junior Grade
Joined
Jun 2, 2013
Messages
1,045
I don't know anything about fiberglass, but you got some mad skills nurseman! Great work and I am jealous of the clamps

Thanks wango, I don't know anything about fiberglass either, that's why we are on this forum!! The people on here are absolutely awesome when it comes to sharing knowledge and helping others out with their projects. You should talk to sphelps and friderday, they both have a BIG case of clamp envy!!!:lol:
 

nurseman

Lieutenant Junior Grade
Joined
Jun 2, 2013
Messages
1,045
This is an amazing read and great work. I am learning from this. Thanks.

Thanks djm3801! This is my first attempt at anything like this, so I am learning as I go. Lots of good information on this site.
 

Rickmerrill

Senior Chief Petty Officer
Joined
Mar 13, 2014
Messages
686
Yep less chopped fibers and more cabosil. Wood's recipe is 1 qt of resin, 1.5 qt of cabosil and 1/4 cup (2 oz) of chopped fibers (or 1L resin, 1.5L cabosil and 60ml fibers. My zip lock freezer bags must be weak, they break at that ratio so I usually mix a little closer to 1:1 on the cabosil. And yeah the bag trick helps you meter the PB out so more uniform fillets and less having to work it. About a 3/4" hole in the corner of the bag. You'll be amazed how much easier the PB will be to work once you remove some of the hairy. I think utensil protocol allows spoon stealing but not cake decorating bags.
 
Last edited:
Top