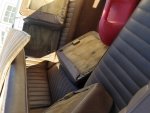
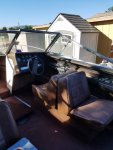
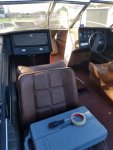
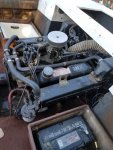
76 Hammond El Dorado V1950 Restoration

devildogae

Petty Officer 2nd Class
Joined
Jan 14, 2017
Messages
147
Did you just re-gel coat below the water line, or entire hull? Plans on doing the cap?
 

52FordF2

Petty Officer 1st Class
Joined
May 31, 2013
Messages
372
Nice heearing from ya all. I know about the knee an hip problems.

Will be to the waterline. At the moment just the transom. Now the assembly begins, after that a sanding and Gel party
 

52FordF2

Petty Officer 1st Class
Joined
May 31, 2013
Messages
372
I may have just join the Vroom Vroom puttputtputtputt group :peep:

20170606_205059_resizeda.jpg

20170606_210718_resizeda.jpg

Steering installed

Next Trim Pump and attachments to it.
 
Last edited:

Watermann

Starmada Splash of the Year 2014
Joined
Jan 12, 2013
Messages
13,787
Hey there's no shame in our motor boat put put club but some video of it would be priceless. :heh:
 

52FordF2

Petty Officer 1st Class
Joined
May 31, 2013
Messages
372
No Title

photo270645.jpg photo270645.jpg

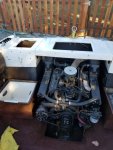
Been working, got a little photo270646.jpg photo270646.jpg more done. Mounted trim pump and the batteries arraignment. Also did the Battery Switch and the Wye Pipe.
can now start mounting the engine. :cool:
 

Attachments

  • attach10451719.jpg
    attach10451719.jpg
    336.7 KB · Views: 1
Last edited:

Watermann

Starmada Splash of the Year 2014
Joined
Jan 12, 2013
Messages
13,787
Oh now there's a big milestone right there!

fetch
 

Kurt2112au

Cadet
Joined
Jul 19, 2017
Messages
11
Hello 52FordF2,
I just bought the same boat, but I must say in much better shape, just needs some loving care, I hoping you can help me out, the panel with all the rocker switches has worn out, and I cant read what they are for, I guess I could try them all and see what they do if they still work, was wondering what your panel looks like, did it have all the writing still on it, and if so do you have a picture of it? I also got a couple of folders with the boat with the manual for the motor and other parts of the boat I would be happy to share with you what I have.

Thanks,
Kurt
 

52FordF2

Petty Officer 1st Class
Joined
May 31, 2013
Messages
372
No Title

Hey Waterman, even though the engine is nearly ready to drop in probably wont be for a few weeks. Going to install an oil drain tube adapter. I have the wiring laid out just needs to install it also.

1. Install Bilge Pump and blower.
2. Install engine
3. Install wiring and then troubleshoot.
4. Create upholstery panels ( Some panels support electrical switch panels).
5. Finish misc. Gel coat
6. Install Windshield and assorted trim works.
7. Install outdrive

Kurt, my panels did not have any printing on them but I was able to find a photo with some on it.
Switch
1 Accessories On / Off
2. Nav Light/ Anchor Lights On / Off / On
3. Bilge Pump On / Off
4. Blower On / Off
5. Tilt Up/ Down Temp On/ Off / Temp On
6. Trim Up/ Down Temp On / Off / Temp On
7. Horn Temp On / Off
8. Cigar Lighter/ Power Plug


If you are making a new switch panel put a few more On / Off switches for other accessories.
 

Attachments

  • photo272089.jpg
    photo272089.jpg
    17 KB · Views: 2
  • photo272090.jpg
    photo272090.jpg
    24.8 KB · Views: 2

Kurt2112au

Cadet
Joined
Jul 19, 2017
Messages
11
Hello 52,
Thank you very much for this! on another note I cant get the trim to come back up, I can get it down but when I try to get it to rise I hear a clicking sound, does this mean its busted or maybe the switch is bad?T he guy I bought it from says it worked, also the switch for the power tilt is missing and i have no freaking idea what it's supposed to do! Have you been able to find parts for the boat? as I said I have what think is the owners manual, a bunch of photo copied papers in a folder.
Any ways would be great to have a convo with you, you seem to know a lot more about boats then i do =0) if you can spare some time for a quick phone convo let me know and I can send you my number through a private message!

Kurt
 

52FordF2

Petty Officer 1st Class
Joined
May 31, 2013
Messages
372
It could be not enough Hydraulic fluid or the Solenoid. Here's a post that is similar

http://forums.iboats.com/forum/engi...8-power-trim-won-t-go-up-on-johnson-115hp-v-4

Have you by passed the Trim switch? just jumpered the Solenoid.

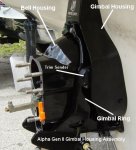
Also what type Gimbal housing you have Trailer/Tilt switch sender on top or on the side Trim sender

20170531_203709_resizeda.jpg AlphaGenII_Prepared_for_drive.jpg

My Trailer/Tilt switch is on top. One of the first things installed before bellows and other misc.
If the Trailer/Tilt switch is on the top may be bad also. After fixing the Trim pump unless you tear it down, you will have to bypass it.

I'll try to get my MC1 outdrive assembly post fixed soon. Darn PB
 

Kurt2112au

Cadet
Joined
Jul 19, 2017
Messages
11
Hello 52,

It was the Solenoid, I jumped the wires last night and it went up, I replaced the Solenoid at the cost of $40 (Napa Auto Parts) which wasn't really all the bad of a cost and now it works! Just have to test the other switch's as the fuel Gage isn't reading and the trim indicators don't tell me if its up or down on the dash. I went through and put the papers in order and found that I have a lot of the manual, I also have the wiring schematic so it should be easy enough to fix the issues.
If you need any of the info let me know and I will put it up here for you
Kurt
 

52FordF2

Petty Officer 1st Class
Joined
May 31, 2013
Messages
372
Where you at?

I'm in Louisville, KY, but sometimes around Bloomington, IN. I live half-N-half (half the time here then haft the time there)
If I'm not on travel working somewhere in the world.

Post some Photos of your boat we all love Boat Porn :eek: :rolleyes::lol:
 

Kurt2112au

Cadet
Joined
Jul 19, 2017
Messages
11
I live in Gilroy Ca, about 50 minutes south of San Fran.

And I will take some pics and post.

How did you get your window to work correctly, you posted something about it in an earlier post, and I didnt understand what you did see pics
 

Kurt2112au

Cadet
Joined
Jul 19, 2017
Messages
11
No Title

Ok so I screwed up above here are some picture about my question above
 

Attachments

  • photo272459.jpg
    photo272459.jpg
    80.8 KB · Views: 2
  • photo272460.jpg
    photo272460.jpg
    85.7 KB · Views: 2
  • photo272461.jpg
    photo272461.jpg
    87.3 KB · Views: 2

Kurt2112au

Cadet
Joined
Jul 19, 2017
Messages
11
No Title

Some other pics
 

Attachments

  • photo272460.jpg
    photo272460.jpg
    85.7 KB · Views: 2
  • photo272462.jpg
    photo272462.jpg
    49.8 KB · Views: 1
  • photo272463.jpg
    photo272463.jpg
    66.8 KB · Views: 1
  • photo272464.jpg
    photo272464.jpg
    67.2 KB · Views: 1
  • photo272465.jpg
    photo272465.jpg
    70.7 KB · Views: 1
  • photo272466.jpg
    photo272466.jpg
    90.5 KB · Views: 2
  • photo272467.jpg
    photo272467.jpg
    67.1 KB · Views: 2
  • photo272468.jpg
    photo272468.jpg
    63.4 KB · Views: 3
  • photo272469.jpg
    photo272469.jpg
    84.2 KB · Views: 2

52FordF2

Petty Officer 1st Class
Joined
May 31, 2013
Messages
372
Kurt,
Was up at Alameda at the USCG island for a week working on equipment last week of June. If I have another trip there I'll contact you.

Have not installed the window yet. My floor substructure was rotten and I had to replace it all. It looks like you may have the same issues that I have.
I would check all stringer, transom and motor mounts.1/4 dia drill bit, 1/2 to 3/4 deep, from the inside.
It could also be how the Tee bolts are on the window.
My fuel tank also had holes in it. Had to replace.

Are the hold down nuts loose?
Is there a gap on port or starboard side?

When I'll install my window I can then adjust the gap. Window hold down nuts are accessible under dash and glove box.

20170606_214241_resizeda.jpg

This is the trim sender that indicates whether it is up or down. One wire is ground the other connects to the dash gauge. You can back off the large nut, then unscrew the sender assembly.

Also you may want to start you own thread/post on you boat for what you may be planning. It keep all your questions and progress together. If you rip out take plenty of measurements. You may want to decap also, it was a pain doing the under side of the bow. I'll try to correct all my photo links because of the photbucket issues soon.

Glad you posted some upholstery shots I was missing all hatch covers. The rear sundeck I'm going to use multiple pieces of 1/8 to 1/4 inch ply glued together to fit the curved surface.

I don't know if you are going to do my route, changing upholstery panels, switch/ dash panel and glove box. may be able to send some small items that I am not going to use
Also how is that Ski pylon mounted in the rear? May want to do one.
 

52FordF2

Petty Officer 1st Class
Joined
May 31, 2013
Messages
372
For the switches you could go to a local marina shop. I replaced all of mine

20170530_222940_resizeda.jpg

Toggles lite up, also a USB and power outlet. Make sure their waterproof.

Yes I know the Accessory is not installed.:watermelon: Did not know the type switch at that time :watermelon:
 

52FordF2

Petty Officer 1st Class
Joined
May 31, 2013
Messages
372
Kurt, is the USCG label readable?

Its is on one or the other side of the steering wheel. Can you send me a good image of it
 
Top