76 Hammond El Dorado V1950 Restoration

52FordF2

Petty Officer 1st Class
Joined
May 31, 2013
Messages
372
Even though I don't have any foam, I have been keeping busy.

20151008_191704_007b.jpg

Cut fuel tank lid. I used the concrete ballast to hold the plastic and wood pucks down while foaming.

20151015_135821_007b.jpg

Made locker boxes and wood pieces that courtesy lights would mount to under the side trays. The back need to be raised up before I can screw the boxes to. My work bench has made the section sag a little. The FG of the transom didn't affect it any.

20151015_195816_006.jpeg

Planning on laying wood where rub rail, swim platform/ ladder and tie downs mount, then Foaming, FGing the floor.

Better not forget the engine mounts, still need to PB then in place.
 
Last edited:

52FordF2

Petty Officer 1st Class
Joined
May 31, 2013
Messages
372
Well got the Fuel Bay Gel Coated

20151020_194137c.jpg

Foamed remaining voids in deck and also foamed shims around tank.
After all foaming I did have 1Gallon left.

20151021_192002_007c.jpg

Glued and screwed the tank lid down.

20151021_203559_008c.jpg

Now I can PB pucks back in, clean up deck, CSM it for water proofing, and then Gel Coat it.

Hopefully before it gets to cold

Until next time
 
Last edited:

52FordF2

Petty Officer 1st Class
Joined
May 31, 2013
Messages
372
Been a while, Still at it.

20160504_193831_001_resizeda.jpg

Working on rear lockers at this moment and picked up something that I need to verify whether it will work
20160506_130601_005_resizedc.jpg

I'll keep you posted. I keep thinking that i'll be able to gelcoat the following week, but the details keep stopping me.
 
Last edited:

Watermann

Starmada Splash of the Year 2014
Joined
Jan 12, 2013
Messages
13,787
Hey you're still at it! Work looks good from here but I don't know much about glass or ford motors. :lol:
 

52FordF2

Petty Officer 1st Class
Joined
May 31, 2013
Messages
372
Good to hear from you Water,

It has a broken head bolt in it. Going to see if it will crank, if it does I'll steal the starter off the 52 and do a compression check.

20160506_130911_004_resizeda.jpg

Broken head bolt from starboard head.Its laying by the oil pump.
If it test ok I'll tear down the SB head and check it out a little more.May do a full rebuild, suppose to have about 595 hours on it.
 
Last edited:

52FordF2

Petty Officer 1st Class
Joined
May 31, 2013
Messages
372
Haven't check the compression but it does turn easily.

It looks like it is a newer engine than a 1976. The spark plugs and oil filter are smaller. The rocker arms are a little different also.

I think its at least a 1986 marine built 5.0 engine. It has brass freeze plugs and a few other things that says marine.

All my 76 - 302 parts bolt right up to it. Will need to check firing (351) order. Guess by watching the valves open while cranking. No working Distributer yet.
 

Watermann

Starmada Splash of the Year 2014
Joined
Jan 12, 2013
Messages
13,787
Clean as a whistle inside the motor by the looks of it in the pics. That sure makes things easier.
 

52FordF2

Petty Officer 1st Class
Joined
May 31, 2013
Messages
372
Been doing some of the details

20160526_210832_resizedb.jpg

Been modifying side storage area. It use to narrow down in the front. That's a plastic fence post wrapped in plastic wrap use as the mold.
20160506_130601_005_resizedc.jpg

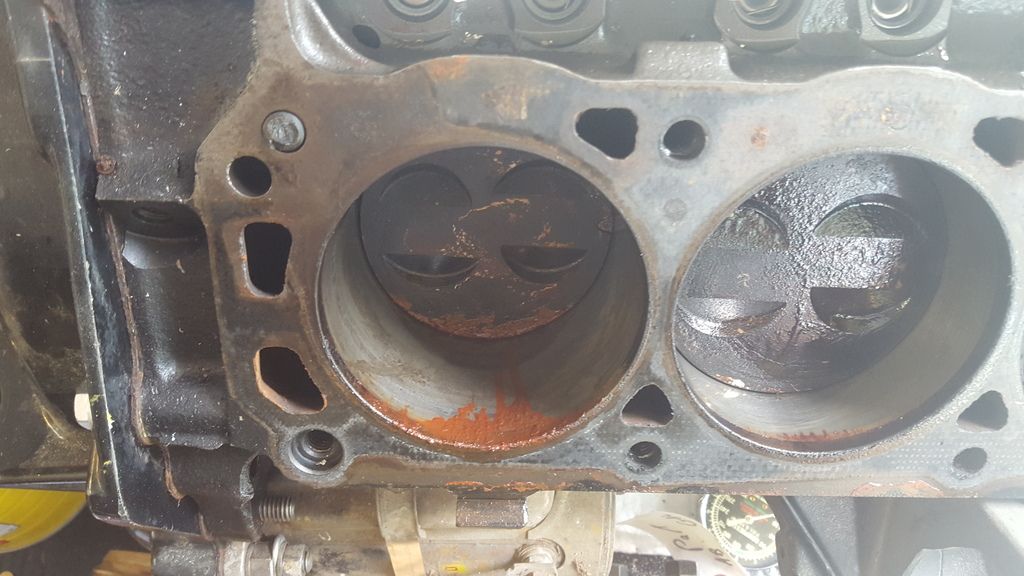
I also was able to crank the engine with a starter. Cylinder #1 to #3 had from 130 to 145 psi, # 4 had about zero psi pressure, was blowing out of broken bolt hole and thru the missing piece of head gasket. Cylinder #5 145 psi, #6 through #8 ranged from 165 to 180 psi. Guess next step is to pull the head and check it out.
 
Last edited:

Watermann

Starmada Splash of the Year 2014
Joined
Jan 12, 2013
Messages
13,787
Looks like it's just us Fitty2 :lol:

You're making that glass work seem easy, it just happens!

Those are some bad compression #s your motor has, hope you get that sorted out.
 

nurseman

Lieutenant Junior Grade
Joined
Jun 2, 2013
Messages
1,045
Same here. I have nothing intelligent to add, so I'm just sitting quietly here in my corner...
 

52FordF2

Petty Officer 1st Class
Joined
May 31, 2013
Messages
372
Water, I kind of screwed up when I typed :facepalm: this.

The pressure reading were actually better than what I typed :watermelon:, They were actually; Cylinder #1 to #3 had from 130 to 145 psi, # 4 had about zero psi pressure, was blowing out of broken bolt hole and thru the missing piece of head gasket. Cylinder #5 145 psi, #6 through #8 ranged from 165 to 180 psi. You thought I had to tear the whole engine down. May still do it though.
 
Last edited:

pckeen

Commander
Joined
Jun 20, 2012
Messages
2,067
Ouch....I see a donor boat in your future....or perhaps a remanufactured powerhead?
 

52FordF2

Petty Officer 1st Class
Joined
May 31, 2013
Messages
372
Still working on the details, finished side trays and cut a few limber holes for drainage.
Yes there should be only two holes :facepalm: I need to plug one up. I also cut drain holes on the inside of the trays so they don't fill up with water.

20160527_195710_resizedea.jpg

Cut some limber holes and cable pathways

20161003_204437_resizede.jpg

The details left is putting seat bases down, cleaning up motor mounts, then sanding and gel coat.
May put another layer of CSM down if it looks like it needs it.

On to the engine


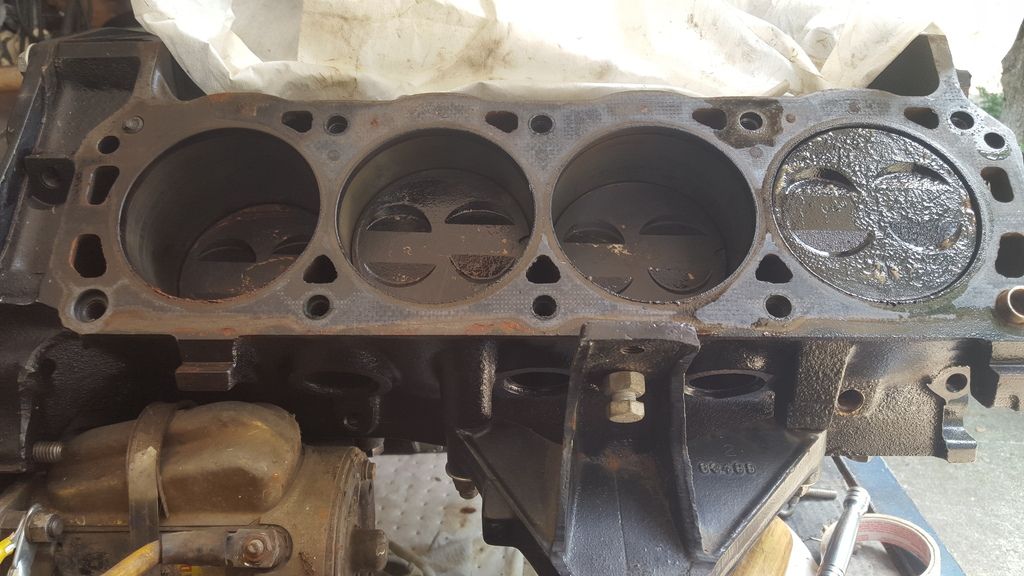
The red rust cleaned up real easy,It was like a Vaseline red gel. I was also able to removed the broken bolt by using a punch to rotate it.

Could the exhaust block have leaked a little water and caused the head gasket and bolt to go?


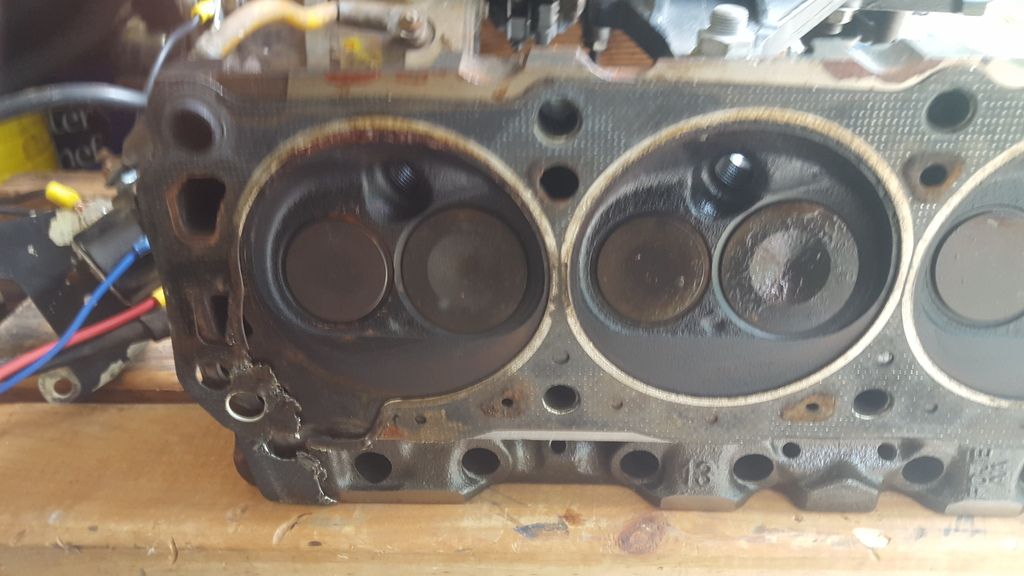
Blown out head gasket, valves looks good.


Engine looks real good. Been wondering if I should pull the other head. That greasy stuff looked like Vaseline

I checked it on my stone with feeler gauges it didn't vary much. I can't get it to a machine shop until Tuesday

I decided that I could not live with the trim switch not working so I'm going to tear back down my transom assembly and rebuild it again.
 
Last edited:

Watermann

Starmada Splash of the Year 2014
Joined
Jan 12, 2013
Messages
13,787
Usually if the exhaust manifold has a leak to where water enters the cylinder while running it can cause some serious problems with varying degrees of hydro lock so I guess it's possible that caused the damage. Does the exhaust value you suspect have ant rust on the face or stem? It looks like in the pic that there's rust on that valve. Be sure to pull your manifolds apart to check the risers,
 

52FordF2

Petty Officer 1st Class
Joined
May 31, 2013
Messages
372
Still here, I was able to finish my motor mounts and bilge plate. Photo's don't want to upload says to large.

:facepalm: First time I didn't pay attention after I placed the wet 1708 on the under side of the motor mount.
It sagged off and hardened, when I noticed it. :facepalm:

Last week, I ground it off and restarted doing it again. Finished it Monday and also did an interior grind to prepare it for Gel.

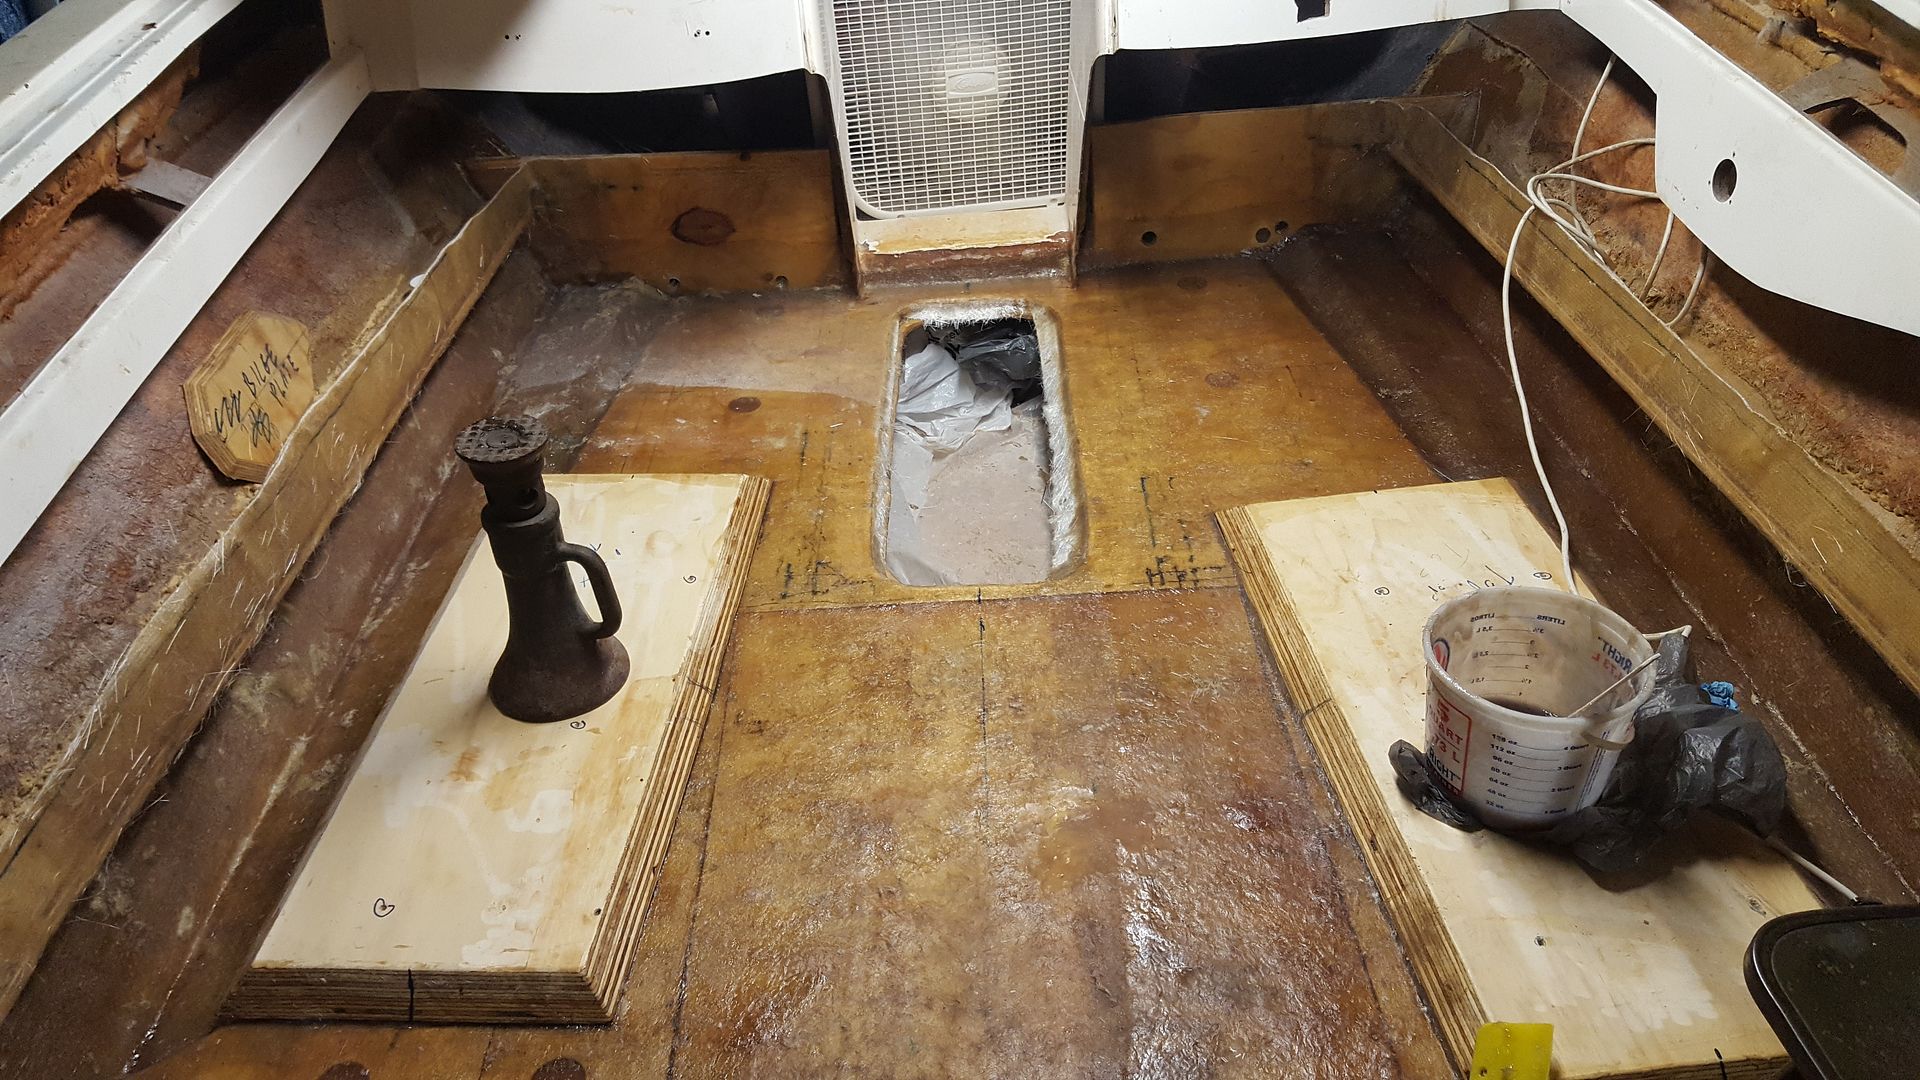
I am also working on some seat bases that are fiber glassed down still need to tab them. That why I needed a grind session. Once the bases are finished it will be another grind session then wash and acetone wipe down.

1. Motor mounts are cleaned up, Bilge plate install with a layer of 1708 and CSM.
2. Seat bases are down, need tabbing and CSM.
3. finish grinding of deck
4. Gelcoat interior
5. Start fixing exterior hinkies ( Keel area, spots here and there) Do I want to run with an ugly brown boat with some scarring?
6. Gel coat/ Paint exterior? (Cover up ugly brown color)?
7. Install transom Assembly
8.Start Upholstery patterns.
9. Steering
10. Motor
11. Wiring
12. Finish trailer (Keel Rollers, Lights)

Should there be anything else ? Got Title
 

52FordF2

Petty Officer 1st Class
Joined
May 31, 2013
Messages
372
20160921_180532_resizedeb.jpg

Motor mounts and bilge plate


Seat Bases need tabbing


Fuel line laid out in position
 
Last edited:
Top