72 Thunderbird Formula w/twin 165hp Mercs

Woodonglass

Supreme Mariner
Joined
Dec 29, 2009
Messages
25,928
Every little bit gets you that much closer to SPLASH!!!! Keep on Keepin' On!!!!;)
 

WOEISMEIGOTTA470

Petty Officer 1st Class
Joined
Aug 31, 2012
Messages
375
Those housings look like new!! How rewarding is it seeing nice clean shiny parts come together on a fresh smooth transom? Outstanding work Mark. My gimbal housing could probably use a repaint, but it's passable for now.
 

Mark72233

Ensign
Joined
Jul 11, 2014
Messages
926
Thanks Woe, I just noticed on my iboats signature I have been promoted to the rank of Chief Petty Officer. Awesome :clap2: when does that pay raise come into effect :rolleyes:. Wood I noticed you're a Supreme Mariner :eek: what kind of pay does that pull in every month :D
 

Woodonglass

Supreme Mariner
Joined
Dec 29, 2009
Messages
25,928
It just means, I'm an Old Dumb Okie that don't know when to keep his mouth shut!!!!:facepalm:
 

mr300z87

Senior Chief Petty Officer
Joined
Sep 15, 2010
Messages
694
Hey Mark congrats on the upgrade!!! Now that boating season is winding down in NJ and my running boat we have been on all summer is coming out of the water soon I will be starting work on project Sea Ray. My outdrive assembly will need to be painted with anti foul since the boat will be slipped in salt water, but I want to have a solid finish for the antifoul to adhere to. You probably mentioned this but what paint did you use on your drive parts?

Keep up the good work, still looking forward to hearing those 6 bangers run.
 

ahmincha

Lieutenant Commander
Joined
Jul 21, 2012
Messages
1,512
Mark it might seem slow going but your work is exceptional and perfection takes time. Keep up the great work
 

archbuilder

Vice Admiral
Joined
Sep 12, 2009
Messages
5,697
Mark, you and Woe are making me feel like a slacker! :D I need to get my butt in gear and get my drive and 6 banger put in! Nice work, keep it up!
 

Mark72233

Ensign
Joined
Jul 11, 2014
Messages
926
Thanks everyone for keeping me motivated. mr300z87, for the engine parts that will be getting really hot I am just using Rustoleum engine primer & then engine paint from a spray can. The parts that aren't going to be getting that hot it is just plain Rustoleum Enamel from a spray can. I clean everything with soap & water, sand it down to get rid of anything that is loose. Clean it again with soap and water and finish with a clean rag and acetone. I prime everything with Rustoleum primer and after a couple of coats I wet sand it smooth before the top coats. I was using the Mercruiser or Quicksilver Phantom Black paint from a spray can but that stuff is expensive and I suspect it is the same as the rustoleum just paying for the brand. I will try this out and hope for the best, if it doesn't last I will try something different. The boat will always go right back on a trailer she wont be in the water more then a day at a time anyway.
 

Mark72233

Ensign
Joined
Jul 11, 2014
Messages
926
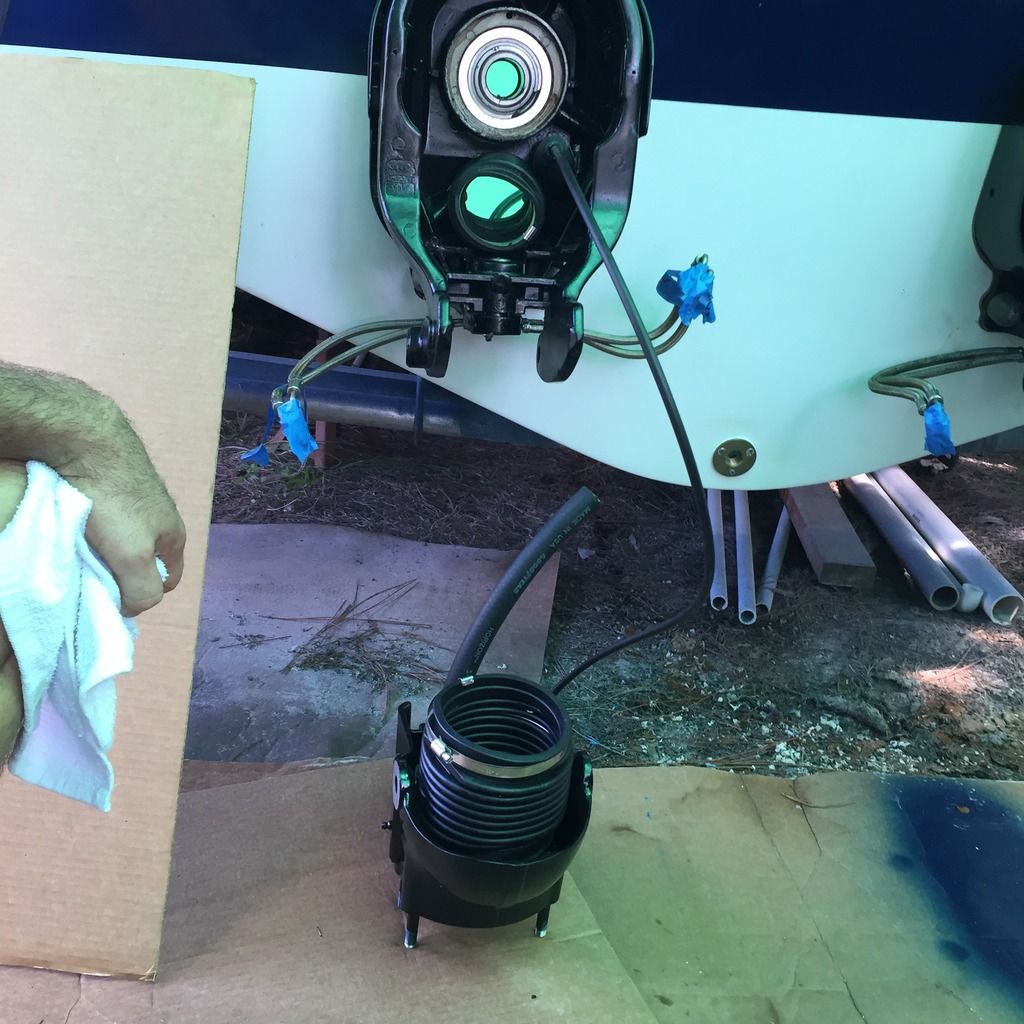
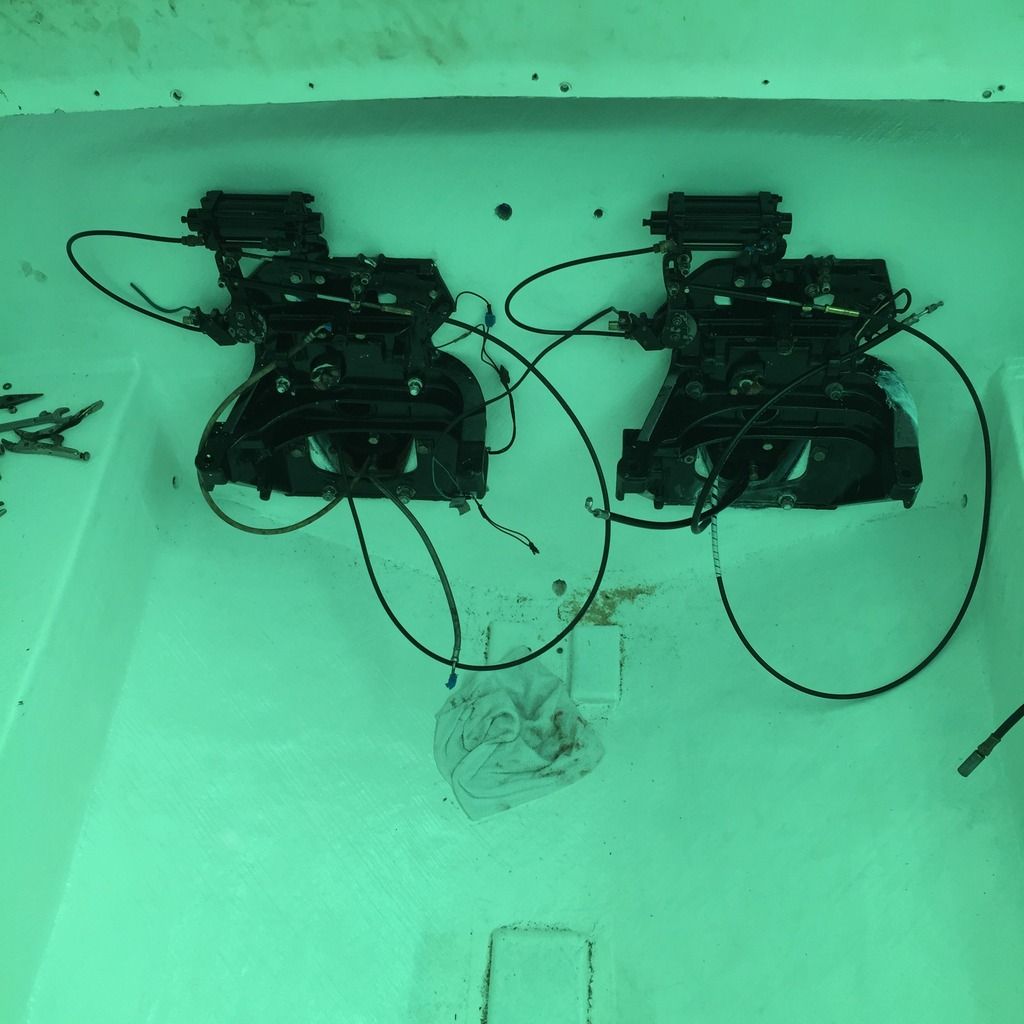
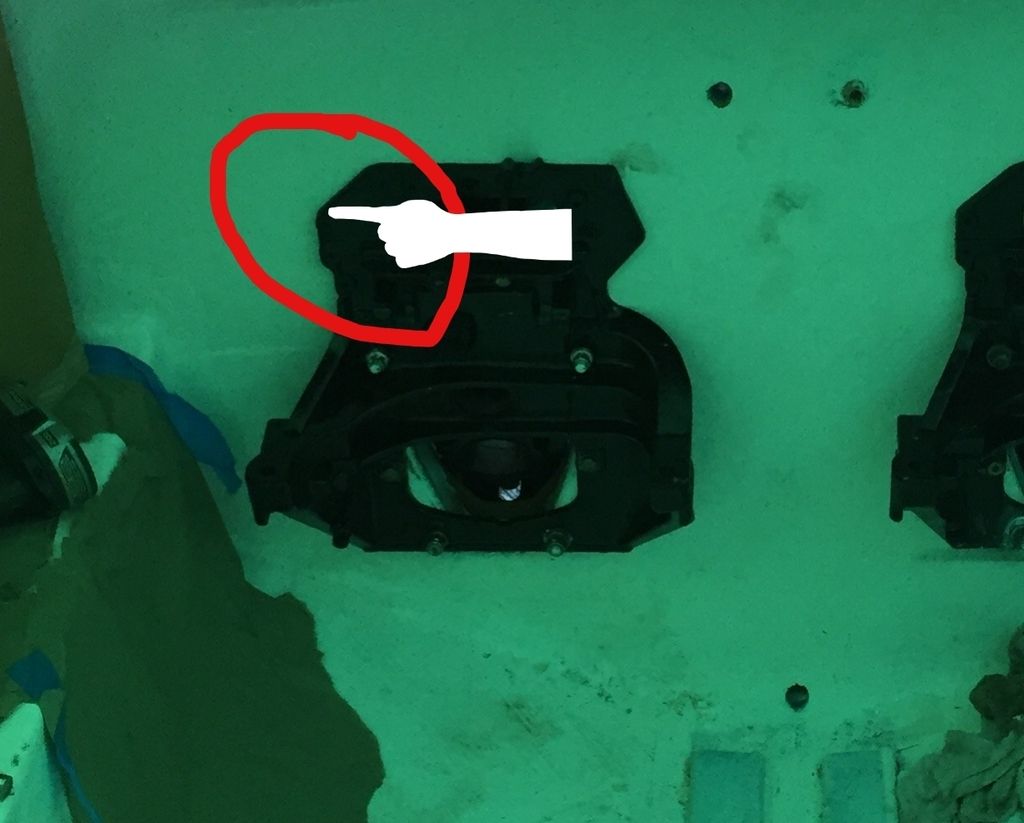
Still moving along here. On Friday I took the second block to the machine shop so they could bore it out .030 over, turns out it was more worn then I thought and they had to bore it .060 over. That should be done this week and I will start rebuilding the second engine next week. I finally got both gimbal housings attached along with all the bellows and a new shift cable for the port engine. I never got a picture of both gimbals attached, this is as close as I can get in a picture.


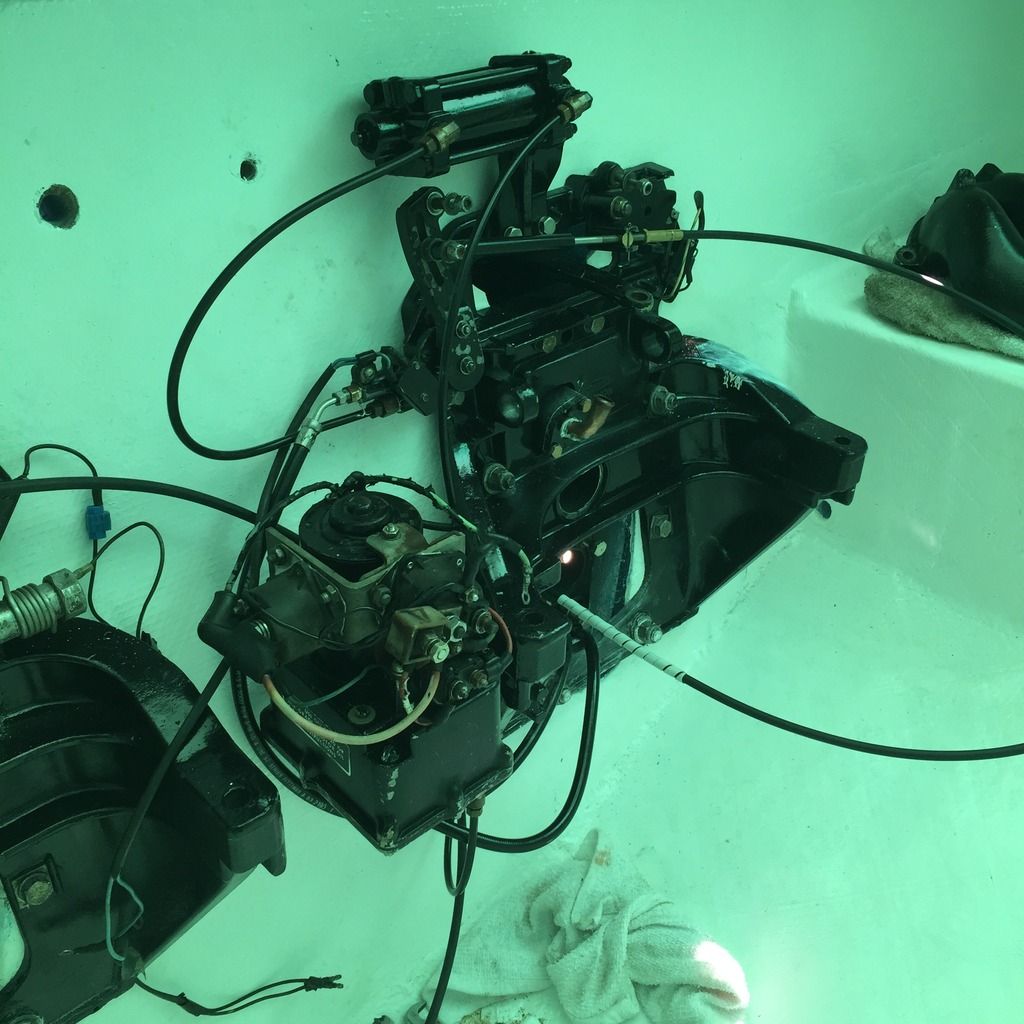
Also did some work on the inside on the transom plates. It was over a year ago when I pulled all this stuff out of the boat, some of it was so corroded I tossed them. Well here it is over a year later and I am trying to remember what went where and to make matters worse I have collected even more parts from the 2 donor engines which had different parts because they were from the late 80's and early 90's boats, so I have to sort through the parts trying to remember what is what. Thankfully I took hundreds of pictures from every angle and as I took each old part off, good thing because I have had to refer to these pictures a lot over the weekend. Attached a bunch of little pieces and parts.


I don't even know what these parts do for sure :facepalm:.

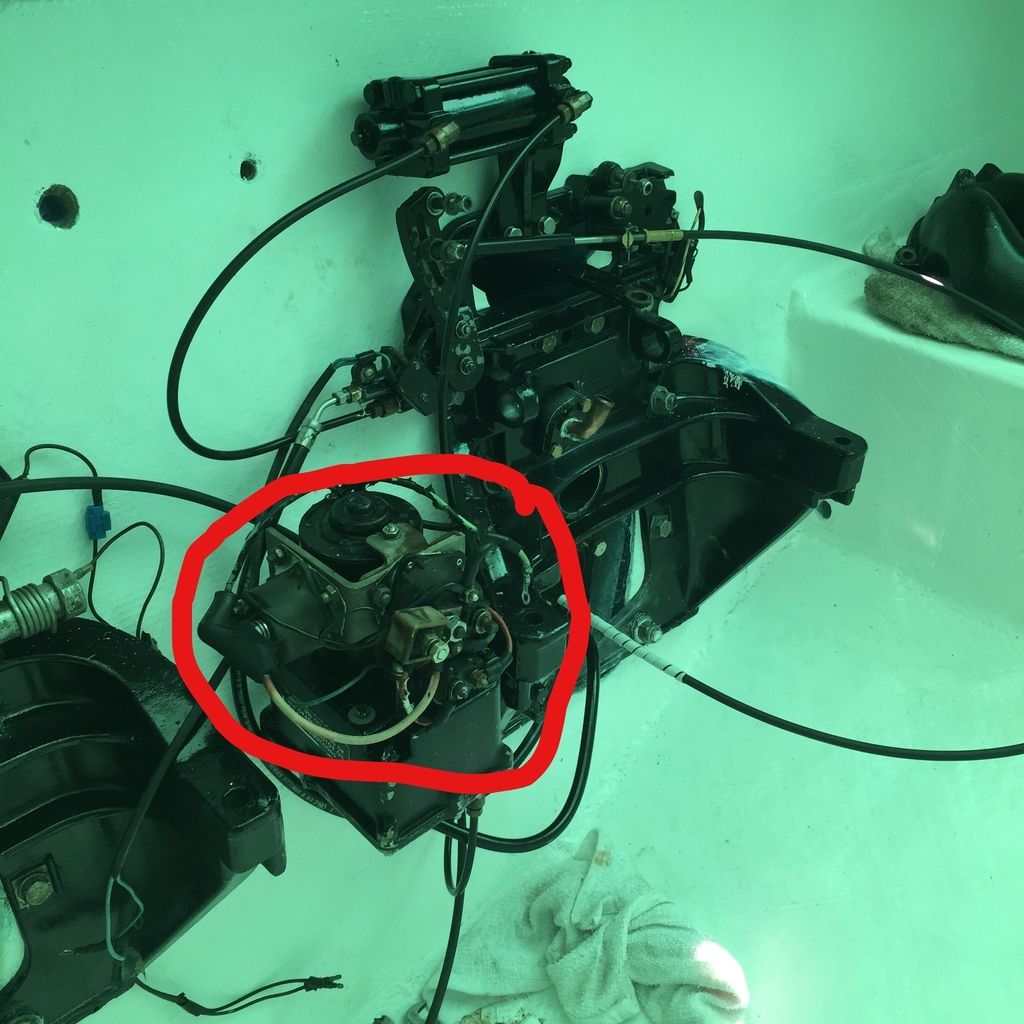
I also attached the port trim motor and all the lines, that was another problem I had even though its a good problem to have. I ended up with 7 trim motors from the old boat, the 2 donor engines, 1 I bought on evil bay and the others from what my dad had squirrelled away. I will definitely use the one I bought from evilbay the other one I just grabbed the prettiest of the group. I have a question on these though. On my old trim motors it only has one solenoid attached to it but these newer versions have 2 solenoids attached to them. If I am guessing right I only need to attach ground, power and the plug and these should be good to go? If that makes any sense.


Mark72233

Ensign
Joined
Jul 11, 2014
Messages
926
I ran into 2 problems on the starboard side. The first I knew was coming and now it is here. The old deck on the port side of the starboard engine the deck had a notch cut out of it about 10"s x 4"s x 3"s deep, which allowed the trim motor room to be mounted.

I didn't make a notch in the new deck, I have a little stand from one of the donor engines that the trim motor will mount onto and then I will just attach that to the deck making sure to seal up any screw that go into the deck.

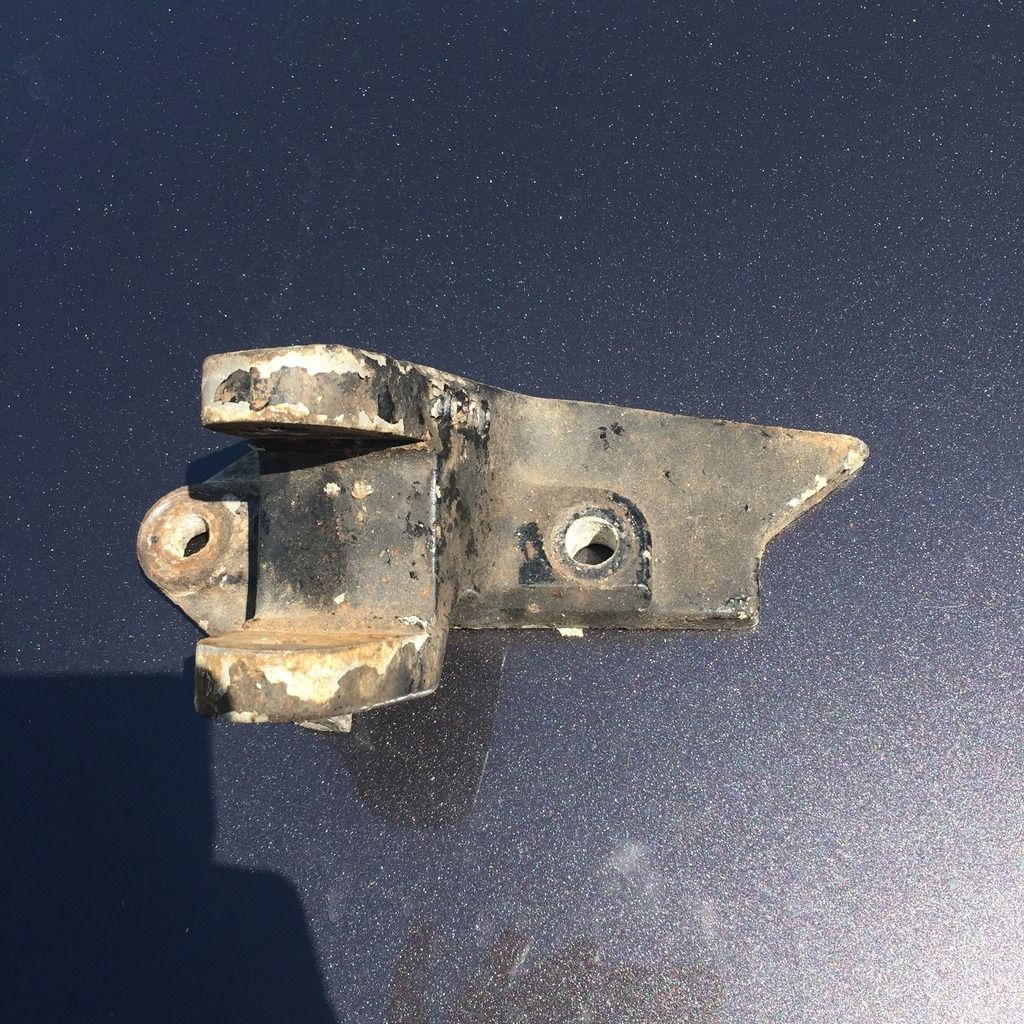
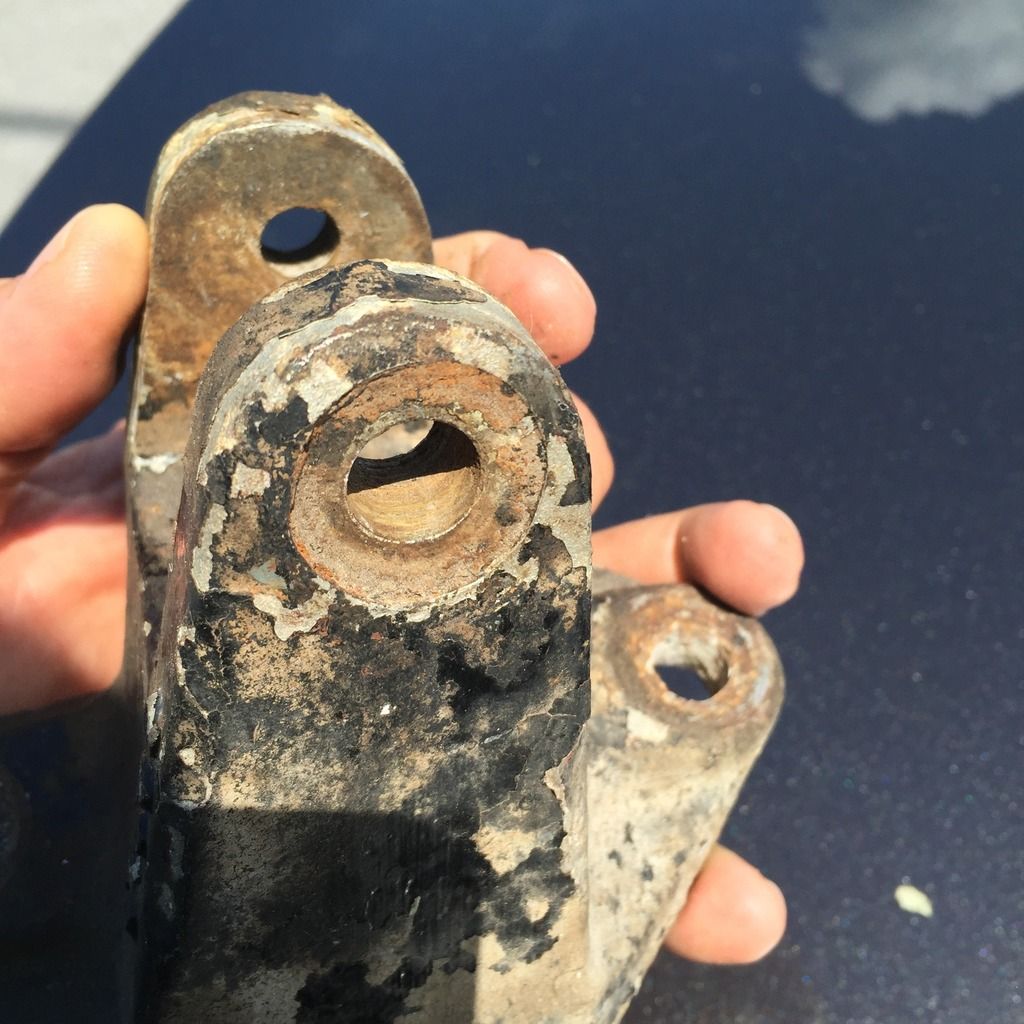
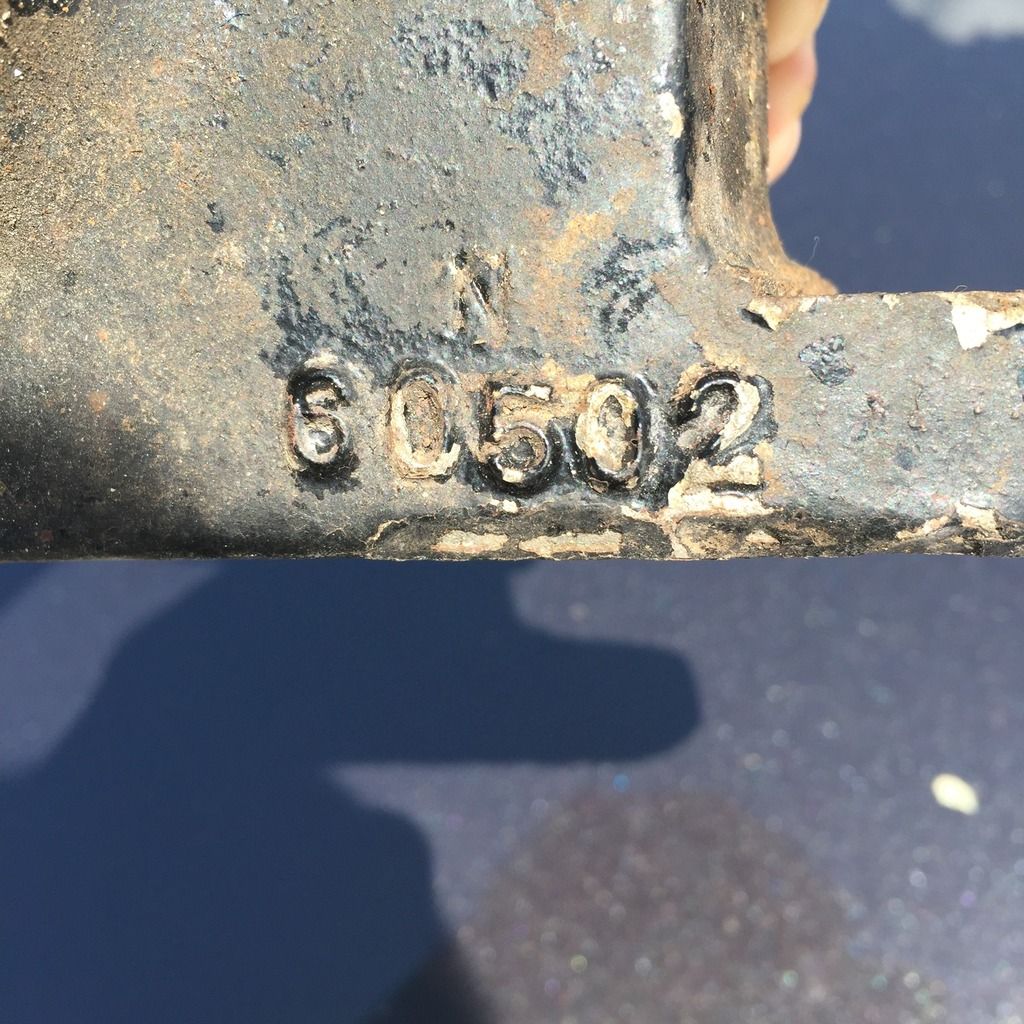
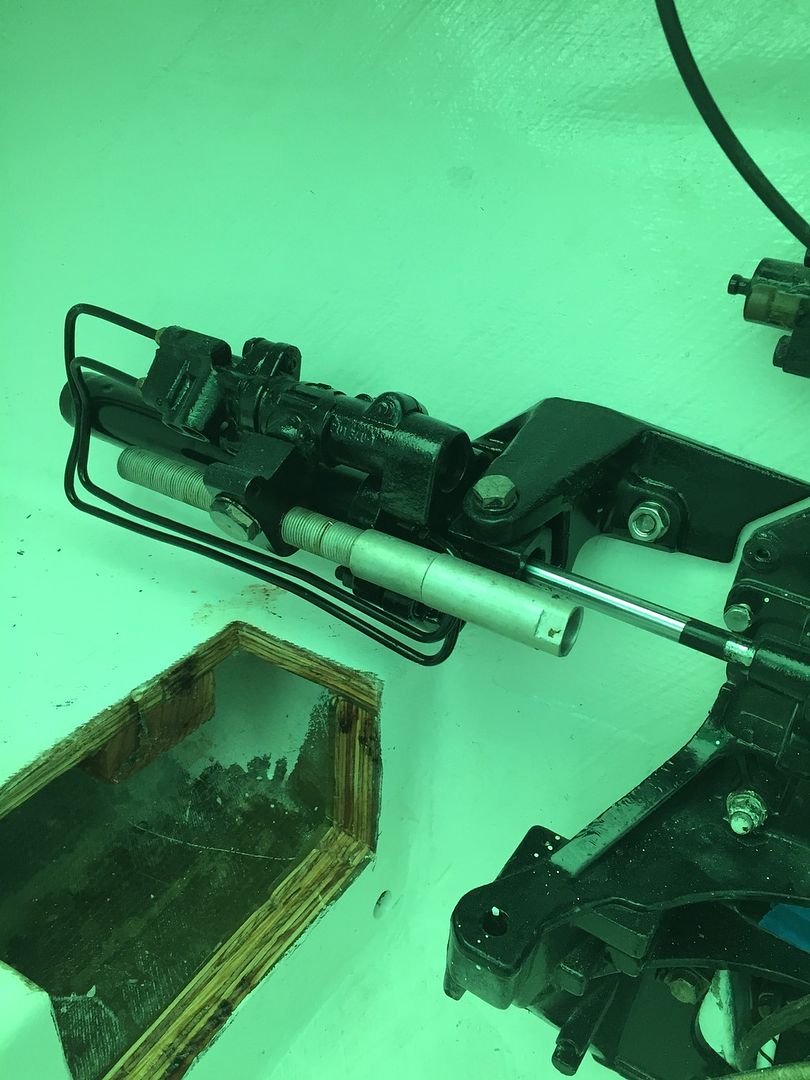
The other problem is with the power steering ram. The old one is a rusted piece of metal with worn parts. I have two other ones again from the donor engines but they are configured differently and attached to the transom plate in such a way that you cant with this in line 6 engine so back to the old one. I disassembled the old one and cleaned all the rust off of it and its starting to look pretty good except the part that the ram attached to is worn out. It has two bolts that go thru the transom with stainless steel lag bolts. The bracket is shaped to conform to the upper port side of the starboard transom plate and then the ram is attached using 2 specialized bolts with tips or studs that lock into the end of the ram and hold it in place. The problem is the bracket that is aluminum the threads for the top bolts are completely corroded away, gone, smooth. Because of these specialized bolts I cant just get a larger bolt and make some new threads it has to be the size of the old bolts. So I guess I need to find a welder who can fix it.


Mark72233

Ensign
Joined
Jul 11, 2014
Messages
926
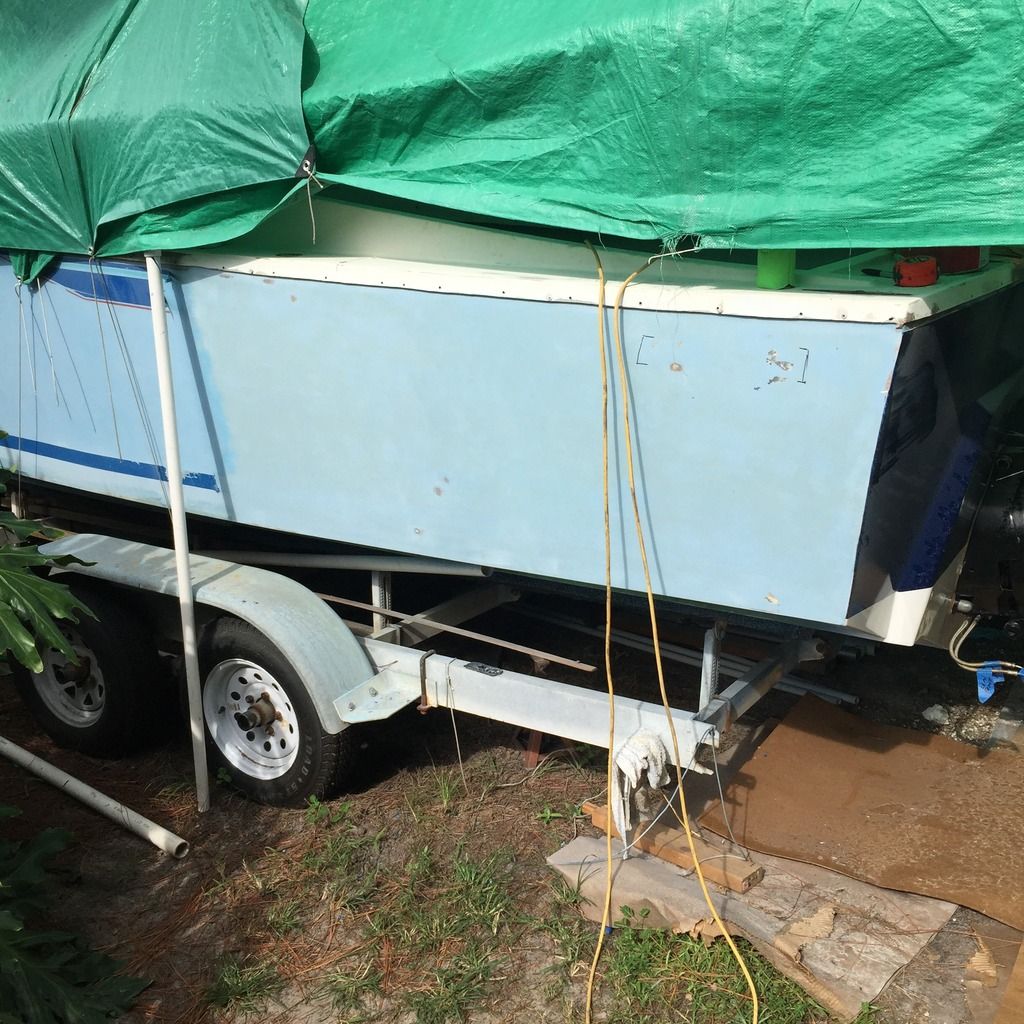
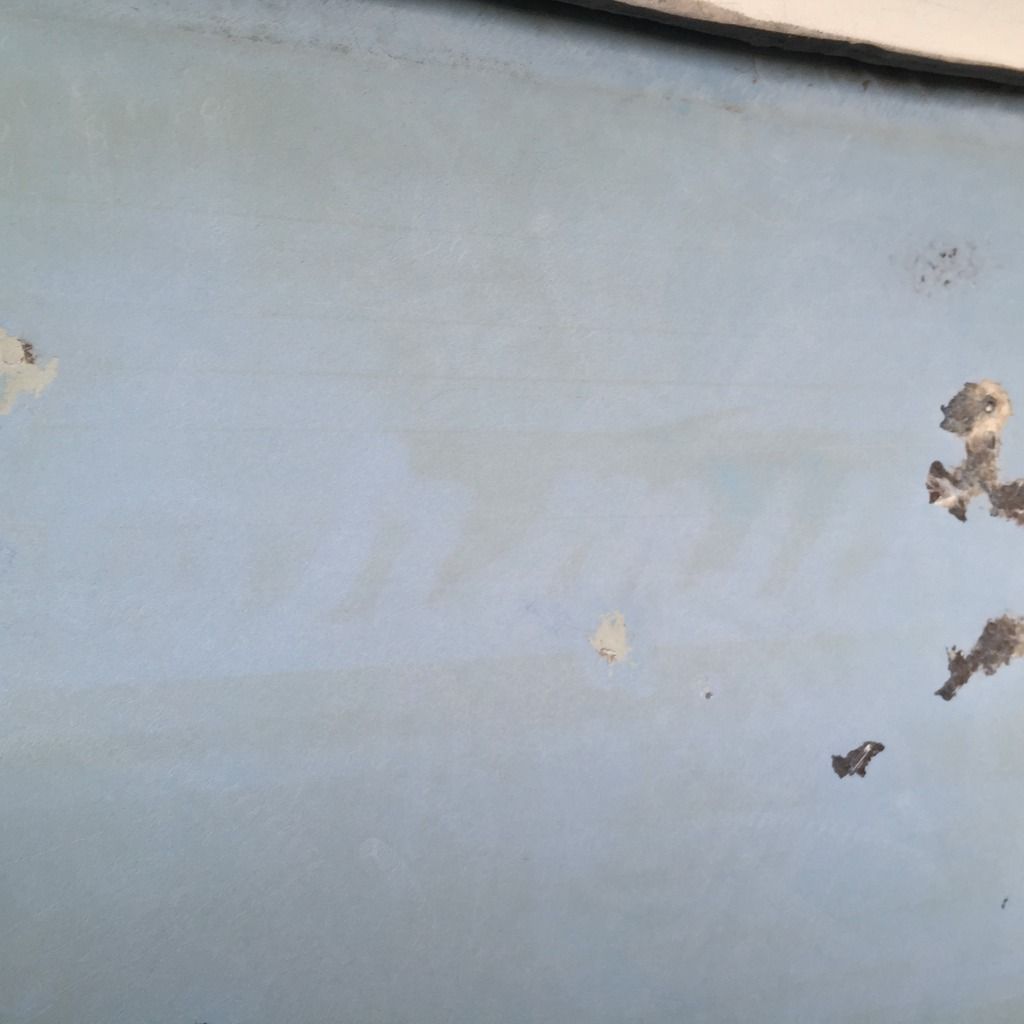
I also started sanding down the outside hull prepping it for painting. I didn't realize someone had apparently painted or applied another layer of gel coat to this boat. Once I started sanding off the first layer there is a faded blue under the top coat and I can still see the shadows of the original Formula plaque in the corner and where it was riveted in place. The writing was script letters not block and I think there was a small Thunderbird Eagle at the end. The sign was not very big only about 2 1/4" tall and about 14" long. I havent been able to find any new or old signs or plaques on evilbay. Anyway the plan is sand it all down with the 80grit then go back over it with 220 before filling in all the dings and dents. Drill out the old rivets and Dremel a little deeper into the gouges to get any loose stuff out and give something for the fairing compound to grab a hold of. This is going to take a few days
Its hard to see the shadow of the old Formula sign
 

Mark72233

Ensign
Joined
Jul 11, 2014
Messages
926
Some good news, I took that worn aluminum part that holds the steering ram to a repair shop and they can fix it for $25 and it will be better then new. That saves me about $125 because the only place I could find one was on ebay attached to other component's for $150. So now I can spend that $125 to replace other worn out steering parts :facepalm:. For those asking how much $$$ does it take to rebuild a 43 year old 23 foot twin engine Formula 233, I am around $14,000 to $15,000 and counting :eek:. Don't tell the Admiral.
 

kramerpage

Chief Petty Officer
Joined
Jul 26, 2010
Messages
447
Some good news, I took that worn aluminum part that holds the steering ram to a repair shop and they can fix it for $25 and it will be better then new. That saves me about $125 because the only place I could find one was on ebay attached to other component's for $150. So now I can spend that $125 to replace other worn out steering parts :facepalm:. For those asking how much $$$ does it take to rebuild a 43 year old 23 foot twin engine Formula 233, I am around $14,000 to $15,000 and counting :eek:. Don't tell the Admiral.

Every little bit of savings helps...And I thought I was over budget....Gee Whizzzz She sure looks great thou.
 

Woodonglass

Supreme Mariner
Joined
Dec 29, 2009
Messages
25,928
Some good news, I took that worn aluminum part that holds the steering ram to a repair shop and they can fix it for $25 and it will be better then new. That saves me about $125 because the only place I could find one was on ebay attached to other component's for $150. So now I can spend that $125 to replace other worn out steering parts :facepalm:. For those asking how much $$$ does it take to rebuild a 43 year old 23 foot twin engine Formula 233, I am around $14,000 to $15,000 and counting :eek:. Don't tell the Admiral.


Uhmmm Yeah but... Ifn' yew wuz to go an try 2 buy a new 1 similar to her, how much overtime do yew thunk yew wood havz 2 werk to payz fer it????:D:eek:;)
 
G

Guest

Guest
Hi Mark!
Checking in to see how you're doing, I know your boat had builders emblems in the stern quarters made of plastic or metal. (Mine did too), but you'll find Jimmy Hoffa before you find a decent used set or an NOS pair. I went with decals, but had them reproduced from an old Hiliner catalog so they were spot on. There's an outfit in Florida called www.magicbrush.com that can reproduce your Thunderbird Decals if you send them a picture of what they look like. These folks do all the old Whaler decals for the BW crowd too. They do very good work and its not expensive. (Thats a switch!)

Are you going to paint the hull or Re-gelcoat it? I painted mine with a two part poly (Interlux Perfection) and it came out great, but the Okie says you could use tractor paint too, Thats gotta be a hard finish too and you may not have to mix two part paint.

Looking good!
 

Mark72233

Ensign
Joined
Jul 11, 2014
Messages
926
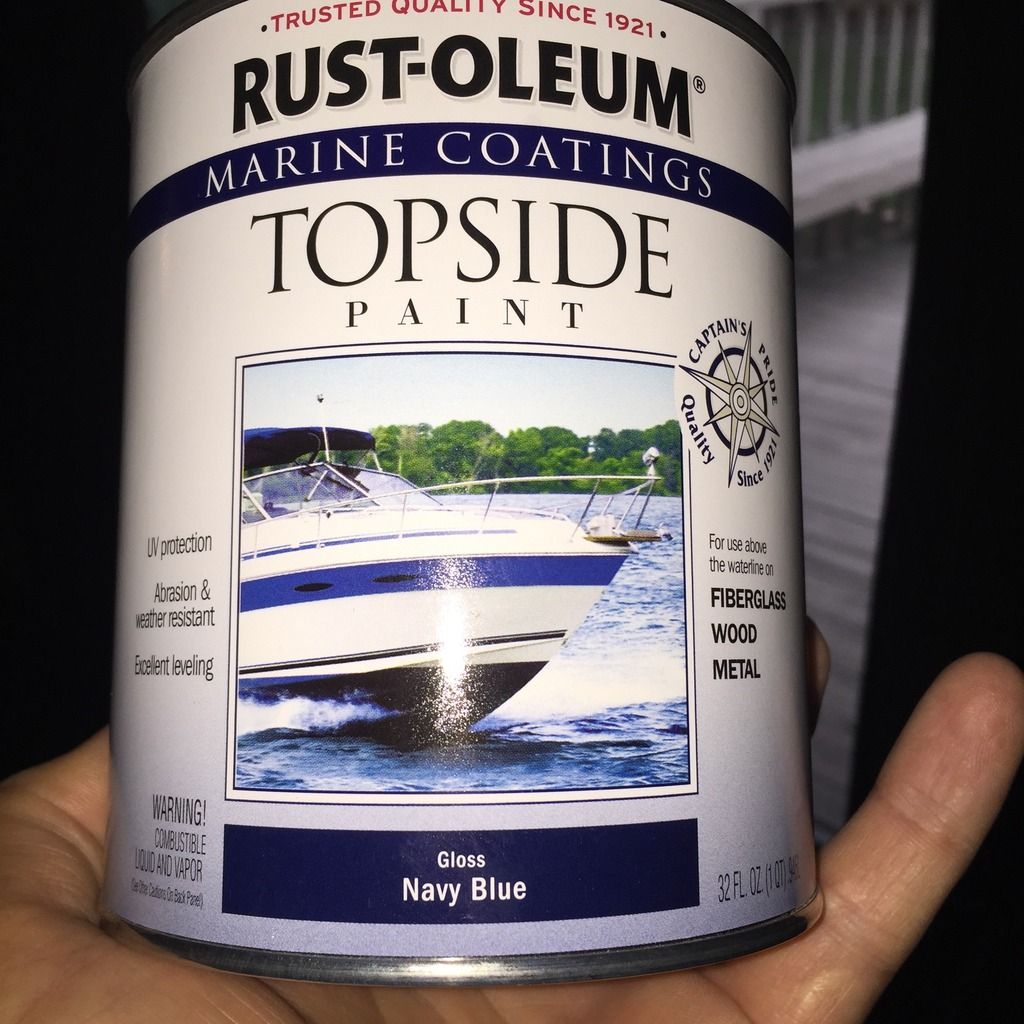
Hi CaptErich, still plugging away at this tub. Mostly messing around with the second block and crankshaft right now. I have come to the realization that the original hull emblems don't exists anywhere. I cant even find a good picture of the old style script emblem like this one had. As for the issue of paint or re-gel coat I went with paint. I am using a rustoleum boat paint.

I went with Woodonglass recommendations on the painting except I switched to the Rustoluem because I liked the Navy Blue they had.
I am doing the Navy Blue on the hull and gloss white top and bottom. No anti-fouling bottom paint this time around since she will always be stored on the trailer maybe a night or 2 in the water once or twice a year.
 

Mark72233

Ensign
Joined
Jul 11, 2014
Messages
926
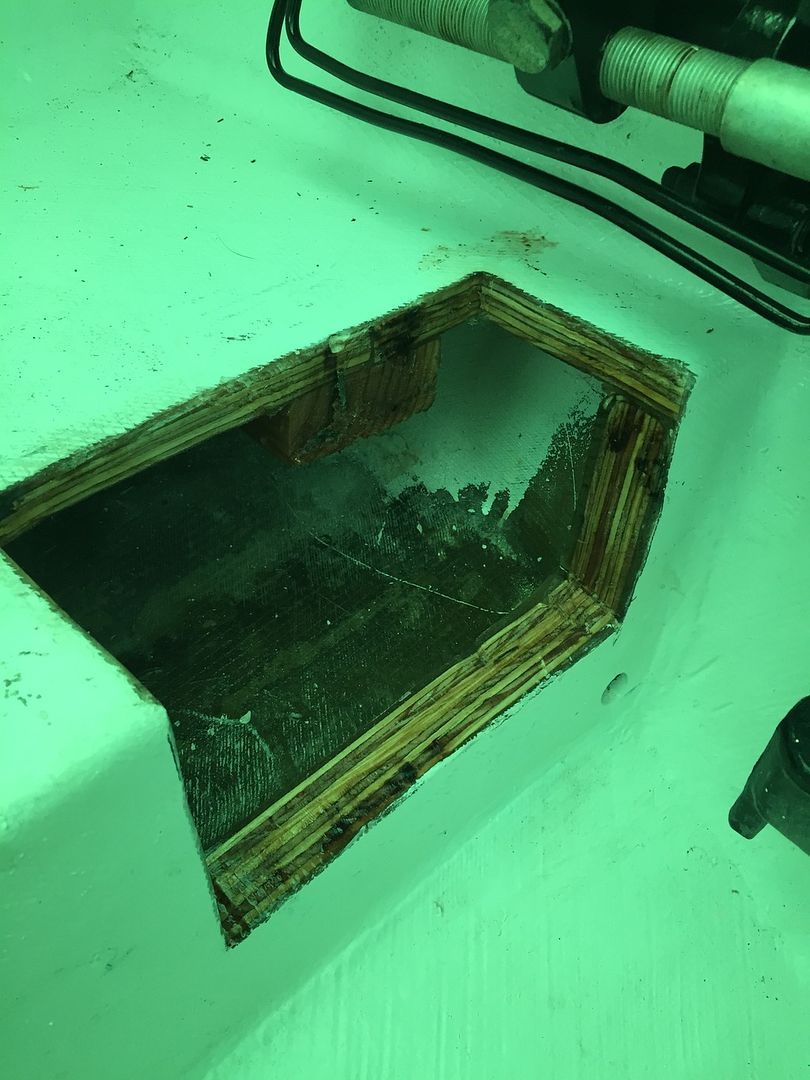
Well my plan for not doing the notch below didn't work out. I forgot about the steering ram taking up a lot of room in that corner and the hoses on the trim pump aren't long enough so painfully I cut out the deck and stringer.


That is a thick heavy piece of wood that came out of there. I have made a half box out of 1/2 ply that will go here and create the notch for the trim motor to extend into. I just need to finish covering it in CSM before I attach it then I will cover it with 1708 so it matches the rest of the deck.
 

Mark72233

Ensign
Joined
Jul 11, 2014
Messages
926
I got the bracket back from the fabrication shop where they fixed the stripped out bolt hole better than new.
 

Mark72233

Ensign
Joined
Jul 11, 2014
Messages
926
I also got the block back from the machine shop, unfortunately he had to bore it out .060 over. I also went ahead and had the crankshaft polished so I have a block, head and crank ready to go. The engine rebuild kit should be delivered today and waiting on me when I get home and I can start putting the second engine together. Once the second one is ready I will move the boat from the back yard to the driveway and drop these things into their new home. Then I can start working on stern drives not to mention electrical work. Oh Boy.
 
Top