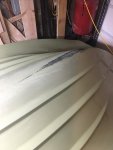
72' Browning Refurb

bobberstop

Seaman
Joined
Sep 3, 2016
Messages
59
I was cleaning up a little today, moving my shop vac and cyclone 10 times reminded me I was going to post how much I was impressed with the cyclone when grinding. I started out with no tenting in a garage (roughly 24'x28') thinking the holding the shop vac hose close to the grinder would keep the dust down, HA!! dream on!! It help for sure but the filter clogs in 5 minutes and best case you have to climb out of the boat dump the vac clean out the filter and the continue grinding. Worse case you don't realize the vac isn't keeping up and the garage is ground zero for fiberglass blizzard!! I will be wiping down tools for decades. So loaded with fresh knowledge gained from iboats sticky on grinding fiberglass, I picked up a couple of the bag inserts for the shop vac, amazing problem solved....almost. The bags are great for keeping the filter clean and maintaining suction but I have a smaller shop vac so the bag filled up fairly quickly, 15-20 of grinding. larger vacs would be better I'm sure. So I went to menards in search of a dust collector, and in talking to a employee he recommended this cyclone. The cyclone was also mentioned in the iboat sticky so for $45 I'm in, lots of places on the internet will show you how to DIY one but I was more interested in making progress on the boat then building a cyclone. You do need a container w/ a lid to mount it on (I use a 5 gal bucket, i would go bigger next time) and extra shop vac hose (had some from my last one). I hooked everything up, vac to top of cyclone hose to grinder out the side of cyclone. I did put a fresh filter and bag in the vac just to be safe. That little cyclone collected 99% of everything the shop vac took in. I never had to change the bag or clean the filter the rest of the 30+ hours of grinding. After a couple hours of grinding I would take a break and empty the 5 gallon bucket, never having lost suction the whole time grinding. Best $45 I've spent on this project so far!!! I'm not promoting any particular brand just the concept of using a cyclone in conjunction with a shop vac. I did attach a photo (Hopefully I'm not breaking any forum rules) of the one I used, sorry the hoses are detached had to use the vac to suck up water after washing out the hull. I'm sure this is old news to most, just throwing it out there. It will by no means stop and/or prevent the itch!!
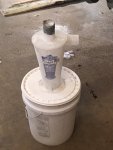
IMG_3039_zpsp7oo9w2x.jpg
 

bobberstop

Seaman
Joined
Sep 3, 2016
Messages
59
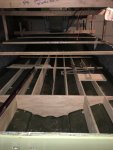
Looking for some guidance. We are starting to build stringers and bulkheads or I should say bulkhead. There is only one "bulkhead" that makes up the front of the bilge area and it only goes part way across. The rest of the "bulkheads" were just 1x2 running across the top of each stringer. Are full height bulkheads better? Should they run full width?

Also I came across a below deck fuel tank that would fit perfect.......if I trim a 4' section of the keel stringer down to 4 inches tall. Can I compensate for the height with a wider stinger or adding layers to the hull itself or is this a horrible idea?
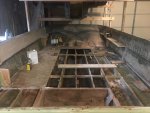
I attach a photo of the hull with the old stringer/bulkhead layout.
Any thoughts?1FC046E5-1D0E-4E5A-8145-93C9EFE4B098_zpsuycxegxj.jpg
 

bobberstop

Seaman
Joined
Sep 3, 2016
Messages
59
Patched up the holes I made during demo. Ground down around the hole flaring it out, then laid in 3 layers of ever widening 1708. Seems rock solid now. Use a paint stick wrapped in wax paper taped to the underside for one and custom crimped a short piece of copper pipe in the vise to match the angle of the second one, it was right on top of chine? (don't have all the terms yet) Both seemed to work great minimal sanding and filling to be done. Still on the fence with my tank dilemma.

IMG_3044_zpsplqd0iuz.jpg

IMG_3042_zpsjeksajxs.jpg

IMG_3045_zps4wb1aqvr.jpg
 

Attachments

  • IMG_3045_zps4wb1aqvr.jpg
    IMG_3045_zps4wb1aqvr.jpg
    231.5 KB · Views: 0

bobberstop

Seaman
Joined
Sep 3, 2016
Messages
59
Patched up the holes I made during demo. Ground down around the hole flaring it out, then laid in 3 layers of ever widening 1708. Seems rock solid now. Use a paint stick wrapped in wax paper taped to the underside for one and custom crimped a short piece of copper pipe in the vise to match the angle of the second one, it was right on top of chine? (don't have all the terms yet) Both seemed to work great minimal sanding and filling to be done. Still on the fence with my tank dilemma.


IMG_3045_zps4wb1aqvr.jpg
 

Attachments

  • IMG_3045_zps4wb1aqvr.jpg
    IMG_3045_zps4wb1aqvr.jpg
    231.5 KB · Views: 0

bobberstop

Seaman
Joined
Sep 3, 2016
Messages
59
Just was refreshing up on bedding stringers, I recall reading a post not to long ago about not needing milled fibers/chopped strand in the PB used to tab in stringers. I wanted to make sure I was remembering that right but of course I cant seem to find it. So would it just be resin with the appropriate amount of catalyst mixed with cabosil to achieve desired thickness? or am I missing something? Would that be true for fillets too? I always under the impression PB had 1/4" chop strand fibers in it. If anyone can offer some clarity it would be most appreciated.
 

bobberstop

Seaman
Joined
Sep 3, 2016
Messages
59
Opinions needed!!

Turns out a co-workers father used to build fiberglass boats for living back in the 70's, worked for a local company for 20 years. I mentioned our project and asked if he could bring his dad by to check it out. While he was here I mentioned that we had originally planned on moving the tank but changed our mind when we removed the floor and saw the stringer layout. He say's almost anything is possible. So we talk for a while and before you know it we are looking at tanks online.


I found two tanks that he thought could work, they are aluminum made by RDS, The first one is 36" long w/ 18 gal capacity and the second is 47" long w/ 22 gal capacity, other then that they are identical. 16" w x &7" tall.

The following were his suggestions for moving the tank,

leveled any low spot (where I may have been a little to aggressive grinding) I could find w/ PB and I am adding a layer of 1808 (local supplier doesn't carry 1708) to the hull starting from 4" up on one side down and across the hull and up 4" on the other side. Starting from 4" up the transom to the end of the stringers, over lapping the seams 5". (Actually this was our plan even before we talked to him about moving the tank, just for piece of mind.)

Cut/notch the keel stringer to accommodate the tank, (approximate stringer height would be 3" tall below tank)

Bed, tab and cap the stringers as normal. Tabbing the keel stringer down on the hull such that the tabbing from strake stringer overlaps.

PB in 3/4" plywood across the top of the cut/notched portion of the stringer and tab perimeter to stringers and bulkheads.

2nd layer - w/ a single piece of 1808 line the tank "compartment".

Install tank following manufacturer guidelines.

Glass in wood strapping above tank to help support floor spanning over tank compartment 16" w x 36"-48"L opening.

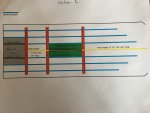
I attached some rough drawings below showing his two options for tank location, Option 1 has the tank 2' in front of the bilge bulkhead putting the tank just behind the helm in the center of the boat for a more neutral buoyancy. On the downside this would require a 3rd bulkhead.

The second option has the tank right in front of the bilge bulkhead, a plus that it only would require 2 bulkheads but not sure how much effect it would have on the stern heavy issue.

With either option we could use the smaller tank to reduce the span.

To be perfectly honest we would love to be able to move the tank, but only if it can be done without a doubt safe.
So I'm looking for some more opinions, is this guy off his rocker or does this sound like a safe and reasonable option? Has this type of thing been done before or is it to good to be true?

FullSizeRender%20-%20Copy%20-%20Copy_zpswxckear5.jpg

FullSizeRender%20-%20Copy%202_zpsefhfela2.jpg
 

bobberstop

Seaman
Joined
Sep 3, 2016
Messages
59
Was gone most of the last week chaperoning my daughters 5th grade camping trip, so needless to say not much got done on the boat. I did manage to get a layer of 1808 laid from wall to wall and from the transom forward 10'. I will try and post pics soon. Still contemplating what to do with the fuel tank. I have one more stringer to glue up then I'm going to start cutting them to fit the hull. Hopefully I will get sometime out there this week!!
 

bobberstop

Seaman
Joined
Sep 3, 2016
Messages
59
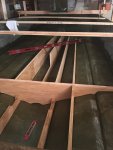
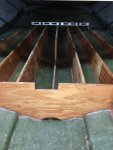
Sorry haven't posted in a while. I've been getting a couple hours here and there on the boat, so progress has been slow. I manage to finish laying a layer of 1808 on the hull. It amazed me how much this strengthen the hull, there is very little flex in the hull now when walking around in it. I also got all the stringers cut out and sanded. I rounded the top edges with the router and dry fitted them to the hull, so I'm ready to apply a coat of resin to them. First I need to pick up another 5 gallons of resin. I'm going to need it!!! 7 stringers and 2 bulkheads makes for a lot the PB and seal coating. I plan on 1 more layer of 1808 20" wide right down the keel from bow to stern.This is to support the keel stringer which I've decided (after talking to 4 different local boat builders/repair guys) to trim down a 37" section of to a height of 4". This will make room for the 18 gal. RDS aluminum tank below deck. The keel will be reinforced with 3 layers of 1808 plus overlapping tabbing from the stringers on either side the keel stringer. The consensus was that would make up for the reduce height of the keel stringer.

I attach a couple of photos I remembered to snap while working on fitting the stringers to the hull. One question that I came up with is do you leave the same 1/4"-1/2" gap between the stringers and the transom, or do you want then up tight to the transom for support?

As always guidance and input is always welcome!!
IMG_3160_zpskqktcfka.jpg


IMG_3170_zps9tfa0nu2.jpg
 

Woodonglass

Supreme Mariner
Joined
Dec 29, 2009
Messages
25,924
Nice workmanship!!!
Butt the stringers tight to the transom and the fillet the edges with PB and glass em in. I'd use PB to bed them in and 1/4" pieces of wood to lift em up off the hull Pull the spacers once the PB starts to kick and fill the voids with PB. When you create your fillets Neatness Counts!!! Keep em smooth and keep the surrounding hull an stringers clean and smooth. It will pay big dividends when you apply the glass.;)
 
Last edited:

bashr52

Chief Petty Officer
Joined
Aug 2, 2009
Messages
413
Well the day I thought would never come is finally here, Major grinding is DONE!! Just need to clean up the bow area a little. Attached a couple pics. It's kind of funny I spent the last couple months worrying about getting to clean glass. Now that I have clean glass, I worry that I took to much off!!
For peace of mind I was thinking of laying down a layer of 1708 on the hull prior to bedding the stringers. If I do this,is there a preferred direction to lay , bow to stern or side to side? Anything else I would need to do special?

Either way it will feel good to be putting stuff back in the hull instead of taking away. The other question that's been rattling around in my head has to do with re-sanding or scuffing up the hull prior to laying in new glass? I have seen this mentioned in a few posts, it seems that people are scuffing up the surface right before laying glass if its been awhile since they finished grinding? What I'm wondering is how long after grinding is it safe to laminate without sanding/scuffing the surface again? Or is it just good practice to scuff up the area your working on right before laying any glass? I know to do a good wipe down with acetone, just didn't quite understand the sanding/scuffing timeline. As always any guidance is much appreciated.

I can't wait to get back to the stress free part of boat ownership, you know the sunshine surrounded by water part!!


I think option 1 would be best, that's the way it is in my boat. You want to shift some weight forward to help keep the nose down and get up on plane.
 

bobberstop

Seaman
Joined
Sep 3, 2016
Messages
59
Thanks for the tips Woodonglass. Butting them together was my plan then I started think everything else has a 1/4" gap maybe i should gap the transom too. Its great to get the reassurance from experienced people!!

I totally agree with you bashr52, I really wanted to move the tank further forward like illustrated in option 1 for the exact reason you mentioned. This old mustang is not as fast of the line as the 4 wheeled version. In the end option two worked better with the tank I found, it also allows me to use the existing
fill and vent fittings topside. I'm hopeful I will get a little improvement from moving the tank off the transom to the front of the bilge.

I have been researching iboats for pros and cons of moving the deep cycle batteries up under the console. I'm planning on mounting a trolling motor on the bow so having the batteries up toward the front would save on wiring the and move roughly 100 lbs off the transom. Seems like its pretty split as far as this being a good or bad move. Some have done it and still get good life out of batteries and others say the rougher ride up front kills the batteries. Reading up on some batteries, the manufacturer claims newer batteries are designed to take more punishment from pounding waves. I tend to be a far weather fishermen anyway some I leaning towards moving them up. Chime in if you have some thoughts on this

Thanks again for the advise and encouragement, post more pics soon!! (hopefully)
 

bobberstop

Seaman
Joined
Sep 3, 2016
Messages
59
Anybody ever used just PB to fill the V behind the bow moaring eyelid, maybe overlay a copy layers of 1708?
Originally there was a wood wedge bedded in "PB" & covered in fiberglass, but the wood had started to rot. My plan was to just replace it, but started wondering about using PB to completely fill the V and cover that with 1708 and eliminate the wood all together. Any thoughts?
 

bobberstop

Seaman
Joined
Sep 3, 2016
Messages
59
I was able to spend a couple hours working on bedding the stringers today. Wow!! 7 stringers and a bulkhead is going to take a lot of Peanut butter!! Which of course means a lot of resin.....ouch!! I managed to get 3 stringers bedded and fillets made, took a little experimenting, I wasn't a fan of the ziplock bag method. It was a bit messy loading the bag and I wasn't able to really tell if it to oozed all the way under the stringer. I finally got a system down just using a 4" squeegee to push the resin under until I could see it start to ooze up and out the opposite side. The small plastic spoon for making the fillets is genius!! Can't remember who's posting I saw that in, (one of wogs I think) but it works beautifully. I have two spots I should have cleaned up better so I will unfortunately have to sand them smooth. It amazes me how strong of a bond that forms to both the hull and stringer, rock solid!! I will get some new pics up tomorrow, just to tired tonight.
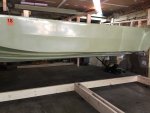
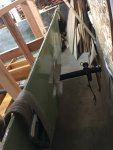
 

bobberstop

Seaman
Joined
Sep 3, 2016
Messages
59
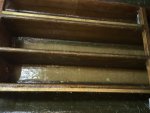
Finally got the all the stringers bedded and filleted. It went fairly well, tried to be as neat as possible, that turned out to be the challenging part. I have a couple areas to sand but all in all happy with the results. Used 5 gallons of resin, but the hull is solid and the stringers are locked in. IMG_3209_zps8x0q5otp.jpg
 

bobberstop

Seaman
Joined
Sep 3, 2016
Messages
59
Its been a while since my last post. I've made slow progress. I managed to get all the stringers, bulkheads and motor mounts tabbed and capped. I also came up with and idea for adding in a ski locker without cutting out the keel stringer. I measured the spaces between the keel stringer and the stringers on either side and realized that they were more then big enough to put a pair of skis in on each side.

So I attempted to make a floor for each of the ski lockers to protect the bottom of the hull and PB them in place. This proved to be harder then I thought. Then I remembered a thread where WOG talked about using foam wrapped in packing tape to fill gaps. This worked perfectly!! Easy to form to match the hull and simple to wrap in packing tape. Once I had it wrapped I used PB to fillet it to the stringers. Once that kicked and I confirmed that the foam did not get eaten up by the PB, I laid in two layers of 1708 over the foam and extended 3" & 6" up the stringers on either side. I capped it all with 1 layer of csm covering both lockers. Finished it off with 2 coats of white gelcoat. Picture below shows lockers prior to gelcoat.

I also ran 2-1 1/2" pvc pipes from the ski lockers under the fuel tank compartment to the bilge area to serve as a drain for both. I painted the fuel tank compartment with two layers of white gelcoat.

I also flipped the hull to start prepping for paint. I will post some pictures once I download them to photo bucket.

D9FBDEE4-18D0-4FFD-B04F-15440150CDC6_zpsfmtj8tsd.jpg
 

bobberstop

Seaman
Joined
Sep 3, 2016
Messages
59
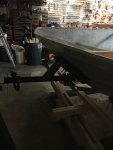
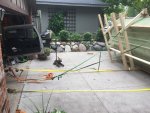
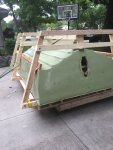
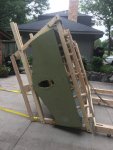
Loaded some more pictures. Once I had the stringers done I decided to hold off on replacing the floor to save the weight. I thought this would make it easier to flip the hull. This turned out to be more challenging then I thought. My first attempt was to build a brackets for the bow and stern to hang the boat from and rotate it. The brackets were good, it was just to tight of quarters in the garage. I had a ceiling height of 7' 10" and an overall beam width of 7' 8". Made it pretty tight. Attached a pic of boat suspended.

I found plan B on the internet, (can't remember if it was here or not) simple make a roll cage of sorts out of wood and tip it over. So I made the simple roll cage mounted it to the stringers. Used a pick up to pull it up on its side and lowered it with 2 to 1 rope system. Worked perfectly and with just two people too. Once it was flipped just a hand full of bolts to remove the portion of the cage that went around the bottom of the hull.

I loaded some pics of the flip below. 61050F1E-527F-4E41-B8D3-A7C2F6AF1857_zpssfmantaf.jpg

8C651AF5-880E-492A-8AB0-7E85C7F72002_zpslozrl3nn.jpg

31F7A4DA-D003-4B7F-AC86-87110E3B051C_zpsoa7pal3k.jpg

D0D64A94-940B-4084-8065-BE3393ABCD2C_zpscaae3umn.jpg

93CAB3BE-E50E-4091-8DA7-49346540034E_zps8edah19z.jpg
 

bobberstop

Seaman
Joined
Sep 3, 2016
Messages
59
It only took about 20 minutes to actually flip the hull. Took couple hours to build all the framing.


A5654C6D-7EC8-4F9E-93D8-78A8D28235D6_zpsdt8xhrh2.jpg
 

bobberstop

Seaman
Joined
Sep 3, 2016
Messages
59
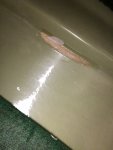
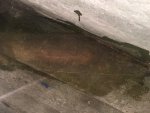
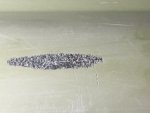
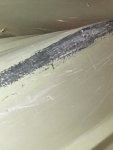
Now I'm getting ready to prep for paint. My question is what would be the best remedy for beach rash on the keel and minor scratches on the hull? (pic below)From what I've read, apoxy filler seems to be the most common. I also wanted to triple confirm that topside paint is ok below the waterline as long as the boat doesnt spend more then 2-3 days in a row, in the water.

01E8D50C-28AD-41E1-809D-B11C90D71CFF_zps4izhbvby.jpg
BAA158F2-7120-4F0B-A9F0-EC28DDE6B0CC_zpsd13gf19b.jpg

FB4CC8DB-4BA2-4F24-B9E8-1E58F6FD1284_zpsjo4ted6g.jpg
 

bobberstop

Seaman
Joined
Sep 3, 2016
Messages
59
So I'm leaning towards using Perfection for paint. I've only come across 1 or 2 negative reviews and a ton of positive. I plan on using the roll and tip method and my try the roll and roll method. The one area I'm slightly confused on is in the preparation process, it uses "pre primer epiglass epoxy resin" as necessary. How do I know if it's necessary? I have some pretty good beach rash on the keel that has gone thru the gelcoat and I'm thinking this would be a necessary area but not sure if it's a allover or not at all type of deal? Any thoughts?
 

bobberstop

Seaman
Joined
Sep 3, 2016
Messages
59
Haven't touch the boat since my last post. My project partner, my father passed away in September and didn't much feel like being out there alone. My kids started asking if we are going boating in the summer, so I started back at it and it feels good to be working on it again. But now my head is filled with questions on paint prep. I get confused everytime I read something it seems to have a different schedule, what I think I've come up with is...

Wash
Sand with 80 grit
Wash
Prime
Fill
Sand (what grit?)
Wash
Prime
Sand (what grit?)
Paint
Sand-between coats? What grit?

Any guidance appreciated!!
 
Top