72' Browning Refurb

bobberstop

Seaman
Joined
Sep 3, 2016
Messages
59
I'm grinding away and I know the rule of thumb is to get to clean fiberglass but....I'm second guessing myself and looking for some guidance.
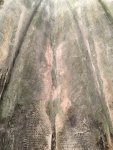
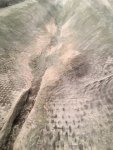
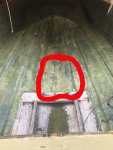
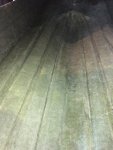
Top picture shows were the keel stringer was. The top of the picture is the bow, where I have ground down to clean hull fiberglass. In the middle of the picture I have feathered out what appears to roven woven and what I assume is their form of peanut butter, and finally at the bottom of the picture is untouched other then to remove stringer. The second picture is the same area just a close up angle to show the depth of build up.

My question is do I need to get down to the hull or is it ok to feather it out like I did in the middle part of the picture? On one hand I'm worried I'm taking to much by going down to the hull but on the other hand I'm worried that the new glass won't bond well in the center part of the picture.

Any thoughts?


24943A50-DF47-4A4B-9201-D3D2EA9C29FA_zpsmfk5pzft.jpgo


F220611D-0317-4950-B9F9-4AA0A6ED2C1F_zps9ctt0ibu.jpg
 

Woodonglass

Supreme Mariner
Joined
Dec 29, 2009
Messages
25,924
The spider web looking areas need more grinding. It should all be fairly smooth and consistent.
 

bobberstop

Seaman
Joined
Sep 3, 2016
Messages
59
But everything above the spider web area looks good? That's the area I'm unsure of. It's ok to have that tan colored area? As long as it is clean smooth and consistent? Thanks Again for the insight.
 

kcassells

Fleet Admiral
Joined
Oct 16, 2012
Messages
8,614
Want to be able to run your hand over it and have no fuzzies or pointy glass tips. That will make your new layups very difficult to get any air bubbles out.
On another note WOG why do you recommend 1.5" stringers? #14
[COLOR=#6A6A6A !important]February 4th, 2017, 10:25 PM[/COLOR]
 

Woodonglass

Supreme Mariner
Joined
Dec 29, 2009
Messages
25,924
Want to be able to run your hand over it and have no fuzzies or pointy glass tips. That will make your new layups very difficult to get any air bubbles out.
On another note WOG why do you recommend 1.5" stringers? #14
[COLOR=#6A6A6A !important]February 4th, 2017, 10:25 PM[/COLOR]


Not knowing what was there before, I actually mentioned using two plys of 1/2" OR 3/4" Some boats used 2x dimensonal lumber for stringers. I'd rather have 1 1/2 Inch stringers than 3/4" ones. It's MY preference and NOT an absolute. Easier to ensure a good attachment to the deck too!!!
 

bobberstop

Seaman
Joined
Sep 3, 2016
Messages
59
Thanks for the spider web and the running your hand over it tips, gives me a method to gauge my progress. As far as stringers go, the old stringers were made out of 1"x 12". My plan for new stringers is doubled up 1/2" Aracua plywood, actual thickness of 15/32. I figure that's pretty comparable to the 1x. Thanks again for the help.
 

bobberstop

Seaman
Joined
Sep 3, 2016
Messages
59
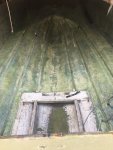
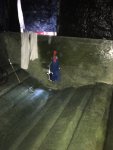
So I thought I was starting to see the light at the end of the grinding tunnel, just a little area left at the bow and keep up the bilge. I was feeling good until I decided to do a quick wash down just to check for any areas that were in need of a little clean up. I've attached a couple pictures of the result. Top pic is freshly washed, middle pic is next day completely dry and bottom picture I circled my questionable area.

Are the lighter green almost yellowish areas that really stand out wet in need of more grinding? When it dry's most a lot it seems to fade away, the keel area in front of the bilge appears the most.My gut tells me it needs more, any thoughts?


IMG_2953_zps2mwq6hqa.jpg


Dry%202-22_zpsnbrlfx4f.jpg


a7745a14-033f-4a9e-a36e-e0f301e46a53_zpsntnqw2gl.jpg
 

bobberstop

Seaman
Joined
Sep 3, 2016
Messages
59
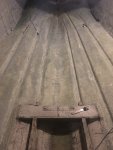
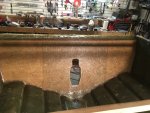
Well the day I thought would never come is finally here, Major grinding is DONE!! Just need to clean up the bow area a little. Attached a couple pics. It's kind of funny I spent the last couple months worrying about getting to clean glass. Now that I have clean glass, I worry that I took to much off!!
For peace of mind I was thinking of laying down a layer of 1708 on the hull prior to bedding the stringers. If I do this,is there a preferred direction to lay , bow to stern or side to side? Anything else I would need to do special?

Either way it will feel good to be putting stuff back in the hull instead of taking away. The other question that's been rattling around in my head has to do with re-sanding or scuffing up the hull prior to laying in new glass? I have seen this mentioned in a few posts, it seems that people are scuffing up the surface right before laying glass if its been awhile since they finished grinding? What I'm wondering is how long after grinding is it safe to laminate without sanding/scuffing the surface again? Or is it just good practice to scuff up the area your working on right before laying any glass? I know to do a good wipe down with acetone, just didn't quite understand the sanding/scuffing timeline. As always any guidance is much appreciated.

I can't wait to get back to the stress free part of boat ownership, you know the sunshine surrounded by water part!!

IMG_2985_zpsqubrkrgl.jpg

IMG_2990_zpsdbaarevp.jpg
 

bobberstop

Seaman
Joined
Sep 3, 2016
Messages
59
After some serious review bingeing of iboats last week, to lock in the order of events for installing the new transom, we got it done today! I have to admit it was a little nerve racking. Started by putting the finishing touches on the plywood, drilled some ooze holes, filled in the screw holes and some splinter holes from drilling and sanded it smooth,rounded the edges and wiped it clean. Scuffed up the fiberglass on the ransom hull and wiped it clean with acetone. Then gave both sides a good coating of resin and mixed up my first batch of peanut butter.
Mixing up the PB wasn't as hard as I thought it would be, I measured out my resin and catalyst for the first couple batches. I didn't add the catalyst til last, so that I could take my time getting the consistency right with the cabosil and fibers. I felt under the gun with my first time mixing and spreading, but now I feel more comfortable with the amount of working time you have.

I attached some photos of it all clamped up. I ended up putting a thin metal plate on the outer edges, because during my test run I noticed I wasn't getting good pressure on the outer edges. The thin plate seemed to do the trick, it was just thick enough to get good contact with the clamps to the transom yet thin enough that I could tighten down enough to still allow good contact thru the middle.
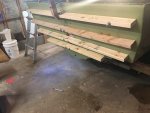
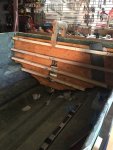
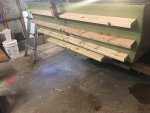
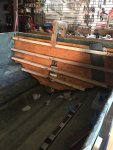
IMG_3010_zpsf5cxspaj.jpg

IMG_3008_zpss4dqe3lp.jpg

IMG_3010_zpsf5cxspaj.jpg

IMG_3008_zpss4dqe3lp.jpg
 

bobberstop

Seaman
Joined
Sep 3, 2016
Messages
59
Transom is almost done!! Two layers of 1708 covering the whole transom extending 5" & 10" on the side and on the hull for tabbing. That 1708 is amazing stuff, un rolling it I thought this is going to be war trying to get this stuff to curve onto the hull & sides but it's surprisingly very conforming. Didn't get to laying the csm to give it that smooth finish, just ran out of gas!!
Hopefully tomorrow.

If I do get to it tomorrow, do I need to scuff up the 1708 prior to laying the csm? Or is a acetone wipe down sufficient?
 

bobberstop

Seaman
Joined
Sep 3, 2016
Messages
59
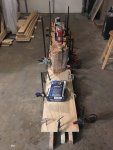
So I decided today to measure my transom thickness to help decide if I should put a layer csm over the 1708 to finish it off or just call it good and it turns out I was just shy of my 2" target thickness so my solutions was to cut and lay in a 3rd layer of 1708 the width of the engine compartment (36") centered it on the key hole. Then I covered the full width of the transom with a layer of csm. You can see the darker outline of the 1708 in the pic. Now I'm at a solid 2".

With that hurdle behind me, my dad came over and we started on stringers. We were able to get all the wood cut into rough sizes that we will cut the stringers out of after getting the pieces glued together. We even managed to get the keel stringer glued and clamped. I really enjoy the building vs grinding.....way funner!!!!


IMG_3036_zps7zvc5ggw.jpg

IMG_3032_zpsaywamjlx.jpg
 

bobberstop

Seaman
Joined
Sep 3, 2016
Messages
59
Thanks!! It's great to be moving forward, which would not be possible without everyone on iboats!! Great site, Great People!!
 

bobberstop

Seaman
Joined
Sep 3, 2016
Messages
59
Silly question this morning, I watched Frisco's stringer bedding video again last night. I started wondering about the foam spacers, between the hull and the stringer. He used PL to hold them in place because of wind. Do you leave them in and PB around them or leave access to them and pop them out once the PB sets up and fill in the hole with PB? I had a scrap piece of the pink foam in the garbage, so I put some PB on it and it seemed to eat away at the foam. Am I over thinking that if I leave the foam spacers in the PB will eat away at it leaving a void space? Or am I using the wrong foam?
 
Top