68 Offshore restoration

Rasdiir

Petty Officer 2nd Class
Joined
Jul 18, 2011
Messages
139
Congrats, always nice to see a Starcraft return to the water!
 

Moserkr

Chief Officer + Starmada Splash Of The Year 2021
Joined
Nov 23, 2020
Messages
854
Yea Sharpie!! Congrats on getting back in the drink. As for the motor, shsu nailed it. After that someone will want to know compression numbers.
 

Sharpie223

Petty Officer 2nd Class
Joined
May 24, 2021
Messages
162
I'm going to see how easy it is to remove the carbs for cleaning. If easy enough I'll just do it, if more involved, I may see where a bottle of seafoam or similar gets me run through a gallon of gas.
 

redneck joe

Supreme Mariner
Joined
Mar 18, 2009
Messages
10,524
i'm a fan of seafoam as a cheap and easy try on rough running on old engines. Many here will disagree. Doesn't always work but for a few bucks and time spent chugging around the lake, why not. I always double the listed 'recipie' on the label.
 

SHSU

Lieutenant Junior+Starmada Splash Of The Year 2019
Joined
Mar 8, 2017
Messages
1,679
i'm a fan of seafoam as a cheap and easy try on rough running on old engines. Many here will disagree. Doesn't always work but for a few bucks and time spent chugging around the lake, why not. I always double the listed 'recipie' on the label.
I do the same and use it as my additive for stabilizer. Knock on wood, haven't had an issue yet.

SHSU
 

Sharpie223

Petty Officer 2nd Class
Joined
May 24, 2021
Messages
162
Looking at the service manual, there doesn't appear to be much to adjust on these carbs aside from the pilot air needle. Figuring I can use calipers to measure depth of that for reassembly, I think I'll just do a full take down, scrub, and reassembly.
 

Sharpie223

Petty Officer 2nd Class
Joined
May 24, 2021
Messages
162
Trial 2:
20230721_064437.jpg


20230721_070358.jpg

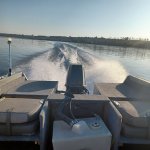
Took the carbs apart and cleaned, then idled some seafoam through. I think all the idling let things geta little oily inside, so had to burn it off before the engine ran well. Averaged 37 mph at WOT. Stayed on plane down to 20mph trimmed full down, I think if I was better balanced I could go lower. Still diagnosing electrical gremlins in the tach, hoping it's not an engine sensor issue. If that's the case I'll probably just get an aftermarket sensor, the kind that wrap around a spark wire. Next efforts need to be trailer side guides, tired of jumping between the dock and the winch trying to get the boat aligned.
 

SHSU

Lieutenant Junior+Starmada Splash Of The Year 2019
Joined
Mar 8, 2017
Messages
1,679
Glad you got the engine mostly figured out. At least you got WOT and unless you can't idle I wouldn't mess with the idle screws. As for the tach, you sure you have the Tachometer set to the correct setting for your engine or is it just not reading?

SHSU
 

Sharpie223

Petty Officer 2nd Class
Joined
May 24, 2021
Messages
162
No settings to mess with on the tach. I troed a jumper straight from the engine to the tach, nothing. A little more testing and then I'll give up and find something universal. I'm more worried if certain alarms also aren't working.
 

Sharpie223

Petty Officer 2nd Class
Joined
May 24, 2021
Messages
162
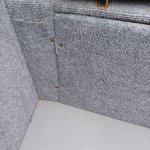
Getting back to work on this now that temps are dropping. Started building up the furniture some more. Made doors for the seat boxes. Made some back panels for the rear seats and some side panels to hold lids over the seats, as well as a center seat/step. And I finally figured out how to mount the gas cap. The hose is a bit sharply turned, TBD if that causes back pressure issues while filling. Up next is finishing the lids over the seats, make drawers underneath, and finish the floor locker.

20231118_144713.jpg

20231118_144606.jpg
 

Sharpie223

Petty Officer 2nd Class
Joined
May 24, 2021
Messages
162
Slowly getting more done in between house projects and car maintenance. Today I got hinges attached to seat box doors, they aren't the best aligned but are fully functional. I'll gove each door a webbing pull and a locking latch (I bought a set of 10 keyed alike latches for all the storage doors on the boat). I like how flush these hinges mount, though they are kinda flimsy.
20240101_141925.jpg

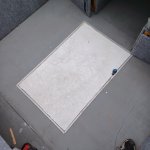
The original splashwell storage area used the typical sliding doors. Since I remodeled that section, I had the aluminum sliding track leftover that I turned into trim for my floor locker. I need more 5200 before I fasten this down to be sure it's sealed. The goal is for the raised edges to prevent and puddling water from being able to flow is, as well as bite into some seal strip on the door. The door will get some thinner (maybe half inch) trim along the outside edge for strength and sealing surfaces.
20240101_144616.jpg

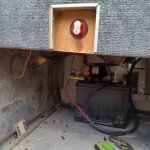
I installed a battery cutoff switch behind a rear seat, but I will need to rework slightly with more and/or heavier wires so I can shutoff the motor cable as well.
20240101_133739.jpg


I hope to start piecing together the planking for the gunnels and bow soon, fully expecting this to take a long time, like plank flooring except everything is at an angle.
 

Watermann

Starmada Splash of the Year 2014
Joined
Jan 12, 2013
Messages
13,754
Moving towards the finish line and some nice carpet work, that stuff isn't easy to work with.

For sure you'll want to box up the batteries and anchor them down
 

Sharpie223

Petty Officer 2nd Class
Joined
May 24, 2021
Messages
162
This weekend I had measured and cut most of the remaining panels and started treating them. Not much in the way of pictures to show.

I think I decided to run extra wires to the new battery cutoff so that the starter can be mounted there. Otherwise battery cutoff will be a pain.

I am someone who works a project at least %75 mentally before any physical work. A lot of the mental work for this winter is now complete, so there should be a bit of new parts on the boat soon. I am probably jinxing myself having said that...

Upcoming this winter:
-Finish seat covers and drawer fronts in carpet and install.
-I cut a panel to raise the deck between bow seats by 2.5", for storage.
-Create a hatch in the front bow section big enough to fit my anchor.
-Make an aluminum face for both consoles. Create a passenger side glove box. Create a better looking blister over where I raised the dash.
-Plastic weld some wood-look hdpe garden edging "terrace board" to cover the gunnels and bow, paint grey.
-paint the sides of the hull. I haven't decided for sure what scheme. I was planning a red and black flake job over black. Now I'm thinking leaving it plain black.
-add spot lights and cabin lights
-finish working on the trailer. I need to make long term bunks and add some suspension limiters.
 

Sharpie223

Petty Officer 2nd Class
Joined
May 24, 2021
Messages
162
Much slower progress this year. This weekend I did manage to get my rear seat covers and drawer fronts carpeted, now awaiting hinges. Got the floor storage lid made as well.
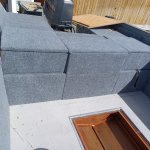
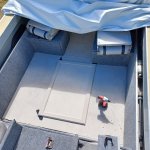
20240323_122232.jpg

20240323_135044.jpg


I think it will look good when all done, but I definitely notice some flaws in my work, such as not so 90 degree angles in the rear structure.

Figured I'd start a list of things that I'd do differently next time. Keeping in mind that I started this boat under a different budget that has since been relaxed. Maybe it will help future builds in their planning.
-plywood and sealant. If properly sealed, I don't see CDX as being an issue, but in the future I would use epoxy for sealer rather than a mix of BLO and spar urethane. I have noticed some mildew growth on some of the BLO, though this may get mitigated in the future with better ventilation and covering.
I do like my painted canvas floors and from other places I have seen this done I think it will hold up well. The question is if the underside will as well. Also the carpeted plywood only sealed with BLO.
-my transom was laminated by 4 pieces of CDX, this ended up being a tighter fit than 2 layers of 3/4", causing some scraping of the sealing layer and smashing/cracking where I had to use a mallet. This was a case of the previously smaller budget.
-purchase a quality cover as soon as you buy the boat. For one, I lost a weekend or two at the start trying to figure out how to melt ice out of my boat. Second, I was slow to cover this last fall and rainwater got in which caused most mildew issues.
-if you are going to remodel the splashwell, either make it all out of plywood and then fiberglass the well, or make sure you have proper tools for the metal forming. I think this partly contributed to my not so 90 degree angles in the back structure. It also made a lot more work trying to match an uneven metal form.
-windshield, not really something that I am currently thinking I wish I had done differently since it will be an easy replacement, and right now it's primarily time constraints keeping me from doing so. I do want to make my own custom windshield in the future though. A more robust frame and also taller.
-boat trailer. Again, easy to replace later, but I should have held out for something better rather than putting time (cutting/grinding/welding) into remodeling the current trailer. I likely would have broken even and been time ahead just making my own from scratch even. I'm probably an anomaly for reworking a trailer to this extent, though.

Anyway, the boat will still look good when I'm done, at least from 10 ft. Hopefully more progress next weekend.
 

Watermann

Starmada Splash of the Year 2014
Joined
Jan 12, 2013
Messages
13,754
Spring has a way of lighting a fire under us boat guys.

You may want to redesign that hatch to be recessed, less things to trip on the better.
 

Sharpie223

Petty Officer 2nd Class
Joined
May 24, 2021
Messages
162
The trip hazard has crossed my mind. I'm still attempting to make it a sealed compartment which the current design needs a reinforced edge, this may change though. I will probably pressure/vacuum test once I have seals and hinges in place. If that fails, I'll likely go for a simpler, unsealed, approach, and maybe use it as a point to blow air under deck while parked (to ensure drying).

Spring has a way of lighting the fire under many projects unfortunately, it's always a juggle.
 

Sharpie223

Petty Officer 2nd Class
Joined
May 24, 2021
Messages
162
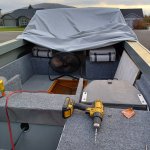
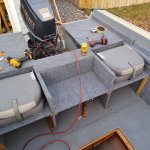
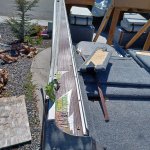
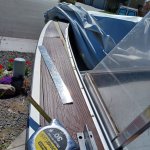
I was able to do a little in the way of gunnel planking this weekend. I'm using terrace board. It's a recycled hdpe material formed to look like wood, about 1/8" thick. Since it comes in a roll, it's rather wavy, but I think a heat gun and some weight should help it lay flat. Basically laying it in like plank flooring, then I'll weld the seams. It isn't the easiest geometry to work with, however, and it takes a number of cuts to get the right fit. This is the same material that I tested flame treatment and painting. Once it's in place I will paint it grey.

20240331_142010.jpg

20240331_142016.jpg
 

SHSU

Lieutenant Junior+Starmada Splash Of The Year 2019
Joined
Mar 8, 2017
Messages
1,679
How you securing it to the gunwales? Should look nice once painted.

SHSU
 

Sharpie223

Petty Officer 2nd Class
Joined
May 24, 2021
Messages
162
Temporarily, with wood screws (pictured). Once it's laid out and the seams welded I'll install rivnuts and flathead machine screws.
 

SHSU

Lieutenant Junior+Starmada Splash Of The Year 2019
Joined
Mar 8, 2017
Messages
1,679
That will make replacing them easier if it is ever needed. Any worries about the sun warping them, or thought that heat will help make it flatter over time?

SHSU
 
Top