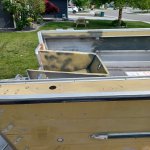
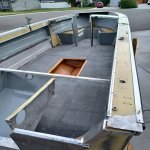
68 Offshore restoration

Sharpie223

Petty Officer 2nd Class
Joined
May 24, 2021
Messages
173
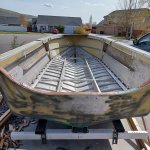
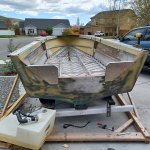
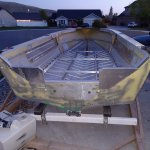
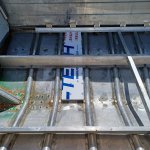
Weekend update. Got the remaining two transom ears in place. Sanded, sawed, and butchered the wood until it was flush with aluminum, and then coated the raw edges with gluvit. Also got angle crossbars installed at the joint location of each deck board, this should stiffen the floor better than the straps the factory used.
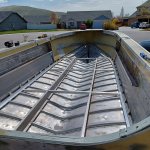
20230422_141208.jpg

20230422_154638.jpg

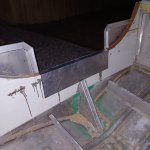
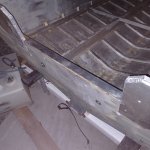
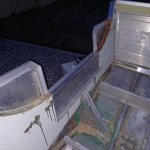
The previous owner had an aluminum plate box welded onto the transom trim for a kicker motor mount. I thought this was a bit overkill but decided, sawed in half, it would make a good support for a rear deck. So this got added on with some pc-7 in-between. I would have preferred 5200 for this, but decided to use what I have, it's above the water line and plenty fixable later if need be.
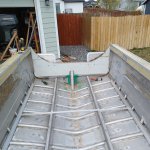
20230423_151638.jpg

20230423_151704.jpg

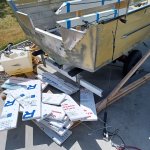
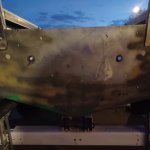
Finally, added my splashwell drain holes. Aluminum tubes for liner, epoxy coated between metal and wood, flared on the inside. Then the transom metal to liner contact has been puttied together. The inside will be covered in flashing after this, with the flashing flared into the liners, the goal being that water can't touch wood.
20230423_203059.jpg
 

SHSU

Lieutenant Junior+Starmada Splash Of The Year 2019
Joined
Mar 8, 2017
Messages
1,741
Good progress. Repurpose is always a good way to go. I still have aluminum sitting around our garage from our project. Can't get my self to get rid of it since aluminum can be used for so much.

SHSU
 

Sharpie223

Petty Officer 2nd Class
Joined
May 24, 2021
Messages
173
Got the back of the splashwell area covered in flashing. Flashing is nailed on, nails will get sealer tomorrow. Drain holes were internally swaged with an 11mm socket. Debating flashing over the part of the "ears" that will be exposed, almost exclusively for aesthetics.
Please ignore the drips to the side. Some wood decided to break through rather than drill through, requiring epoxy sealer.
20230424_204120.jpg

20230424_204136.jpg
 

Sharpie223

Petty Officer 2nd Class
Joined
May 24, 2021
Messages
173
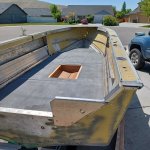
Created some transom trim. It's mostly in place but requires some final 3lb hammer "sculpting". I made the "ear" sections straight, and I'm glad I did because it really makes the look flow with the rest of the modifications. The ears also got flashed on the inside, I dont really want any unarmored wood showing. The center trim where the engine will rest I made out of a homemade angled section for the inside, and to take the majority of the weight, and a thin section of extruded angle on the outside, to make it look good. All of this will be screw nailed into place once I go buy some screw nails. Then I screwed a thin angle onto the bottom of the splashwell line. The splashwell will be riveted to this, rather than screwed directly into wood.
20230427_202454.jpg

20230427_202517.jpg

Not pictured, cut some thin ply (1/8 utility panel, made from some southeast asian species), and cut a cedar (real eastern red cedar, sawdust smelled awesome) board backbone to make the under deck locker out of. Going to glue and staple this together, then coat in boiled linseed oil, and canvas cover the bilge side. Should be water resistant enough. It's thin ply, but my design is to have it tight to foam for support, also shouldn't see much weight.
 

Sharpie223

Petty Officer 2nd Class
Joined
May 24, 2021
Messages
173
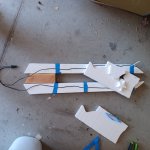
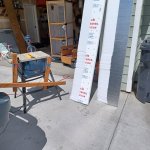
Built a hot wire cutter for cutting foam. Decided I didn't want to deal with foam crumbs/dust. Plus I will be using expanded polystyrene, so the hot wire will help seal the cut edge. Using stainless fishing leader and a 12v5a supply, it works, but not very quickly. It's very pulsed, like it cuts and then has to rebuild heat. I could probably play more with wire size, but this should get me through the project.

20230501_140628.jpg
 

Sharpie223

Petty Officer 2nd Class
Joined
May 24, 2021
Messages
173
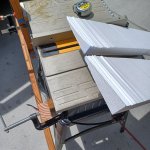
I added a second plug so I could double the power supply inputs. Not really double, I added a 12v 2a power supply in parallel to the 12v 5a, and it works much better now. Funny enough, the 2a on its own did a better job than the 5a on its own. I think they must use two different current limiting circuits, and the 5a causes large drops. Either way, I tried making a rip fence to cut down some 8" strips. It sorta works, but prone to wandering. I think next time I will just mark a line and do my best to cut along it and it will be at least as accurate. The 1" fits nicely under the factory spars, the plastic backing gives it some decent flex. I cut to a length to leave a drain channel.

20230503_105435.jpg

20230503_105513.jpg

Oh yeah, look at all the foam dust!
 
Last edited:

Sharpie223

Petty Officer 2nd Class
Joined
May 24, 2021
Messages
173
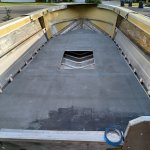
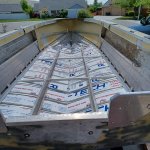
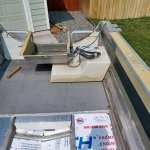
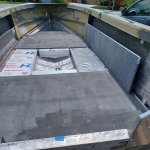
And fit testing floors. Need to trim some at the back, about 1/8" or so. Going to work on drilling for rivnuts while I'm at it, then shopvac (again!) and install foam. Yes, the back floor is multicolor, ran out of final paint at the end, the canvas soaks up more than I planned. That section will be covered by the real seats/deck/splashwell.
20230503_182345.jpg
 

Sharpie223

Petty Officer 2nd Class
Joined
May 24, 2021
Messages
173
Wasn't going to be in town this weekend but the whole family came down with a stomach bug. Rest is the best medicine, so naturally I put down some sugarcane derived antiseptic and got to work with the boat.

First I worked on finishing most of my foam cuts. Set up my table saw with the hot wire so I could use the rip fence, this made much more accurate cuts, but at the end of the run it became freehand and funky. Did the same with my larger hot wire for angled cuts.
20230506_124523.jpg

20230506_130310.jpg

Then vacuumed the boat, again, and installed first layer of foam between ribs. The bow sections got lightly contact glued in.
20230507_135230.jpg

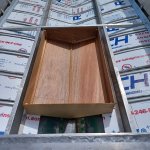
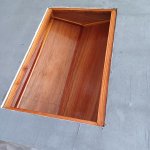
Then assembled my under deck storage. It's plywood and cedar at this point, but I plan to canvas the underside and heavily varnish the inside. Fits great with the rib foam! It will be attached permanently to a deck board before install.
20230507_145214.jpg
 

Sharpie223

Petty Officer 2nd Class
Joined
May 24, 2021
Messages
173
Attempted to install the decks. They all fit in place nicely, but a few rivnuts popped through. I think my drill bit was a little large, didn't have an intermediate size though. So I get to reinstall a few with some epoxy. A couple just weren't well aligned and will get redrilled, and one rivnut just got missed. I will leave the decks in place through tomorrow so I can mark drill spots for fastening console and bow metal. I bought threaded inserts for this. I also figured out that the bow wood needs a little more foam under it for support.
In this picture I was also test fitting the side wall bottom brackets, they will be attached with the screws that attach the deck boards. I did find out that despite going for a lighter medium grey, the floors still get blazing hot in the sun. May need to coat with paint #3 before full use.
20230512_121243.jpg
 

SHSU

Lieutenant Junior+Starmada Splash Of The Year 2019
Joined
Mar 8, 2017
Messages
1,741
For your under deck storage, you have any plans for drainage, just in case water gets in?

SHSU
 

Sharpie223

Petty Officer 2nd Class
Joined
May 24, 2021
Messages
173
Still deciding on that, it's really not an if but when water gets in. I might just add a drain plug in the bottom, otherwise I think I'm looking at hand pumping. A check valve would be nice but I need to research if anything exists that would work.
 

Sharpie223

Petty Officer 2nd Class
Joined
May 24, 2021
Messages
173
My goal is to have it normally sealed, so I can use it as flotation, if I drill a hole I'll have to find a reliable plug. I'm hoping I can get the lid to seal that well, but if not, it at least adds flotation until water overflows the deck level.
 

redneck joe

Supreme Mariner
Joined
Mar 18, 2009
Messages
11,025
if you need to rely on that for flotation I would say you need proper flotation in other areas.
 

Sharpie223

Petty Officer 2nd Class
Joined
May 24, 2021
Messages
173
Not really a need but a good extra measure. I've calculated that even the bilge full of foam won't float a fully loaded boat at the deck level (2600 lbs per factory label). Every extra bit helps, a full bilge should float about 1500 lbs. Looking at above deck spots to stuff more foam.
 

Sharpie223

Petty Officer 2nd Class
Joined
May 24, 2021
Messages
173
For cheap plywood, it should looks good with a coat of oil and varnish! I am thinking of using this plywood for the inside of a camper build floating in my mind.
20230514_134511.jpg

Today I finished forming the reduced splashwell and riveted to the transom. It's a bit crooked, but I think once I attach the top deck, it should pull straight. There unfortunately wasn't enough material to fit to my transom additions, more trim I suppose. I also test fit my fuel tank, due to the reduced room, the short part wont fit under the splashwell now. For now I will just turn it the other way, in the future I might swap to an aluminum square tank.
20230518_143528.jpg

20230518_143536.jpg

20230518_143829.jpg

Did a little test fit of the side walls as well.
20230515_142924.jpg
 

Sharpie223

Petty Officer 2nd Class
Joined
May 24, 2021
Messages
173
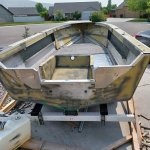
Painted and installed the interior sheet metal this weekend. Also painted hull sections that I expect to show after everything is done. I was unsure if the inside gunnel walls will be covered in hdpe afterwards so didn't paint them, I think I may just paint them and call it good though. Also the hull sections under consoles show more than I was thinking, so they will get painted as well. The paint is KBS MAXX, I rolled it on expecting major orange peel but it leveled much better than expected. Still has orange peel, but maybe no more than a factory automotive clear coat, not concerning for this job anyway. That's good news for me, when I repaint my car, this is going to be my clearcoat; when sprayed, I may not need to cut/buff. This paint covers really well, I would recommend it, but expect to pay for the quality, $67/qt.
20230521_161946.jpg
 

SHSU

Lieutenant Junior+Starmada Splash Of The Year 2019
Joined
Mar 8, 2017
Messages
1,741
Moving right along. We are our own worst critics. Nobody else will notice the minor issues.

SHSU
 
Top