68 Offshore restoration

Sharpie223

Petty Officer 2nd Class
Joined
May 24, 2021
Messages
163
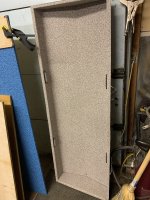
I was able to paint the extra areas along the gunnels and under the console before my 7 day recoat window ran out. I also managed to build seat boxes for the driver and front passenger, as well as get a good start on the rear casting deck/seating area. Front seat boxes are done minus carpeting. Rear deck/seating unit is mostly done but requires some final thoughts on how to make under seat storage function, then oil treatment and carpet. The second picture doesn't actually show the current state of the rear unit. There will be boards spanning from the side walls to the front unit walls to hold a folding seat on either side, eventually this will get a lid over it to keep weather off. There will likely be a drawer of some sort under each seat, and a door in the center section where the 1x2 crosses on the floor. The front boxes will also receive a door at some point (low priority).
20230528_141056.jpg

20230529_132944.jpg
 

ShoestringMariner

Lieutenant Commander
Joined
Apr 18, 2015
Messages
1,593
My goal is to have it normally sealed, so I can use it as flotation, if I drill a hole I'll have to find a reliable plug. I'm hoping I can get the lid to seal that well, but if not, it at least adds flotation until water overflows the deck level.
I drilled a hole at each end of my rod/ski locker. It will fill with rain water, a plug means you have to manually pull it to empty it. My thoughts is to let it auto drain
 

Attachments

  • 029B3890-BDDD-4336-98A5-046054FF221B.jpeg
    029B3890-BDDD-4336-98A5-046054FF221B.jpeg
    2.6 MB · Views: 4
  • 35E0289A-6736-4B94-8B63-98B0C1ED097A.jpeg
    35E0289A-6736-4B94-8B63-98B0C1ED097A.jpeg
    2.7 MB · Views: 4

Sharpie223

Petty Officer 2nd Class
Joined
May 24, 2021
Messages
163
My goal is to give the deck side a small raised seal, and give the lid a matching outer seal to make it airtight. I'll then test it with a vacuum to see if it worked, if not, then I'll probably go check valve.

First I need to figure out what kind of material I make the flange around the lid from. Aluminum barstock would be my first choice, but also likely expensive. Right now it's low priority. Top priority is what is needed to get the boat on the water and running, the rest will be finished later, at a slower pace.
 

SHSU

Lieutenant Junior+Starmada Splash Of The Year 2019
Joined
Mar 8, 2017
Messages
1,697
How did you secure the floor in?

SHSU
 

Sharpie223

Petty Officer 2nd Class
Joined
May 24, 2021
Messages
163
Rivnuts into the aluminum stringers and supports. I have stainless countersunk machine screws and washers holding the floor in, then. Technically I still need to remove the screws one by one so I can cut a countersink in the washers, right now the screws stick out a little. Doesn't stop me from getting on the water.

I do need to figure out some kind of trim between floor boards, I'd like to find a self adhesive vinyl.
 

ShoestringMariner

Lieutenant Commander
Joined
Apr 18, 2015
Messages
1,593
My goal is to give the deck side a small raised seal, and give the lid a matching outer seal to make it airtight.
If you can go watertight hatch, that’s going to be nice!

the rest will be finished later, at a slower pace.
Rabbit hole warning. I know this one well. To the point where I bought a second boat to use while my project creeps and stops and creeps and stops.
 

Sharpie223

Petty Officer 2nd Class
Joined
May 24, 2021
Messages
163
A little progress. Carpeted the seat boxes, starting to plan out their location. I'd like to keep them forward of the deck board seam, but might be a little tight getting in that way.
20230601_161024.jpg


20230601_155328.jpg
 

Sharpie223

Petty Officer 2nd Class
Joined
May 24, 2021
Messages
163
Well I tried to test out the front seats, without the swivel in place yet. Even without a dashboard I can tell my knees will hit as is. I think I might try to add a blister over the top for instruments, and raise the dash that way. This would save moving the seat back so far. Or I will need to put the seat on a slider as well as a swivel. Anyone know of a low cost sliding mount?
 

Sharpie223

Petty Officer 2nd Class
Joined
May 24, 2021
Messages
163
I guess I am looking for low cost and low profile, too. Trying not to add height. There are some simple sliding mounts, just aluminum plate in a track. I might try that and add a spring plunger to maintain solid placement.
 
Last edited:

Sharpie223

Petty Officer 2nd Class
Joined
May 24, 2021
Messages
163
Progress from the last couple weeks.

Got the rear deck carpeted and added some flashed panels over the splashwell, installed but need to figure out better screws for the back edges. Still needs some trim added where the carpet meets the splashwell edge.

Seat boxes are installed. Rear seats are installed. I created an adjustable mount for the front seats out of 3/4 angle. The basic idea is to use a 1/4 pin to hold it in place. The driver's side box still had to be moved back slightly to clear the steering wheel when turned around.

Boards for bow seating are carpeted and installed. Front bow support pieces have been recut and installed. I made the center section of the bow support removable from the outer sections, for ease of install/removal when necessary. No more unriveting sections to remove wood...

The dash panels have been cut and are held in by temporary screws. I think for now these will just get a coat of paint, later an aluminum face with a pattern. Also made a blister over the raised portion of the driver's panel. It's not the prettiest but will function, probably epoxy faired later on to become a permanent addition.

Schedule was to be finished with controls/electrical/engine this weekend. I think that would have been realistic if I was quicker with the carpentry side of things, unfortunately that took at least twice as long as planned. Still shooting for 4th of july (ish) for the first run.

Sorry for the bimini in the pictures, its been warm. There's also a lot of open storage areas. These will be finished at a slower pace as priority 2 items. Priority 1 items being what it takes to get on the water.

20230617_203454.jpg

20230617_202940.jpg

20230617_155857.jpg

20230617_202931.jpg

20230612_140055.jpg
 
Last edited:

SHSU

Lieutenant Junior+Starmada Splash Of The Year 2019
Joined
Mar 8, 2017
Messages
1,697
Carpet looking sharp!!!

All projects seem to take twice as long as originally planned. lol

SHSU
 

Sharpie223

Petty Officer 2nd Class
Joined
May 24, 2021
Messages
163
Not as productive of a weekend as expected, life priorities and being a "responsible adult" and all that...

I did manage to get instruments and switch panel in place, throttle box attached, motor mounting plates cut for the new configuration, and with my dad's help the engine installed. The mounting screws for the outboard and mount plates will require individual removal and sealing, time and material constraints dictated putting that off for later. I also managed to get controls attached and function tested. Wire runs, windshield, and trailer updates, then the water test.

20230626_135544.jpg
 

Sharpie223

Petty Officer 2nd Class
Joined
May 24, 2021
Messages
163
Got windshields on for the most part. The rear brace on the near side of the picture is just loosely on, I am debating removing or shortening this brace, has anyone done something similar and how stable was the windshield after?
20230702_203329.jpg
 

Moserkr

Chief Officer + Starmada Splash Of The Year 2021
Joined
Nov 23, 2020
Messages
867
I removed the brace on mine. It required adding mounting bolts to the side windows for support. Seems plenty sturdy for my purposes now. My windshield frame already had damage from a PO so I didnt have a lot to lose by cutting the brace off. Makes getting in and out easier too. Somewhere in my build thread theres a part about how I did it exactly.
 

SHSU

Lieutenant Junior+Starmada Splash Of The Year 2019
Joined
Mar 8, 2017
Messages
1,697
Direct front impact is all it would help with in my opinion. So unless you are planning on slamming a bunch of weight on it, then up to you.

SHSU
 

Sharpie223

Petty Officer 2nd Class
Joined
May 24, 2021
Messages
163
Ready for maiden. Got trailer completed (fenders, some bracing, shocks, lights) and will ensure it is all together at the gas station on my way tomorrow morning. Bracing is currently 3/4 conduit, this will be upgraded to some angle iron over winter. I was unsure about shock position and angle, but the way they are has taken the bounce right out. They are toward their compression limit, so some extra mount plates will be installed at a later date. I don't trust the 60 year old half stripped threads that hold the springs in long term, so suspension travel limiters are in planning as well.

The gas tank had the old pickup tube dissintegrate into rings, I replaced with a length of pex for now, I may upgrade later. Sending unit testing will be winter project most likely, I only go for short runs and can see the tank level visually. Until I figure out the gas cap placement better, it's in a temporary position. I also glued a piece of hdpe cutting board to the transom for a no holes transducer mount. Glue was loctite marine, or maybe pl marine or something like that, plus flame treatment, very secure.

Not a very pretty boat at this time, but that will come later.

Compress_20230707_202047_7586.jpg

20230707_193316.jpg

20230707_193354.jpg
 

Moserkr

Chief Officer + Starmada Splash Of The Year 2021
Joined
Nov 23, 2020
Messages
867
Awesome!! Cant wait to see her on the water. The odds n ends can come along as you have time, but enjoying the summer on the water is what counts the most to me!
 

Sharpie223

Petty Officer 2nd Class
Joined
May 24, 2021
Messages
163
Test report:
Trailer: towed as well as any trailer I have towed. I don't see any cracked welds or loose screws, no overheated bearings or grease leakage. No swaying as if the tires were misaligned. There was a small amount of sway on the freeway, I think the weight distribution may not be forward enough due to the nature of a light aluminum boat. Retrailering the boat took some work to center, absolutely need to get some side guides in place.

Hull: no apparent leaks. With just me in the boat it does certainly sit low on the driver's side. Moving to the center evens it out. Definitely will need to get that gas tank moved to the side for balance. Also sits pretty tail heavy. I think the restoration removed a lot of ballast in the form of water logged foam and rotten wood. Nature of the beast. Install of trolling motor and trolling battery should help.

Engine: The engine isn't going to let me escape the joys of outboard ownership. It started and idled, it did quit the first time but otherwise did fine at idle. It also reversed fine. In forward it struggled to keep going. At low speed it did okay, usually. Adding throttle caused it to quit. I'm glad I have a decent sized protected marina to test in, no getting swept down with the river. Considering the engine sat for a year with zero winterization/storage maintenance, the carbs may just need a good cleaning. I'm not sure trust the water pump either, it's something I should have just done, will do that before the next trip. Any other ideas on the engine quitting?

20230708_065315.jpg
 

SHSU

Lieutenant Junior+Starmada Splash Of The Year 2019
Joined
Mar 8, 2017
Messages
1,697
Congrats on the SPLASH!!!!! Nothing like the first time out.

As for the outboard, suggest a good deep cleaning of the carbs and a rebuild kit, new water pump, check the gear case oil, etc.... Anything else would have to defer to the appropriate motor forum.

SHSU
 
Top