68 Offshore restoration

Moserkr

Chief Officer + Starmada Splash Of The Year 2021
Joined
Nov 23, 2020
Messages
869
An original nose cap and you drilled a hole through it!?!?!?!?!?! lol

Good progress

SHSU
Mine had a big crack that I jb welded, sanded, then painted over…. But the u-bolt for the trailer winch hook up would be a better point to lift from. Nose caps are cast aluminum and pretty weak, and not attached well.

Wish mine had the OG side rub rail. Not sure which PO(s) took that off lol

Once the paint stripping is done, it gets a lot more fun. That part damn near killed me.
 

Sharpie223

Petty Officer 2nd Class
Joined
May 24, 2021
Messages
167
Mine had a big crack that I jb welded, sanded, then painted over…. But the u-bolt for the trailer winch hook up would be a better point to lift from. Nose caps are cast aluminum and pretty weak, and not attached well.

Wish mine had the OG side rub rail. Not sure which PO(s) took that off lol

Once the paint stripping is done, it gets a lot more fun. That part damn near killed me.

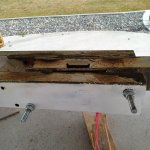
I wanted to use the winch eye, but it would have caused the bow tip to scrape the hoisting rope while flipping. My hoist frame isn't very sturdy. I sent the eye all the way through every front layer, so it picked the sheet metal behind the cap as well. Still not the strongest, but the empty hull should be near 300 lbs from my estimate, so not much stress to lift half.

I don't plan to strip all of the old paint, only around seams, and anything flaky. After epoxy coatings I will give a self etch dusting, then a light layer of a "standard" enamel primer over the whole thing, then the rustoleum with hardener.

The sides will actually get painted a couple months from now. They are going to be a flake job using urethane paint and will require the garage being turned into a spray booth. The plan is to repaint a car in there around the same time. After the bottom paint is done, I can flip over and carry on with the rebuilding without waiting.
 

Sharpie223

Petty Officer 2nd Class
Joined
May 24, 2021
Messages
167
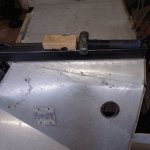
Got all the bottom rivets coat-it'ed and gave each seam a good line as well. In reality only the bow seams and the chine seams do much for sealing, but it feels like a more complete job this way. Also patched some dents with pc7, once cured I'll sand flush.

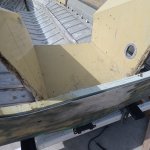
I'd say the hardest part is over but the drilled swiss cheese in the transom still needs addressed. The pc7 is very tough on its own, but I think I've come up with a good plan to use countersunk screws to plug the holes, and then sand flush, then back each one up. Kind complex to try and explain and I don't feel like taking the time to make drawings, but I'll take pictures of the process when I get there.
20230331_154638.jpg
 

Moserkr

Chief Officer + Starmada Splash Of The Year 2021
Joined
Nov 23, 2020
Messages
869
That icy frost colored paint would look great! Haha. Coat-it looks good. That stuff is tough as nails so you shouldnt have to worry much about leaks.
 

redneck joe

Supreme Mariner
Joined
Mar 18, 2009
Messages
10,925
Gonna be mid 80s here today and i gotta work. Cust even offered to reschedule but i' going to be a good boy.
 

Sharpie223

Petty Officer 2nd Class
Joined
May 24, 2021
Messages
167
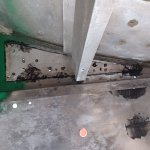
Ripped apart the front of my trailer, prepped for welding today. After lowering my trailer I realized that the tilt mechanism just isn't going to help me, but is a weak point. After welding that joint I will add some stabilizers from the axle crossmember up as far as they will go for better side to side tongue support.
Also sprayed self etch during a safe time in the weather. I had just cleaned with 30% vinegar and wanted to get the shiny metal covered. Tomorrow will be the next stage of primer and then gloss grey rustoleum. Since it will sit overnight, I think I may scuff with alcohol on a rough sponge before continuing the paint. It looks like I will be able to flip back over in another week. Hoping to finish the transom patch before then, much easier working that section when it's a cave that I can sit in.

20230407_160224.jpg
 

Sharpie223

Petty Officer 2nd Class
Joined
May 24, 2021
Messages
167
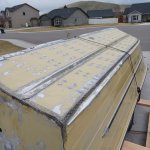
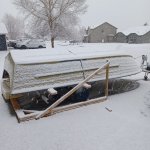
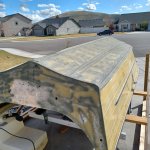
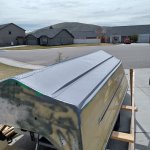
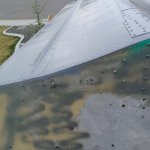
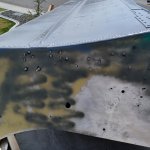
The weather forecast yesterday was for no rain, so I got the bottom all painted. Woke up this morning and there was rain on it... Good thing I used enamel hardener, so it was cured enough to not take damage. Ended up putting the second coat on in the dark last night, missed a few places, but not going to worry. Turned out well otherwise.
20230409_125629.jpg

Also got the trailer tilt joint welded. This will mostly be held together by bolts. But welded spacers in place. Still need to clean and touch up paint.

20230409_125652.jpg
 

Sharpie223

Petty Officer 2nd Class
Joined
May 24, 2021
Messages
167
I may be weird but there's something satisfying about the look of glossy solid colors on riveted metal.
 

Sharpie223

Petty Officer 2nd Class
Joined
May 24, 2021
Messages
167
Started on the transom patching today. First part was to place a first layer patch on the i side and match drill every hole. Then I countersunk each hole. Epoxy putty was smeared between the patch and transom, and then countersink screws placed through each hole, smeared in epoxy putty, these.are held in place just by threading in the sheet metal. Several other screws were used to hold the patch tight while epoxy cures.
20230410_143612.jpg
20230410_143528.jpg

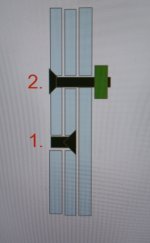
Next step will be to remove the temporary screws and grind the plug screws flush on each side. Then a second patch will be placed over the first patch with plenty of epoxy putty in-between. This will be secured by countersink screws from the outside with a nut holding tight on the inside, through the same holes that the temporary screws were through. Then these will be ground flush on the outside. The diagram below sorta shows what I'm thinking, with #1 screws sealing most holes, and #2 screws holding the second patch in place. The second patch is to prevent any loosening of the plugs. The first patch is to give a little more countersunk area for grip. Holes that will be behind transom wood I will seal with #1 style of screw plugs, with the transom wood backing up. Holes through the joint of the transom channel and the transom I will seal with the #2 style. A little bit of head will be left on each after grinding to hold everything, but should still be flush enough to be unnoticeable. Epoxy sealing around all metal contact of course.
20230410_150211.jpg
 

Sharpie223

Petty Officer 2nd Class
Joined
May 24, 2021
Messages
167
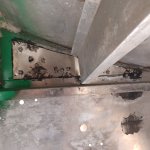
I had a reason for originally using two backing plates, now I cannot remember what that reason was. So I popped out all of the screws except for two super close to other holes. Those two got cut flush with the outside. The rest got installed from the outside with a backing nut. These will be ground flush with the outside. Two holes behind transom wood got plugged from the inside, and will be ground flush both inside and out. The other holes behind transom wood are still plugged with pc7 epoxy, and they seem pretty solid. They are also above the typical water line, so I'm going to risk it.
20230413_135539.jpg

20230413_135554.jpg

While crawling around in the boat cave, I remembered that there's a bunch of holes still needing patched where I removed a bunch of side cleats. On that note, does anyone have an idea why 4 tiny cleats would be installed on both sides of the boat, just under the gunnels? Best idea I have was someone had a lot of people on inner tubes to tie up to.Here is an old picture that shows the tiny cleats. Not sure if this is common practice somewhere?
20220529_191607.jpg
 

Sharpie223

Petty Officer 2nd Class
Joined
May 24, 2021
Messages
167
Flipped back right side up. Ground down any patching on the upper transom and decided to install the new transom wood. Definitely did not slide right in. Broke a rubber mallet, so I decided to use a sledge with a chunk of 2x scrap in-between. Still beat up my freshly glued/sealed transom. It's in at least. I have a lot of gluvit left over, think I'll soak the beat up portions and clamp while curing. The kindling in the boat is from broken 2x pieces, not broken ply.
20230415_143737.jpg
 

Sharpie223

Petty Officer 2nd Class
Joined
May 24, 2021
Messages
167
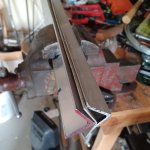
Starting on the angle aluminum that will finish the chine bracing. Got the 2 pieces of 1/8" angle attached to the ribs of the straight portion from stern to where the console end. Got two pieces of old floor crossmembers bent into 1/16"-ish angle for where the chines curve. Used two pieces of angle and a vise as a bending brake. Thats the old piece of floor crossmember in the middle (the strip that connects two sections of deck). Worked surprisingly well.
20230417_142356.jpg
 

SHSU

Lieutenant Junior+Starmada Splash Of The Year 2019
Joined
Mar 8, 2017
Messages
1,726
Nothing like reusing what you already have laying around.

SHSU
 

Sharpie223

Petty Officer 2nd Class
Joined
May 24, 2021
Messages
167
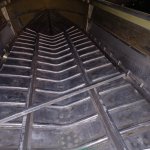
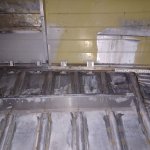
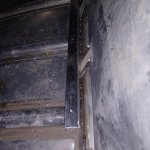
Got my side bracing mostly attached. Front pieces are riveted to ribs and chine braces, back pieces are riveted to ribs. Unfortunately because the ribs and side angles are not 90 degrees, I can't get them riveted to the side braces as well. I think I will just add some 1/4" screws to span the gap, but not necessarily pull tight. I really just want the ribs' vertical travel to be tied to the side braces', which are tied to the areas between the ribs. This way, under load, the ribs and gaps should have minimal differences in movement, lessening any point loads which lead to cracking.

My upcoming issue: while I left some margin for error in my deck width, I didn't leave enough to account for the angle being away from the sides so much. Space between angle walls is 63.375 or so, deck width with wrapped canvas is 63.625ish. 1/4" interference, I'm thinking maybe I can slightly bend the deck and force it in, maybe it will push the angle closer to the walls, otherwise I think I may be cutting and recanvasing...

Cross bar was just checking levels
20230417_203249.jpg

Front
20230417_203318.jpg

Side gap
20230417_203338.jpg
 

SHSU

Lieutenant Junior+Starmada Splash Of The Year 2019
Joined
Mar 8, 2017
Messages
1,726
My vote would be to redo the canvas. Trying to force an interference of 1/4 is a recipe for disaster.

SHSU
 

Sharpie223

Petty Officer 2nd Class
Joined
May 24, 2021
Messages
167
I think that's pretty much the conclusion I've come to. I think I could make it fit, the question is what it does to the rest of the structure. I could see it wearing out seams and rivets in short order. I'm going to attempt to rip a half inch or so off the sides and see if the canvas stays put, if it does, I'll gluvit the raw edge and call it good. The trim will hide the cut.
 

Sharpie223

Petty Officer 2nd Class
Joined
May 24, 2021
Messages
167
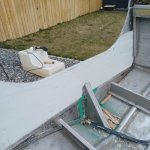
Started some plastic surgery on the splashwell. BFH bending brake made it work, still need to trim, but need some other parts in place first. Also didn't think about needing to move the drain holes, but that's fairly simple.
20230420_101527.jpg

20230420_103114.jpg

Trimmed the edges of the deck boards, luckily the canvas stayed adhered. I will seal the edges tonight, then maybe I can start boat reassembly. I also need to figure out how I build the underside of the "ski" (rod and lifejacket) locker. It's 3'x2', maybe I can find a rubbermaid that size and save building a wooden box.
20230420_132640.jpg
 
Top