68 Offshore restoration

Sharpie223

Petty Officer 2nd Class
Joined
May 24, 2021
Messages
173
I ordered some serrated flange lock nuts, I will hold these still and torque from the button head. That should allow the serrations to set into the relatively soft aluminum without chewing it up. Of course that leaves the screw still able to loosen. The 5200 smeared over every screw should act at least as well as a nyloc in my mind.
 

SHSU

Lieutenant Junior+Starmada Splash Of The Year 2019
Joined
Mar 8, 2017
Messages
1,741
I ordered some serrated flange lock nuts, I will hold these still and torque from the button head. That should allow the serrations to set into the relatively soft aluminum without chewing it up. Of course that leaves the screw still able to loosen. The 5200 smeared over every screw should act at least as well as a nyloc in my mind.

Blue loctite works too, but will be honest that I used the 5200 method too... lol

SHSU
 

Sharpie223

Petty Officer 2nd Class
Joined
May 24, 2021
Messages
173
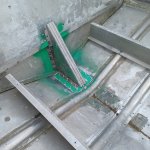
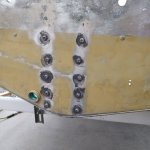
I finally made some progress. Used the rest of my tube of 5200 to make the patch sandwich. Did run out before the transom screws, used epoxy putty for that. Also tightened up the few loose rivets that I found, or attempted anyway. Just need to finish up the gluvit then I can flip and paint.
20230311_140819.jpg

20230311_140848.jpg

20230311_140854.jpg
 

Sharpie223

Petty Officer 2nd Class
Joined
May 24, 2021
Messages
173
For those looking for an instructional video of the patch plates, its from 2:40 on in this video, especially around 4:10. Though he forgot the mayo...


Moserkr

Chief Officer + Starmada Splash Of The Year 2021
Joined
Nov 23, 2020
Messages
869
Never seen a patch with screws instead of rivets, but it sure looks like you built it to withstand anything! Nice job.
 

SHSU

Lieutenant Junior+Starmada Splash Of The Year 2019
Joined
Mar 8, 2017
Messages
1,741
I am wondering if I should have bolted my hull back together instead of re riveting the entire thing.... lol

SHSU
 

Sharpie223

Petty Officer 2nd Class
Joined
May 24, 2021
Messages
173
I would have preferred rivets but not at the price of a true rivet gun. Stainless screws should be stronger as long as they don't loosen up, but they absolutely require sealant since they don't swell to the hole diameter.
 

jdvasher

Petty Officer 1st Class
Joined
Jul 10, 2019
Messages
371
Stainless in aluminum will cause corrosion, especially below the waterline. That 5200 will hopefully create a barrier between the 2 metals though.
 

Sharpie223

Petty Officer 2nd Class
Joined
May 24, 2021
Messages
173
Galvanic corrosion is a lingering thought.

From what I've read, stainless fasteners in aluminum structure tends to be okay due to the difference in surface area. Aluminum fasteners in stainless base metal would likewise not be okay.

That said, between the 5200 as sealant, gluvit on the bilge side, and coat-it on the outside, I don't really expect an environment conducive to galvanic. We'll see how long the outside under the knee brace stays coated, it may require some maintenance now and then.
 

SHSU

Lieutenant Junior+Starmada Splash Of The Year 2019
Joined
Mar 8, 2017
Messages
1,741
While galvanic corrosion will happen, SS is the least damaging for the return on strength that I have seen. Plus I haven't seen where you can get Aluminum bolts that would work in the applications we use SS for. Original parts from factory weren't SS and you can see how long these boats have lasted with them. A good anode should handle it well enough. Just got to make sure you aren't leaving water sitting in the bilge and such.

SHSU
 

Sharpie223

Petty Officer 2nd Class
Joined
May 24, 2021
Messages
173
Since this will be a trailered boat and currently only planned for freshwater, bilge moisture would be the biggest issue. In my mind it's just a generally good idea to have a dry bilge that I am planning to leave a few air channels in my foam to keep air moving when not on the water, my guess is passive air flow will be enough.
 

Sharpie223

Petty Officer 2nd Class
Joined
May 24, 2021
Messages
173
Patched the transom holes that won't be used with pc7. It has some kind of fiber in it, maybe kevlar? Not sure that I trust it without backing nonetheless. I tried to embed some aluminum window screening on the inside, but couldn't get it to stay put due to the curve. I think I will try gluing a piece of flashing on the inside, going to use a lot more epoxy...

20230316_143141.jpg
 

SHSU

Lieutenant Junior+Starmada Splash Of The Year 2019
Joined
Mar 8, 2017
Messages
1,741
Best options for holes is a rivet patch or a bolt through it.

As for what you have done, I have never tried, but I agree that any filler without backing I wouldn't trust.

SHSU
 

Sharpie223

Petty Officer 2nd Class
Joined
May 24, 2021
Messages
173
I may revise my plan tomorrow, I trusted it with the idea that there would be a metallic mesh in the matrix, not so much on its own. I think for the lower holes, I may plug with an epoxy coated screw from the inside, that way I can still cut it flush and smooth the outside. For those located over transom wood, I will install a screw from the outside, but still cut flush, the wood should hold it tight. A patch from the outside would be easiest, but I think the look will bother me too much, same with extra fastener heads sticking out.
 

SHSU

Lieutenant Junior+Starmada Splash Of The Year 2019
Joined
Mar 8, 2017
Messages
1,741
I may revise my plan tomorrow, I trusted it with the idea that there would be a metallic mesh in the matrix, not so much on its own. I think for the lower holes, I may plug with an epoxy coated screw from the inside, that way I can still cut it flush and smooth the outside. For those located over transom wood, I will install a screw from the outside, but still cut flush, the wood should hold it tight. A patch from the outside would be easiest, but I think the look will bother me too much, same with extra fastener heads sticking out.
Cutting the head or nut off to keep it flush, will defeat the purpose. I get that it won't look perfect, but none of these boats are show boats. Last thing you want is the epoxy to crack and the flush bolt to fall off. That would ruin your day more then a couple bolts in the transom.

Just my 2 cents, take it for what little its worth.

SHSU
 

Sharpie223

Petty Officer 2nd Class
Joined
May 24, 2021
Messages
173
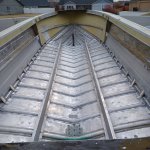
Finished gluviting the inside of the boat today. Focused mainly on the seams that leaf to exterior, as well as rivets on the main hull sheet. I also gave every rib rivet and seam a coating, but don't expect these to accomplish much due to distance from exterior. I bought the 2 lb size of gluvit and have used less than half, I think I might gluvit the bottom of the hull prior to coat-it, figuring the coat-it will give more abrasion resistance, and the gluvit a tighter seal. I feel like this is a milestone, having a cleaned, sealed, mostly refurbished hull. I will try to install some cross bracing prior to flipping for paint, hopefully next weekend. Any tips for flipping the hull without a hoist?
20230319_150020.jpg

As for the plug screws, the plan is to use a screw with a minor diameter tight to the inside diameter of the hole, then the screw will be cutting tight fitting threads, these threads will be sealed with epoxy. I think this should offer close to full strength of the base material. To up the hold even more, I might drill a small hole in the cut face, allowing a punch to spread the cut face wider than the hole, this will require some testing for practicality.
 

Sharpie223

Petty Officer 2nd Class
Joined
May 24, 2021
Messages
173
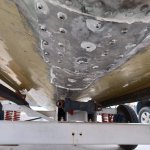
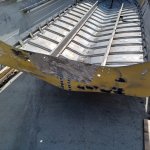
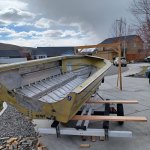
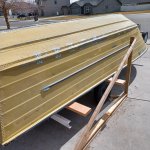
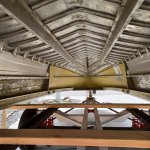
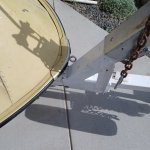
Got the boat flipped. Added a couple of 2x6 across the trailer, lifted the front, and just rolled and slid it. Lots of space underneath for any interim interior work (going to weld the trailer tilt shut and add some bracing). Here's some pictures of the setup, took two people. I did have to install a lifting eye in the bow, should be an easy hole to patch.
20230325_135144.jpg

20230325_142918.jpg

20230325_142928.jpg

20230325_143834.jpg
 

SHSU

Lieutenant Junior+Starmada Splash Of The Year 2019
Joined
Mar 8, 2017
Messages
1,741
An original nose cap and you drilled a hole through it!?!?!?!?!?! lol

Good progress

SHSU
 

Sharpie223

Petty Officer 2nd Class
Joined
May 24, 2021
Messages
173
My only hesitation in drilling was which bit would be sharp enough, haha. Also kinda a sad state of my drill bit collection, at least they get used.

Made progress today, sanded half the bottom up to my ratchet strap, all paint sanded. Then abrasive wheeled away all paint surrounding rivet heads and seams to make way for epoxy. Removed any paint patches that seemed to come off too easy. Finished the day by tack clothing with methanol.

20230326_200919.jpg
 
Top