1995 Crownline 202 BR Deck Restoration

Status
Not open for further replies.

Badfish95

Petty Officer 2nd Class
Joined
Jun 30, 2012
Messages
118
Re: 1995 Crownline 202 BR Deck Restoration


More foaming photos. Hopefully tomorrow I can get out there and plug the holes. I have about a gallon and a half of resin left from my original 15 gallons and another 5 gallons of resin coming on Monday. I saw in another thread that boat building follows the rule of PI.... Take what you thought it was going to cost and multiply that by PI 3.141.... Originally budgeted $1,200-$1,500 so the math is working out quite nicely :facepalm:


I already bought the carpet and still plan on using it. My new plan is to only carpet the areas that are open to the air. I will carpet from the bilge to the bow. The other areas will likely get the Rustoleum industrial paint job that WOG has outlined. That way, when wet lifejackets get stowed under the rear hatch, the carpet wont trap the moisture against the deck. The rear sundeck supports were originally screwed into the deck creating a place for water intrusion. I may not carpet those like they were originally. They are already coated with spar urethane. I may scuff them and paint them the same color as the rear bilge, deck area. This way I can apply silicone to the to the screw heads/removable areas to hopefully prevent water intrusion. If I ever need to remove the rear sun deck framing to get at the engine, I can just reapply the silicone.
 

Badfish95

Petty Officer 2nd Class
Joined
Jun 30, 2012
Messages
118
Re: 1995 Crownline 202 BR Deck Restoration


Cleaned out the overfill by taking out the pilot bit in my hole saw and then using a chisel to pry out the foam plug.


Here are the plugs PB'd in. It worked better when I overfilled the holes and pushed the PB out through and around the plug. You can use the excess to butter over the top or fill the next hole.


I had just enough resin left to tab in and fillet the block that hold the side panels in and all of the risers.


These turned out pretty well. I used PB and 1708 to tab them in and then went over the riser with another layer of 1708.


These will get more reinforcement with the 7.5 oz cloth.


Battery box riser. It just made sense to raise it up as well. This area will all get painted Rustoleum industrial gloss white. I picked up the primer, paint and hardener. The only hardener I could find was Majic brand enamel hardener from Tractor Supply. I assume it will work the same as the Valspar brand stuff. Right?
 

Badfish95

Petty Officer 2nd Class
Joined
Jun 30, 2012
Messages
118
Re: 1995 Crownline 202 BR Deck Restoration


Here's how she sits. I used up the last of my initial 15 gallons of resin. I have 5 more coming tomorrow. I will sand the entire deck before adding 1.5 oz mat and a layer of 7.5 oz cloth. I have a 12" wide roll of 1708 that will be used to tab the deck to the hull. I plan on Peanut Buttering the crack between the deck and hull and tabbing in with 1708. I will then add the 1.5 oz over it and quickly follow with the 7.5 oz cloth. That should about do it for the deck.

I bough a gallon of Rustoleum primer for the bilge, ski locker and rear deck area. If I prime the whole thing is there really any need to add wax to the top layer of cloth?
 

Woodonglass

Supreme Mariner
Joined
Dec 29, 2009
Messages
25,927
Re: 1995 Crownline 202 BR Deck Restoration

If you're gunna paint the deck you'll need to add wax to the final coat of resin to make it fully cure. Painting over uncured resin is not a good idea.
 

Badfish95

Petty Officer 2nd Class
Joined
Jun 30, 2012
Messages
118
Re: 1995 Crownline 202 BR Deck Restoration

Thanks WOG. I appreciate all the help you have given me throughout this build. With a little luck I'll be done bugging you and be back on the LAKE!

I ran out of resin and had a little time left in the day. Decided to attempt a gel coat repair. The boat has plenty of scuffs and scratches to practice on. I decided to tackle a few of the largest ones. Here's some before and after pics. I rate the repair an 8 out of 10. If the color had been better I would have been blown away at how easy this is. I do not fault the gel coat maker since nearly 20 years of UV light has more than likely yellowed my gelcoat. With a little practice, I'm sure I could custom color match it a little better. Either way, this boat is for enjoying the lake and will without a doubt receive another ding or twenty.


UGLY dock scar! This was done prior to my taking ownership. My guess is it was tied up and took a serious pounding against a not so forgiving dock. I sanded it with 150 grit and put a few notches in the fiberglass to give the gelcoat something to bite onto.


Still pretty ugly. I used a body filler spreader to build the area up. The kit came with 2 oz of gelcoat paste. It doesn't seem like a lot of material but I only used half of the jar and could have easily repaired 4 or 5 of these sized dings with that amount. I let it dry overnight, but the directions say it can be sanded in an hour or two.


Knocked the high stuff down with 150 dry, then switched to 220 dry. Followed with 400 wet, 600 wet and then 1000 grit wet. After a few minutes with Meguirs one step compound on a HF buffer it is looking pretty respectable.


Color is Crownline Moonstone. The stuff is distributed by Spectrum and I purchased it through iboats(shameless plug). I chose it over the mix in match stuff since they have already done the homework on most boat models. Again, the color match isn't great but probably better than I could have done with a mix and match kit. I highly recommend this product for simple repairs. It comes with the catalyst and is already waxed and thickened. I fixed 3 other areas and have about an hour of labor in the whole thing.
 

Badfish95

Petty Officer 2nd Class
Joined
Jun 30, 2012
Messages
118
Re: 1995 Crownline 202 BR Deck Restoration

My vinyl guy called and said my seats were almost finished. That got me thinking about the seat post risers and the carpet situation. He said sewing an edge band on the carpet was no big deal. That meant I needed to get the carpet rough cut and over to him quick. Here's what I did.


I bought a few paper drop cloths 12'X9'. They were just large enough to make my template. I laid it in the bow and taped it near the bilge.


I made sure to leave excess around the edges. All edges except for the seat posts will get covered with the original vinyl wrapped panels.


Here it is cut to fit. I carefully rolled it up and carried into a clean room to transfer onto the carpet.


Here I have it laid out onto the carpet, ready to cut. It is 16oz Marine carpet from Lowe's so it cut relatively easy with scissors.


Here it is rough cut and loosely laid into the boat.


Seat post risers are cut free. My vinyl guy said it wouldn't take long to sew a vinyl banding on the sqaure cutouts. The wrinkles will all be rolled out when I apply the glue(hopefully). The nice thing is there aren't any real large runs to make. The ski locker will be from a seperate piece as well as the fuel tank cover. As always, any suggestions on how to successfully lay the carpet is appreciated as this will be my first marine carpet installation. I chose the Latex based mildew resistant stuff from Lowes. I understand the rubber cement is preferred but the workability of the Latex was appealing in the case that I need to re-position the carpet.
 

Badfish95

Petty Officer 2nd Class
Joined
Jun 30, 2012
Messages
118
Re: 1995 Crownline 202 BR Deck Restoration

We were able to get the hull tabbed and seams taped last night. I am hoping to finish the deck tonight.

We started at 8p and stopped laying glass at midnight last night. Can I just wipe the fresh areas with acetone and keep working tonight?
 

JASinIL2006

Vice Admiral
Joined
Feb 10, 2012
Messages
5,674
Re: 1995 Crownline 202 BR Deck Restoration

Less than 24 hours? I would think so. I know I waited a couple of days and did the same, but that was in pretty cool temps (this winter in my garage). The acetone should get the glass nice and sticky.

You're making nice progress!

Jim
 

Badfish95

Petty Officer 2nd Class
Joined
Jun 30, 2012
Messages
118
Re: 1995 Crownline 202 BR Deck Restoration

Thanks Jim. I am really pushing to get things done. My goal is to have it ready for the Lake by Memorial Day.

I sure hope the carpet installation goes faster than the glasswork!
 

JASinIL2006

Vice Admiral
Joined
Feb 10, 2012
Messages
5,674
Re: 1995 Crownline 202 BR Deck Restoration

I hauled to get my boat done, and now all the rivers around here are too flooded to boat! Aaaagh! Driving me crazy... hope you're on the water by Memorial Day. Goals are good!
 

Badfish95

Petty Officer 2nd Class
Joined
Jun 30, 2012
Messages
118
Re: 1995 Crownline 202 BR Deck Restoration

Well, the floor is all glassed in. For most pita part of this project it is a toss up between grinding glass or working with CSM and 7.5 oz. We finally got it to lay down but it will need some touching up here and there. Glad it is mostly over. I ran out of resin while applying the CSM to the tank cover. Since it was waxed resin, can I scuff it with a grinder and go over it with the 7.5 oz?


I'm also looking for some opinions on using Peal and Seal inside the engine compartment. Originally, the boat had a foil faced sound deadener/thermal barrier on the insides of the vertical deck lid supports. I would say the panels are 6-8" away from the engine. It looked to be a butyl rubber/ asphalt mat with foil facing. It was heavily stapled onto the panels. Lowes sells Peal and seal(for roofing applications) for $17.00 for 6"x25' roll. That is extremely cheap compared to the name brand sound/heat deadeners. Do you think peal and seal would work for this application?
 

Badfish95

Petty Officer 2nd Class
Joined
Jun 30, 2012
Messages
118
Re: 1995 Crownline 202 BR Deck Restoration

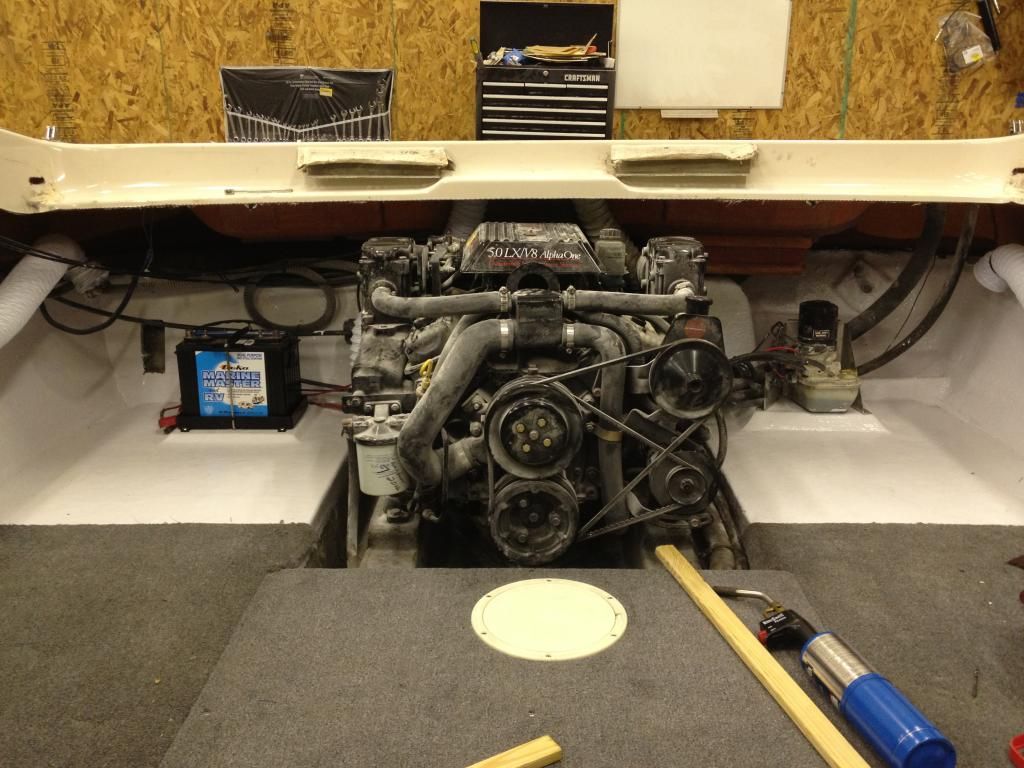
Update on progress. The fiberglass is done! What a great feeling! I was able to pull her out of the shop and dust everything off. The garage got another good sweeping too. I decided to paint as much of the rear compartment as possible. This will keep as much moisture absorbing carpet out of the less ventilated areas. It should make it easier to clean as well. I'll still use carpet where seats and hatches could rub. This way it will limit rattles and wear. Everything has been acetoned and scuffed for paint.

I had to put the restoration on hold since my buddy needed help with his Tiki Bar. He has put up with my project all winter and spring, so giving him a hand was the least I could do. The tiki bar is turning out sweet! I took photos and will post them once the home computer gets fixed(using cell phone now).

Tonight, I hope to get some paint down and start wrapping new pieces with carpet. I'm still holding out hope for a Memorial Day Splash.
 

Badfish95

Petty Officer 2nd Class
Joined
Jun 30, 2012
Messages
118
Re: 1995 Crownline 202 BR Deck Restoration


I almost forgot to post up the vinyl work. Pro-Stitch out of Taylorville, IL did these for me. I am very happy with how they turned out and they treated me well on the price. Originally, I was going to keep the rear sun pad all white, however the guys at Pro-Stitch talked me into keeping it original. I'm glad I listened, the "Ruby" swirl really adds character.


Here's some photos of the Tiki Bar Roof project. We already had the deck and bar built last year. The thatch will be in on Tuesday. Neither of us had framed a hipped roof prior. Roof Framing Calculators - Hip + Gable Roof Framing - Online is a really cool roofing calculator. It made ordering materials a breeze and took the guess work out of the angles. It took three of us to lift the treated main section up, but once the in place it was solid!


Still needs sheathing and a few creepers installed, but you get the picture. I'll post a picture once the thatch is on. It's gonna be a great summer.
 

Badfish95

Petty Officer 2nd Class
Joined
Jun 30, 2012
Messages
118
Re: 1995 Crownline 202 BR Deck Restoration

Here's an update of my progress. I will post photos after Memorial Day weekend(can't slow up now!). I want to thank WOG for his rustoleum roll n roll recipe. The paint rolled on like milk and hardened like a rock! The paint was so much easier to work with.

Sun: 5p-1a. Primed all parts and deck portions not covered by carpet.

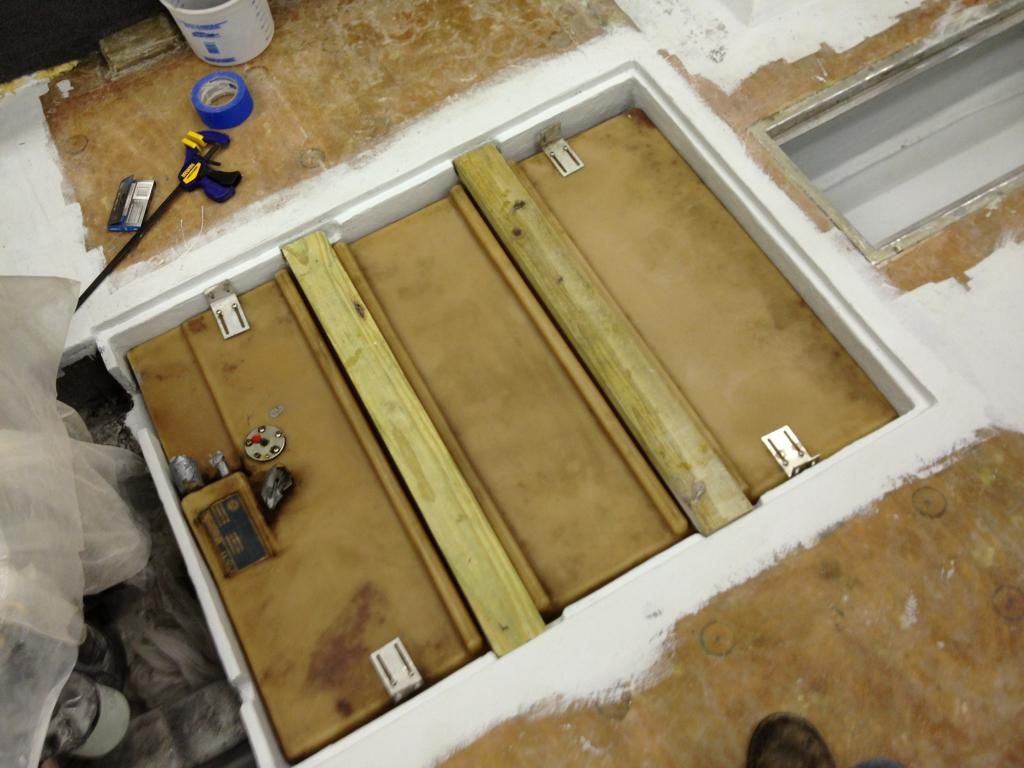
Mon: 6p-12:30a. Painted all parts, etc. Cleaned mildew and 20 yrs of gunk off outside of fuel tank. Used the 2 gallons still in the tank to swirl and clean inside of tank. Test fit tank.....wheeeew! It fit! I had a nightmare that it didn't fit after new stringers were cut. Not going to lie, it is snug, but its probably better than sitting in there loose. Carpeted ski compartment lid and sides of hull!

Tues: 7:30p-1a. Painted parts, etc. Carpeted parts not painted.

It's starting to come together. I know I'm pushing it for a Memorial Day Splash, but I work better with a deadline...
 

Badfish95

Petty Officer 2nd Class
Joined
Jun 30, 2012
Messages
118
Re: 1995 Crownline 202 BR Deck Restoration


Template for side carpet.


Side carpet installed. I used staples and indoor outdoor glue. It held fine, but I would recommend Dap Weldwood contact cement for no painted areas like this. I actually used 3 types of carpet adhesive and give my opinion on them in another post.


Heres is my fuel tnak prior to a good scrubbing. There was about 2 gallons of gas still in it. I sloshed the gas around and dumped it out. No sense leaving any dirty fuel/water in the tank.


Tank installed. I used self stick campershell weather stripping under the tank to keep it from rubbing against the hull. It was a closed cell type that closley resembled what came out of the boat.


Carpet is in! I took some serious force to get the fuel tank lid on after I added carpet to it. A 2x4 and a rubber mallet did the trick.


The sides went it pretty easy. Also, you can see that I replaced the vent hoses. Menards has the vinyl wraped 4" ducts. They are marketed for bathroom vents, but came out of the package the exact length needed.
 

Badfish95

Petty Officer 2nd Class
Joined
Jun 30, 2012
Messages
118
Re: 1995 Crownline 202 BR Deck Restoration


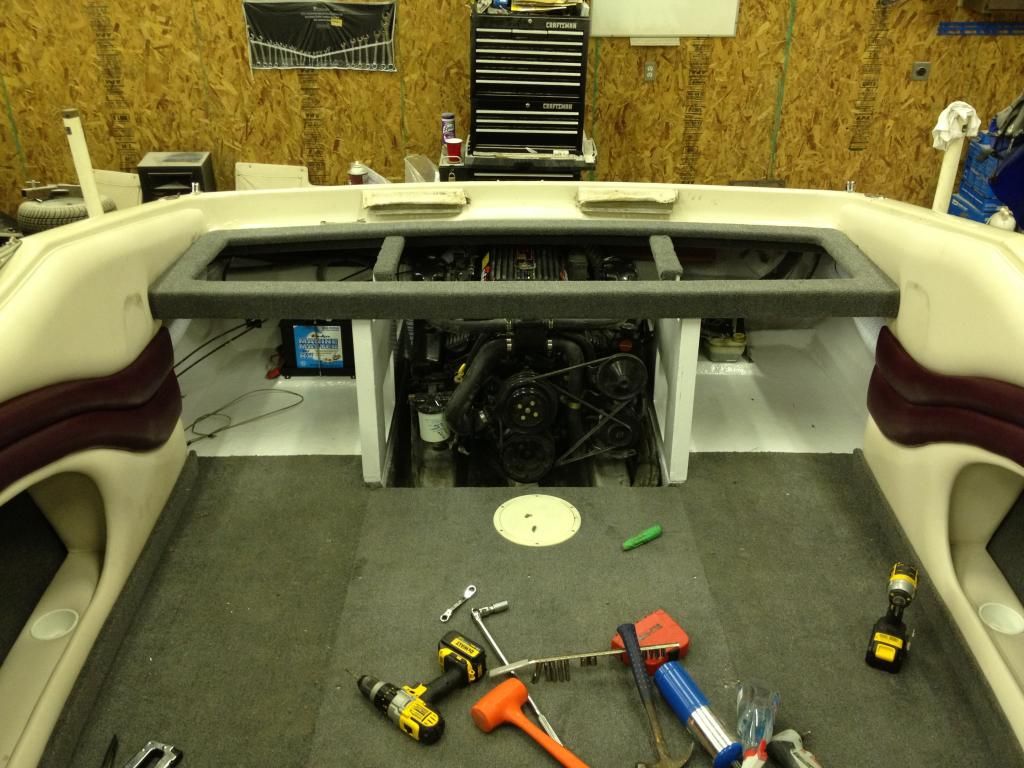
The rear hatch framework went in easy as well. It feels very solid.


Top view after another full day in the shop. I was feeling pretty good about a Memorial Day maiden voyage.


Sun Deck installed. My father in law came over and gave me a hand installing the sun deck. It went on almost too easy. I purchased new 20# gas springs from Jamestown and they hold the lid up well. I could have gone with the 30# ers but I fell the less stress on the pivots/framework the better.


Rear bench seat is intalled and set in place. It looks and feels like a new boat. To quote Phil Robertson, I'm "Happy, happy, happy." We celebrated hanging out with some friends around a fire. It is finally starting to feel like summer. The weather has been terrible here in Central IL. We have been getting dumped on for the last month. Lets hope things clear up, there is plenty of water in the lake now...
 

StevenT

Petty Officer 1st Class
Joined
Mar 9, 2009
Messages
230
Re: 1995 Crownline 202 BR Deck Restoration

BD95

Your restore looks Great, Awesome job. I noticed an exact match in your restore and mine. Our swim platforms look identical, tools and all.:lol:
 

Badfish95

Petty Officer 2nd Class
Joined
Jun 30, 2012
Messages
118
Re: 1995 Crownline 202 BR Deck Restoration


Here she is. I still have a few odds and ends to install, but 97% of it is complete. We had the kids, a picnic lunch, life vests, safety gear etc. all packed up and on our way to the lake. I took a look to the West and asked my wife to check the radar. She said, "Yeah, this one isn't going to miss us." As much as I wanted to put her in, the thought of soaking all that work in a rain storm made me turn around. I didn't get to splash on Memorial Day, but that's just how it goes. Two hours after we put the boat away we experienced some nasty storms. Looks like we made the right call.


Looking more inviting now.


There it is. I bought this boat less than a year ago. We were able to use it for most of last summer and now it is ready for another 10+. I am so happy to have it finished.

Special Thanks to:

My buddy Mike: Thanks for letting me take over your shed for the last four months and for helping with the build. At one point he said, "I absolutely hate fiberglass work but couldn't leave you out here by yourself." That's a true friend.

My Dad: Thanks for giving me a week of your time. We put in some crazy hours and I couldn't have gotten the stringers cut so well withou you. Much of what I did on this boat was learned by watching you growing up. Thanks for being there.

My Wife: Thank you for being so patient and understanding. This project took a lot of time away from you and the little guys. I'll make it up to you guys when we are all forced to be within 20'2" of each other for the entire weekend!

Woodonglass and the rest of the iboats crew: I was asked, "How do you know how to do all these things?" The answer is, iboats. WOG was patient with my questions, even though he had probalby been asked the same ones a thousand times over. This site helped talk me back from the ledge several times. I hope I added something to this precious boating resource. Thanks iboats.
 

Badfish95

Petty Officer 2nd Class
Joined
Jun 30, 2012
Messages
118
Re: 1995 Crownline 202 BR Deck Restoration

BD95

Your restore looks Great, Awesome job. I noticed an exact match in your restore and mine. Our swim platforms look identical, tools and all.:lol:

Ha ha, yeah. Some guys ask what tools you will need to do this job. It would be easier to name the tools you don't need.... The hardest part about boat restoring is all the trades you will need to become familiar with:

Woodworking
Fiberglassing
Carpeting
Vinyl/Upholstery
Gel coat repair
Mechanics(engine and outdrive)
Electrical
Painting(bilge and engine compartment)
Sales(to your wife why you need more supplies)
Marriage Counseling(when she doesn't believe you)
Finance (when you blow your original budget)

... well at least that is how it went for me.
 
Status
Not open for further replies.
Top