1995 Crownline 202 BR Deck Restoration

Status
Not open for further replies.

tpenfield

Moderator
Staff member
Joined
Jul 18, 2011
Messages
18,046
Re: 1995 Crownline 202 BR Deck Restoration

tpenfield,........... ok, I'm beginning to cave on the foam idea..... The problem is, I will actually lose sleep over the idea of not having the structural, sound deadening, stabilizing, life saving, puncture rectifying, liability erasing, magical foam back in there. I could have sent it to the local boat yard and paid them to put a band aid on it for $3,000.00 and be back to the sand bar sipping a cold one. However, like many of you, I need to be at the sand bar sipping a cold one knowing that my boat was built right. It's a curse...

Here's my plan:

The limber holes are staying in as they will at least give the foam a chance to dry out if it ever does get wet. What if I took 3/8" rope and covered it in vaseline or some kind of grease. I would insert the rope into the limber holes and then along the bottom side of each cavity. The ends of the ropes would stick out into the fuel tank area. Once the foam hardened I would yank the rope out and there would be a small channel on the bottomside of each cavity to allow water to drain to the bilge when parked bow high. Think it would work? I think I may have read this idea somewhere. It seems to be the most logical idea over pvc drainage, balloons, dissolved paper mache... etc.

Either way the foam debate is over, just don't tell my wife that it's going to cost more.

This rope method is to create a channel for water to drain if ever needed? It might work, but it might not, as the foam will have a good grip on the shape of the rope, and the grease coating may not matter too much. The fact that the chambers have limber holes should be good enough for drainage. If you did want to form a channel, you could make a tube of screen material and put it in the bottom of the chambers. When you pour in the foam, it will tend to stop and set up when it hits the screen mesh, leaving a channel.

Just my thoughts.
 

fat fanny

Lieutenant Commander
Joined
Feb 9, 2006
Messages
1,935
Re: 1995 Crownline 202 BR Deck Restoration

Ilike the idea of linning the cavity with plastic and having a cap for that cavity when pouring and the end result is a plug this way any channel can be formed into the bottom of the plug with say 1/2 a pc, of pvc leading to weap and or limber hole and for that matter the plastic can be left in place and the plug re-inserted being encapsulated in plastic. I think I got this from Ooop's in one of his posts with an experiment he did .
 

tpenfield

Moderator
Staff member
Joined
Jul 18, 2011
Messages
18,046
Re: 1995 Crownline 202 BR Deck Restoration

Keep in mind that the structural value of the foam is based on the adhesion to the hull and structural surfaces it comes in contact with, creating a highly rigid structure. If plastic ere used as a molding aid, then the only value of the foam would be flotation.

In my recent restoration I used the pour-in stuff and was quite amazed at how solid and rigid the foam was after curing. . . Hard as a rock
 

JASinIL2006

Vice Admiral
Joined
Feb 10, 2012
Messages
5,674
Re: 1995 Crownline 202 BR Deck Restoration

I thought my deck was pretty solid after screwing and peanut-buttering it to the stringers, and tabbing it to the hull. Add foam, though, made a huge difference. You can tell the deck is much more rigid. Really surprising how much of a difference the foam made.

Jim
 

Badfish95

Petty Officer 2nd Class
Joined
Jun 30, 2012
Messages
118
Re: 1995 Crownline 202 BR Deck Restoration

After a bit more grinding and prepping this morning we were able to glass the bow and ski locker sections in. We used 2 layers of 1708 in one layup to minimize the prep work. It took a lot more time than I thought. It was really difficult working in those tight spaces. I wasn't able to reach all the way under the bow section without taking off my respirator. I would hold my breath and roll the glass in. Then I would come up and take a few breaths through the respirator like a scuba diver. Pretty sure I lost a few brain cells, and I don't have many to spare... I have from the captains chair back to finish up and then it's deck time.
 

jbillingsley

Petty Officer 2nd Class
Joined
Oct 19, 2012
Messages
125
Re: 1995 Crownline 202 BR Deck Restoration

Badfish, I'm right there with you on no foam. I'm in the process of restoring an `85 Wellcraft 210 Elite. It's a 20'5" hull. Factory original, it did not have foam. I grew up with this boat - my dad traded up to it when I was 11, noise was never an issue and it was a very solid hull. I vividly remember my dad launching it off a 6' wake not long after we first got it. Mine's a Scarab (Nova) by heart and there's every bit of that in her.

You're a good ways ahead of me on your restoration, and I'm going to be doing a lot of things the same way you are. Proper weep holes, glass over/seal everything. Mine rotted primarily because the weep holes weren't sealed. A dry and impenetrable substructure is what I'm after with my rebuild. Screw foam.
 

DanTheMan23

Cadet
Joined
Jul 3, 2012
Messages
10
Re: 1995 Crownline 202 BR Deck Restoration

Badfish, this is one awesome project you have going on! Major props!

I'm actually in the process of tearing out the old carpet in my 98' 202br, luckily the floor is in great shape! I saw that you ended up with a 12x23' carpet, where did you end up buying that from? Will you be running the carpet up the sidewalls in the boat? My boat originally came with this vinyl crap on the sidewalls which I tore off as well.

Another question I have is, how hard was it to unscrew the seat posts from the floor? I'm having an incredibly difficult time unscrewing the damn seat posts from the deck.

What I would really love to do is forget the carpet, fiberglass and gel coat the whole floor, and use the snap in carpet. I'm still on the fence of diving into such a project..

Really looking forward to your end product, awesome work!
 

Alwhite00

Master Chief Petty Officer
Joined
Apr 14, 2011
Messages
885
Re: 1995 Crownline 202 BR Deck Restoration

Looks great, Transom was ok with all of the other rot?

LK
 

Badfish95

Petty Officer 2nd Class
Joined
Jun 30, 2012
Messages
118
Re: 1995 Crownline 202 BR Deck Restoration

MrThunder: I agree completely that foam sucks... But so do taxes and they are both somewhat necessary. The current plan is to go back with it more for structural support and liability reasons... I would stay the course with your build an leave it out if it came that way from the factory.

DTM23: I think I hear that Crownline switched to a much better grade of plywood in the late 90's that carried a warranty so you are probably in good shape. I bought the carpet at Lowe's mainly to avoid shipping charges. Yes, I will be carpeting the sides. 12' makes it gunwale to gunwale, so we'll see. I went the carpet route for ease of installation.... And to keep it somewhat original. Snap in carpet looks great but sounds costly. As for the seat screws they are stainless steel machine screws screwed into a steel plate under the floor. My plates were extremely rusted so use an impact drill/driver if possible. Good luck with your resto.

Alwhite00: I haven't done core samples but they pass the hammer test. My plan is to replace the stringers an when its time to upgrade the engine look closer at the transom/mounts. I pulled the drive and replaced the bellows, gimbal bearing, ujoints, shift cable, etc last summer and the engine stayed in perfect alignment without needing to adjust mounts. That's enough for me to go ahead and run it for a few more years.
I have more photos to post and will when I get time. I test fitted the rear hatch and supports. It took a little adjusting but came out well.
 

Badfish95

Petty Officer 2nd Class
Joined
Jun 30, 2012
Messages
118
Re: 1995 Crownline 202 BR Deck Restoration

Here are some photos of recent progress.

IMG_1330_zps21e4d997.jpg

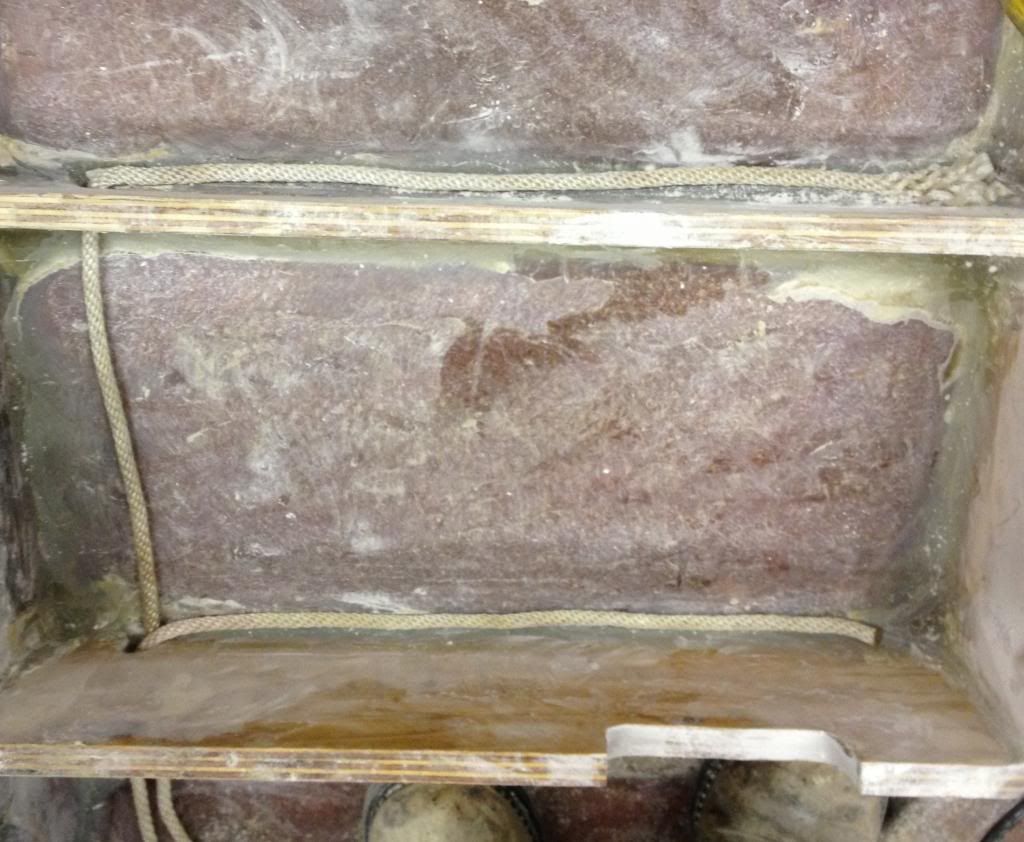
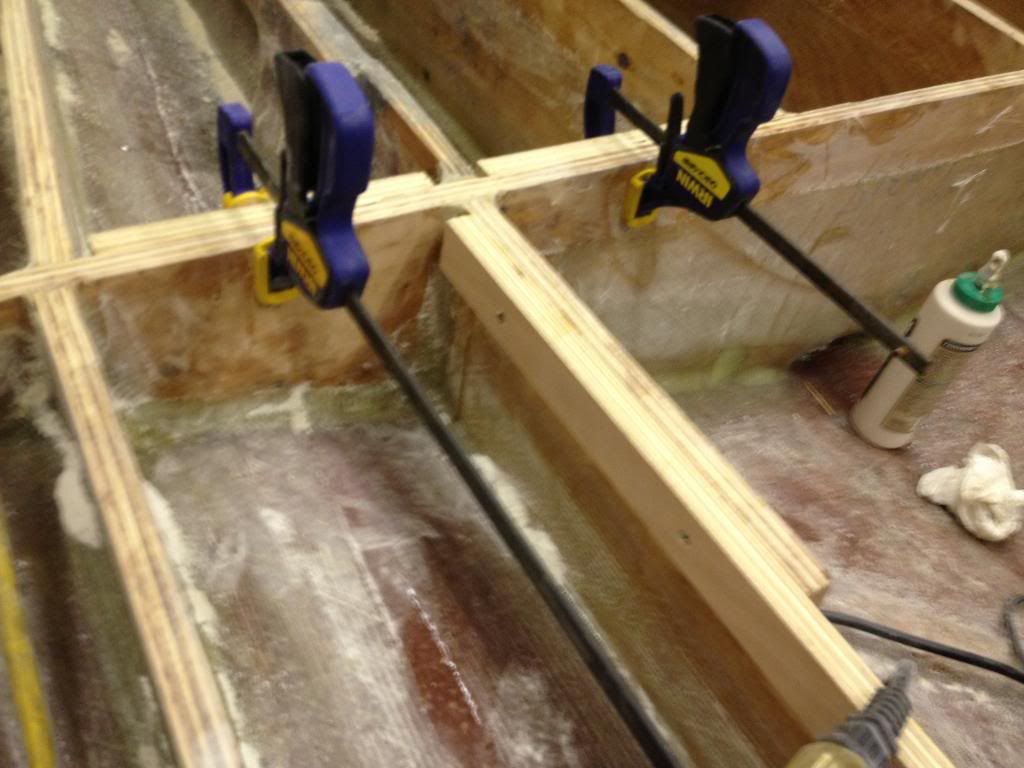
Here is an example of how I would lay out the rope before the pour in foam is installed. Instead of grease or vaseline I was thinking liquid soap would be a better option. It should provide enough lubrication to pull the rope out and eventually wash away if water were to get in.

IMG_1337_zpsdba0b6a6.jpg

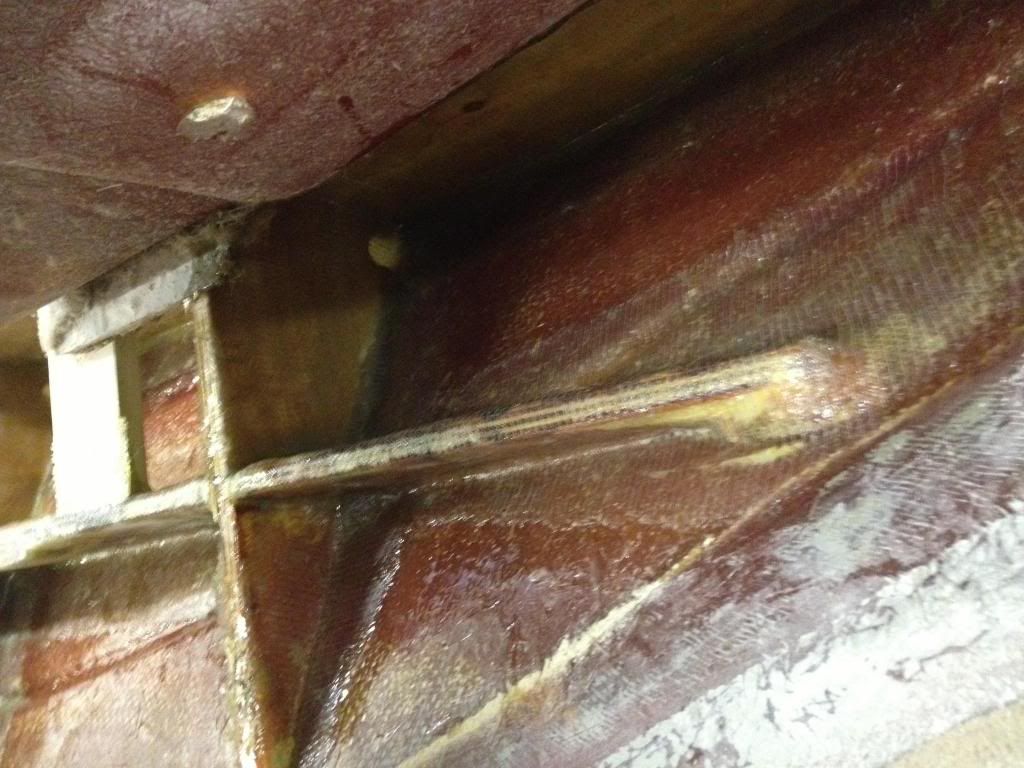
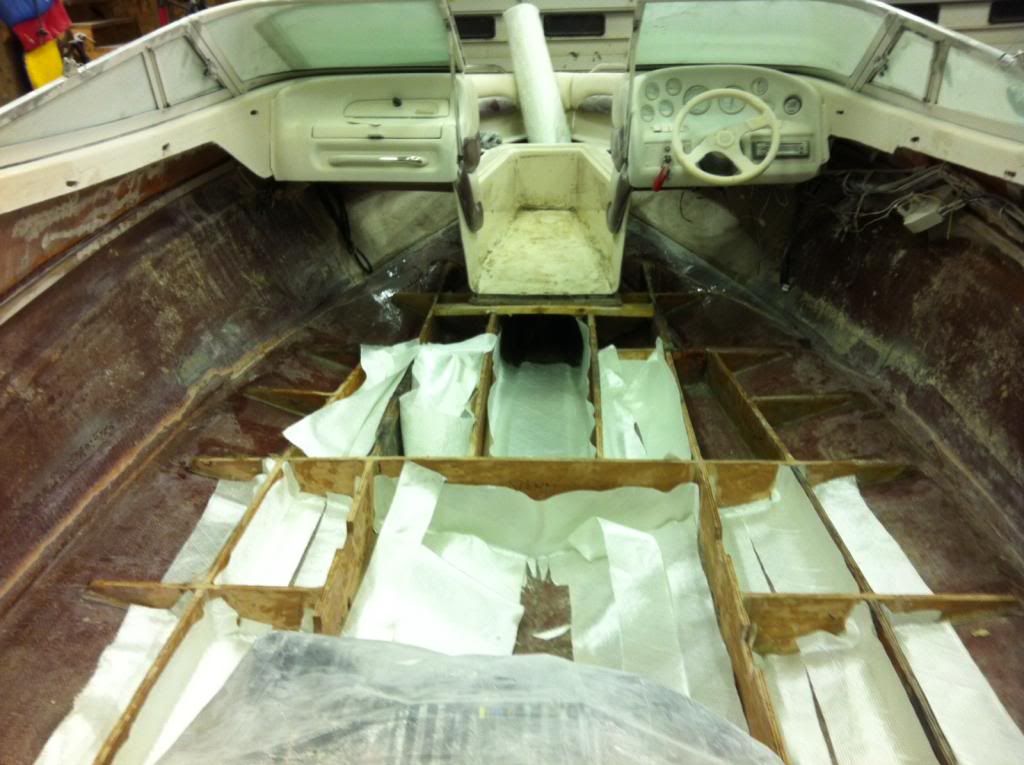
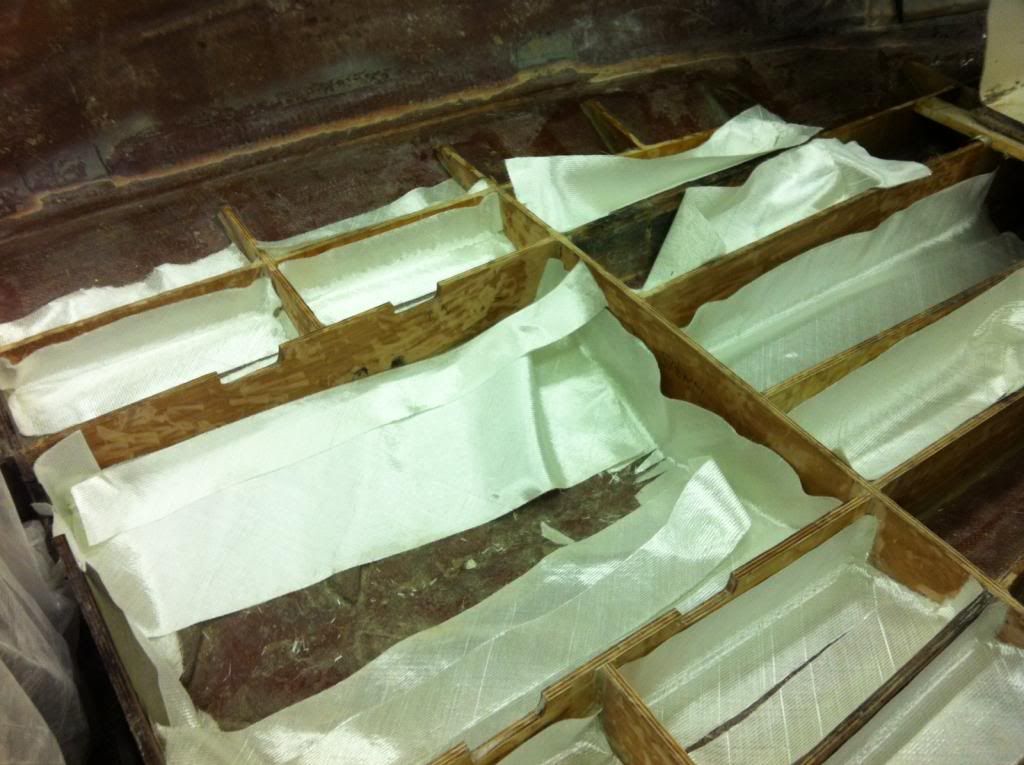
Here is the bow section under the starboard seat storage. We didn't carefully pre-cut the 1708 so its not as clean looking as it could be. After the deck is installed no one will ever know the difference. I may apply another layer of 1708 if I have enough material left over. You can see where the limber hole was covered over. I will open this up with a rasp bit chucked into my drill and then peanut butter(w/ fibers) the edges real well.


IMG_1341_zpsf0089a71.jpg

IMG_1342_zps909bf397.jpg

A couple shots from the loft.

IMG_1344_zps71a6e22c.jpg

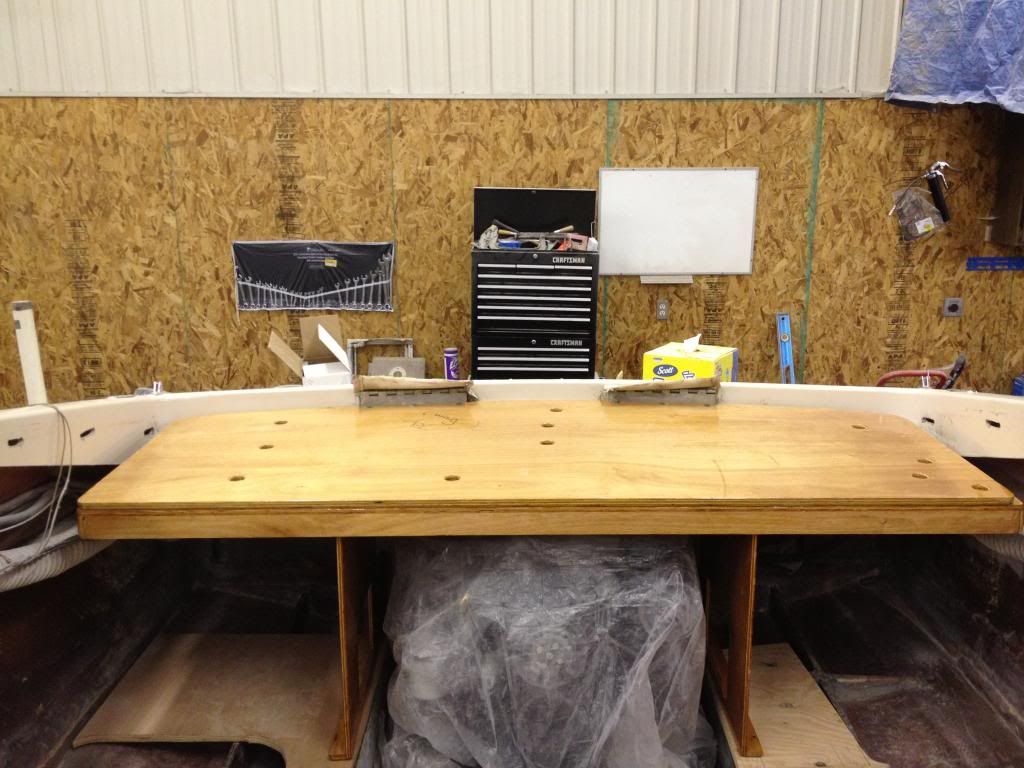
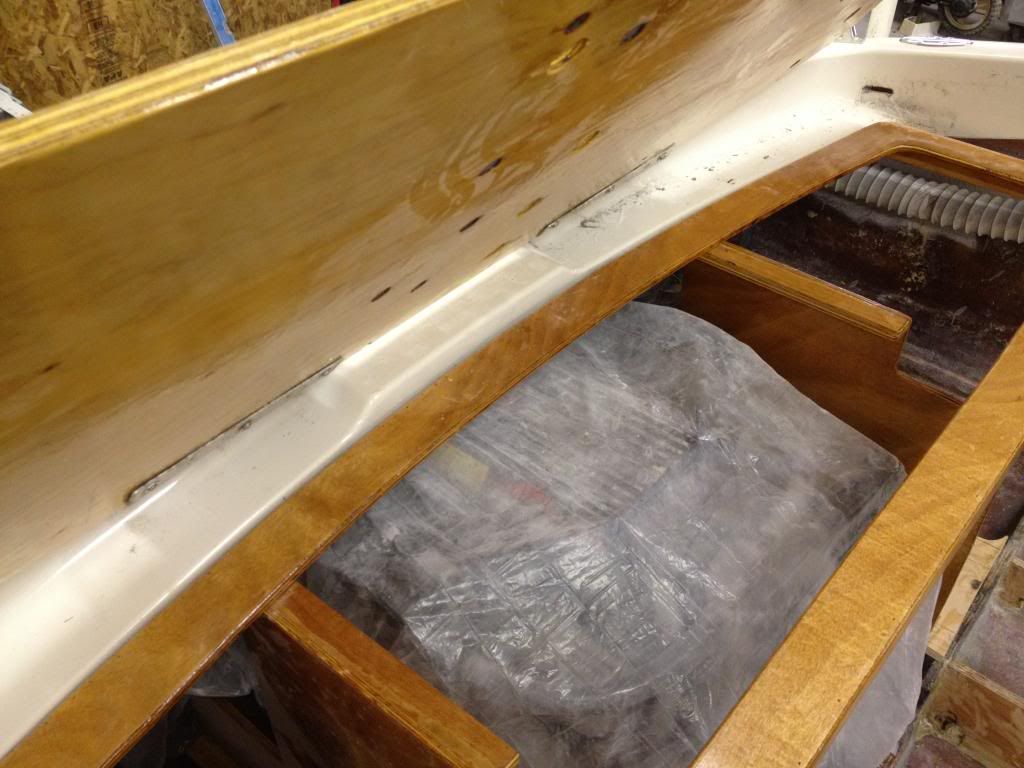
Here is the rear hatch and supports test fitted. I cannot stress enough the need to to test fit your new woodwork. My rear hatch was already at the Upholstery shop when I realized that I still needed to install stainless steel T-nuts BEFORE it got covered with foam and vinyl. I used the old wood as a template, but you can still be a little off when transferring pencil lines and cutting them with a jigsaw. We scribed the areas where there was excess material and I used the angle grinder with flap disc to remove the high spots and create a custom fit. Oh yeah, and be sure to buy stock in 36 grit flap discs....

IMG_1345_zps6528bd35.jpg

Here is the hatch lid lifted. I will need to order some replacement gas supports/shocks. One was missing and at $15/ea I may as well replace them both.

Slowly but surely.......
 

JASinIL2006

Vice Admiral
Joined
Feb 10, 2012
Messages
5,674
Re: 1995 Crownline 202 BR Deck Restoration

I'll be interested to hear if you can pull the rope out after foaming the hull. I'm amazed at how sticky that stuff is, and how much force it can exert when filling the cavity. Will you do anything to make sure the rope doesn't float off the hull when you pour in the liquid foam?

Jim
 

Badfish95

Petty Officer 2nd Class
Joined
Jun 30, 2012
Messages
118
Re: 1995 Crownline 202 BR Deck Restoration

I'll be interested to hear if you can pull the rope out after foaming the hull. I'm amazed at how sticky that stuff is, and how much force it can exert when filling the cavity. Will you do anything to make sure the rope doesn't float off the hull when you pour in the liquid foam?

Jim

I will have to do a trial run to see if the foam will clamp the rope inside the cavity. I don't think I want a permanent wick inside each chamber. I will try and make a box with left over scrap and post how well it worked.
 

Badfish95

Petty Officer 2nd Class
Joined
Jun 30, 2012
Messages
118
Re: 1995 Crownline 202 BR Deck Restoration

IMG_1347_zps30978b66.jpg

We got all the 1708 for the stinger layups cut last night. This should make it go faster and look cleaner in the end.

IMG_1346_zps0aed111e.jpg

I had just enough 1708 for the stringers and will need to order more to tab the hull in. I am going to use CSM to wrap over the tops of the stringers once they are attached to the hull. I think a good rule of thumb is 1 yard of 1708 for each foot in length. This should get most stringer and deck restorations close. I ordered 15 yards and came up a little short. My next order will include 5 yards of 1708 and some 8 oz cloth for the top of the deck. I will use up the rest of the CSM waterproofing any exposed stringers and the deck surfaces.
 

Badfish95

Petty Officer 2nd Class
Joined
Jun 30, 2012
Messages
118
Re: 1995 Crownline 202 BR Deck Restoration

It's been awhile since my last post. I have been slammed at work. I get a few hours here and there. With glasswork it takes an hour to prep and an hour to clean up, so progress is slow. I would post pictures but I haven't made a whole lot if visual progress.

All the 1708 in the previous photos has been glassed to the stringers. I cut some strips of 3/4" plywood for "nailers" and have wood glued them to the top edges of the stringers. These are put where two pieces of decking will butt together. I put a 45 on the bottom side so the glass is easier to lay up. I will post pictures once they are all wrapped and tied to the existing 1708. I have another order of fiberglass on its way from US Composites: 7.5 oz cloth for deck, 12" 1708 tape for seams and tabbing to hull, extra 1.5 oz mat for sealing the bottom and top of deck, 5 more gallons of resin and last but not least, the 80# kit of 4lb density foam(yea, I caved).

Question: Before I put the deck down, do I need to use surfacing wax on the final layer of glass? Is it ok to just use the wax on the top surface of the deck?
 

Badfish95

Petty Officer 2nd Class
Joined
Jun 30, 2012
Messages
118
Re: 1995 Crownline 202 BR Deck Restoration

Despite a few setbacks I had a productive day today. There was a lot of getting in and out of the boat so I'm wiped. Here's the progress:


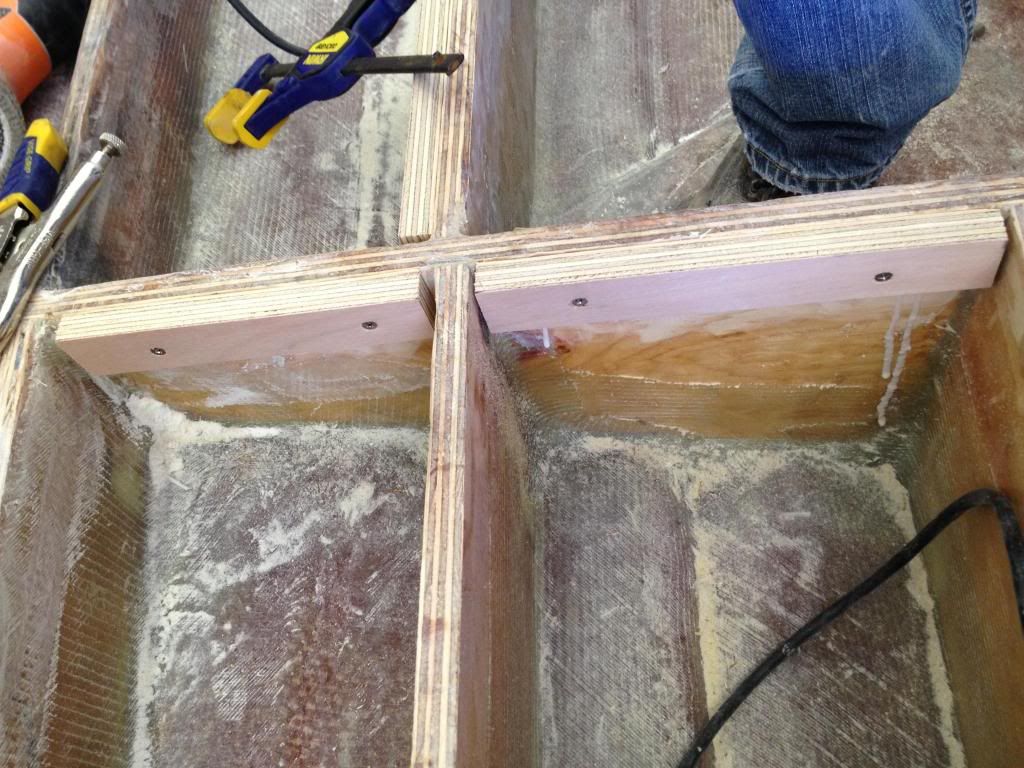
This is a terrible photo, but it shows the cleats that I glued to the existing stringers. You can see where I ground the 1708 so that the 1.5 oz layers will have something to grab onto.


Here you can see the other side of the cleats. I was hoping it would show the 45 degree cut on the bottom to make it easier to glass.


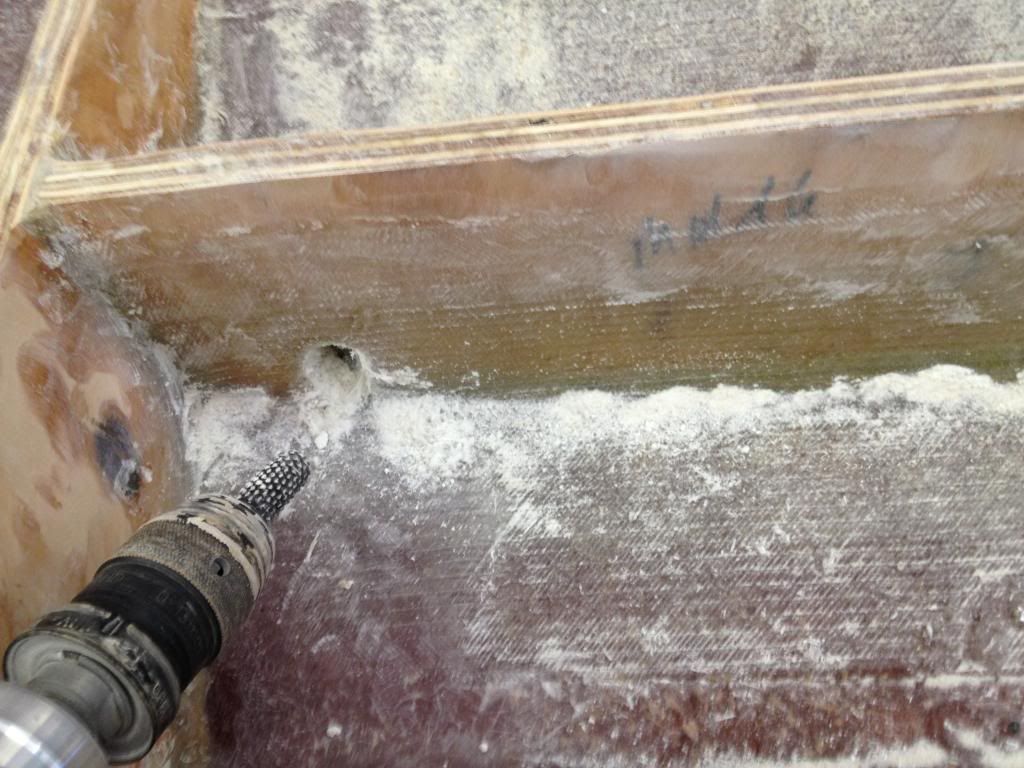
The rasp bit I bought has definitely paid for itself. It does a good job of opening up the limber holes and leaves a nice rough surface. After I smooth the edges with a little peanut butter they'll be good and waterproofed.


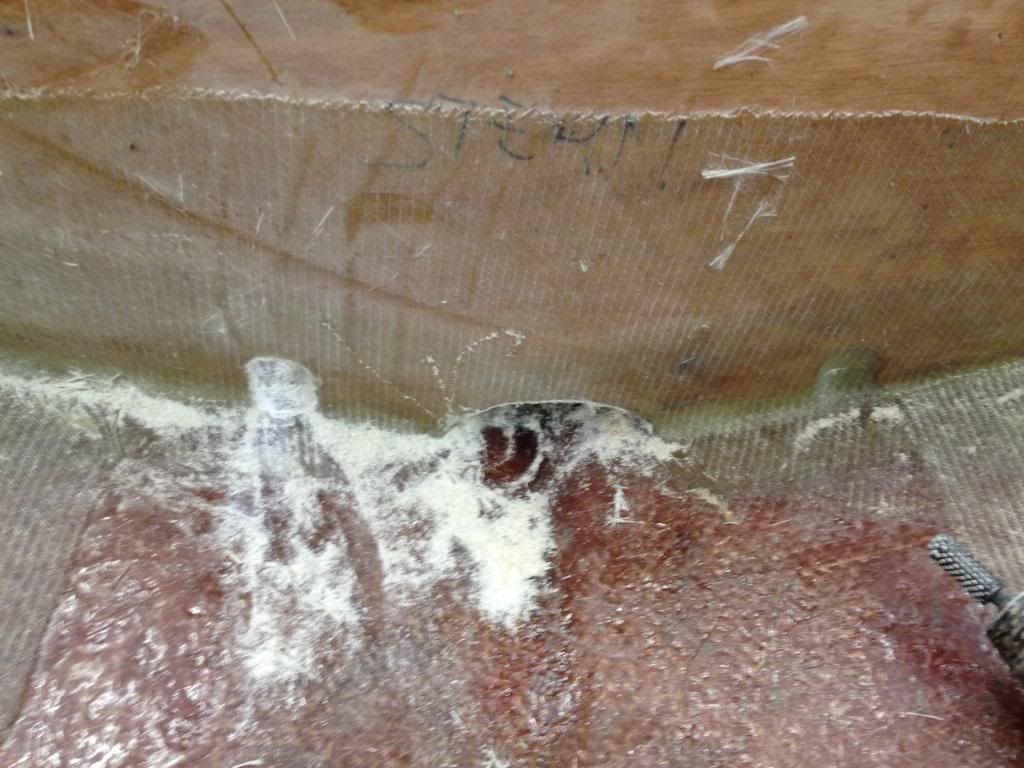
More limber hole grinding.


Man it felt good to stand on a level deck! I needed a little visual progress. The glasswork has been a slow process. It was good to get back to the woodwork, just to break it up a little.


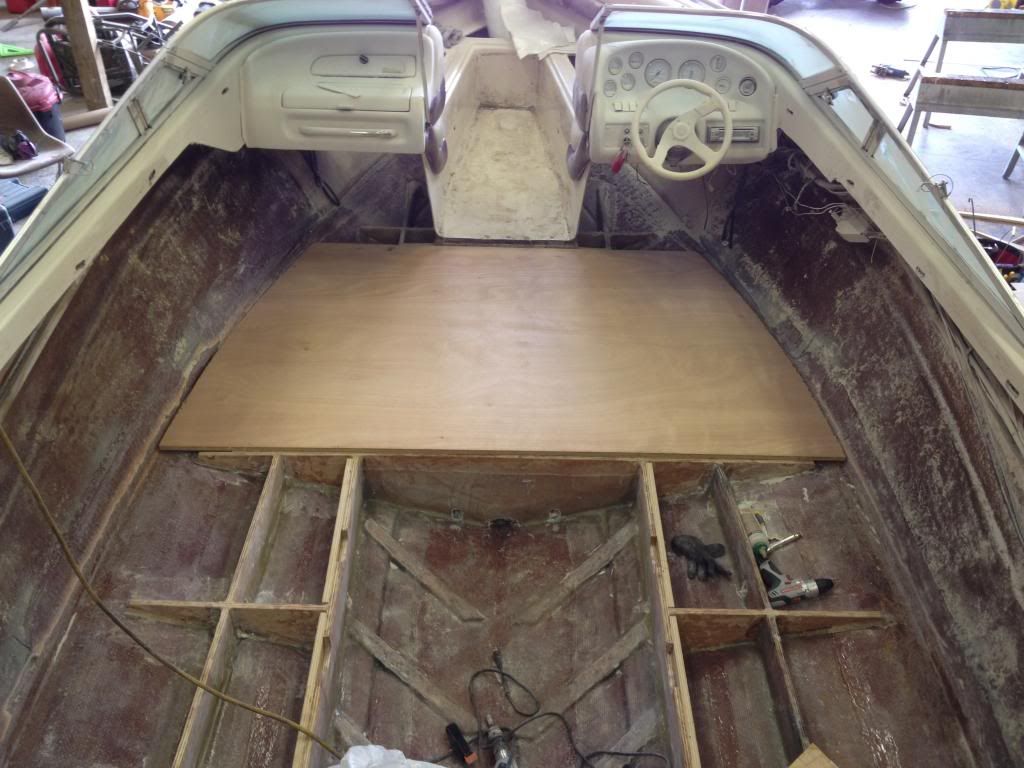
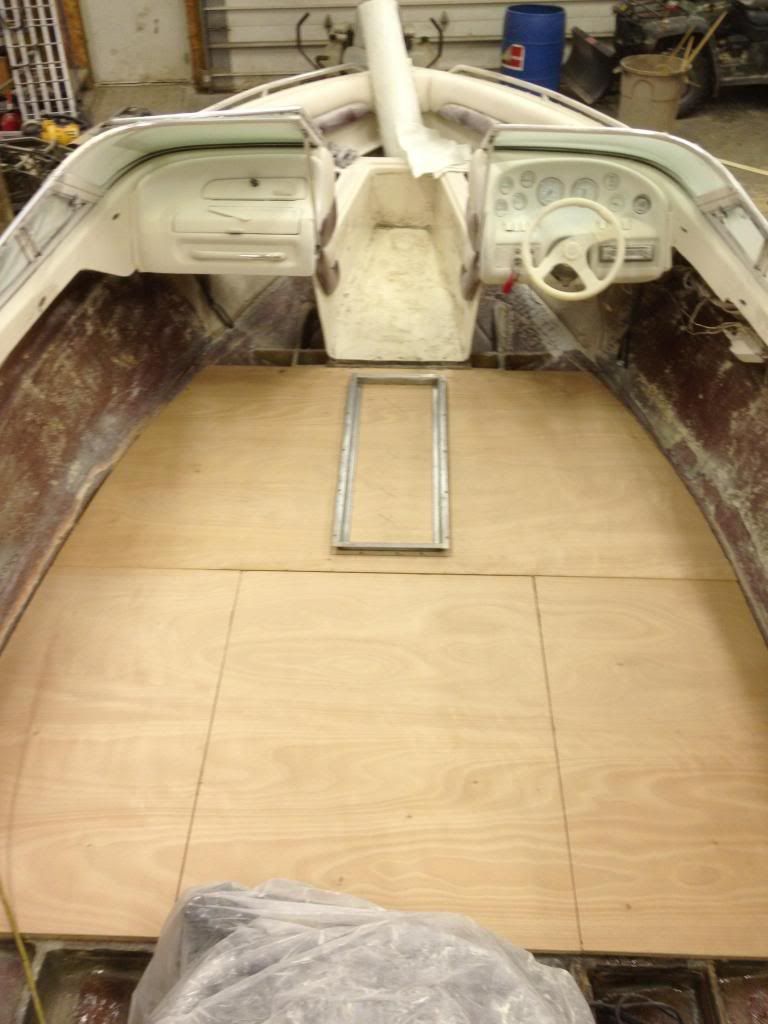
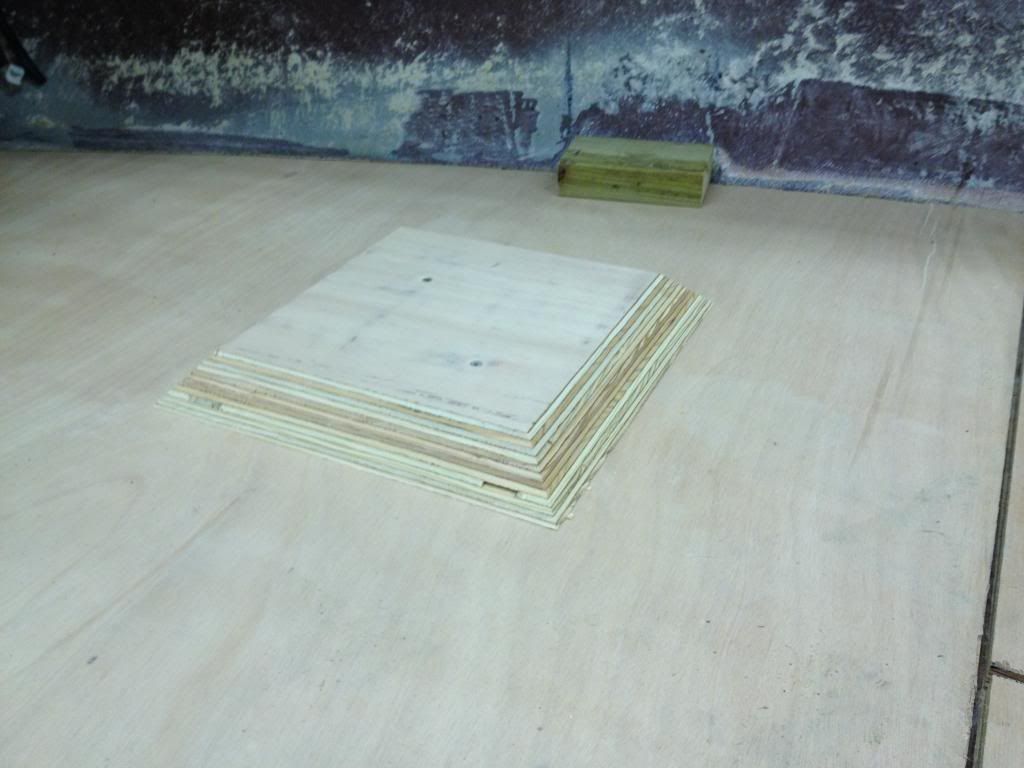
Here's where I quit for the day. The original deck had a small access hole to get to the fuel sending unit. I decided it would be better to have access to the whole fuel tank. The deck was cut out of two sheets of 3/4" exterior grade plywood. I am one sheet short, but it should finish the deck around the engine and under the bow seating. I will have enough scrap left for the seat post risers. Since my original power trim mounting bracket completely rusted out at the bottom, I'll probably make a riser for the new stainless steel bracket as well.

Any ideas on how to carpet around the seat risers without it looking bush league? I considered covering the risers(12"X12"X 1.5" with a 30-45 angle on each side) with a scrap piece and then gluing the main carpet over the top with squares cut out... if that makes sense.
 

StevenT

Petty Officer 1st Class
Joined
Mar 9, 2009
Messages
230
Re: 1995 Crownline 202 BR Deck Restoration

Your project is coming along nicely. Looking forward to the next update.
 

Badfish95

Petty Officer 2nd Class
Joined
Jun 30, 2012
Messages
118
Re: 1995 Crownline 202 BR Deck Restoration

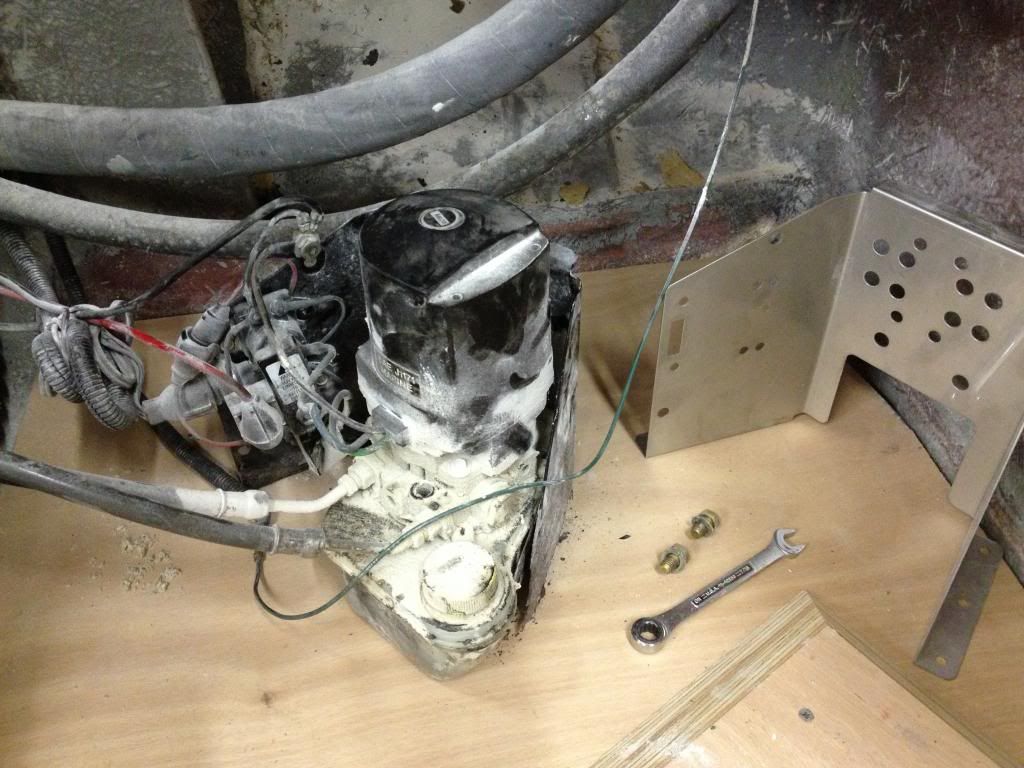
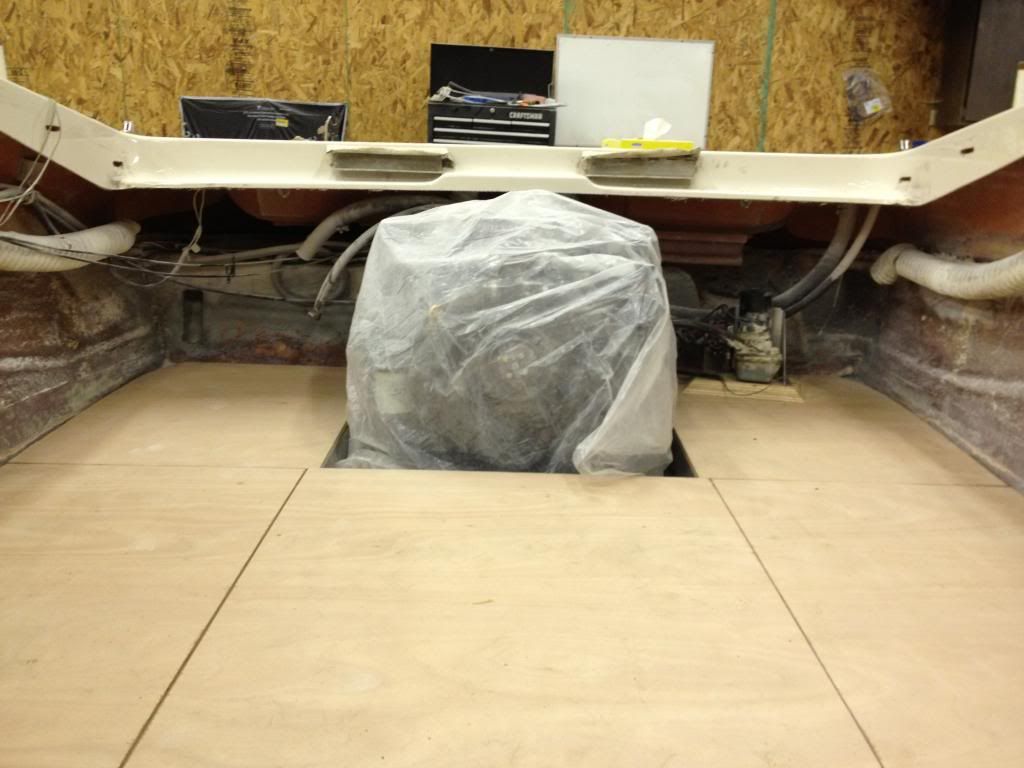
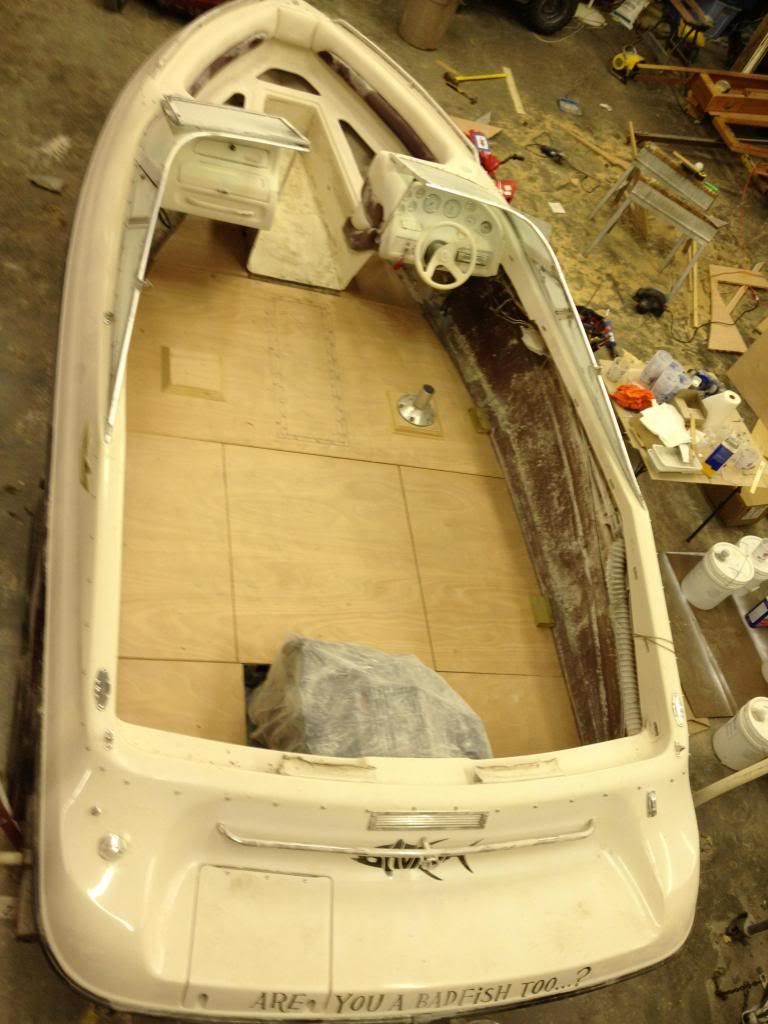
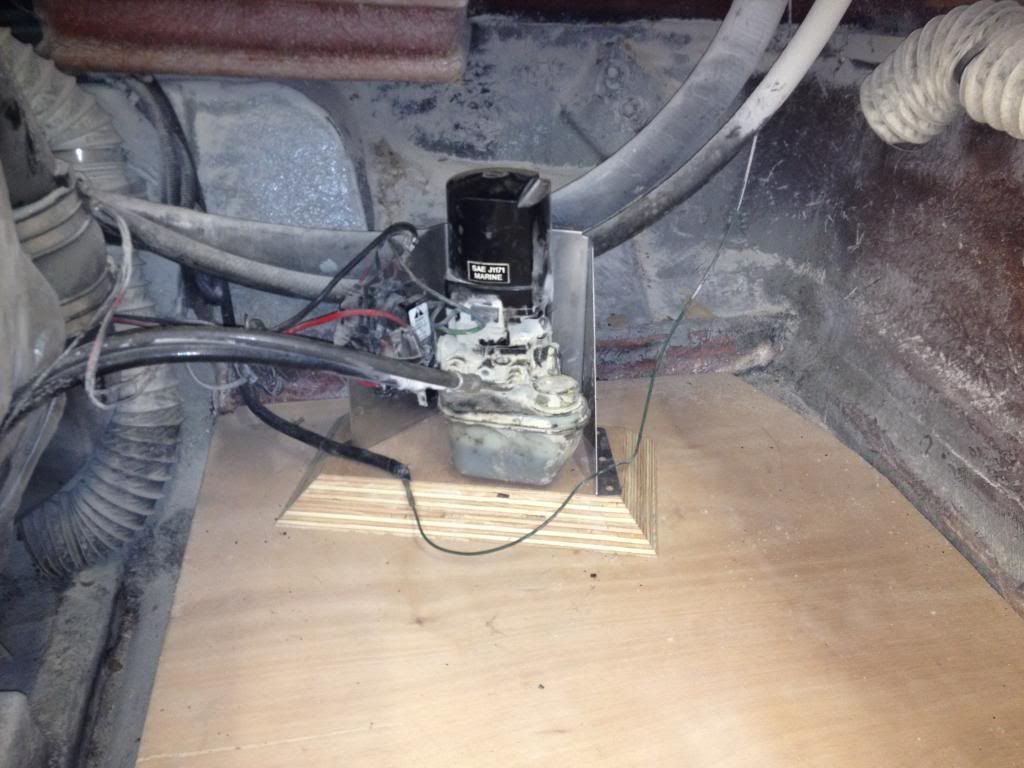
I made some more progress last night. All decking has been cut to fit. After I prep the l stringers and bow section, I'll be ready for the final glasswork. The first photos are of the new Stainless steel trim pump bracket being installed. I made a riser for the mounting bracket. The bracket is right near the swim platform ladder and is where water will have a tendency to collect first. It might be overkill, but it didn't take too long make out of scrap 3/4" plywood.


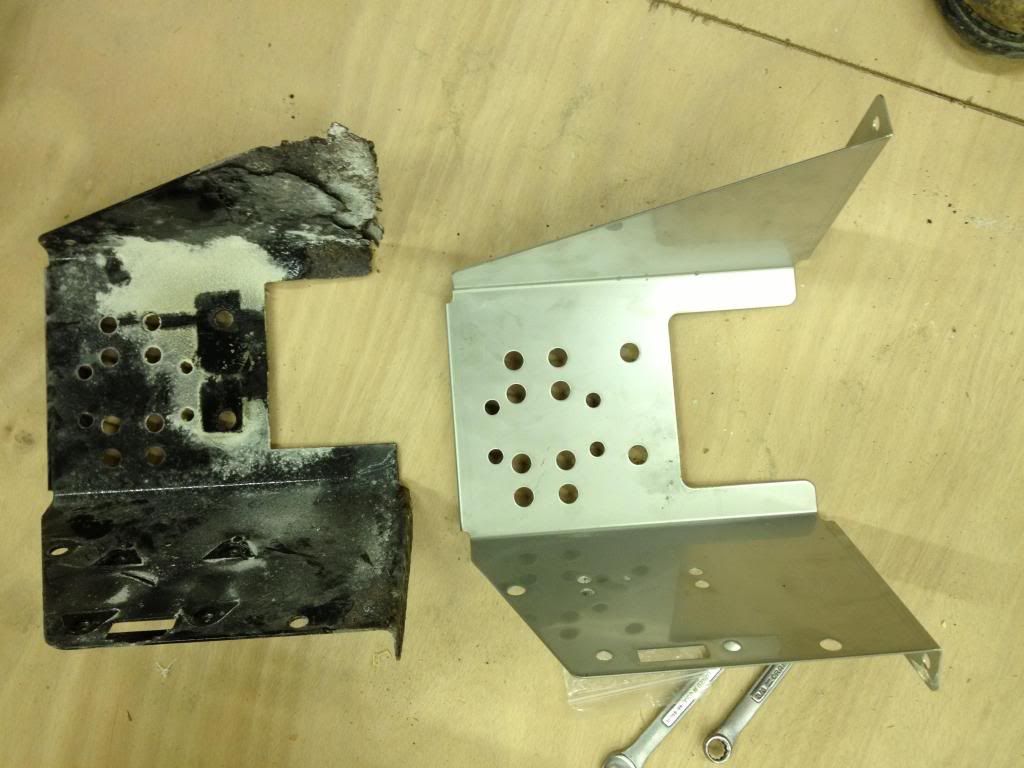
Here's a photo of the old pump and bracket.


You can see the mounting holes on one side of the old bracket are completely rusted out.


Pump installed on new bracket. I will wait to get the sun deck framing in before I decide on where to mount the pump permanently. The new bracket looks pretty slick. For $40.00 off ebay it was a no brainer. Super easy to install as well.
 

Badfish95

Petty Officer 2nd Class
Joined
Jun 30, 2012
Messages
118
Re: 1995 Crownline 202 BR Deck Restoration


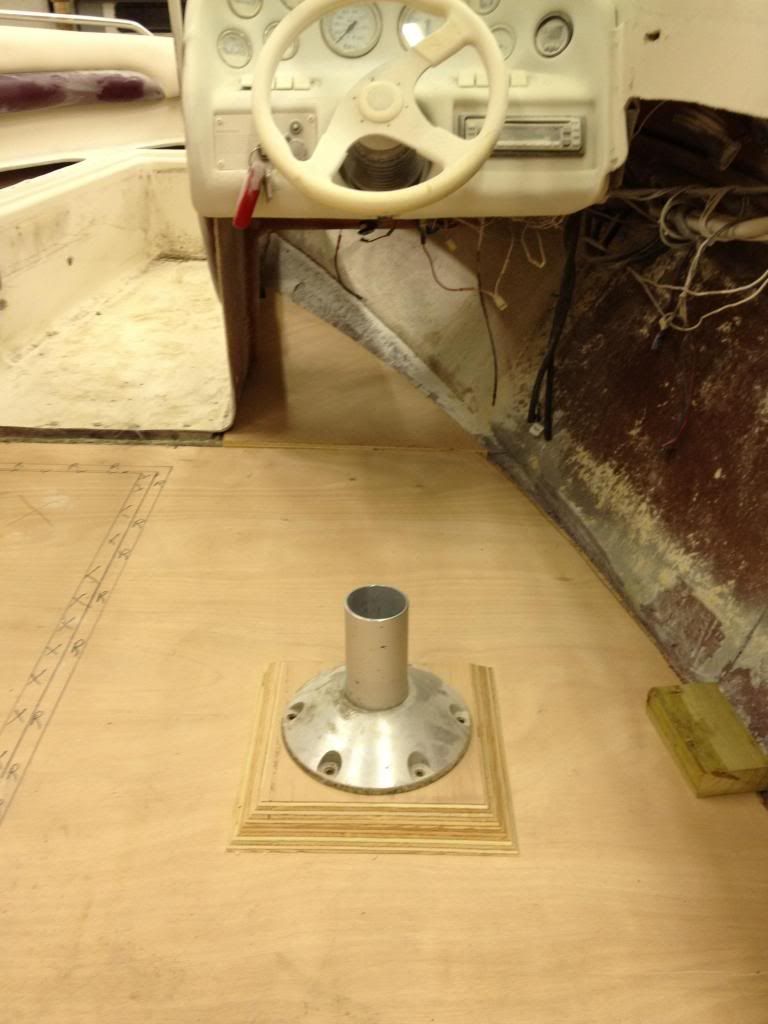
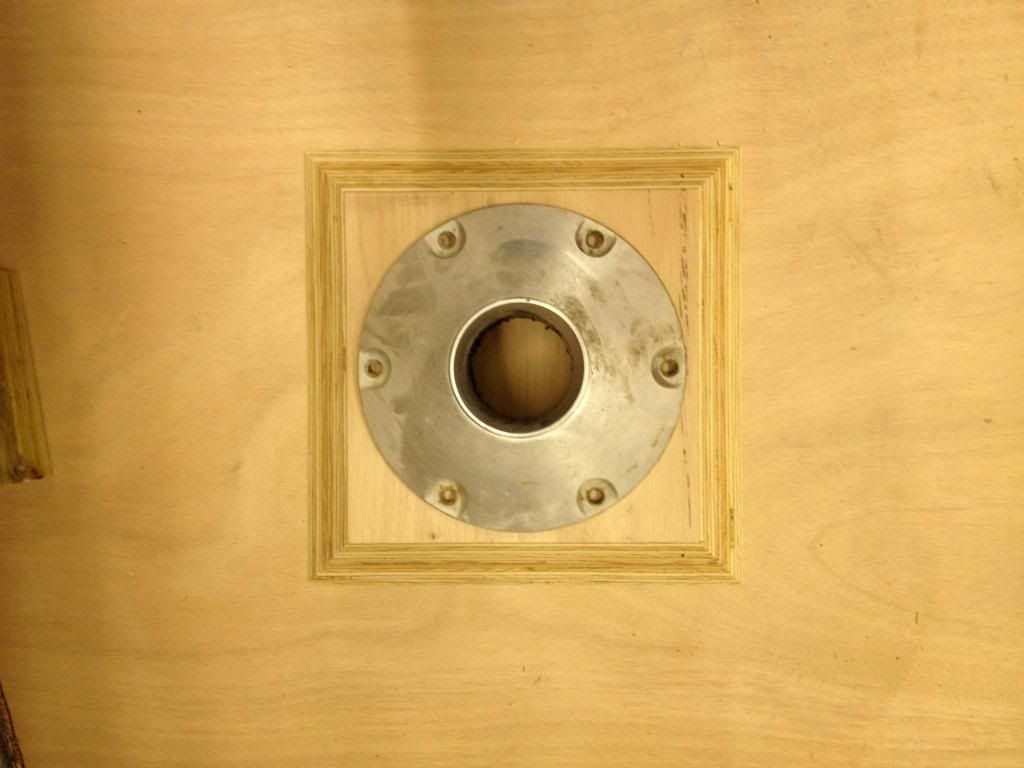
Here's the seat post riser placed near its final location.


Another shot of the seat post riser. The post bracket is 9" in diameter. The top is 10 3/4" across and the bottom is 13 3/4". The sides were cut at a 45 degree angle. I'm still not sure how I'm going to carpet over these without it looking like crap. Any ideas? I could gelcoat the risers and carpet around the bases, but there will still be a frayed edge.


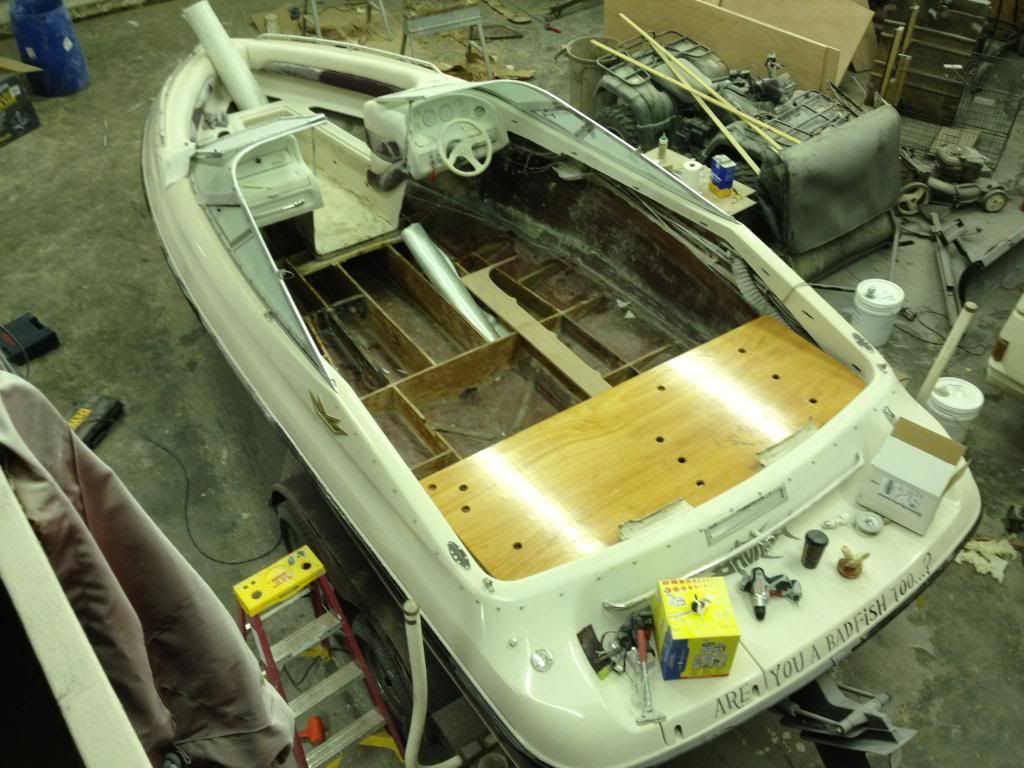
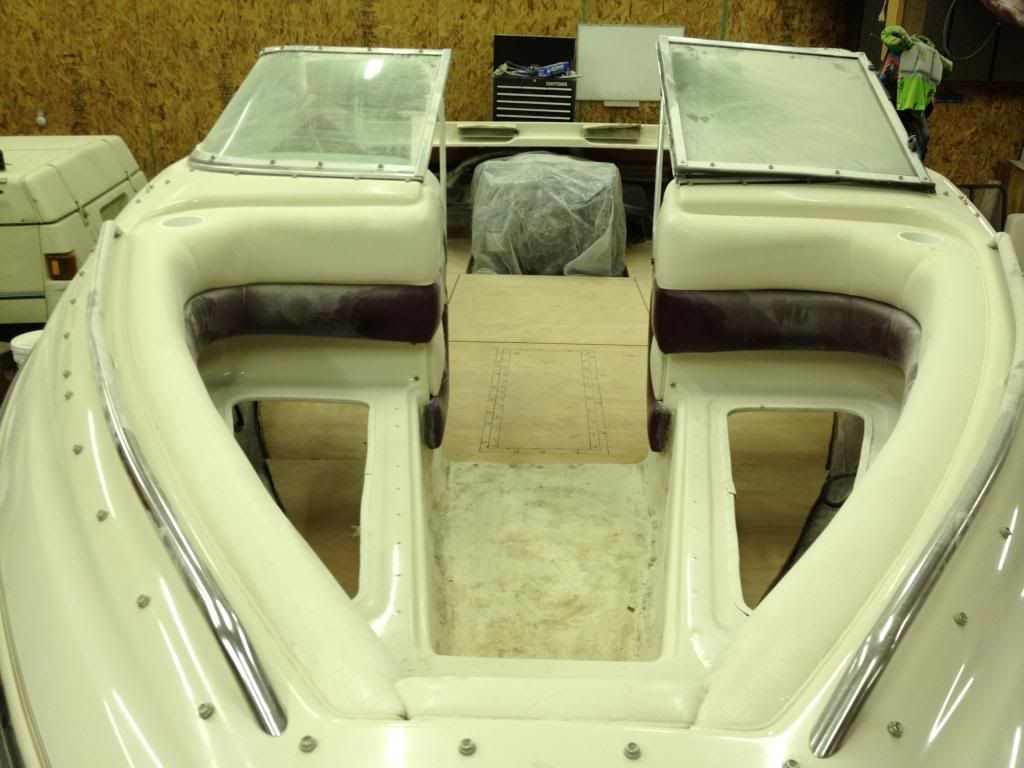
Bow pieces cut. The bow area has some old glass work that needs to be cleaned up before it will fit better. I will peanut butter and tab into the hull and top cap/bow section. I don't plan on ever doing this again....I'll let the next guy figure out how to cut it loose.


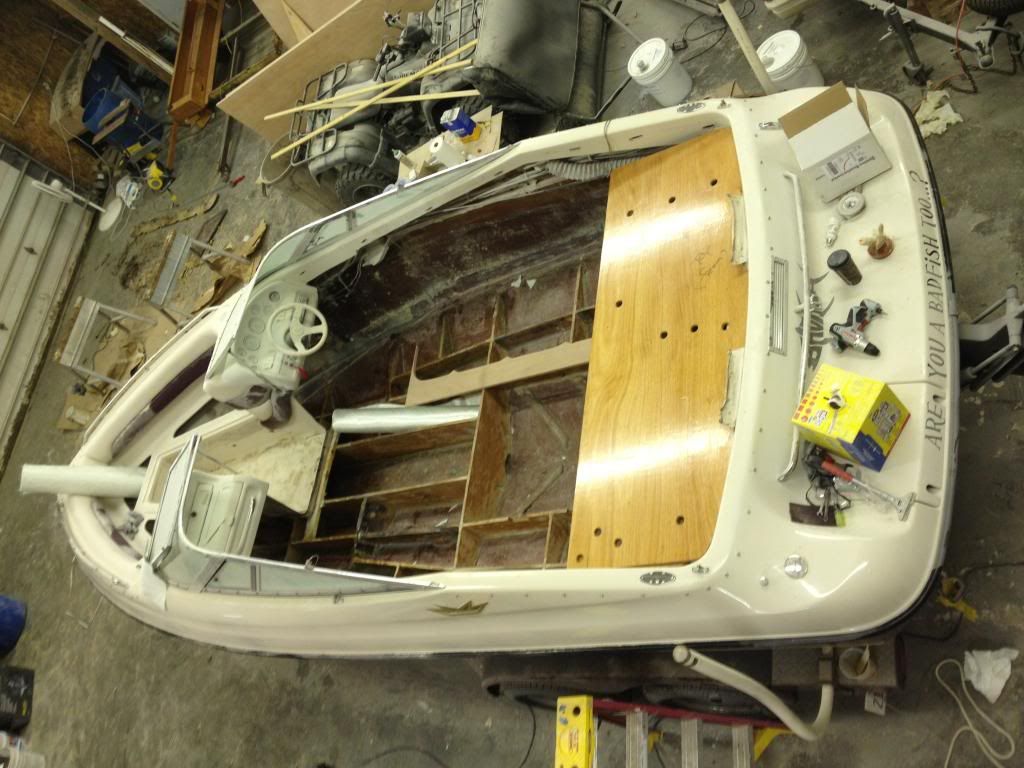
View of the stern.


View from the loft.


View from the bow. It felt really good to get to this point.
 

Marada92

Petty Officer 1st Class
Joined
Jan 14, 2011
Messages
223
Re: 1995 Crownline 202 BR Deck Restoration

Great progress! I had the same idea about PB the cap to the hull.... I don't plan on it needing to be torn apart anytime in my near future so no worry to me! Keep up the good work!
 
Status
Not open for further replies.
Top