1990 Sea Nymph FM160B Restoration

bonz_d

Vice Admiral
Joined
Apr 22, 2008
Messages
5,276
Frey, that is coming along nicely!

Now that I'm feeling a little better maybe the weather will warm enough for me to get back to mine. I hear it calling in my sleep!
 

Frey0357

Petty Officer 1st Class
Joined
Mar 13, 2014
Messages
313
Frey, that is coming along nicely!

Now that I'm feeling a little better maybe the weather will warm enough for me to get back to mine. I hear it calling in my sleep!

Thanks Bonz! Yeah mine has been whispering to me for a while....its been fun getting some work completed!

Moving onto the sub flooring foam, it is tedious. Just doing a little each day has resulted in some progress....:)

Frey
 

Frey0357

Petty Officer 1st Class
Joined
Mar 13, 2014
Messages
313
I hate using 5200(4200) so as an easier/cleaner option using perhaps less product I'd run a bead of sealant down the middle of the wood to bed the cap in. Seal the fastener holes, then once that is all set up caulk the seams all the way around the cap.

Should accomplish the same thing with less chance to goop yourself up.

Thanks TDF! After working with 4200, I find it to be a PITA especially because it gets everywhere! I still have some on my hand several days later that I cannot remove! lol.

I will do something creative with the transom cap to get it sealed, I don't want any water gettin' in or building up due to condensation. More coming soon!

Frey
 

Watermann

Starmada Splash of the Year 2014
Joined
Jan 12, 2013
Messages
13,798
Once foamed and the decking goes in that's when the progress really starts taking off. It's a nice feeling though to be in the rebuild stage. :encouragement:
 

Frey0357

Petty Officer 1st Class
Joined
Mar 13, 2014
Messages
313
Update: I got a few things completed lately!

What was once broken, is now fixed! The transom cap was snapped in half, due to the failed transom, but now has been welded back together. It is really great when you have access to family that has the ability to weld aluminum! Thanks Uncle Clyde (...and Matt of course)!
IMG_1697_zpsz5iakxfc.jpg
IMG_1698_zpsedytztom.jpg


I have begun foaming the sub flooring areas. I began cutting a series of triangles to fit the space but being cautious not to pack it too tightly so that water can travel to the center of the boat (following gravity) and then travel back to the bilge area. Once this is completed on both sides it is time to cut and seal the flooring!:nod::nod::nod::nod:
IMG_1696_zpszucx39eg.jpg
IMG_1694_zpsi5prisbf.jpg


IMG_1695_zpsuzpkx5qt.jpg


The 1/2" flooring will fit between the top of the pink foam and the bottom of the metal structure in the pic above (top right). Some of the foam is sticking up in the photo but when pressed downward goes right into place! This foam is structural and plays an important role in supporting the flooring to limit flexing.

To seal the rivets on the inside of the boat, as a precautionary measure, I have used G-Flex over the top. That stuff seems real solid! It will remain inside the boat with no chance of UV deterioration since it is all under the flooring.

Happy Friday to all! It's the wife's birthday this weekend, so I don't think I can sneak away to work in the garage much! I had to promise I wouldn't....... lol! :heh:

Frey
 

Watermann

Starmada Splash of the Year 2014
Joined
Jan 12, 2013
Messages
13,798
Nice job they did welding that 1/16" thin AL, it's tough to say the least. It's a real PITA doing foam that way but you won't be sorry in the long run, you can get in a ton of foam edge ways like that. Looking good so far Frey!
 

Frey0357

Petty Officer 1st Class
Joined
Mar 13, 2014
Messages
313
Update: Got a bit more done yesterday!

So, I am not a fan of spongy flooring in a boat. To prevent this, I built some additional braces to go between the ribs and flooring supports where I wont have foam for support. I wont have foam there to provide a channel for water in the event that I get water in the boat (with the center channel in the boat, water can freely flow back to the bilge area, where it can be pumped out). I like these, they are very 'Beefy" :D. I used aluminum stock from a local metal shop, bonus: they were scrap, therefore I got them on the cheap!

Certainly not pretty, but very functional.....
IMG_1712_zpsbvzteugy.jpg
IMG_1713_zpszam7hnq1.jpg


Here is one installed:
IMG_1715_zpsfrqoqmtp.jpg


And here is both installed:
IMG_1716_zpsx1zc3jof.jpg


Now foam placed on one side of the boat....
IMG_1717_zpsyfl4xsao.jpg


I still have to foam the other side.....and then get my flooring materials! Picking up this week: Exterior 1/2" Plywood and more WOG's secret formula for wood sealant!

Thanks everyone! Comments/ideas are all welcome;)

Frey
 

Frey0357

Petty Officer 1st Class
Joined
Mar 13, 2014
Messages
313
Progress has been very slow due to cold weather! Hoping to get back on track this week!!!

Got lots to do to get back on the water!

Frey
 

bonz_d

Vice Admiral
Joined
Apr 22, 2008
Messages
5,276
You think you've been slow? My Nymph has been at a stand-still since Nov.. Little to no heat in my garage and it's been a cold winter.
 

Frey0357

Petty Officer 1st Class
Joined
Mar 13, 2014
Messages
313
Ouch Bonz! Well I'm sending warm thoughts up your way....from sunny Michigan!

Frey
 

bonz_d

Vice Admiral
Joined
Apr 22, 2008
Messages
5,276
Hopefully next week it will warm enough. Supposed to warm over the weekend but I'll be playing nurse for a few days. Wife's having shoulder surgery Thur.
 

Frey0357

Petty Officer 1st Class
Joined
Mar 13, 2014
Messages
313
Ok, so I got side tracked again on my project, but at least I'm still working on the boat! :eek:

I hated looking at the engine cowl in its crappy looking state, so I decided to clean it up a little and that lead to full on restoration. Now, I'm not looking for a brand new looking cowling, just something that looks better and doesn't have paint peeling.

Original Cowl, looking Rough!
IMG_1746_zpshxjwmydp.jpg
IMG_1749_zpssdi4eepe.jpg


Removed decals, that part was easy! They simply peeled right off, no heat, no chemicals!
IMG_1750_zps4yzm1bmf.jpg


Then sprayed with automotive "thick - Fill In" rattle can primer. Sorry no pic on that one! I forgot!

Beginning to paint 1st coat, very lightly!
IMG_1775_zps4gq1fajc.jpg
IMG_1776_zps6ssbz1xd.jpg


I have painted several coats now, and the paint is beginning to cover nicely! I have sanded very lightly between coats with 800 grit paper. Final sanding was wet sanded with 1000 and 1500 grit paper, looking real smooth. Planning to put last coats of paint on today, while we still have warmer weather and sunshine! I will update with new pics soon!

I have new decals purchased and intend to place them on after many days of final curing.

**Here are my questions to the fellas that have done this before: After paint is final what steps should I do next? Install decals then clear coat over everything? Wet sand (again) the final coat of paint and then buff out with rubbing compound, then apply decals? Looking for recommendations. Remember I want something that looks nice and is functional, no considerations for showroom quality finishes, this is just a fishin boat! :D

thanks in advance everyone!

Frey
 

Watermann

Starmada Splash of the Year 2014
Joined
Jan 12, 2013
Messages
13,798
On my Johnny's cowl I clear coated and put the decals on last. Not sure what solvent would do to the vinyl re-pops. You painting the rest of the motor too? That's the fun part :lol:
 

Frey0357

Petty Officer 1st Class
Joined
Mar 13, 2014
Messages
313
Thanks Watermann. After 1st coat of clear, did you sand or just re-apply over the top? I had the same question regarding the re-pop decals.....

yeah I will likely have to paint the motor also, but not sure yet. For sure I need to "De-Grease" it, there is grease everywhere! What products might anyone recommend for degreasing an outboard? I read somewhere someone used Oven Cleaner......

Frey
 

Watermann

Starmada Splash of the Year 2014
Joined
Jan 12, 2013
Messages
13,798
I hate sanding so that was a no, shot 2nd cc an hour after the 1st and called it good.

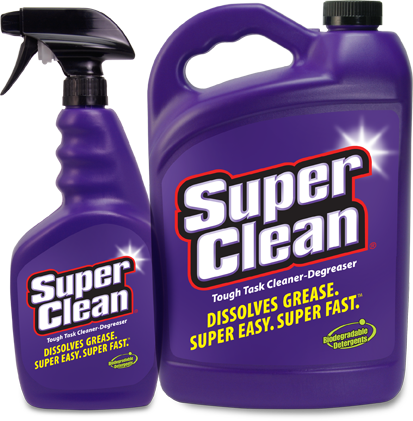
I only use Super Clean, you can get it at walmat.

787569512778380072.png
 

Frey0357

Petty Officer 1st Class
Joined
Mar 13, 2014
Messages
313
Thanks again Watermann!

Good to know, I am tired of sanding mine....:)

Frey
 

Frey0357

Petty Officer 1st Class
Joined
Mar 13, 2014
Messages
313
Here are some pics after polishing....I wasn't going to do this (I told myself this!), but I did anyway. Really turned out nice! It's not perfect, but a HUGE improvement over what I started with!

Before:
IMG_1749_zpssdi4eepe.jpg


After:....Looks black, but it's the dark blue Evinrude color!
IMG_1784_zpsxpji87nd.jpg


Here are more:
IMG_1783_zpslly0lfuo.jpg


IMG_1782_zpsov82dvgg.jpg


Sanded, primered, sanded some more, painted, sanded, painted, sanded, clear coat, sanded, clear coat....then polished with Meguire's Ultimate Polish...stuff is amazing!

I will add the decals next!

Frey
 

chasmo

Seaman Apprentice
Joined
Aug 29, 2011
Messages
32
You may want to reconsider the wax prior to installing the decals. I like to apply decals after color sanding and clear coat. Afraid they wont adhere as well with wax on the surface.
 

Frey0357

Petty Officer 1st Class
Joined
Mar 13, 2014
Messages
313
Thanks Chasmo, for the thoughts on the wax from the polish that I used. I cannot find any contents that state the polish that I used contains wax products, but to be certain to have the best adherence that I can I have followed up the polishing with several treatments of rubbing alcohol over the surfaces where the decals will be applied. The rubbing alcohol did not change or affect the polished surfaces in anyway and the adherence for the decals was excellent! I am very confident that I have the best adherence that I could get! I will post pics later of the finished product, but it turned out much better than I thought it would.

Frey
 
Top