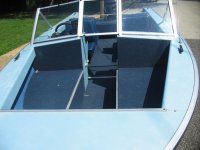
198x SS-150 rebuild

SHSU

Lieutenant Junior+Starmada Splash Of The Year 2019
Joined
Mar 8, 2017
Messages
1,741
If someone with a SS-160 has the time could I get a measurement from the bottom of the gunnel to the top of the front seat frame (not the cushions)?

Our 1984 SS16 has a distance of 7.5" from bottom of gunnel to top of front seat. So remove a ~3/4 for the board to get to top of aluminum support. Hope that helps.

SHSU
 

Sharpie223

Petty Officer 2nd Class
Joined
May 24, 2021
Messages
173
You guys make a good arguement, but I already have the carpet so I'll give it a try! I plan on running it up under the gunnel and then securing it at the top with some sort of mechanical fastening, so that should stop it from peeling down at least.

Edit: Forgot to ask this last night, but what glue is everyone using? I saw another thread where someone did a comparison and they recommended Lepage contact cement, any reason not to go with that?
3M has several levels of contact cement. If I was carpeting over aluminum I would use a weaker level just to tack it down, then mechanically fasten the edges. Then if you need to work on the metal later on it doesn't become a project just to remove the carpet.
 

Rasdiir

Petty Officer 2nd Class
Joined
Jul 18, 2011
Messages
167
Our 1984 SS16 has a distance of 7.5" from bottom of gunnel to top of front seat. So remove a ~3/4 for the board to get to top of aluminum support. Hope that helps.

SHSU
That's perfect, and pretty much lines up with the measurements I made to the brace for that front triangle. I got 7" when I extended from that brace on a level plane.

Thank you!
 

Rasdiir

Petty Officer 2nd Class
Joined
Jul 18, 2011
Messages
167
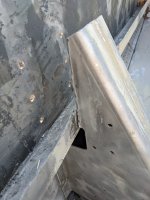
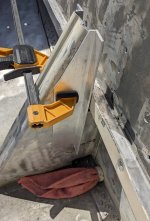
Got the 2x front braces fabricated up, and installed one and the previous brace from that wood triangle on the starboard side. Had to cut 4 notches in the top edges to allow for a curve around the hull, and then had to tighten the angle a bit because of the slope of the hull. I press-ganged my daughter into working the bucking bar again, but I'm going to have to find a new riveting partner as she gets sick of it after about 10 lol. It's a pity too, she does a pretty good job!

Cheers, Jared.
 

Rasdiir

Petty Officer 2nd Class
Joined
Jul 18, 2011
Messages
167
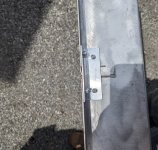
Put in a few hours after work and got the holes drilled out for the chine braces, 6 per side, and bolted the braces in place ready for riveting.

One of my patches to cover a corrosion hole will curve up the side about an inch (the hole is on the bottom but near the edge), and I will have to replace the 8 rivets on the side seam where the bottom meets the side. To make it easier to buck the new rivets I hoped that I would be able to gently lift a rib out of the way, so I drilled out all the rivets on the port side of the second last rib. That was a complete failure, the rib is too stiff to lift more than an inch unless I remove all of the rivets securing it to the hull, so i will have to work around it, and also replace all those rivets as well.

Remaining to complete before a riveting party whenever my buddy is available:
  • Drill out a few more rib rivets that will be used to hold on patches
  • Drill out the rib and side seam rivet holes to 3/16 and clean them up
  • make the patches and drill the rivet holes in the patch pieces
  • clean up the holes for the chine braces
  • Go over the interior bottom with the nylon and brass brushes on a drill again. Sitting in the rain all last summer has revealed a few spots of white corrosion that aren't deep but I still want to clean it up before placing patches over top
Slowly but surely it moves forward!

Cheers, Jared

PXL_20230530_230851740.jpg
 

Rasdiir

Petty Officer 2nd Class
Joined
Jul 18, 2011
Messages
167
Weather and laziness after work (mostly the laziness :) ) mean that progress continues to be slow, but I do plug away here and there. I did manage to secure a riveting partner for next weekend, and after that things will pick up again.

I cut out, formed, and drilled out 3 of 4 patches, and also cleaned up the holes for the braces. I had to remove about 5 of the rivets holding the rear of the port gunnel on so I could get at the back of that tear in the rear port side and make a patch. Also, my rib rivets were actually 5/32 instead of 3/16, so today I will be drilling out and cleaning up the holes on the one rib and hopefully getting the brass wheeling of the interior complete. For the rest of this week I will begin filling in the exterior pitting with the JB MarineWeld, clean up any corrosion under the brace locations and start cutting out my new transom.

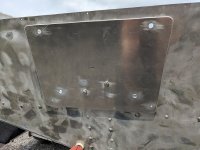
Once riveting is complete I will be installing the transom prior to painting, and I wanted to use a 1/4" aluminum plate as a motor pad. For those who have done that, are you riveting the pad on or is it just held on by 5200 and the knee brace/motor bolts? I read about this in a few threads but can't find them now. If I rivet I will have to make divots in the transom wood to accommodate for the tails, is there a better technique? I will be remembering to keep the top of the pad slightly lower than the top of the transom to account for the transom trim.

Any idea how to best straighten that rub rail edge on the rear port corner? Without removing it I can't really bend it back, and it mostly just bounces when smacking it with a hammer.

Patch for spot under the rib I drilled out (the rivets are just placed there for hole alignment):

PXL_20230610_210027543.jpg

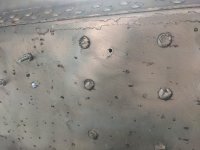
Here is the corrosion hole under another rib:
PXL_20230610_171225529.jpg

And the patch for that one:

PXL_20230610_210038335.jpg

This is that tear I had in the rear corner:

PXL_20210903_155028250.jpg

And the patch/brace for that:

PXL_20230610_210018870.jpg

Cheers, Jared
 

Rasdiir

Petty Officer 2nd Class
Joined
Jul 18, 2011
Messages
167
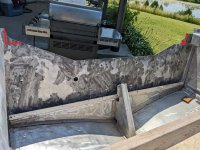
So while I wait for my buddy to help with riveting I am busy thinking about future items on this, and I wanted the collective opinion what to do about a PO hack job. The port transom aluminum has a small (about 4" long) area cut out at the top that I would like to fix if possible, but if not should I just cut the other side to match? I assume the best option here is to weld on another piece, but that will be difficult to arrange so if anyone has an idea please chime in.

PXL_20220709_191430974 2.jpg
 

Sharpie223

Petty Officer 2nd Class
Joined
May 24, 2021
Messages
173
I wasn't fixing anything, but ended up bolting some plate on each side to build up my transom on the sides. I just used epoxy putty between plate and transom sheet, then screws to clamp. Turned out very solid.

You could do something similar, adjust your transom shape if you want to. If you want the original shape you could just screw/glue a doubler on the back. Only problem will be getting original c channel trim over the top, likely will require something custom made for that.
 

SHSU

Lieutenant Junior+Starmada Splash Of The Year 2019
Joined
Mar 8, 2017
Messages
1,741
My vote is to just cut it off on the other side and make them match. Easiest method.

SHSU
 

Rasdiir

Petty Officer 2nd Class
Joined
Jul 18, 2011
Messages
167
I wasn't fixing anything, but ended up bolting some plate on each side to build up my transom on the sides. I just used epoxy putty between plate and transom sheet, then screws to clamp. Turned out very solid.

You could do something similar, adjust your transom shape if you want to. If you want the original shape you could just screw/glue a doubler on the back. Only problem will be getting original c channel trim over the top, likely will require something custom made for that.
Did you end up with any spacing issues from the plate on the inside? That was going to be my first plan but even if I use 1/16 sheet there will be small gap between the transom wood and transom aluminum wherever the new plate doesn't cover. Given the price of aluminum I can't really justify a full transom re-skin. The PO also hacked up the original c-channel, so I will be fabricating new for that anyway.

If I did end up cutting the other side to match I will probably just bring it straight down instead of leaving the small amount of curve, which will make c-channel fabrication a lot easier. Maybe something like this?

PXL_20220709_191430974 3.jpg
 

Rasdiir

Petty Officer 2nd Class
Joined
Jul 18, 2011
Messages
167
Unfortunately my riveting partner fell through last weekend, so the search continues! In the meantime I decided to keep picking away at other items, so I fabbed up a motor pad out of 1/4" aluminum and got the transom rough cut and glued.

The motor pad took a long time to cut with my cheap jig saw and a metal blade, and even longer to drill out the 1/2" motor bolt holes with a little Makita cordless drill, but it is now sanded, drilled, and almost ready to get installed for good. When I was drilling the holes for the knee brace bolts I couldn't get the bottom 2 since the drill chuck was hitting the knee brace, but I will pick up a longer drill bit for that.

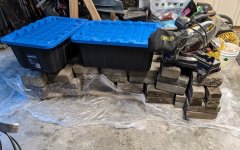
I had already picked up the 3/4" ACX Fir plywood for the transom last fall and had the shop cut it into 3 pieces, so today I fit checked the previous transom (which the PO actually sized pretty good), traced that out on one of the pieces leaving about 1/2" extra all the way around, clamped the 2 pieces together, and cut it out using my skill and jig saws. I cleaned up the pieces and then spread about 3/4 of a 16oz bottle of Titebond III on them evenly with a foam brush. I didn't want to use screws since I will be sealing with OTF, not epoxy, so clamping pressure is approximately 4-500 pounds of patio stones and another 100 or so pounds of random items on top. Hopefully it's enough, but there was good squeeze out almost all the way around so it should be ok. I will leave the weight for a full 24 hours and will wait until this weekend to cut it down to final size.

Motor pad:
PXL_20230625_181830949.jpg

Transom getting glued:
PXL_20230628_003434759.jpg

Cheers, Jared
 

SHSU

Lieutenant Junior+Starmada Splash Of The Year 2019
Joined
Mar 8, 2017
Messages
1,741
I think you need more patio stones.... lol

SHSU
 

Rasdiir

Petty Officer 2nd Class
Joined
Jul 18, 2011
Messages
167
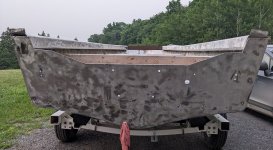
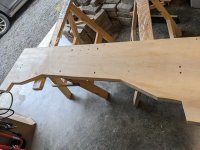
Poked away during the week, and I managed to get the transom skin cut down on the starboard side to match the PO hack job on the port side. After that I got the transom cut down to match, sanded, and drilled. There was a little bit of tear-out when drilling, but it should be fine with the aluminum pads and washers I will use on the inside for all bolts. I just eyeballed the angles and somehow managed to line up all of the holes between the motor pad, boat skin, and transom wood!

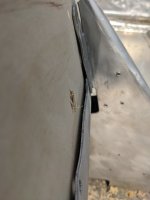
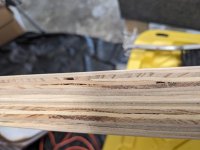
My transom wood seems a bit narrower than the tray, is that normal? It is 2 pieces of 3/4" laminated together, so I thought that would be the same as original, but I seem to have between 1/16 and 1/8" of gap. My plywood also has a few voids, what can I fill those with before sealing with OTF?

I also cut 5 of 7 floor 1/8" 1x2 angle cross braces to length and then cut in the angles so they would sit flat. I will have to cut my floor panels down in width about 6-7" to ensure they end over these braces, but then all floor seams with be directly over a brace, which I can then rivet them to.

There are a couple of holes on the transom that I need advice on. Number 1 was a PO installed bolt holding a piece of plywood for a transducer, and number 2 are the holes from an original transducer mount. I will just install a bolt to fill hole number 1 since I can't think of a good way to patch a 3/8" hole, but unfortunately when I set up my trailer for bunks they are now close to directly below the original transducer holes so I can't reuse those and risk bumping the future transducer with the bunk. To make it more complicated the holes are larger than a 3/16" rivet, so I can't just rivet them shut. Should I just drill through the transom wood and put bolts to fill those holes and then install a new transducer mount farther to the right, or should I try and reuse them but have the mount end up farther to the right?

Transom skin cut to match from the PO hack job:
PXL_20230630_005504286.jpg

Transom wood cut, sanded, and drilled:
PXL_20230701_161306060.jpg

Transom wood is narrower than expected?
PXL_20230701_150236898.jpg

What should I use to fill these voids?
PXL_20230701_192722999.jpg

Floor brace dry fit:
PXL_20230701_203527988.jpg

Old transducer holes:

PXL_20230701_203514821.jpg
 

BWR1953

Admiral
Joined
Jan 23, 2009
Messages
6,195
Filling voids: I use syringes for all kinds of things when working on these boats. Maybe fill one with 3M 5200 or epoxy, then squirt it in there?
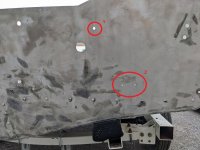
3/16" rivets can be drilled out and riveted with 1/4" rivets.

:cool:
 

Rasdiir

Petty Officer 2nd Class
Joined
Jul 18, 2011
Messages
167
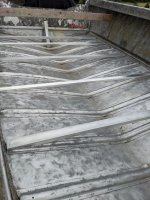
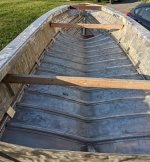
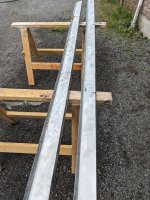
Was a bit under the weather when I woke up yesterday so I took a rebuild break and watched Season 5 of Drive to Survive while eating homemade chicken soup courtesy of my wonderful Admiral. I was feeling much better by the evening, so today I spent some time cleaning off the stringers. My stringers were covered in glue, had a small amount of corrosion, and there were a few sections that had some old wood and carpet still glued on. I got most of the old glue off with the drill and nylon brush, then sprayed 50/50 vinegar and water and let that sit for a while before rinsing.

I am still having a very difficult time finding anyone else that has a SS-150, therefore comparison pictures are almost non-existent, but I now believe that my boat had a ski locker from the factory due to the glue and wood bits that were on the stringers right in the center. I also did manage to find one picture of someone else's SS-150 where I can just see the ski locker hatch poking out, but I have also found other ones without so maybe it changed between the years. Unfortunately I was unable to locate the 1984 and 1985 Starcraft brochures, so I can't confirm which years had them and which didn't. Regardless, although more storage sounds appealing, I can't think of what I would put under there and I would rather have more flotation, so no locker for the rebuild.

Other SS-150 with a locker:
20130723_195747_mini.jpg

Different SS-150 without a locker:
starcraft-ss150-1638953.jpg

Stringers before cleaning:
PXL_20230703_182008750.jpg

Stringers after cleaning:
PXL_20230703_193926473.jpg
 

SHSU

Lieutenant Junior+Starmada Splash Of The Year 2019
Joined
Mar 8, 2017
Messages
1,741
I remember when I was at that stage. Looking good and any progress is good progress

SHSU
 

Rasdiir

Petty Officer 2nd Class
Joined
Jul 18, 2011
Messages
167
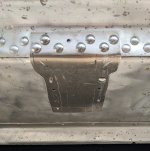
Still trying to firm up a riveting partner (my buddy might be available during my vacation time next week), but I did manage to capture my gf's daughters boyfriend into helping for an hour last night and we got one of the patches on. Went fairly seamless and I'm feeling pretty good about the patch, it was well buttered with 5200 and each rivet also got dipped in 5200 before insertion. Putting some painter tape over the heads before riveting also meant no smiley's and much easier cleanup after.

I also cut off the old broken knee brace tabs with my dremel and cleaned it up, then fabbed up new ones from 1/8" 1x2 angle. I marked out the bolt holes since I will use 1/4" SS bolts to hold it on, but I want to confirm that using long bolts that run through the tabs on both side is the right way? I don't need short bolts that have the nut inside the knee brace?

I also picked up a pop rivet gun from Princess Auto (not on sale though so it was $100, ugh) and got a package of blinds from Canadian Tire to put some bracing on the cuts in my stringers. Of course, after I attached the braces I realized that the blinds from CT had steel cores, so I will have to drill them out and redo them with the all aluminum blinds that just arrived yesterday from a company called Tec N Tec in Quebec.

Patch outside:
PXL_20230711_234824235.jpg

Patch inside:
PXL_20230711_234833034.jpg

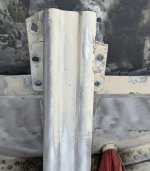
Knee brace with broken tabs:
PXL_20230704_222219798.jpg

Knee brace cleaned up with tabs cut off:
PXL_20230704_231823877.jpg

New knee brace tabs to bolt on:

PXL_20230708_152154397.jpg

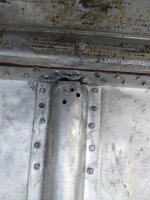
Stringer braces that need to be re-rivited:
PXL_20230708_150411698.jpg

Cheers, Jared
 

Moserkr

Chief Officer + Starmada Splash Of The Year 2021
Joined
Nov 23, 2020
Messages
869
Looks good! I had to add new wings to my knee brace as well. I chose to use solid rivets to attach the new wings to the brace. Something you could easily do by yourself and would save a few bucks vs SS bolts and nuts.
 
Top