198x SS-150 rebuild

Rasdiir

Petty Officer 2nd Class
Joined
Jul 18, 2011
Messages
132
Hello to all you tin craftsman, I've been reading all of your restorations for years and now I finally have the chance to try my hand at my own rebuild! Although I have been on the water a few times with friends, this is my first ever boat to actually own and drive, so my knowledge is somewhat limited. I live on the shore of a decent lake near Kingston, Ontario, so I intend to use this boat for both fishing and cruising/tubing with the family.


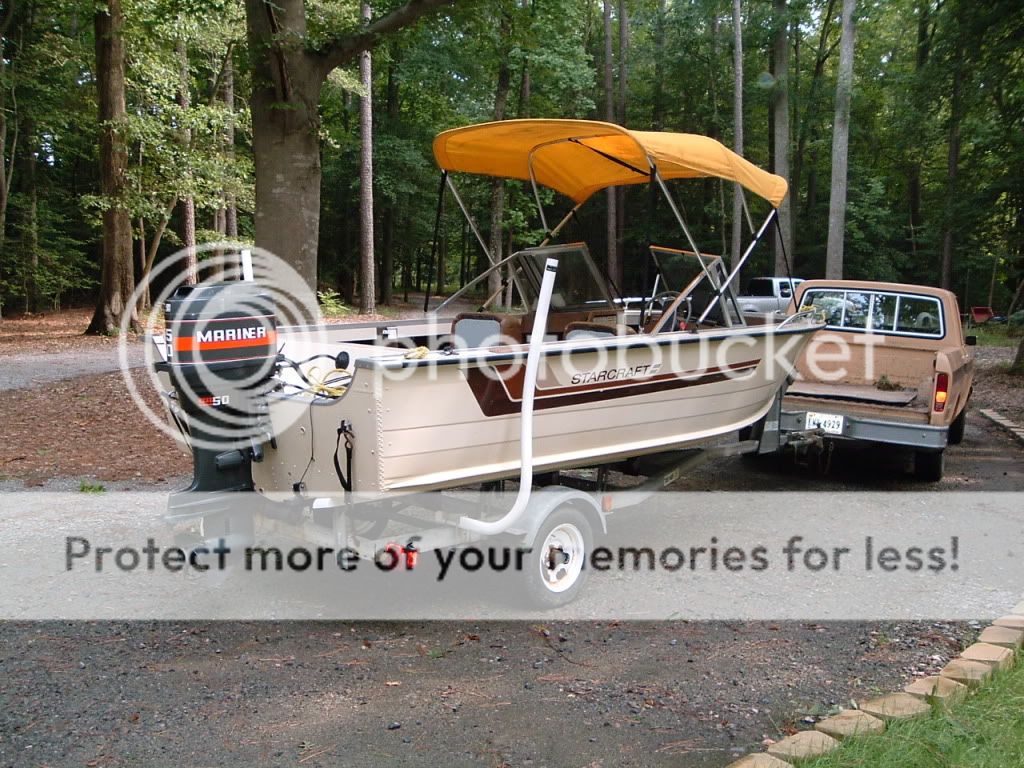
A few weeks ago I picked up what seems to be a somewhat rare model, the 15ft Super Sport (SS-150). I paid too much for it, but that's the market here in Canada right now. The HIN plate on the transom was removed by a PO (I'm hoping to find a secondary during the teardown, my understanding is that manufacturers often hid a backup under fittings in the interior), but from the decal pattern and referencing pictures of other models I have narrowed the year down to somewhere from 1983 - 1986, does that seem right? I have searched everywhere I can think of and haven't been able to find much information on this boat, and have only been able to find two for sale that had pictures I could reference, so if anyone has any information on it I would love to hear it! The PO replaced the floor and transom (somewhat badly, they are just painted instead of sealed and he left the original foam) and also did some trailer work, although much more is required.


The boat came with a 1985 Yamaha 90hp 3-cyl (90-ETLK) that is quite clean and seems to run well to my novice ear, although it is slightly overpowered for this hull (capacity plate states 80hp). I have read that this is a solid reliable engine and is fairly light for its size (NADA states weight as 260lbs) so I'm still debating if I want to keep it or trade for a 70 or 80hp, any thoughts? The boat does sit fine in the water and really doesn't seem heavy at the rear even with three people.


I have been planning this for years as I went through all of the great builds on here, and I started specifically planning the day I picked up the boat, so the slightly more detailed list for the build is:

  • Teardown to bare hull. After 4 hours on the water I have only noticed a small amount of water in the hull , maybe 1-2 litres total, but I want to do this build right and get it as leak-free as possible. The hull and rivets seem to be in fairly good condition (although the roller trailer has left a series of divots) so I'm hoping not too many rivets require replacement, although I will learn how to do that too as I'm sure it will come in handy throughout this process. The splashwell has some cracking in the corner and the knee brace tabs are broken and had a repair done by a PO which I will redo again, so I will be paying particular attention to beefing up the structure in the rear when rebuilding. Although probably not required, I would also like to add braces between the stringers and possibly the rib end braces if they are not already there, thoughts? I will be using the usual pink or blue foam wrapped in fuel-proof plastic for flotation.

  • Floor/transom: I'm still debating the best sealant, I've never used epoxy so was leaning toward spar varnish, although I've read some people have a problem with adhesive when installing the floor covering? I would like to use Nautolex for the floor and the bow seating platforms (which are completely missing and will have to be built from scratch, I like the aluminum frame that FIGMO used in his SS16), and possibly for the storage boxes beside the splashwell. I also want to make a drop in casting deck for the bow seating area, so the aluminum frame will be easy to adapt for that idea. I have a bit of work to do on the transom, I have noticed one small corroded area near the top and a PO also made a mess of the transom trim, so that will have to be made from scratch as well. The transom end caps are a diy from a PO, so I'll have to either fix them up or find new ones.

  • Painting: A full repaint is in order, but the admiral and I haven't chosen a color yet (debating between maroon, grey, and white or navy, grey, and white). We both love this paint design and decals: https://www.ohiogamefishing.com/attachments/100_0767-jpg.20536/. I will be picking up a HLVP from Princess Auto and will learn how to use it on the trailer rebuild.

  • Interior: Driver seat will likely be replaced with a pedestal, and I haven't decided on a plan for the passenger seating yet. I would like to keep the back-to back seat style but make the whole box removable with a pedestal mount underneath for when it's just me and a buddy fishing, but I haven't figured out a good attachment system yet for the box. I also need to figure out a way to keep the bow cushions secure while also easily removed for fishing duty. I plan to do carpet on the vertical sides and possibly also the rear storage boxes, as all vinyl on the rear splashwell and storage boxes may be a bit too much of a fishing boat look.

  • Motor: Although the motor seems fine I will be taking it in a few weeks to a nearby mechanic for a full inspection and proper winterization. I also plan on changing the impeller, water pump, spark plugs, and getting the carbs cleaned if required at this time. I have noticed a bit of stiffness when shifting and also a bit of play in the steering, so that will also be addressed during the build.

  • Trailer: I have a very solid but not great for the boat EZ-loader, model and year unknown as the PO had it registered as homemade. There are currently rollers on it, but I want to switch to bunks to stop denting the hull, thinking about 2x outer and rearmost bunks being a 2x6 on edge and the two inner forward bunks being 2x6 flat. The tires, axle, lights, and front stand are newer and everything works, but the entire trailer needs a paint job, new hardware, and I also want to add side bunks for easier loading and a safety chain from the frame to the bow eye. I'm hoping switching to bunks will also allow me to get the boat 3-4" lower on the trailer.

  • Other: I would like to add a trolling motor on a removable mount, and a second battery under the bow seats for the trolling motor and all accessories. Although the current wiring seems decent I will likely be redoing it all. Boat will be trailered and stored in a portable shed, but will occasionally remain at the dock for a day or two at a time, so I have all of the original canvas for the zip and snap together mooring covers, as well as the frame, and I will also be trying to make new covers that aren't ugly brown and 45 years old! Most of the aluminum trim is in decent shape, so I will be polishing it up. I will need new rubrail and the seal for the window frames above where they screw on. I would like to add some LED interior lights under the gunnels, and also fab up some small bow rails as I love that look!

  • Budget: Not fixed, but less spent is always better! I donèt intend to go too high end on this build, but I do want to do it right and solid.
Pictures:
PXL_20210824_235410745.jpgPXL_20210824_235425073.jpgPXL_20210825_214111148.jpgPXL_20210825_214116136.jpgPXL_20210825_212719411.jpg

Anyway, I am quite certain that I will have a million questions as I go through this process, and I'm very excited to finally get started after years of looking at others! All thoughts and comments are welcome!


Cheers,

Jared
 

Rasdiir

Petty Officer 2nd Class
Joined
Jul 18, 2011
Messages
132
Why would the PO remove the HIN?
No idea, it was a small plate that was riveted on, I assume he knocked it off while trying to do the transom and just didn't care. I can still see the mark in the paint where it used to be.
 

Rasdiir

Petty Officer 2nd Class
Joined
Jul 18, 2011
Messages
132
Here's a few more pictures
HIN plate location PXL_20210903_155107960.jpg

Crack in splashwell:
PXL_20210903_155202306.jpg

Knee brace fix by PO:
PXL_20210903_155627053.jpg

Bit of tearing on the rear port corner under a homemade transom cap. Not sure what to do about this?
PXL_20210903_155028250.jpg

PO homemade bow seat:
PXL_20210903_154948029.jpg

Capacity plate:
PXL_20210903_155522352.jpg

Cheers,
Jared
 

Watermann

Starmada Splash of the Year 2014
Joined
Jan 12, 2013
Messages
13,753
Welcome to channel tin and thanks for the nice pics.

You are right that 15'r is a rare model and to add to the rarity some, there were only a few years in the mid 80's that SC made half lap sides and half smooth. My next conquest is, (if there is one) would be a 15' V5 Holiday

That 3 cyl Yamaha is a highly sought after motor, being a lightweight 3 cylinder with gobs of power and high reliability. That high power is what was tearing up the age and previous owner compromised stern of the boat. (knee brace and SW cracking). It's an easy fix though and can be done right.

You have lots of work ahead of you in the tear down and will come across even more old boat maladies I'm sure.

Any paperwork come with the boat, reg, title bill of sale? That should have the HIN if not then the bow numbers will reference the HIN when you get the title in your name.

I believe the color scheme of your SS makes it a 1984 model year. I've seen it many times, here's another members 84.
DSCF2775.jpg
 

Rasdiir

Petty Officer 2nd Class
Joined
Jul 18, 2011
Messages
132
Welcome to channel tin and thanks for the nice pics.

You are right that 15'r is a rare model and to add to the rarity some, there were only a few years in the mid 80's that SC made half lap sides and half smooth. My next conquest is, (if there is one) would be a 15' V5 Holiday

That 3 cyl Yamaha is a highly sought after motor, being a lightweight 3 cylinder with gobs of power and high reliability. That high power is what was tearing up the age and previous owner compromised stern of the boat. (knee brace and SW cracking). It's an easy fix though and can be done right.

You have lots of work ahead of you in the tear down and will come across even more old boat maladies I'm sure.

Any paperwork come with the boat, reg, title bill of sale? That should have the HIN if not then the bow numbers will reference the HIN when you get the title in your name.
I did get a bill of sale and also included a photo of the transport Canada inspection plate with the serial number when I submitted the license paperwork, so we'll see what they say. I still have the PO's contact info if required for any additional paperwork. The trailer did have the ownership which has already been transferred to me, so that part is good already.
 

BOYS & TOYS

Petty Officer 2nd Class
Joined
Mar 1, 2008
Messages
141
Welcome. It seems the government is more interested in collecting tax on the boat than anything else. The 90hp should be fine with proper transom repair.
 

SHSU

Lieutenant Junior+Starmada Splash Of The Year 2019
Joined
Mar 8, 2017
Messages
1,665
Welcome!!! Will be a fun restore to follow!!!

Can you use the Canada Transport Number to get a HIN number from them?

SHSU
 

Rasdiir

Petty Officer 2nd Class
Joined
Jul 18, 2011
Messages
132
Welcome!!! Will be a fun restore to follow!!!

Can you use the Canada Transport Number to get a HIN number from them?

SHSU
I'm hoping they provide that when they give the license, just have to wait as their website states up to 15 business days for processing. There is also a process to create a notarized affidavit that you did buy the boat and they can still grant the license without the HIN,so that would be the next step if they don't grant the first application.
 

Lectro88

Petty Officer 1st Class
Joined
Oct 24, 2020
Messages
302
I would leave or keep the motor.
You load the boat down with people or "cargo" It will still have plenty of go..
But Beefing up is in order and you need to get those cracks fixed and again some reinforcement.
Thats the downside to being overpowered. Now you need to Overbuild..
Rather than plastic on the foam..
How about Epoxy and fiberglass. just a thought, maybe others will chime in.
Enjoy.
 

Rasdiir

Petty Officer 2nd Class
Joined
Jul 18, 2011
Messages
132
The boat is now licensed and transferred to me, this project is legal!

Long hours at work the last few weeks mean I haven't been too busy yet on this project, however I picked up my trailer bunk brackets and my daughter and I made a dent on the teardown. Most of the gunnel accessories are off, windshield is off, seats and floors are out, the wood storage boxes at the rear are out, and most of the foam was removed. The interior of the hull seems to be in great shape after a quick look, once it is cleaned up I will be doing a more in depth inspection. I do still have to remove the lovely brown carpet off the hull sides as well.

I discovered that my splashwell cracks actually aren't, it was just the way they made this one. The two storage boxes on each side have one aluminum face which becomes the side triangles of the splashwell, the splashwell bottom is just an angled flat sheet. The gap between the side piece and splashwell bottom was caulked and painted over, and the caulking had cracked. I am debating whether I should be getting these pieces welded together or just attach them all together properly with rivets, as they really aren't right now. I will be ensuring stability of the whole system by making an aluminum frame for the front face of the whole rear storage area, so it should be strong enough.

The original pour in foam was actually not too wet, just a couple of the pieces at the rear had water. Foam actually came off really easily too, once I got a finger under the bottom edge it came right up in big pieces without much residue left behind. The angle of the hull means there is not a lot of height for replacement foam, but since Starcraft only had the pour in foam on the outside of the stringers (and not even between all ribs) I am not worried about getting enough back in, especially as I will be filling between the stringers too.

PO had told me that he redid the floor, but he definitely did not do it carefully or properly. He had used marine plywood, but it was in 3 separate pieces and he didn't redo the 2ft at the rear, which was quite dry-rotted. He also painted it with some sort of green goop that was still a bit tacky and ended up all over us, and it was only secured to the stringers (with 2 1/2" deck screws!) and not the ribs. Speaking of stringers, only one of them is attached to the hull at all, and that one only has 3 rivets left! PO also added an aluminum angle brace across the stringers at the rear where the "new" deck met the old piece he left, but he cut a vertical slot in both stringers so the angle would lay flat.

I was going to take the motor to a mechanic right away for a full inspection, but since the teardown has begun and this project will likely take most of a year or more to complete I think I will just winterize it well and store it until I need it. I know it works well already, so I don't really see the point in putting new pieces on now (water pump, impeller) and then letting it sit. I do need to build a stand and get the motor into an insulated garage for winter, but I'm still trying to figure out the best way to transfer it without an engine hoist or a solid tree and pulley.
Pictures:
PXL_20210925_214724856.jpg
PXL_20210925_214743749.jpg
PXL_20210925_214754992.jpg
Cheers,
Jared
 

SHSU

Lieutenant Junior+Starmada Splash Of The Year 2019
Joined
Mar 8, 2017
Messages
1,665
I discovered that my splashwell cracks actually aren't, it was just the way they made this one. The two storage boxes on each side have one aluminum face which becomes the side triangles of the splashwell, the splashwell bottom is just an angled flat sheet. The gap between the side piece and splashwell bottom was caulked and painted over, and the caulking had cracked. I am debating whether I should be getting these pieces welded together or just attach them all together properly with rivets, as they really aren't right now. I will be ensuring stability of the whole system by making an aluminum frame for the front face of the whole rear storage area, so it should be strong enough.
My vote would be to replace with solid rivets. My SS16's splashwell was also fitted together with rivets. Since I had a customer splashwell made I had it welded, but if I had used the original I would have riveted it again too.

Speaking of stringers, only one of them is attached to the hull at all, and that one only has 3 rivets left!
Mine were in similar shape too. Once the hull structural integrity starts to go, everything starts to pop really quick. I was surprised how important each piece was in maintaining structural integrity

I was going to take the motor to a mechanic right away for a full inspection, but since the teardown has begun and this project will likely take most of a year or more to complete I think I will just winterize it well and store it until I need it. I know it works well already, so I don't really see the point in putting new pieces on now (water pump, impeller) and then letting it sit. I do need to build a stand and get the motor into an insulated garage for winter, but I'm still trying to figure out the best way to transfer it without an engine hoist or a solid tree and pulley.
Learn to do your own motor work and you will save so much money. So many YouTube videos show how to do the normal repairs/maintenance. Parts diagrams are easy to find to for most motors. As for lifting the motor, 2 or 3 buddies might be able to manhandle it off and onto a stand. That being said, an engine hoist/tree is so much easier.

SHSU
 

Rasdiir

Petty Officer 2nd Class
Joined
Jul 18, 2011
Messages
132
Hey all,


Due to winter there hasn't been a lot of movement of this project. I did get the motor fogged and on a stand in the garage (unheated, but it rarely goes below 0C), and I have been spending some time planning the electrical.


My thoughts on my electrical plan (pdf attached. Diagram 1 shows the individual lines for each light, diagram 2 was simplified and still shows light locations and grounding but not positive, which all comes from the switch panel):

  • Based on my intended use case of a mix of family fun and fishing I wanted to go with a dual battery setup, but did not see a requirement to tie them into a single system. The trolling motor gets a dedicated battery in the port bow seat which I can remove from the boat to charge (plan on using Anderson quick disconnects). All other items will run off the starting battery in the rear, which shouldn't be a problem as the only things that would take consistent or large amounts of power are the fish finder and possibly the USB ports. This design saves a ton of large cable to tie the two batteries into the same switch in the rear, and I can still always physically transfer the trolling battery to the rear if I need it to start the motor.
  • I have not yet finalized exactly what lights, fishfinder, horn, or trolling motor I want, so the power draw I am anticipating has been calculated high (LED lights should be around 5A but I planned for 10).
  • I have a ton of LED lights built into the diagram, but really do not anticipate using the deck or storage lights very often as I will rarely be out at night and will virtually always be using the main motor, so it can be charging the start battery anyway.
  • I am planning to use a fuse block, switch panel, and terminal strip under the driver console for all positive connections, and several grounding buses (driver console, port bow seat storage, and starboard rear storage).
  • I planned circuit breakers rather than fuses for two connections: the start battery to driver console fuse panel, and the trolling battery to trolling motor plug.
  • We will not be using a built in stereo and will use bluetooth battery speakers for music. These may be plugged into the USB ports, but the power required is minimal.
  • I wired the bilge pump through the console switches as the boat will virtually always be trailered and never remain in the water when we are not in it, so I don't need the bilge to work if the start battery switch is off. This also simplified the wiring coming off the start battery switch, although as you can see from my first question below it did add some complications in cable size.


I do have some questions that I'm hoping to get some help with:

  • Cable sizing: I understand the idea of using a cable chart like the one found here: https://www.boatus.com/expert-advic...ve/2020/february/choose-the-correct-wire-size, but I seem to be coming up with some crazy thick cable for relatively small load devices. Example: bilge pump is 5A, and the cable length will be 31ft (11ft for positive from battery to console fuse panel, 14ft for positive from console switch to bilge, 6ft for ground from bilge to rear bus bar. Is this correct or do I have to count the ground length all the way up to the console?). 5A over 30ft requires 10 or 12AWG cable at 3% loss, which seems very large for a 5A bilge pump when some people are using 10AWG for their battery to starter connection? I also wanted some thoughts on the cable size from the start battery switch to the console fuse panel. The fuse panel is rated for 100A, but that means I require either 1 or 2AWG? (22ft roundtrip at 100A)
  • Grounding: My understanding is that all the grounding buses that are tied together must be able to support the full load of all the devices on the circuit. Does this mean that the cables tying the front and rear ground buses must also be able to support the starting engine load? Basically, do I have to use the same 1AWG for the ground bus bar connections as I use for the positive and negative load from the battery to the motor?
  • Are there any efficiencies to be made in the cable paths? Right now I planned that all positive lighting wires would go up through the bow to reach the starboard side, but that makes for very long cable runs (29ft roundtrip for the port under gunnel lights, which then requires 12AWG. That's huge cable for a less than 1A circuit)


Any thoughts on the overall plan or advice, especially on cable sizing?


Cheers, Jared
 

Attachments

  • SS150 Electrical diagram.pdf
    148.6 KB · Views: 54

SHSU

Lieutenant Junior+Starmada Splash Of The Year 2019
Joined
Mar 8, 2017
Messages
1,665
That is a detailed plan you have. Each of us have our own ways of doing things, but in the end its your project and must be happy with it. That being said, see comments below:

Dual Batteries: I use our boat in a similar fashion as far as fishing and family. I have a house bank and an engine bank. The house bank (2 batteries stored up front for weight distribution) runs the flood lights, house lights, nav, radio, etc on two batteries tied together in parallel. I have never run the house batteries dead after a full day on the water. Also the max time I have used the flood lights was like 5 hours before the sun came up. I have a separate battery for just starting and nav lights. My motor doesn't charge so wanted a dedicated battery plus it helps keep weight distribution where I want it and not three batteries in the back.

Bilge Pump: @Watermann is the one that suggested to hot wire the bilge pump with a float switch to the starting battery when I did ours. While our boat is a trailer queen as well, I have had it turn on by the float switch when we were making runs in some chop because of the amount of spray we were taking (Bad day in Galveston bay). I also have it wired to to the switch panel so I can manually turn on if I see there is some extra water back there, but that is rare. Recommendation is to have it hardwired to battery with a float switch. You might not see the need now, but better to be over prepped then not.

Cable Sizing: I used 14 gauged marine tined wire for our build. Starter and T/T are only thing with heavy gauge. Overkill in many cases but got it in bulk.

Just my 2 cents and what we did on our build.

SHSU
 

Moserkr

Chief Officer + Starmada Splash Of The Year 2021
Joined
Nov 23, 2020
Messages
835
Im late to the party but that is a cool boat! Much more swept forward bow than the 16ss, and the rounded gunnel sides are a first for me. Ill be tagging along as you build her above her former glory!!
 

Rasdiir

Petty Officer 2nd Class
Joined
Jul 18, 2011
Messages
132
That is a detailed plan you have. Each of us have our own ways of doing things, but in the end its your project and must be happy with it. That being said, see comments below:

Dual Batteries: I use our boat in a similar fashion as far as fishing and family. I have a house bank and an engine bank. The house bank (2 batteries stored up front for weight distribution) runs the flood lights, house lights, nav, radio, etc on two batteries tied together in parallel. I have never run the house batteries dead after a full day on the water. Also the max time I have used the flood lights was like 5 hours before the sun came up. I have a separate battery for just starting and nav lights. My motor doesn't charge so wanted a dedicated battery plus it helps keep weight distribution where I want it and not three batteries in the back.

Bilge Pump: @Watermann is the one that suggested to hot wire the bilge pump with a float switch to the starting battery when I did ours. While our boat is a trailer queen as well, I have had it turn on by the float switch when we were making runs in some chop because of the amount of spray we were taking (Bad day in Galveston bay). I also have it wired to to the switch panel so I can manually turn on if I see there is some extra water back there, but that is rare. Recommendation is to have it hardwired to battery with a float switch. You might not see the need now, but better to be over prepped then not.

Cable Sizing: I used 14 gauged marine tined wire for our build. Starter and T/T are only thing with heavy gauge. Overkill in many cases but got it in bulk.

Just my 2 cents and what we did on our build.

SHSU
I guess the consensus is hard wire the bilge, so I will modify the plan to have the float direct from the start battery and a manual switch in the console.

Im late to the party but that is a cool boat! Much more swept forward bow than the 16ss, and the rounded gunnel sides are a first for me. Ill be tagging along as you build her above her former glory!!
I thought it was pretty unique with the rounded sides too, but there are a few unique issues with this version. I have to fabricate bow rails as it doesn't seem to have come with them. I am also having an almost impossible time finding other people with this model, I think the show your boat thread only had two, and I have only found two others ones on for sale sites across the internet. I am very interested in seeing what others have done with these boats, as another main difference between the 15 and 16 is the splashwell area: this model has a tiny splashwell, storage on each side of it, and another compartment for the gas tank and battery in front of it. I love the small splashwell and the storage, but the gas compartment eats a lot of floor space. I'd love to have the extra room but I think I will be keeping that portion mostly the same since I will be slightly overpowered and part of my reinforcement plan is an aluminum angle frame across the whole width of the boat for all of those compartments, which should tie in the sides and transom nicely.

Cheers,
Jared
 

renns

Petty Officer 1st Class
Joined
Dec 20, 2017
Messages
316
Wow, I missed out on this thread earlier. Nice boat, and VERY nice wiring diagram! I'm a newbie here, so will be following along to see how the responses apply to my project.
 

ShoestringMariner

Lieutenant Commander
Joined
Apr 18, 2015
Messages
1,563
Late to the party too! Another Canuck here, great looking project. I bet it flys! I’d say keep that Yammy or trade for another Yammy triple. (70). Or as I another said, beef up the hull if you choose to keep.
I’m very intrigued, I don’t think I knew there was a 15’ SS. Watching with much interest.
 
Top