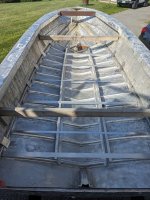
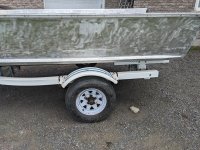
198x SS-150 rebuild

Rasdiir

Petty Officer 2nd Class
Joined
Jul 18, 2011
Messages
167
Looks good! I had to add new wings to my knee brace as well. I chose to use solid rivets to attach the new wings to the brace. Something you could easily do by yourself and would save a few bucks vs SS bolts and nuts.
I would have to remove the knee brace for this, right? Not sure if the bucking bar would fit while it's still on the hull?
 

Moserkr

Chief Officer + Starmada Splash Of The Year 2021
Joined
Nov 23, 2020
Messages
869
Ah yes it would have to be removed. Doubt you could do it while still attached. So rivets may not work. If welding wont work either then SS bolts would be the only choice left.
 

Rasdiir

Petty Officer 2nd Class
Joined
Jul 18, 2011
Messages
167
Continued plugging away at random items while I wait for riveting help. I did manage to rivet on the patch at the top left corner where it was split by myself, but left handed gun action meant I got a few smiley faces on the rivet heads. Not a big deal, it should be plenty strong. Once that patch was on I buttoned down the gunnel top again with the new all aluminum blind rivets that just arrived, and also put a few extra solids on the top right side where it was starting to bend.

I got the holes drilled for one of the patches on the bottom, and also cleaned out the corrosion hole with a dremel and got JBWeld filled in the hole. I removed the previous blinds on the stringer braces and replaced those with the full aluminum ones as well, then riveted down the starboard stringer. The port stringer has to wait until I get that rib and the bottom patch riveted on since the stringer passes right over them.

I finished drilling out the 1/4" bolt holes for the new knee brace wings, and I also picked up 3" SS bolts, although the hardware store was out of nyloc nuts so those will have to be ordered before I can install the braces for good. Bolts were only $1.65 each, which I thought was pretty decent!

I picked up a 1 1/4" hole saw (since the PO had made the hole that size through the transom aluminum) and drilled out the splashwell drain through the transom, and also got the first coat of OTF on one side. The OTF doesn't really seem to be soaking in that well, I only mixed up about 3/4 of a litre and still have most of that left after the first coat, any ideas what's going on?

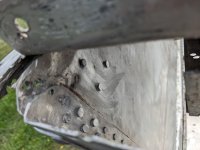
Outside of the top left patch over the crack:
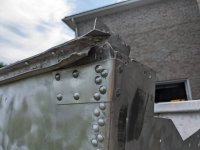
PXL_20230720_142525783.jpg

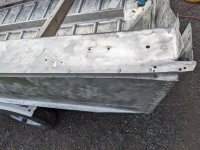
Inside of the top left patch:
PXL_20230720_142546032.jpg

Gunnel buttoned back on:
PXL_20230720_142551634.jpg

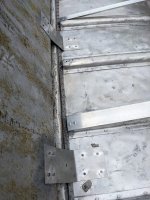
Starboard stringer riveted on. It looks and is curved, but I reused the same holes as the factory so I can only assume it's designed like that?
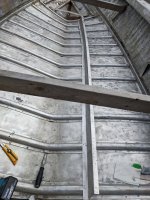
PXL_20230720_142804639.jpg

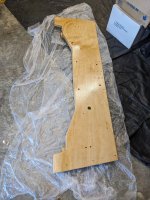
First coat of OTF on transom wood:
PXL_20230720_151644798.jpg

Cheers, Jared
 

Rasdiir

Petty Officer 2nd Class
Joined
Jul 18, 2011
Messages
167
I finished putting the OTF on the transom, it took 4 coats on the first side and 3 on the second side, the edges and holes got a total of 7 coats. Now I have to wait a week or two for that to dry/cure and then I can put on the 3 coats of spar varnish.

I also managed to get my nephew to help and got the last two patches riveted on, he's only 14 but did a great job! Now that those patches are on I also riveted on the port stringer to the ribs and began cutting the notches out of the cross braces and attaching those, got 1 on so far. The port stringer has even more of a curve than the starboard one even though I followed the factory holes, the Starcraft assembly guys must have had a few too many lunch beers when making this one!

Yesterday I picked up 4 sheets of 2' x 8' x2" XPS and some foam safe PL adhesive so I can begin cutting and gluing the foam into blocks for under the floor. Long ways to go before floor installation but I might as well do something on this project while I wait to finish riveting the chine braces, my slow pace is already turning this into a 3 year project.

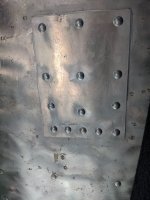
Large patch for a hole right beside a rib (front is the side with extra rivets):
PXL_20230723_214609654.jpg

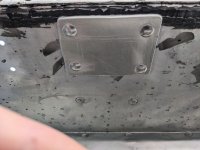
Small patch right at the end of a rib:

PXL_20230723_214652941.jpg

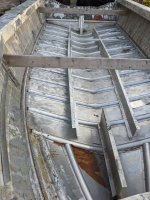
Stringers installed and started on braces:
PXL_20230725_233519362.jpg

Cheers, Jared
 

SHSU

Lieutenant Junior+Starmada Splash Of The Year 2019
Joined
Mar 8, 2017
Messages
1,722
my slow pace is already turning this into a 3 year project.

Don't worry, it took me 2 1/2 years to get ours finished. It will be even more fulfilling because of the added length and commitment.

SHSU
 

Rasdiir

Petty Officer 2nd Class
Joined
Jul 18, 2011
Messages
167
Finally some riveting success! Got my gf's son to help me today and managed to get all 12 chine braces riveted on, and I also got all floor cross braces notched out and riveted to the ribs and stringers. Only a few more rivets in the front left seat braces and then a couple randoms and this thing is ready for a leak test!

I'm on vacation from work for the next 3 weeks, but I do have a trip to see family in the middle of that time so we'll see how much progress I can get in around the trip. I'm still aiming to have the painting done on the hull by end-Aug, so my to-do list before that is:

  • Finish the last 12 or so rivets;
  • Paint inside of transom skin and bilge area. Prior to painting I need to thoroughly clean and degrease the entire bilge area;
  • Install the transom wood and all bolts;
  • Install the 1/4" motor mount plate;
  • Leak test, fix anything if required;
  • Flip the hull and fill in the pitting with JBWeld;
  • Run a bead of 5200 along all outside seams; and
  • Sand entire hull.
What grit should I be sanding to before the self-etching primer?

Chine braces:
PXL_20230731_190815432.jpg

Chine and floor bracing riveted on:
PXL_20230731_211222623.jpg

Chine brace rivets from the outside:
PXL_20230731_190808246.jpg

Cheers, Jared
 

SHSU

Lieutenant Junior+Starmada Splash Of The Year 2019
Joined
Mar 8, 2017
Messages
1,722
I just wire wheeled and didn't sand, but all you need is enough to knock off the oxidation.

SHSU
 

Rasdiir

Petty Officer 2nd Class
Joined
Jul 18, 2011
Messages
167
Back from vacation yesterday, it was nice to see all my family and their little ones but I am always happy to be home.

Got the last 12 rivets in on the front seat braces, and did a leak test. I strapped the hull to the trailer in the hopes that the trailer weight would get it farther under water, but our steep launch in the backyard and my short trailer tongue meant I had to abandon that plan since the tow vehicle would have been quite a ways in the lake before the hull was floating.

Since floating it wouldn't work I pulled it back up to the house and put in about 50gal with the hose, then moved the hull back and forth on the trailer to cover all the rivets we put in and all the seams. Good and bad news: None of the rivets I put in are leaking, but I did find two more tiny holes under the rear rib ends and the bow seam also has a very slow leak. The rib end holes appear to be near breakthroughs by the PO when screwing down the floor since the pin hole has a small curve outwards, but they should be fairly easy to throw a few more small patches on.

For the bow seam I am thinking I will rebuck the rivets, then do a caulking line of 5200 on the outside and will coat it well with gluvit when I get to that stage. Any other ideas? It was only leaking about 1 drop every 2 seconds or so.
 

Rasdiir

Petty Officer 2nd Class
Joined
Jul 18, 2011
Messages
167
Think the 5200 is not needed, I would just try the gluvit. Its designed to get into the cracks and seal.

SHSU
Would it cause problems or is it just not required? Not sure if it was the PO or the factory but there is a sealant bead along the how seams right now.
 

SHSU

Lieutenant Junior+Starmada Splash Of The Year 2019
Joined
Mar 8, 2017
Messages
1,722
Would it cause problems or is it just not required? Not sure if it was the PO or the factory but there is a sealant bead along the how seams right now.
It isn't the right adhesive for the job. So it would work, but Gluvit should work better. If its a redish brown goop is most likely factory.

SHSU
 

Rasdiir

Petty Officer 2nd Class
Joined
Jul 18, 2011
Messages
167
It isn't the right adhesive for the job. So it would work, but Gluvit should work better. If its a redish brown goop is most likely factory.

SHSU

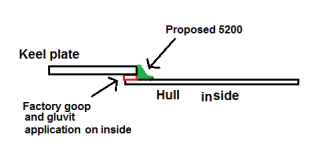
Oh, sorry, I think I didn't explain well. I wanted to do 5200 on the outside of the seam where the bow keel plate meets the hull sides (see picture below, there is also something already there like that, not sure if from the factory or a PO), but then use gluvit on the inside of the seam. If I use gluvit on the outside and let it seep into the seam should I then cover it up with anything or just paint? The seam currently has reddish goop in between the plates and painted on the inside of the bow plate.

Untitled.png

I spent some time yesterday forming up the newly required patches and prepping the holes for rivets, so I will pick up a new tube of 5200 today and hopefully get these patches on this week. I also started putting the coats of straight spar on the transom. 1 coat went on yesterday and I quickly sanded with 220 and put another coat on today. The last coat of the first side will go on tonight after the recommended 6hr dry time.
 

Moserkr

Chief Officer + Starmada Splash Of The Year 2021
Joined
Nov 23, 2020
Messages
869
Id put the gluvit right over the factory goop and thats it. If anything, apply a second layer of gluvit if needed. No 5200 on top of it. Paint not necessary but you could. I noticed where I painted over some 5200 on my transom, paint started to crack as the 5200 shrunk.
 

Rasdiir

Petty Officer 2nd Class
Joined
Jul 18, 2011
Messages
167
Roger to both, no 5200. Does Coat-It seep into seams like Gluvit? Coat-it is 30% cheaper and materials on this project are adding up.
 

Moserkr

Chief Officer + Starmada Splash Of The Year 2021
Joined
Nov 23, 2020
Messages
869
I used coat-it inside the hull and my PO used it outside on the whole bottom of the hull. I dont leak a drop. It seeped into a few spots on the seams noticeably, and otherwise made a nice covering on each rivet inside. Where it seeped in I hit it again and it didnt seep in anymore.

No experience with gluvit. But the bottom of my hull gets beached on granite sand, and that barely wears out coat-it. Its impervious to paint removers.
 

Rasdiir

Petty Officer 2nd Class
Joined
Jul 18, 2011
Messages
167
Due to a pantry makeover project that I started this weekend (and is still ongoing) I haven't gotten too much completed, but I did get the two new patches on from the leaks I found and then did another leak test. With only the bow seam still dripping slowly I was ready to move on, but it turns out Coat-It was only cheaper to buy, not ship to Canada, so Gluvit was chosen and is now on the way for the seam.

I thought all was well on the leak front so I enlisted my step-son to turn the boat over so I could start cleaning out and filling in the bottom pitting. I then started the pantry project and while I was outside sanding boards I noticed a grey patch on the bottom of the hull. Turns out it was another JBWeld fix by the PO, and that caused me to remember another spot I had noticed near the keel while stripping paint last summer. One thing lead to another and now I have two more patches to put on and about 12 random rivets to replace due to extreme corrosion on the heads. I do have to be careful not to go too crazy, because most of the bottom rivets have small amounts of pitting and if I get too worked up it could turn into a never-ending fix. I have to remind myself that they have held strong for 40 years and this is not a yacht, so they will be good enough for me.
 

SHSU

Lieutenant Junior+Starmada Splash Of The Year 2019
Joined
Mar 8, 2017
Messages
1,722
You are way ahead on the rivet front if you don't have to replace them all, don't ask me how I know.....

lol

SHSU
 
Top