1988 Glastron GX 199 Restoration

chconger

Petty Officer 1st Class
Joined
Jul 3, 2012
Messages
315
Re: 1988 Glastron GX 199 Restoration

Update:

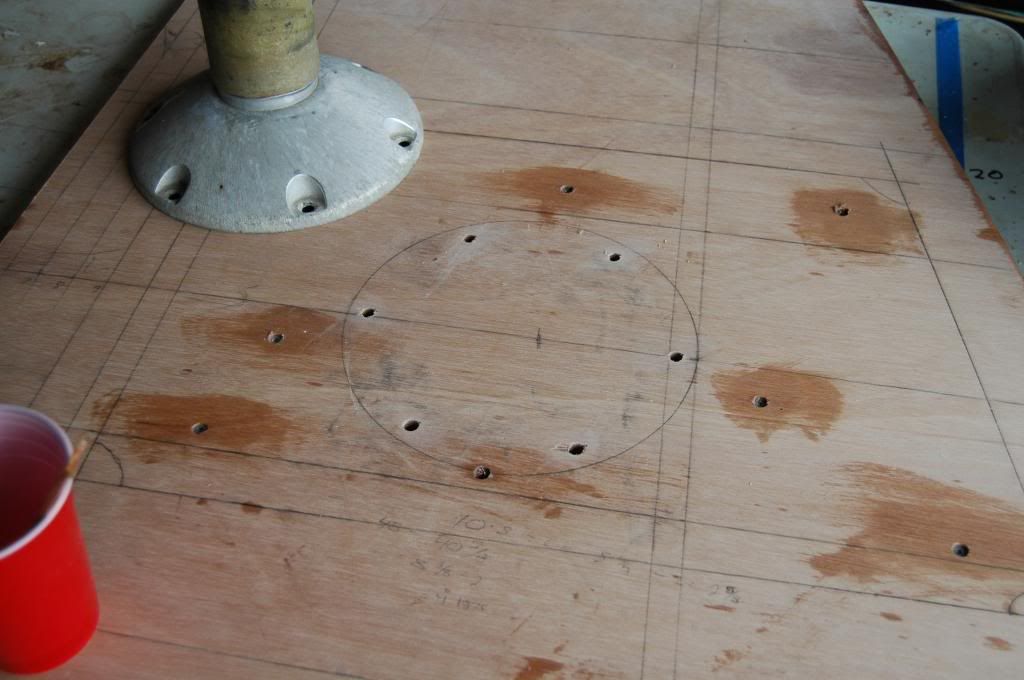
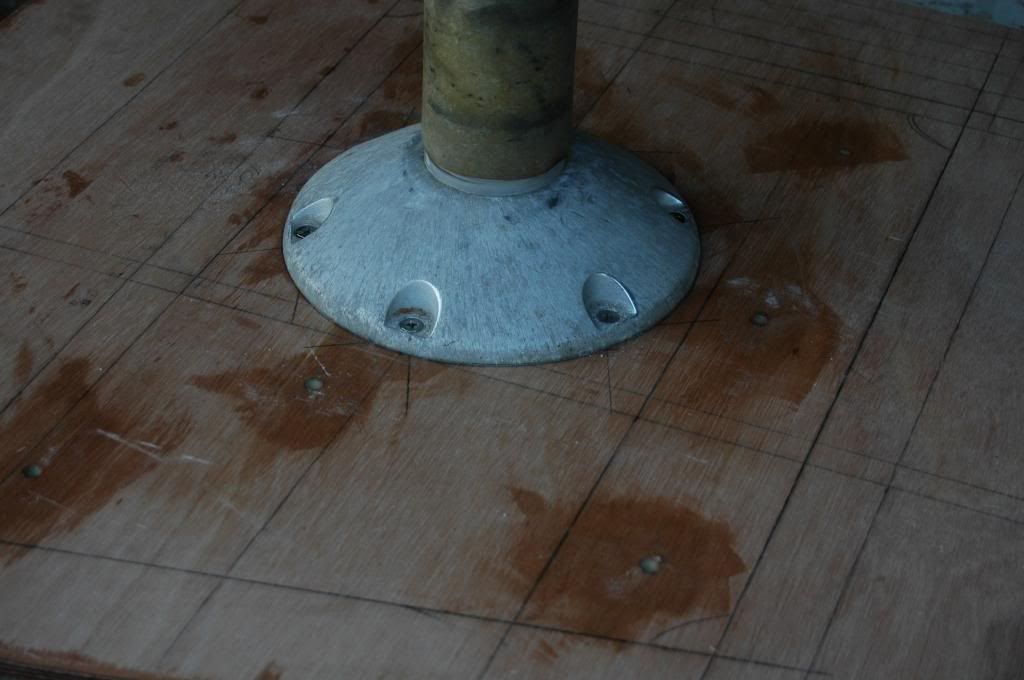
I fussed and fiddled about the seat position only to put it back where they were in the first place; (OK Glastron, you win this one!)
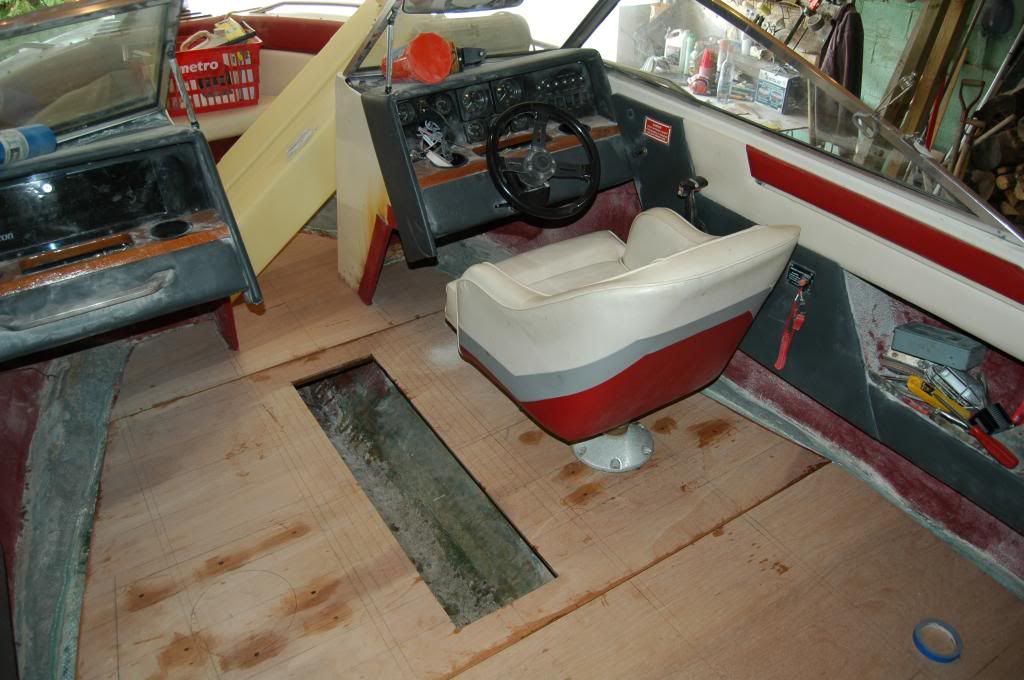
DSC_7622_zpsba64521e.jpg


I drilled over size holes;
DSC_7623_zps7bfd1c27.jpg


And filled with epoxy and white flour;
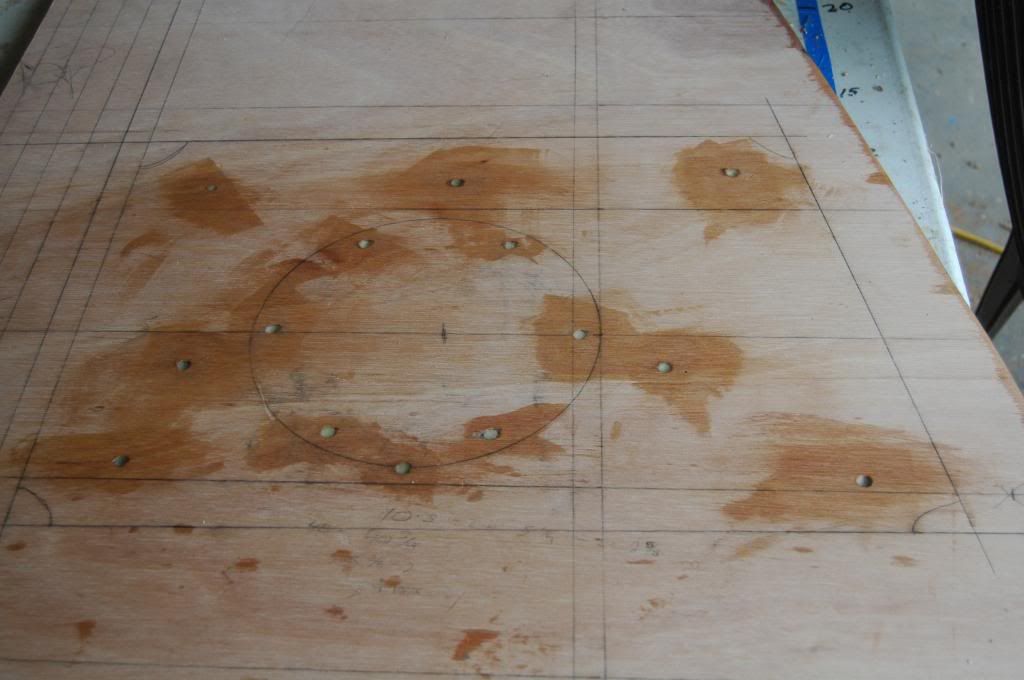
DSC_7624_zps4870894d.jpg


Not too much work to show today. But I take it in stride. When I was young, I realized the meaning of life, and I found working on boats is a great distraction.


Cheers
Chris
 
Last edited:

Woodonglass

Supreme Mariner
Joined
Dec 29, 2009
Messages
25,927
Re: 1988 Glastron GX 199 Restoration

If you really did use white flour, next time I'd use Baby Powder instead of flour.
You could use this type of threaded insert...
main_insertscrewin.jpg
 

chconger

Petty Officer 1st Class
Joined
Jul 3, 2012
Messages
315
Re: 1988 Glastron GX 199 Restoration

Ohhhhh

I like that;

main_insertscrewin.jpg


I have a good fastener store that I will challenge them to find these for me.

Why do you say baby powder?
 

archbuilder

Vice Admiral
Joined
Sep 12, 2009
Messages
5,697
Re: 1988 Glastron GX 199 Restoration

Great work, I like the oversize dove tail joint! I was thinking the same thing as EZ, that plywood sure is nice looking! I used some t-nut similar to what Wood posted, they worked great.
 
Last edited:

chconger

Petty Officer 1st Class
Joined
Jul 3, 2012
Messages
315
Re: 1988 Glastron GX 199 Restoration

Well I ended up with T-nuts because that's all they had in stainless locally.

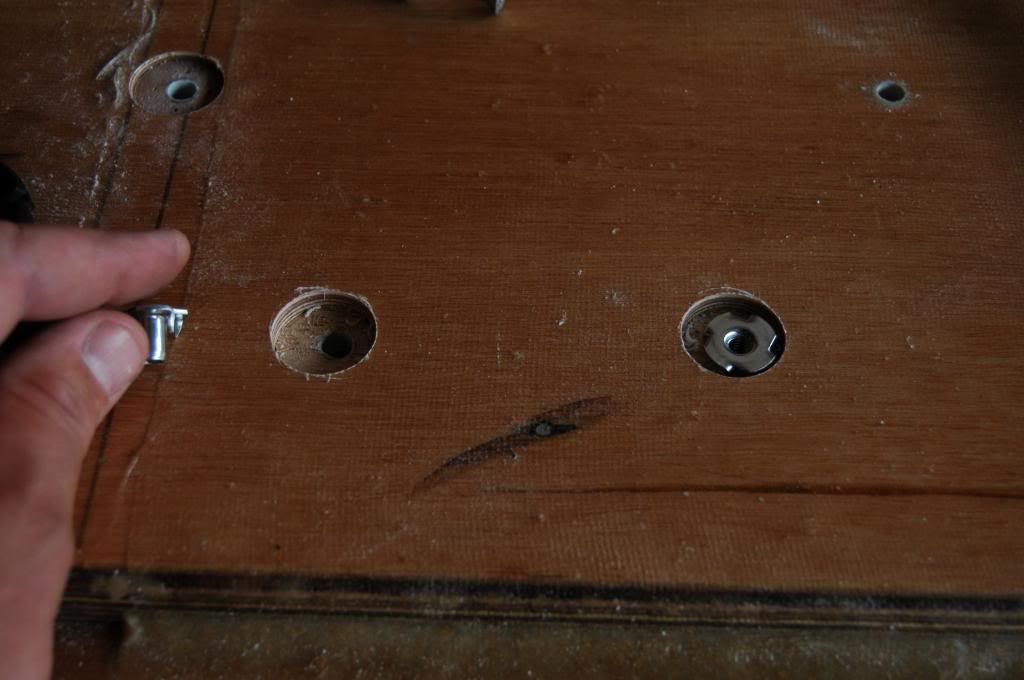
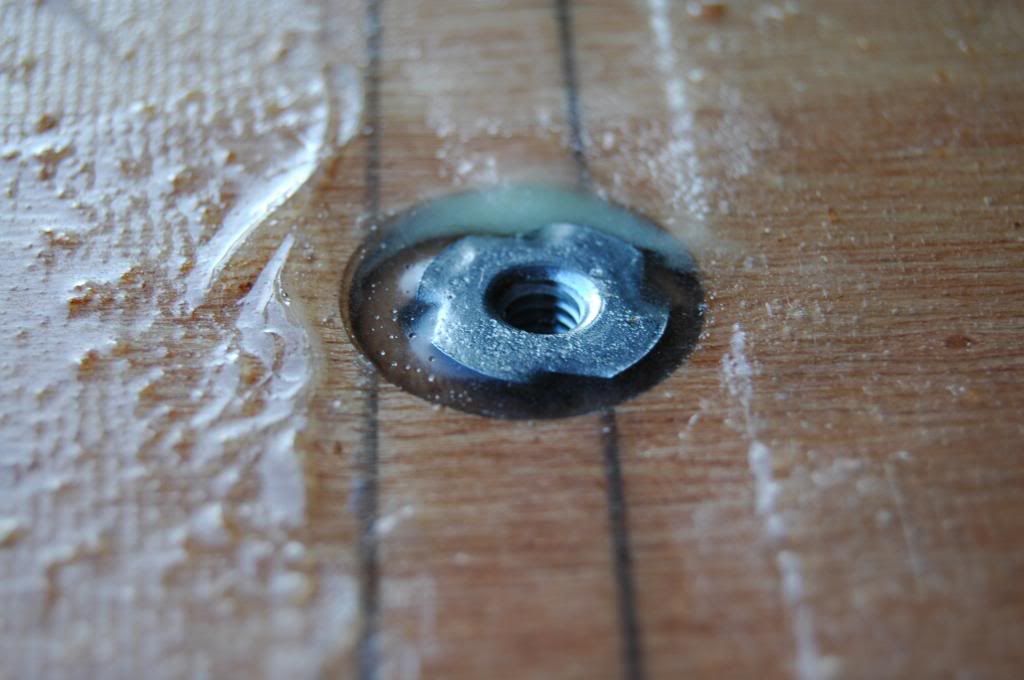
I initially had the idea of counter sinking the entire area of the nut to the full depth of the "tangs" and setting it in epoxy;

DSC_7630_zps1d0e71c0.jpg


I then got spooked by all the material I was removing. So only 2 of the 12 nuts ended up with deep counter sinks. There are 2 other nuts with shallow countersinks because a stringer will run under them and it needs to be flush.

So for the rest of them. I first drilled my 1/4 hole for the bolt all the way through. Then, on the bottom side, I drilled a 3/8 hole only to the depth to accommodate the t nut

DSC_7626_zps84575b7b.jpg


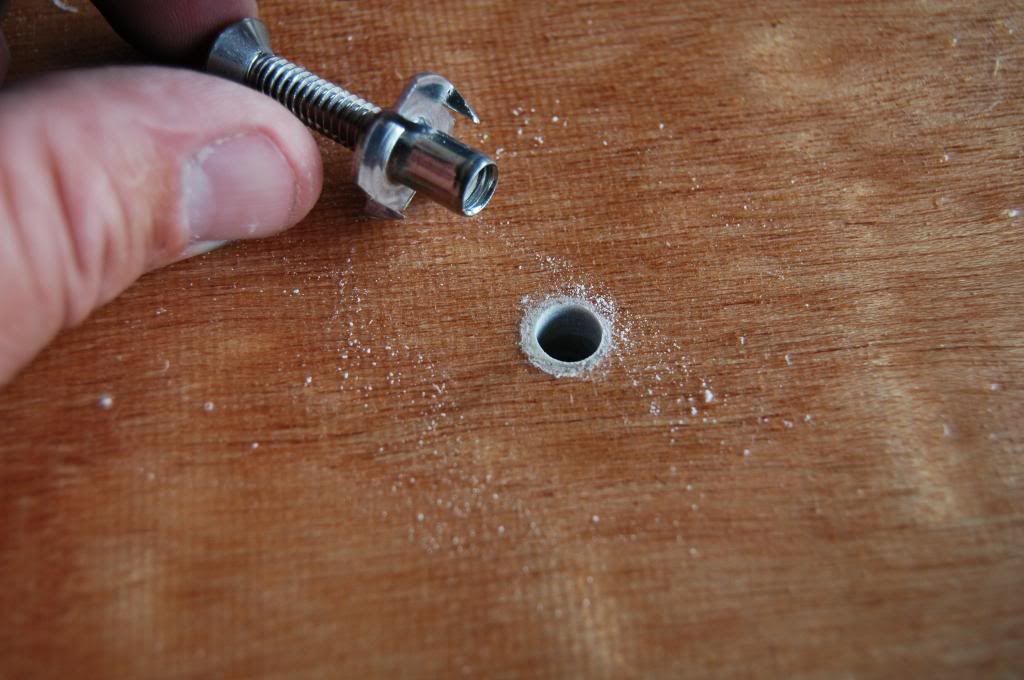
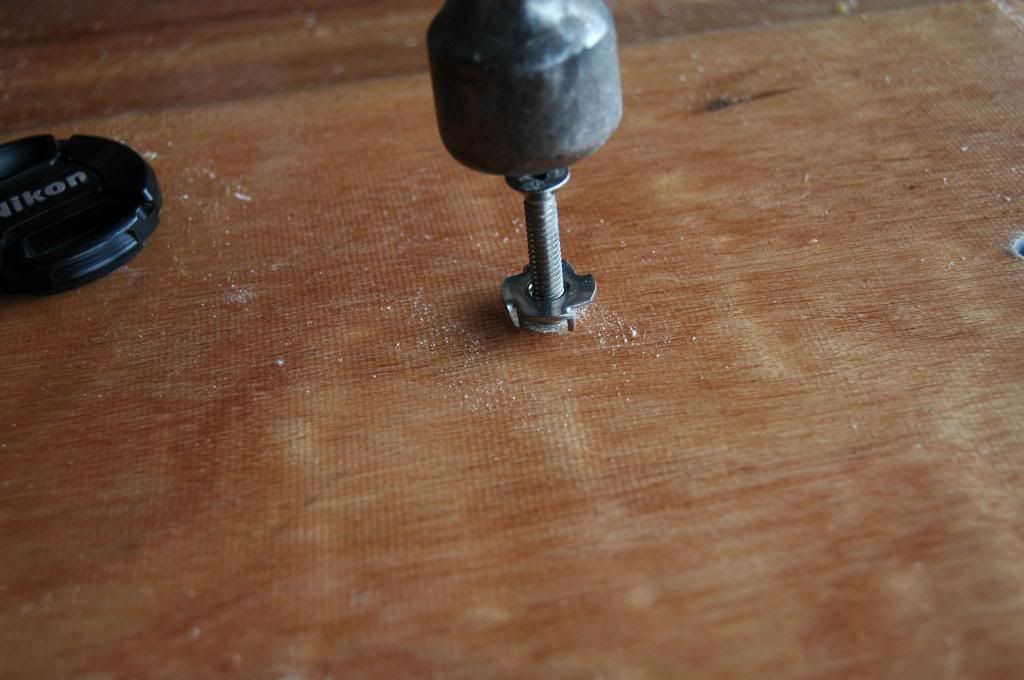
Then I used a hammer to locate the points where the "tangs" will want to go into the wood;

DSC_7627_zps06b31489.jpg


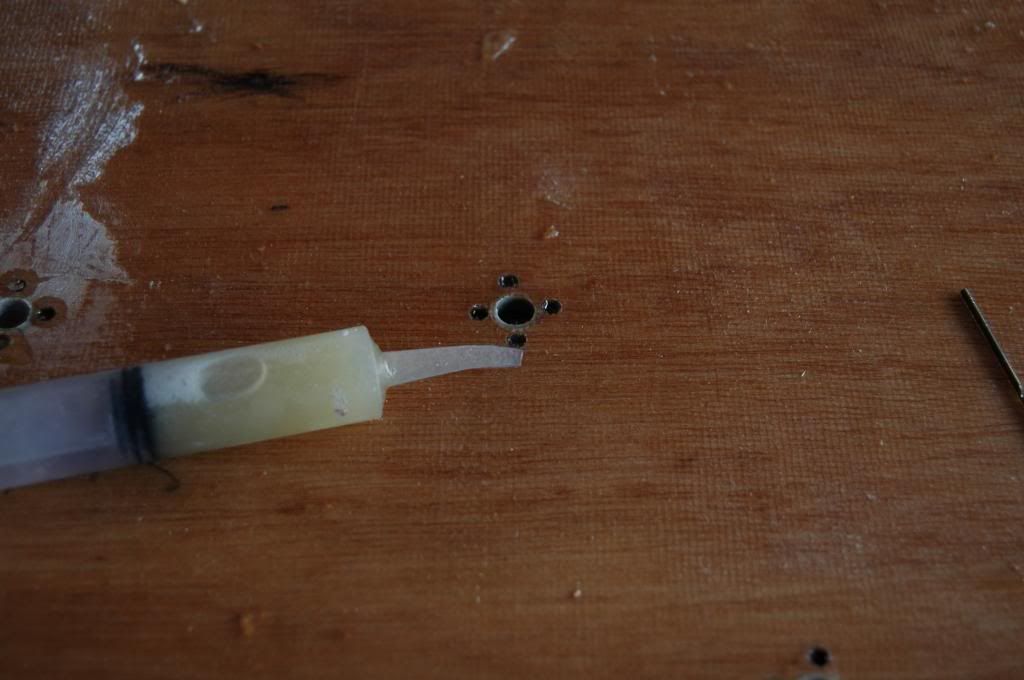
I then drilled holes to accept the tangs, and filled each one of these smaller holes with epoxy;

DSC_7632_zps23fd9f54.jpg


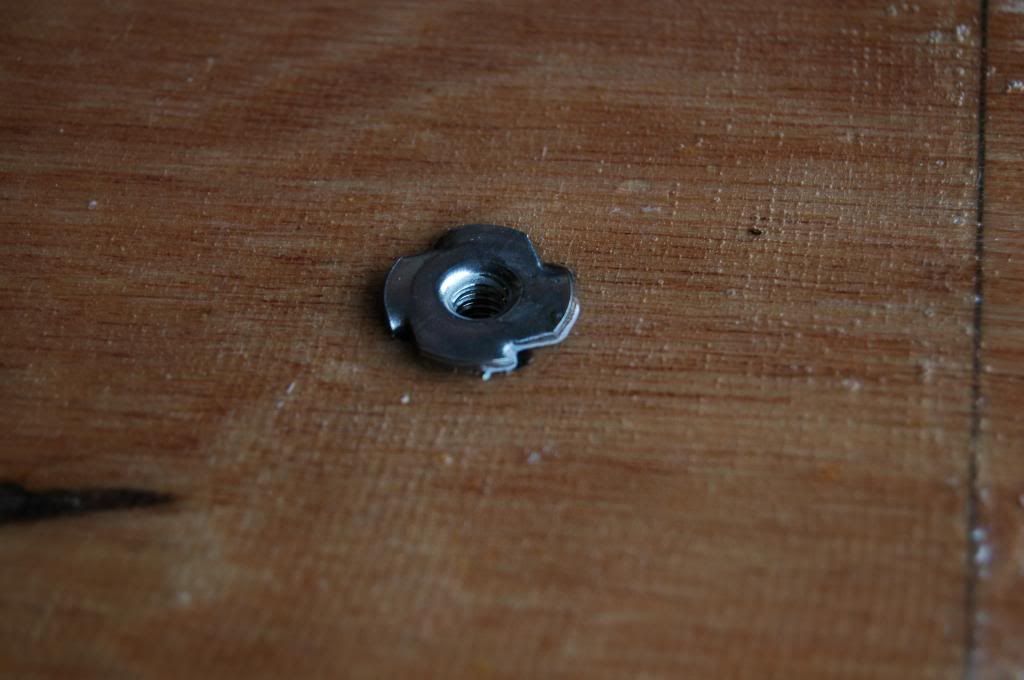
Next I coated the outside of the t-nut's barrel and inserted them in;

DSC_7633_zpsebdc698b.jpg


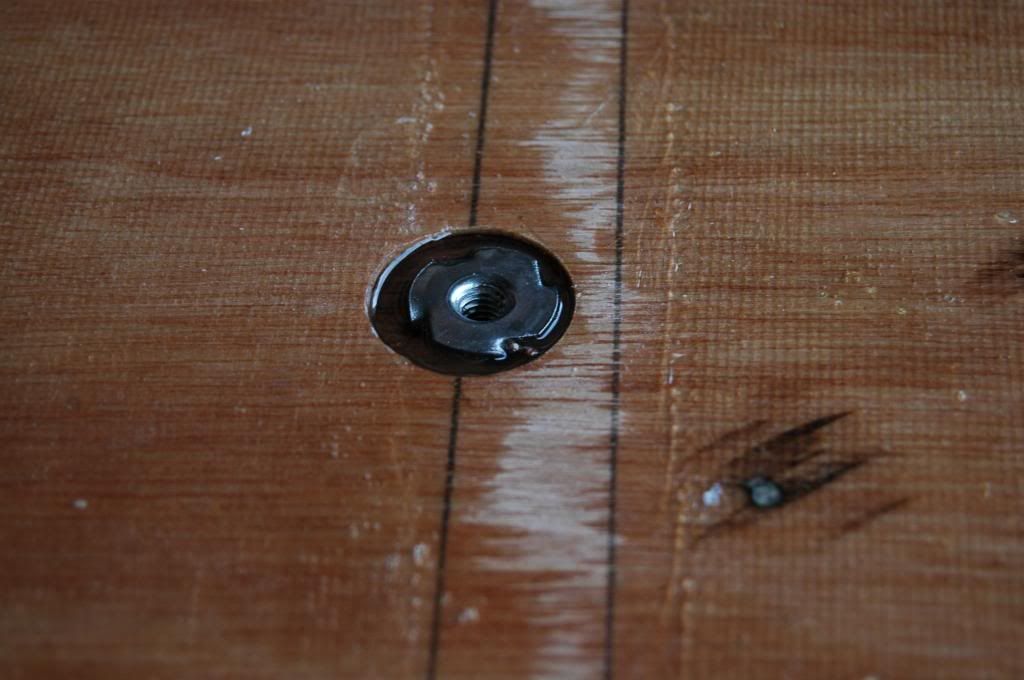
For the counter sunk ones, I did the same thing, but just flooded the area with much more epoxy;

DSC_7634_zpsc8e83b24.jpg


The pencil line there indicates where the stringer will lie.


Sorry I don't have more pictures to show the end state; but I came back to these and kept adding epoxy through the next few hours as it was absorbing into the wood and disappearing on me. Now they are all set up and the wood is completely protected.

My first 2 deep countersinks are in a pool of epoxy as I had planned. They are fine.
 

geneseo1911

Petty Officer 2nd Class
Joined
Jul 3, 2011
Messages
183
Re: 1988 Glastron GX 199 Restoration

Holy smokes....I thought I did a good job waterproofing my boat until I see what you're doing!
 

chconger

Petty Officer 1st Class
Joined
Jul 3, 2012
Messages
315
Re: 1988 Glastron GX 199 Restoration

Great work, I like the oversize dove tail joint! I was thinking the same thing as EZ, that plywood sure is nice looking! I used some t-nut similar to what Wood posted, they worked great.


Thanks Archbuilder. I just had a look over your Sleekcraft build. Very fine work yourself.

The giant dove tail was just for fun, but it worked out perfectly.

The certified plywood is nice to work with for sure. I am happy to say that I just bought my last of it, and was surprised to see the price jump; 1/2" sheet was $108. Before tax.

A guy across the yard here is building a house boat; he told me yesterday he is at 100 sheets of that stuff.
 

chconger

Petty Officer 1st Class
Joined
Jul 3, 2012
Messages
315
Re: 1988 Glastron GX 199 Restoration

Holy smokes....I thought I did a good job waterproofing my boat until I see what you're doing!

Thanks Genese! I guess I am just super paranoid about anything getting into that plywood. These seats represent the only holes through the deck that will not be covered over in fiberglass cloth.

Glastron just used large screws here to hold down the seats. Amazingly the seats were held secure right up to the end of that old deck. Go figure.

Chris
 

chconger

Petty Officer 1st Class
Joined
Jul 3, 2012
Messages
315
Re: 1988 Glastron GX 199 Restoration

Baby powder because it is inert. White Flour could potentally spoil/sour and "Mold" in the mix.

Well I will be a good test case. The entire thing is put together with brown wheat flour. Every fillet. These holes here are the first area I used white flour.

DSC_7430_zpsffc83ed9.jpg


I expect (hope) that if follow up any sanded area with a overcoat of epoxy, I wont expose any flour to air/ water to set up mold.

Nothing I make seems to be gluten free;

I built my Tunnel Mite with wheat flour too. Been 5 years now with no mold. So there's that to cling to.

P1040026_zps8d389650.jpg


Cheers
Chris
 
Last edited:

Woodonglass

Supreme Mariner
Joined
Dec 29, 2009
Messages
25,927
Re: 1988 Glastron GX 199 Restoration

Wheat flour is used by wood boat builders quite a bit. The White Flour....not so much. Not saying you can't just that It can be a bit more problematic. Might not be. Just want to make you aware. Just about anything you can think of has been used to thicken resin!!!!!:eek:
 

chconger

Petty Officer 1st Class
Joined
Jul 3, 2012
Messages
315
Re: 1988 Glastron GX 199 Restoration

That makes me feel better. Ill keep going with the brown wheat and make this the last stop for white.

I have been searching for a name for this boat, perhaps; Flour Power
 

Woodonglass

Supreme Mariner
Joined
Dec 29, 2009
Messages
25,927
Re: 1988 Glastron GX 199 Restoration

We should make note, this only applies to epoxy! If you're using POLY you should NOT use flour, ever!!!! Poly needs a thickening agent that will enhance it's strength and act as a binder for the mix. Epoxy has this already, Poly does not.
 

chconger

Petty Officer 1st Class
Joined
Jul 3, 2012
Messages
315
Re: 1988 Glastron GX 199 Restoration

I Did not know that, a very important point. I am all epoxy all the time, so I guess I escape total disaster once again.

Learn 15 new things a day here....
 

SeanyMagic

Seaman Apprentice
Joined
Aug 14, 2013
Messages
33
Re: 1988 Glastron GX 199 Restoration

I have been searching for a name for this boat, perhaps; Flour Power

I like that lol!. Nice work done during this whole thread. Very nice boat, and that kite pic very cool!
 

jbcurt00

Moderator
Staff member
Joined
Oct 25, 2011
Messages
25,043
Re: 1988 Glastron GX 199 Restoration

I have been searching for a name for this boat, perhaps; Flour Power

I like that lol!!

Nope

Niet

Nein

No way

Pretty much anything else...............

Freakin' Tank, maybe :rolleyes:


However, given the good work, thoroughness, and the level of attention to detail:

No More Worries! would be even more appropriate...
 

chconger

Petty Officer 1st Class
Joined
Jul 3, 2012
Messages
315
Re: 1988 Glastron GX 199 Restoration

HAHA Thanks Guys! OK Freakin Tank is in the running...


So here is how it ended up;


All the bolts lined up fine;

DSC_7640_zps06f566c5.jpg


All counter sinks look OK. The white is a blob of you-know-what peanutbutter I pushed in the clear pool to fill it up :

DSC_7649_zps816f09f5.jpg


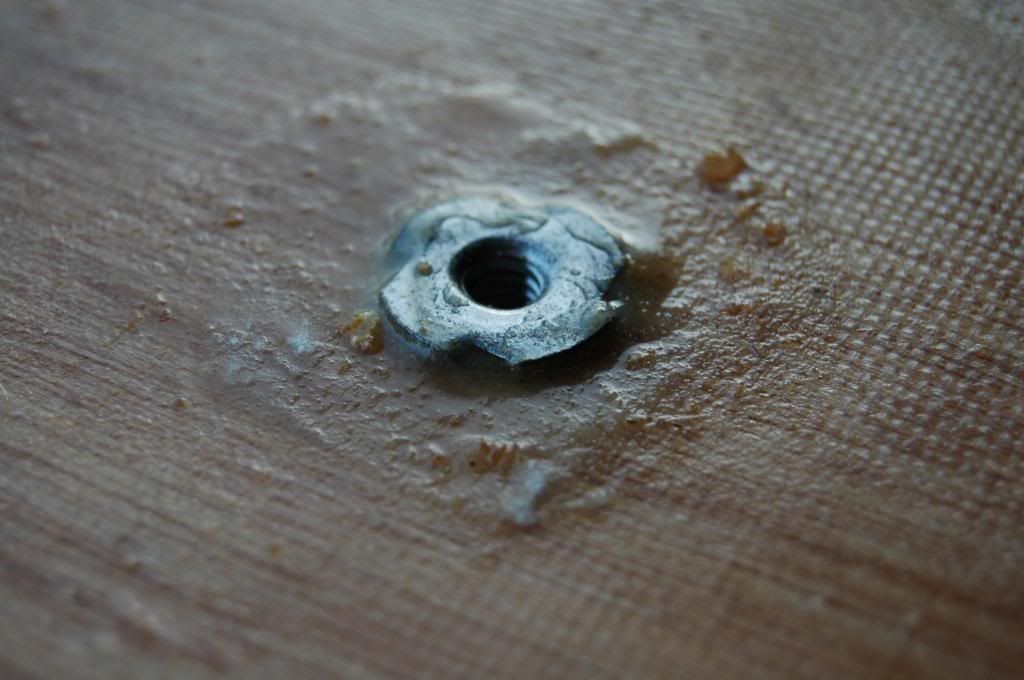
And the t-nuts that stand proud are a well-sealed chunky mess this close up;

DSC_7650_zpsd1ef1f22.jpg


Cheers
Chris
 

chconger

Petty Officer 1st Class
Joined
Jul 3, 2012
Messages
315
Re: 1988 Glastron GX 199 Restoration

Moving on to the fuel tank;


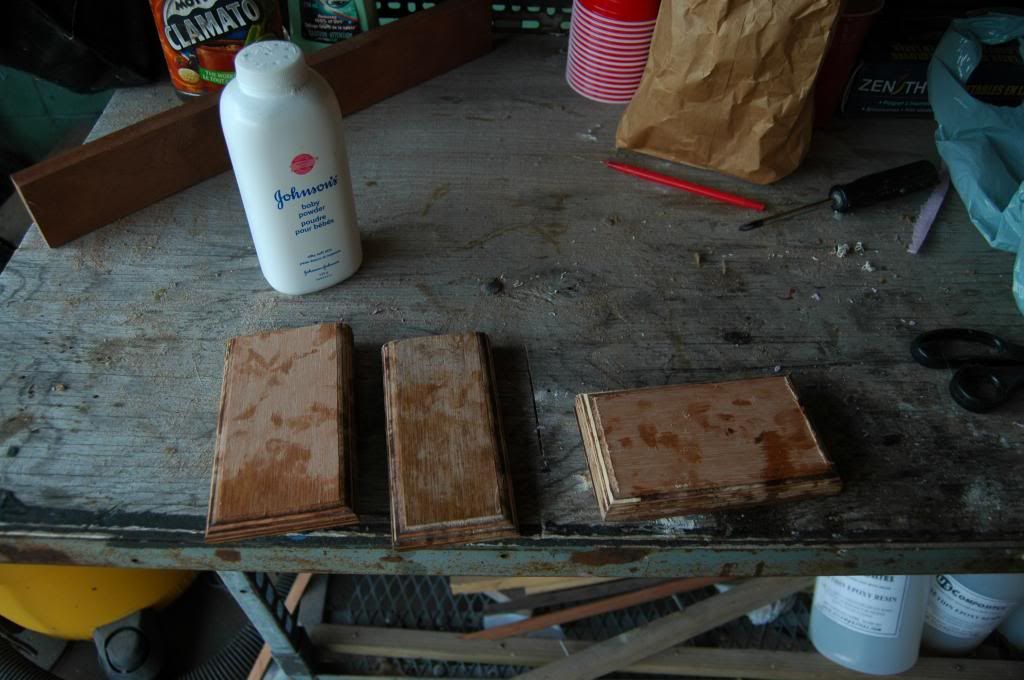
I made these marine mahogany switch plates;

DSC_7664_zps58f13dbd.jpg


Here is how;

My original plan for the tank was to reuse the aluminum one and install new nylon coated strapping. So previously I had glassed in the new strapping (glassed in under the tank position) in the approximate position of the old strapping.

But the old tank had pitting, and I went with a Moeller plastic.

Moeller warns you that their tank expands 3%. I even discussed that warning my self here on another thread not long ago. Can you guess where this is going?

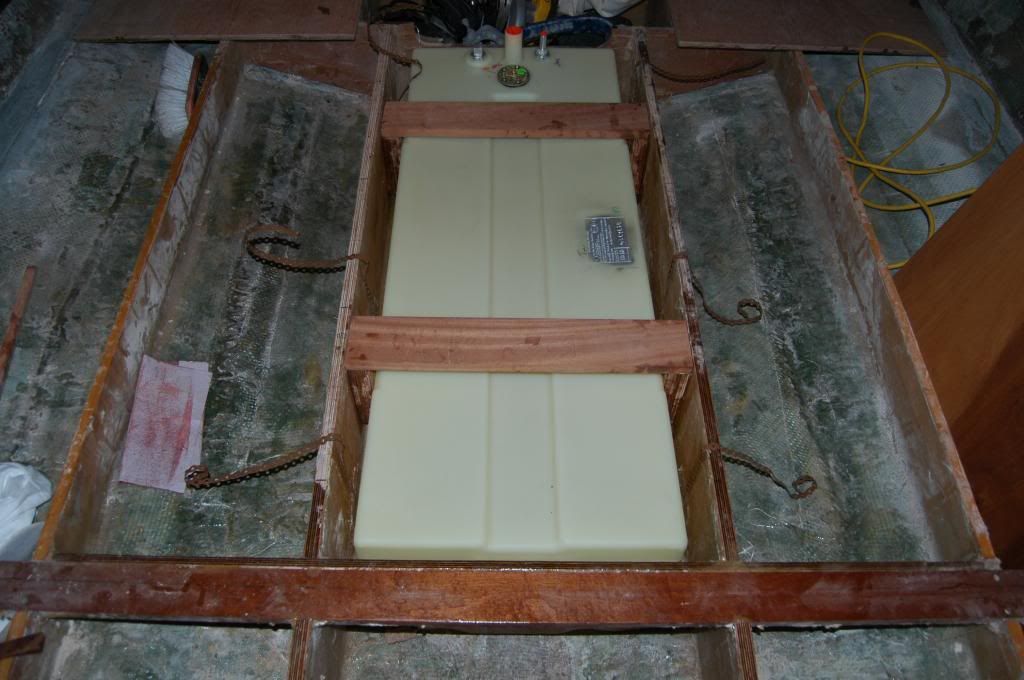
One strap interfered with the fuel level sending unit. I decided to glass in some wood pieces to hold the tank in place. I cut some blocks to mount on the side of the stringers and bulkhead and glued them in place with epoxy, intending to glass them later.

I dry fit the mahogany tie down and floor support beams and all together it was to look something like this:

DSC_7653_zps45f5c0f3.jpg


However I used the "inaccurate" method of measuring everything. I have used this process before and it never works for me. Not sure why I keep returning to it.

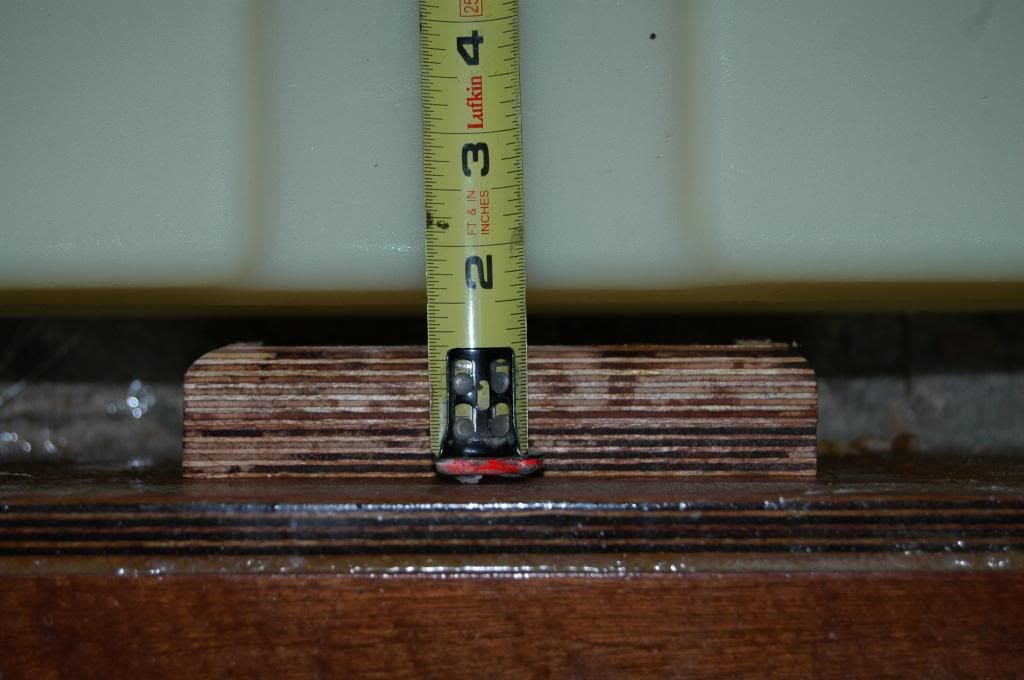
The tank is 48" long, so I should have had just under 1.5 inches clearance on the end. Here is what I had;

DSC_7655_zps4ddad488.jpg


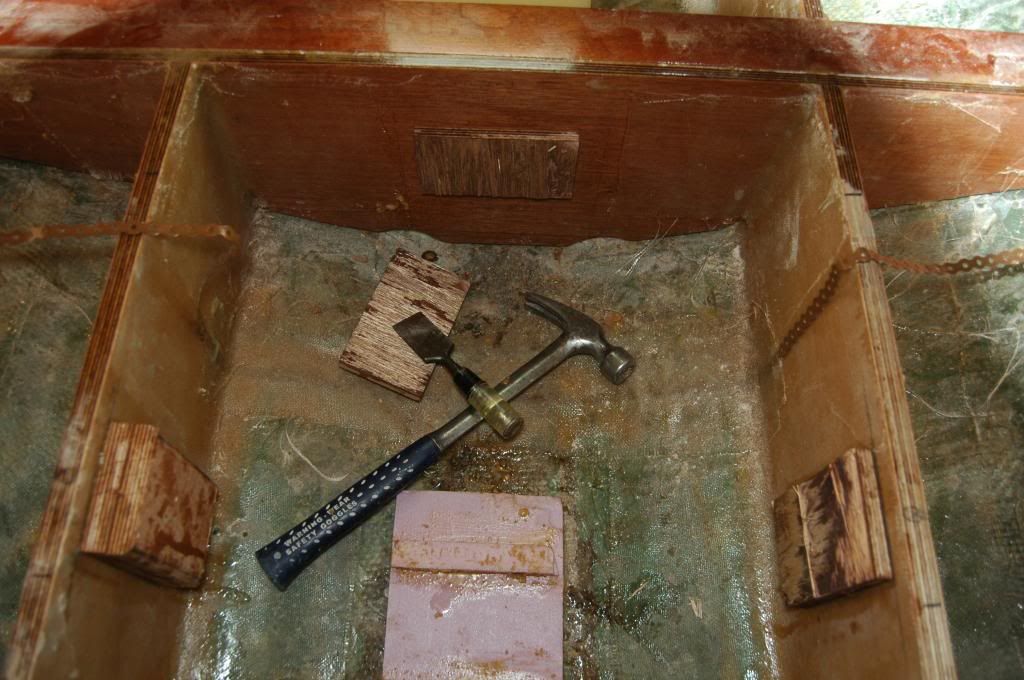
The same issue on the sides. Everything was too tight. What was I doing???


So out comes the tools I started all this with;

DSC_7661_zps18f7b60e.jpg


I did not think I would be using a hammer and chisel again on this boat that soon.


Anyway.... that's the story of my switch plates.


I took a belt sander to the raw pieces and smoothed them over as best I could. It was getting late and I proceeded to glass over them anyway; with predictable results; functional, strong, but not pretty! Pictures are not yet approved for release.


Cheers
Chris
 

Attachments

  • DSC_7664_zps58f13dbd.jpg
    DSC_7664_zps58f13dbd.jpg
    90.7 KB · Views: 0
Last edited:

britisher

Petty Officer 1st Class
Joined
Feb 23, 2012
Messages
369
Re: 1988 Glastron GX 199 Restoration

Well I ended up with T-nuts because that's all they had in stainless locally.

I initially had the idea of counter sinking the entire area of the nut to the full depth of the "tangs" and setting it in epoxy;

DSC_7630_zps1d0e71c0.jpg


I then got spooked by all the material I was removing. So only 2 of the 12 nuts ended up with deep counter sinks. There are 2 other nuts with shallow countersinks because a stringer will run under them and it needs to be flush.

So for the rest of them. I first drilled my 1/4 hole for the bolt all the way through. Then, on the bottom side, I drilled a 3/8 hole only to the depth to accommodate the t nut

DSC_7626_zps84575b7b.jpg


Then I used a hammer to locate the points where the "tangs" will want to go into the wood;

DSC_7627_zps06b31489.jpg


I then drilled holes to accept the tangs, and filled each one of these smaller holes with epoxy;

DSC_7632_zps23fd9f54.jpg


Next I coated the outside of the t-nut's barrel and inserted them in;

DSC_7633_zpsebdc698b.jpg


For the counter sunk ones, I did the same thing, but just flooded the area with much more epoxy;

DSC_7634_zpsc8e83b24.jpg


The pencil line there indicates where the stringer will lie.


Sorry I don't have more pictures to show the end state; but I came back to these and kept adding epoxy through the next few hours as it was absorbing into the wood and disappearing on me. Now they are all set up and the wood is completely protected.

My first 2 deep countersinks are in a pool of epoxy as I had planned. They are fine.

Chris,
Looking at the pic of the t nut attached to the bolt and also the accompanying pics of the holes in the wood, it looks to me like you have installed the tee nuts on the top of the deck? They should have been installed under the deck as that is how they are designed to work. The bolt as it tightens pulls the tee nut tangs deeper into the wood and makes for a snug hold. My SR has good knows how many of those things on it and I've had to replace every single one. The one thing that I learned the hard way on my boat was that you have to drive the tee nuts in after the holes have been drilled to get em snug and that cause issues with the bolt tightening up properly. My way round it was to drill the holes, then seal the inside with poly resin (I used poly on my refurb). The offer up the tee nut and tighten down with the bolt right through to pull the tee nut snug, then back of the bolt till it is flush with the tee nut top, then hammer down. That way you are always sure the bolt will work through he tee nut threads.
If you need SS fasteners (tee nuts, screws, bolt, ect) then use JamesTown Distributors in Maine. They are really good guys and their prices for SS fasteners are way better than anyone else. For comparison Lowe's will relieve you of $4.00-$5.00 PER SS TEE NUT!!! West Marine are more competitive, but they still charge out nearly $3.00. Jamestown came in at 99c.
When I installed my new seats on my SR to replace the ones that had rotted (everything had rotted), I used the SR method of attachment which was big lag screws. My seats have ply platforms as part of the SR design and are double thick 3/4" ply under the seats. They can handle the lag screws.
You are doing a really great job on the rebuild and the quality of your work is excellent (wish mine was as good).
On the name with the tank them how about Abrams or Sherman?
PS... like some of the other posters, I too was paranoid about drilling any sort of hole through the new, so at the back of my boat where the trim pump and battery sits, I decided to install a false floor over the new deck. 2 panels of 3/4" ply in the wells either side of the motor. Everything sealed and painted. The trim pump and battery box straps are all screwed and sealed BUT only into the false floor.
 

chconger

Petty Officer 1st Class
Joined
Jul 3, 2012
Messages
315
Re: 1988 Glastron GX 199 Restoration

..........
it looks to me like you have installed the tee nuts on the top of the deck? They should have been installed under the deck as that is how they are designed to work...........

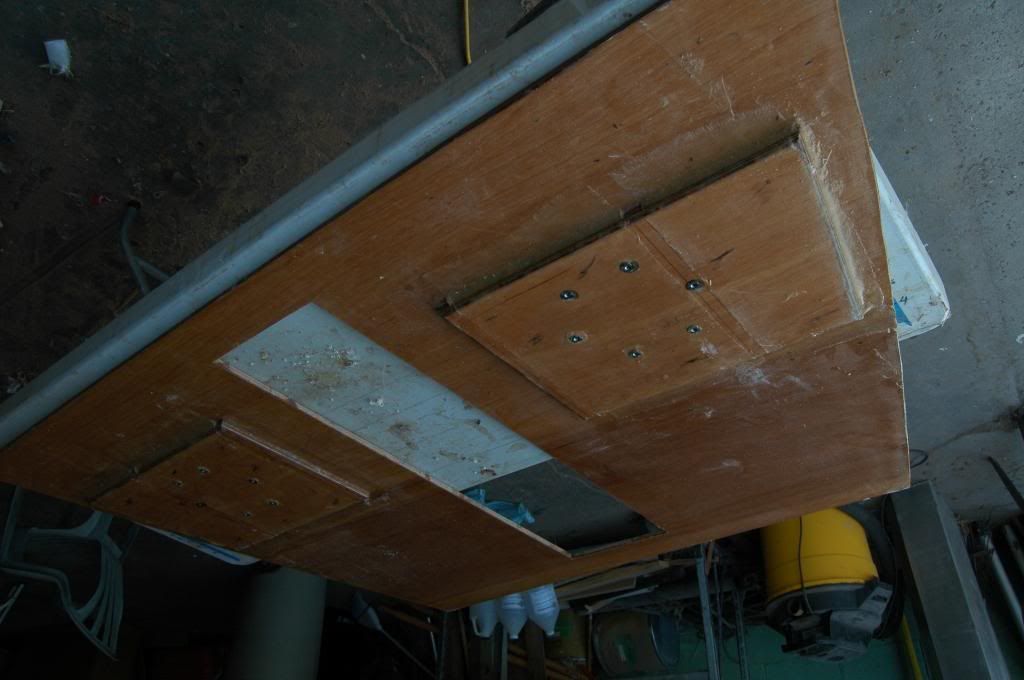
Hi Britisher; You are looking at the bottom side of the panel there.

Perhaps this will help:):

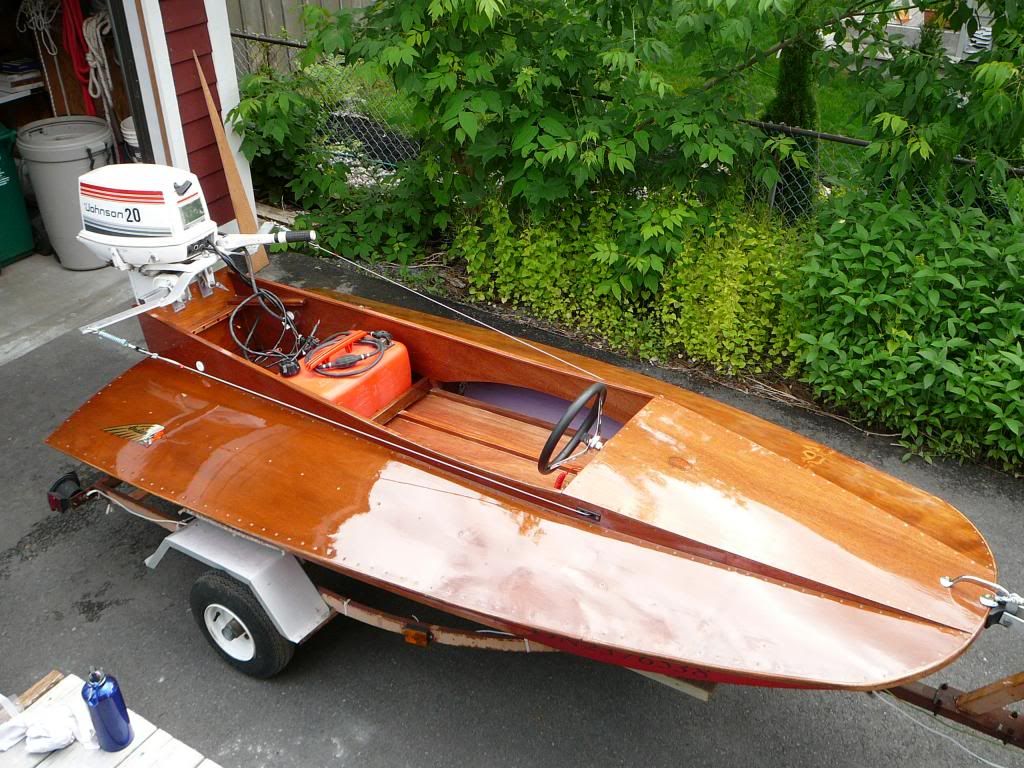
16497f6a-8da4-4ca9-b8db-e325d62d1cd8_zps6ad089d5.jpg


Cheers
Chris
 
Last edited:
Top