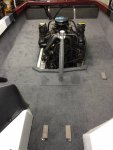
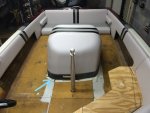
1987 Ski Centurion Tru Trac II - First Time Rebuild - Floor, Engine, Dash, etc.

Status
Not open for further replies.

ACon977

Senior Chief Petty Officer
Joined
Nov 21, 2017
Messages
759
If you used poly resin theni would recommend gelcoat... probably will be the most durable finish for the price... got mine from us composites in Florida... I bought 2 gallons but I think it's way more than I'm gonna need and I'm going to do 3 coats.

Thanks Props. Being in Colorado, I'm not sure the shipping from Florida would be too quick. I ended up purchasing a Gallon of that deck paint that I linked, Ill do some tests with it on scrap wood and see what we get. I'm sure I could find gelcoat around here. Just thought that it would be fast and easy to try out this stuff.
 

ACon977

Senior Chief Petty Officer
Joined
Nov 21, 2017
Messages
759
use urethane paint ,ppg nason and many others have urethane paints they have a hardness typically of 90 where as most gelcoats are 80, easier to apply..


The paint I ended up purchasing was a Urethane. Im all about easy to apply, since I'll be doing a lot of the boat. This said 400sq ft per can, so I got 2. I think that may be on the lite side.. but who knows

also raptor liner makes a urethane bed liner material that you can shoot to a smooth or rough texture so that's great for doing floors. and you can tint any color you like and it sticks awesome to fiberglass poly resins.

I've seen a couple people throw this out. I think it would be a good solution, if I wanted that grittier texture in the boat. But I plan on doing the foam floor, so Im not sure how well that would adhere to it.
 

ACon977

Senior Chief Petty Officer
Joined
Nov 21, 2017
Messages
759
Any thoughts on how to cut out the floor? Ive seen some people use cardboard to trace and easy cut the profile of the boat. Or I was going to do the same thing that I did with the front bulk head and measure the distance every inch or two and transfer it across. Just not sure how easy that will be given itll be a rather large piece.

m sure some of you have a better idea.
 

AlabamaNewbie

Petty Officer 1st Class
Joined
Jun 25, 2018
Messages
239
I've been trying to think ahead to that point to. I'd about decided to snap a line down the center and measure out from the center every 3 inches in each direction until I'm past the curve, then every 6 inches. Then transfer that to cardboard and test fit and tweak as needed. I first thought about doing it every inch, until I did the math to see how many inches were in 17 feet... lol
 

ACon977

Senior Chief Petty Officer
Joined
Nov 21, 2017
Messages
759
I first thought about doing it every inch, until I did the math to see how many inches were in 17 feet... lol

haha thats my thought as well. it would be a tad rough to do it that way. I just know that when I did it for the bulkhead it was still a bit off since i only went down to the 1/8th of an inch. and it would be super time consuming. but not sure how else to do it.
 

ACon977

Senior Chief Petty Officer
Joined
Nov 21, 2017
Messages
759
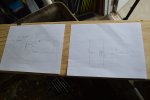
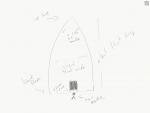
I did some sketch ups in ACad based on my dimensions that I took when first pulling the cap off. I think by putting it into 5 pieces I can get it to all come out of 3 4x8sheets. Note, the bow section I am not rebuilding since it was fine when I took it out.

Deconstruction - measurements .JPG
 

Attachments

  • Floor Layout.JPG
    Floor Layout.JPG
    14.2 KB · Views: 2
  • Floor Layout.JPG
    Floor Layout.JPG
    14.2 KB · Views: 2
  • Floor Layout_2.JPG
    Floor Layout_2.JPG
    10.7 KB · Views: 2
  • Floor Pieces.JPG
    Floor Pieces.JPG
    9.4 KB · Views: 2

AlabamaNewbie

Petty Officer 1st Class
Joined
Jun 25, 2018
Messages
239
I did a mock up too using adobe- but yours is a lot more precise....
 

Attachments

  • photo299688.png
    photo299688.png
    356.3 KB · Views: 1

ACon977

Senior Chief Petty Officer
Joined
Nov 21, 2017
Messages
759
hahaha sounds about like the kind of dimensions that end up actually going in the boat. I get everything as close as I can, measuring to the 1/16 of an inch.... and then end up scoring the boards with whatever screw, nail, drillbit, or piece of metal I have close to me at the time. Bit here, tad there, just half a pen cap for 3.2 fingers on that part....

Make a cut,

****, too much.. whoops... stare at it for a bit... well time to take more off somewhere else so it doesnt look awkward
:bounce::rofl:

I made sure to take measurements right from the beginning, WOG was adamant. and that "dumb old okie" sure knows his stuff. I read a few threads where people didnt, then put their floor in and couldnt get the cap back on... doing everything I can to avoid that issue.
 
Last edited:

ACon977

Senior Chief Petty Officer
Joined
Nov 21, 2017
Messages
759
Also, since I have the boat under the cap now, I will probably actually measure the cap in a few places to confirm the width of the hull is correct. It would be embarrassing if my measurements were a little off and even after planning it still got messed up.
 

ACon977

Senior Chief Petty Officer
Joined
Nov 21, 2017
Messages
759
Lol in reality. This is what I'm cutting based off of

20180828_172104-1512x2016.jpg
 

Attachments

  • 20180828_172104-1512x2016.jpg
    20180828_172104-1512x2016.jpg
    496.3 KB · Views: 1

ACon977

Senior Chief Petty Officer
Joined
Nov 21, 2017
Messages
759
But not too bad on the first dry fit. Time to start marking and trimming
 

Attachments

  • photo299708.jpg
    photo299708.jpg
    450.2 KB · Views: 0

ACon977

Senior Chief Petty Officer
Joined
Nov 21, 2017
Messages
759
Got it fitted for starboard. And just for shits-and-grins I flipped it over and, who would have guessed! The stringers are actually centered in the boat! Good feeling there.
 

Attachments

  • photo299709.jpg
    photo299709.jpg
    521.6 KB · Views: 0

ACon977

Senior Chief Petty Officer
Joined
Nov 21, 2017
Messages
759
And now that those are both cut and trimmed. Feeling good.

I cut the middle piece and that's fitting nicely.
20180828_185840-2016x1134-1008x567.jpg

Typically there is a removable section and then the permanent section where the engine cover mounts to. The removable is to have access to the steering cable and rudder.

20180828_192538-2016x1134.jpg

my question. Probably best for Timr71 would be, how far up was your removable section? To the shaft base? Or I guess better question, how big was your stationary piece
 

ACon977

Senior Chief Petty Officer
Joined
Nov 21, 2017
Messages
759
Well. Last update for the night. I got the front piece of floor cut and fit. I need to grind some of the old floor down but overall it fits the space.

20180828_211339-2016x1134.jpg

there are some spaces between this piece and the hull headed towards the front. My thought was to put some really hairy and thick PB in that space and then put some healthy glass up the sides of the hull..

thoughts? Any thoughts or opinions are appreciated!
 

fibersport

Petty Officer 2nd Class
Joined
Jul 18, 2010
Messages
103
Just a quick note about resin, air won't hurt it but I'm pretty sure prolonged exposure to sunlight will, I don't think it is UV resistant. A coat of paint would fix that. Great progress on the floor too!
 

AlabamaNewbie

Petty Officer 1st Class
Joined
Jun 25, 2018
Messages
239
That looks really good!

When I was removing my deck, I realized that the employees putting it in that day was either hung over, or still drunk. On one side, it sat nicely on this little ledge up against the side of the boat - all the way up the until about 3 feet from the bow. The other side - was about an inch away from the side until about 3 feet from the bow. At that point, it dropped down below the ledge about an inch (which reminds me, I need to ask a question about this over in my thread). On the one side, it was nicely bonded to the hull. The other side had just globs of some kind of resin filler (not PB, it has no fibers in it). Its been horrible trying to get it all cleaned up. But I figure no matter what I do with the new deck - it will be better than that!
 

Timr71

Petty Officer 1st Class
Joined
Jul 19, 2012
Messages
326
Probably best for Timr71 would be, how far up was your removable section? To the shaft base? Or I guess better question, how big was your stationary piece

Ok, Here's how I did it. If you want the short story, my removable center section is the whole piece. Here's why:

We carpeted in a rim to live the motor box about 3/8 of an inch. This was done for two reasons, 1. it keeps things from rolling into the bilge when you're working with the box open or removed and 2. the spark arrestor was actually hitting the engine box, so no clearance.

I'm attaching 4 photos so you can see our procedure. What you can't see is that in the back of the engine, the engine box hinges actually mount on to the newly installed lip that we put it. This has another beneficial effect. When this motorbox was in my cousin's boat, someone would always catch a toe on them when moving around the boat. Now that they're lifted slightly above floor level no one has busted their toe on them yet in my boat.

The center floor section actually slides under the lip rail that we installed, and if you look in the pictures, it runs all the way to the tank with just enough clearance for the blower tube to get up and over. To remove that center section, I have to take both pieces of the back seat out, and then it lifts right out. And, I've had to do that on the lake...when we sheared the prop shaft. But that's a different story.
 

Attachments

  • photo299759.jpg
    photo299759.jpg
    57.7 KB · Views: 3
  • photo299760.jpg
    photo299760.jpg
    64.6 KB · Views: 3
  • photo299761.jpg
    photo299761.jpg
    111.3 KB · Views: 3
  • photo299762.jpg
    photo299762.jpg
    120.2 KB · Views: 3

Timr71

Petty Officer 1st Class
Joined
Jul 19, 2012
Messages
326
My pictures are in backwards order. so view them left to right instead of the other way. Sorry. Hope this helps.
 

kcassells

Fleet Admiral
Joined
Oct 16, 2012
Messages
8,715
Noone paints their stringers under the deck. Can if they want. Is this what you are talking about? If the sun is pounding away at them while your working just throw a tarp over them.
Read the specs or ask the supplier. Most have UV protec. built in.
 
Status
Not open for further replies.
Top