1987 Power Play XLT-185 - floors, stringers, and upholstery

todhunter

Canoeist
Joined
Sep 15, 2020
Messages
1,316
Thanks Mark! Yeah, it's just a pickup, and I did buy the Mercruiser/Quicksilver brand part. I do still have the old one, but it's a superseded part and the wiring is a tad different. Hopefully staying OEM keeps it alive.

Thanks for the heads-up on the remote oil filter - I'll keep an eye on that, especially during the first startup. I don't think I have a low oil pressure alarm...maybe that's something I'll add in the future.

I definitely have blown the financial budget, and have gone over my time budget as well, but I know it will be sweet when it's done, and it will all be worth it. Thanks for the encouragement.
 

todhunter

Canoeist
Joined
Sep 15, 2020
Messages
1,316
I've made little bits of progress this week. I spent an evening getting more dash wiring done. I'm almost done under there.

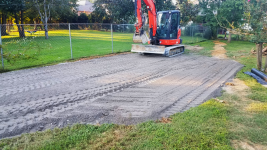
I got a contractor to come put down gravel in the spot I'm going to put my carport to park the boat under.
20210928_184031.png


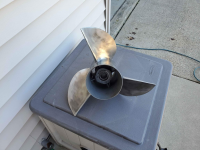
I bought a prop. This has been a tough lesson so far - I bought it used on FB Marketplace and it was misrepresented in the ad and poorly packaged. In short, it's going to have to go to the local prop shop and I'm probably just going to have to eat the cost.
20210928_02.png


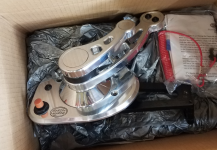
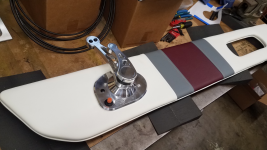
I also splurged and bought the Hardin Marine shifter. My original Quicksilver shifter was missing parts, and let's be honest - this is a sexy piece that is going to compliment the new dash and upholstery well.
20210929_180813.png


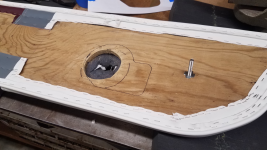
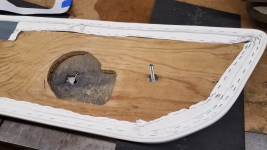
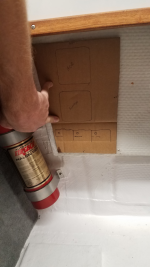
Well...the new shifter needs a bigger hole in the side panel than the original Quicksilver shifter. Shame on me for making an assumption that it would be the same. So, I had to enlarge the hole in my brand new upholstered side panel. I carefully pulled the staples holding the foam and vinyl in the hole then used a router, being very careful to not touch the foam or vinyl. My upholstery guy said he would re-staple everything for free for me, as they will already be going back to him to make a small tweak at the other end for fitment. I definitely had a beer after doing this stressful task.
20210928_194334.png

20210928_203056.png
 

zool

Captain
Joined
Aug 19, 2012
Messages
3,432
Nice, well worth disturbing some new vinyl to install that! Probably shift much smoother than an old oem.
 

todhunter

Canoeist
Joined
Sep 15, 2020
Messages
1,316
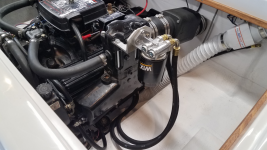
I installed my oil filter relocation kit today. At the recommendation of @Reserector_ , I triple checked the routing and made sure the flow was set up correct.
20211002_140930.png


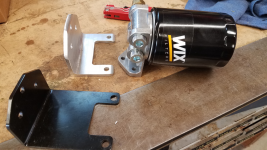
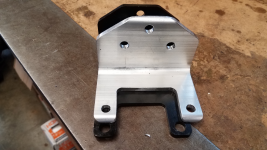
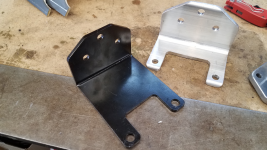
I'm pretty disappointed in the customer service from the company that made this kit. They state on their site that this will work for a 1983+ Mercruiser 5.7, but the bracket they provided hangs the oil filter off the front of the elbow, which places the filter in an interference fit with the coolant hose going to the elbow. After several email attempts and multiple calls, I haven't gotten a response so I decided to make my own bracket out of thick aluminum angle. My bracket mounts the filter on the side of the elbow.
20211002_131348.png


Here you can see that my bracket is wider, so it will fit the bolt pattern for the side of the elbow.
20211002_131330.png


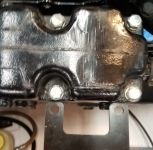
Here is the bracket from the kit showing how it doesn't line up with the side 2 bolt holes:
20211002_141333.png


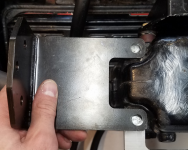
And this shows that the original bracket does line up with the front bolt bolt holes on the elbow.
20211002_141401.png


Based on the bracket not fitting, I wouldn't recommend buying this kit. I feel like the bracket is pretty important and not everyone can make their own.
 

Attachments

  • 20211002_131337.png
    20211002_131337.png
    1.4 MB · Views: 1

todhunter

Canoeist
Joined
Sep 15, 2020
Messages
1,316
Nice, well worth disturbing some new vinyl to install that! Probably shift much smoother than an old oem.
Yeah, I'm hoping so! I was missing pieces to my OEM shifter, and I wanted the bling too. 😂
 

todhunter

Canoeist
Joined
Sep 15, 2020
Messages
1,316
I've been taking a few evenings off from working on the boat over the last few weeks, but I've been making progress.

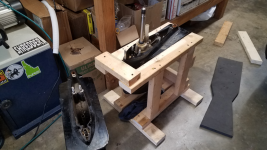
I split the drive and replaced the water pump and the seal in the upper that the driveshaft goes through. Here is is just after splitting:
20211009_084132.png

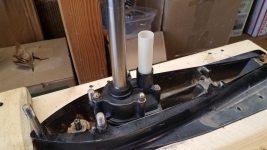
Here it is after replacing the parts. Since my boat is a thru-hull exhaust, this drive has never had exhaust gases inside it, so other than some dried algae, it looks good in there.
20211009_091535.png


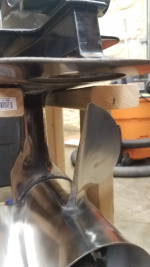
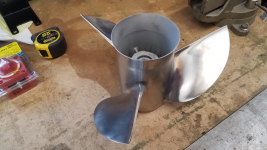
I took my bent FB marketplace prop to a local prop shop and they straightened the bent blade, smoothed out the burrs on the edges, and balanced it. It looks fantastic.
20211014_173636.png

20211014_185959.png


I am going to need to replace the trim-tab anode with a flat anode.
20211014_190008.png


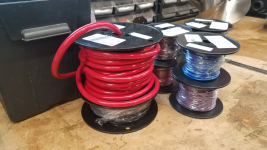
I also got the last of my wire order, so I should be able to get the wiring wrapped up in the next week or two.
20211014_175012.png
 

todhunter

Canoeist
Joined
Sep 15, 2020
Messages
1,316
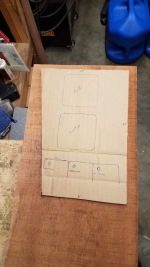
I started working on a mounting plate for my battery switch, charging relay, and a couple of fuses.
20211015_185928.png


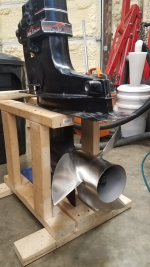
It will mount here, on the back of the bench seat inside the engine compartment. I'm planning to make some stand-offs to hold it about 1 inch off the fiberglass.
20211015_190022.png


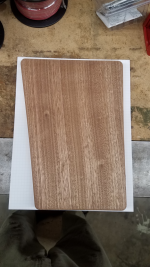
Transferring the template onto some mahogany:
20211015_185802.png


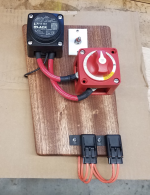
Mounting plate complete.
20211015_202758.png
 

todhunter

Canoeist
Joined
Sep 15, 2020
Messages
1,316
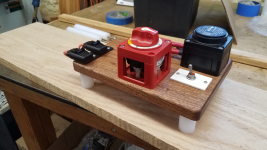
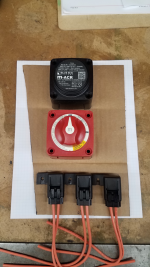
A little more progress on the battery switch / fuse panel. I shifted some things around from the original layout, and have added a switch to the ACR ground wire so that it won't be a phantom load that drains the battery when in storage.
20211023_172726.png


I made some standoffs from 1" HDPE bar stock to hold the panel off the fiberglass to allow clearance for wires to run behind the panel.
20211023_172818.png
 

todhunter

Canoeist
Joined
Sep 15, 2020
Messages
1,316
Got most of the under-dash wiring knocked out. I may have to redo the wiring for the three 10-pin switches because the connectors are REALLY close to each other (maybe touching? ...we'll find out) when using piggyback connectors. I've still got to run the wiring for courtesy lights, USB chargers, and the radio/speakers.
20211029_071633[1].png

20211029_071653[1].png
 

todhunter

Canoeist
Joined
Sep 15, 2020
Messages
1,316
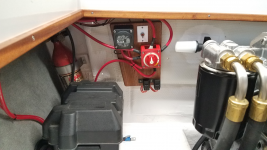
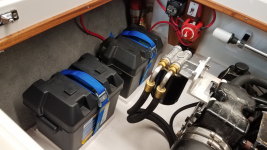
Today I got both battery boxes mounted with the tie down straps.
20211030_155912.png


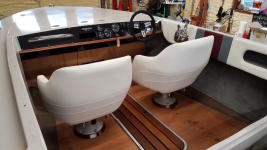
I installed the starboard side panel and shifter and got the shifter wired up. I also installed the rails on the bottom of the captains chairs and set them in the boat to figure out where I want to glass the mahogany bases down at.
20211030_155555.png

20211030_155538.png
 

zool

Captain
Joined
Aug 19, 2012
Messages
3,432
Neat and clean bilge, you should be able to keep it that way for a while.....everything looks great.
 

todhunter

Canoeist
Joined
Sep 15, 2020
Messages
1,316
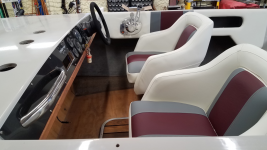
I set the rest of the upholstery in the boat for a dry fit and a picture - it looks great, but there's still some tweaks I'm going to have to get the upholstery shop to make. They had to build a bunch of this stuff from scratch due to missing pieces, and they didn't have the hull at their shop - they just took measurements off my boat.

20211031_104356[1].png

First off, the sun pad is too long fore/aft - not enough room to get the hinges in. Also the stripe on the sun pad is off by about 1/2" with the stripe on the backrest.
20211031_085859[1].png

20211031_091408[2].png


Lastly, the bench seat backrest overlaps the port side panel by about an inch. I'm thinking the easiest route will be to shorten the edge of the back rest.
20211031_085949[1].png
 

Reserector_

Chief Petty Officer" & 2021 Splash of the Year Win
Joined
Oct 15, 2019
Messages
609
You need to enter it in a boat show before you put it in the water. It's going to be awesome!
 
Top