1987 Power Play XLT-185 - floors, stringers, and upholstery

todhunter

Canoeist
Joined
Sep 15, 2020
Messages
1,308
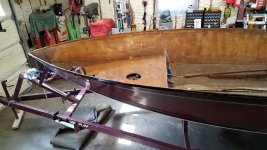
I'm leaving the hull on the trailer and will add additional bracing as required. I talked to a guy who as rebuilt 3 of these and he said Power Play built the hulls so thick he didn't need any bracing on his full gut restorations. I figured I'd see how flimsy it feels with the cap off and decide my path forward then.

I'm hoping to do most of my grinding outside too - I'll just pull the trailer forward out of the garage and into the driveway. If I have to grind indoors, I plan on making a plastic tent to contain as much dust as possible.
 

Baylinerchuck

Commander
Joined
Jul 29, 2016
Messages
2,726
Yeah, I just saw the pic of the washer and drier and figured you don’t want to get fiberglass dust throughout those appliances. My neighbors aren’t that close, so I used compressed air and blew the dust out of mine on breezy days before putting it back in the garage. Like you, I wanted to keep that dust out of my garage, and my house.
 

todhunter

Canoeist
Joined
Sep 15, 2020
Messages
1,308
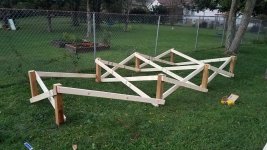
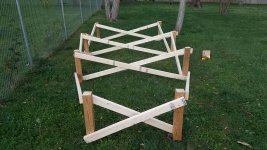
I threw together a stand for the cap. I've got a few guys coming over tomorrow to help pull it off and set it on the stand. Wish me luck!
20201030_185602.jpg

20201030_185611.jpg
 

todhunter

Canoeist
Joined
Sep 15, 2020
Messages
1,308
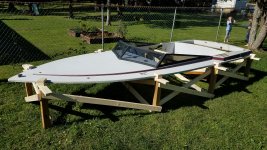
A crew of friends and family came over today and helped me lift off the cap and set it on the stand. We also pulled the outdrive transom assembly off the boat. Next steps are getting a tarp tented over the cap and starting to take detailed measurements of the hull before I continue tearing things out.

20201031_152655.jpg

20201031_151314.jpg

20201031_151317.jpg
 

todhunter

Canoeist
Joined
Sep 15, 2020
Messages
1,308
I started today by measuring the width of the hull every foot starting at the transom and working towards the bow. I made a sketch and wrote down the dimensions.

Next, I drained as much gas out of the tank as I could manage. This took a while. I ended up getting between 7-8 gallons out using a kerosene heater siphon pump hose clamped onto the fitting on the fuel tank. I could never get the siphon pump to flow and had to hand pump the entire 7-8 gallons out - I'm guessing this was due to the anti-siphon valve? It made a slight noise every time I pumped the bulb.
Next on the list was to go to Harbor Freight and get a 12x20 tarp to cover the cap with. It took some time to get the tarp tied down over the cap, but it's done. I'm sure my tenting job will require some tweaks - I'll see how it does after the next rain.
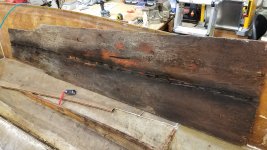
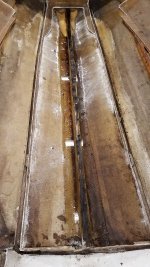
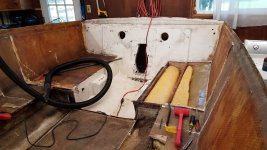
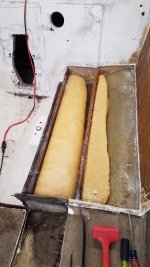
Finally after lunch I was able to start digging into the boat some more. I got one side of the decking in the engine compartment pulled up and I was able to save the piece of wood in one piece to use as a template for a new one. I dug out the old foam too. Of course these compartments had some water in them. The stringer closest to the bilge is pretty rotten but seems like it will stay in one piece during removal. The manufacturers also made the bulkheads span the width of the hull as one piece and then made the stringers in 2 pieces. I plan to rebuild it the other way around - one piece stringers and multi-piece bulkheads, all tabbed together and capped in glass. The outer stringers are barely tabbed into the transom, lol.

20201101_151857.jpg

20201101_151758.jpg

20201101_154935.jpg
 

todhunter

Canoeist
Joined
Sep 15, 2020
Messages
1,308
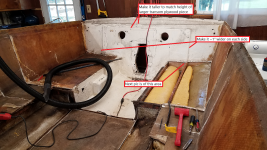
My transom is obviously made with two layers of plywood. Why is the layer closest to the bilge smaller than the piece that's up against the outer fiberglass layer on the hull? Is it a cost thing - the manufacturers use less wood and thus save money?

Other than weight, are there any drawbacks to making the smaller layer wider and taller? Here are my thoughts: Make the smaller layer just a little bit wider so that the two outer stringers can tie into the transom better. I'm talking about adding maybe 1" or so to the width of the small piece. The outer stringers currently hit the transom just past the edge of the smaller piece. Also why not make them the same height? I don't have a good reason for that other than I just think it may be more aesthetically pleasing.

1.png

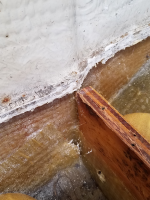
Here you can see the smaller piece of transom plywood just isn't wide enough to have the outer stringer butt up flush to it so it can be tabbed in.
2.png
 

kcassells

Fleet Admiral
Joined
Oct 16, 2012
Messages
8,715
Your right a 1/2 arsed job there. Take it to the floor to tie in the stringers. Also go full height. It'll look better. It's not a strength thing regarding width but to tie in the stringers as you noted would be proper method.
Since you can do it that way makes sense to me and a cleaner job.
Personally I don't know why it's not full width. The cut out is common and I have seen where there is on a slab of wood picking up the key holes.
Looking good.
 

todhunter

Canoeist
Joined
Sep 15, 2020
Messages
1,308
Thanks for the confirmation. I think it was just shoddy work on the port side regarding tying in the stringer to the transom, because the starboard side looks like the transom is wide enough to have the stringer butt up against it.

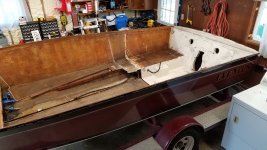
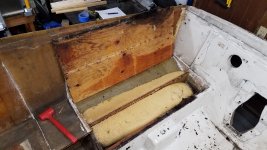
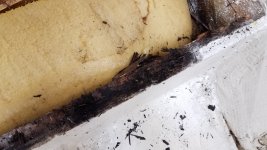
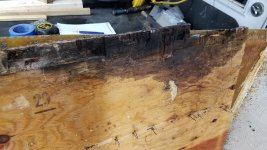
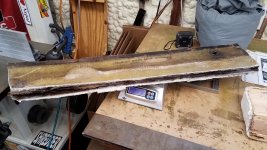
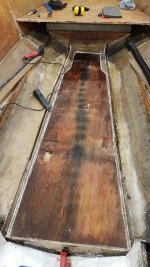
I got the starboard side opened up and old foam dug out tonight. It was much worse with more rot on the stringer that forms the bilge wall, just aft of the engine mount. I was still able to get the piece of decking out in one piece. I went around it with my multi-tool to cut the glass, then was able to use pry bars to get the fiberglass skin off the wood. From there it was removing the few stainless screws that did not have resin in the head, then prying the decking up, pulling the staples and remaining screws out. It's weird - in some areas they used cleats on the sides of the stringers to attach the decking to, and in other areas they just stapled/screwed directly into the stringers.

Starboard side after de-skinning:
20201102_183643.jpg

Decking pried up:
20201102_184950.jpg

Rot on the stringer:
20201102_184957.jpg

Rot on the bottom of the decking:
20201102_185003.jpg

All decking and foam removed from the engine compartment:
20201102_192247.jpg
 

Baylinerchuck

Commander
Joined
Jul 29, 2016
Messages
2,726
My Chaparral is not full width either. The transom glass is thick enough on its own for properly Encapsulated 3/4” plywood. The outdrive requires the double thick plywood to get close to the 2” to 2-1/4” Thickness required. The 3/4” single layer is fine for mounting tabs, depth finders etc to the transom.
 

todhunter

Canoeist
Joined
Sep 15, 2020
Messages
1,308
What kind of wood do most folks recommend using for cleats? By cleats, I mean wood attached to the side of the stringers / bulkheads into which screws can be driven to hold down the decking. What I'm pulling out of the boat looks like either teak or mahogany, but I could be wrong about that. Whatever I put back in, I think I will coat in resin but not cover in glass. Here you can see what was stapled to my stringers.

1.png
 
Last edited:

kcassells

Fleet Admiral
Joined
Oct 16, 2012
Messages
8,715
If its teak or mahogany save it and use it again. A solid wood that will take a screw, oak, maple, poplar just like you are taking out.
You're also going to use an adhesive like pb.
Counter sink your screws, predrill, dip in 5200. coat with pb.
 

todhunter

Canoeist
Joined
Sep 15, 2020
Messages
1,308
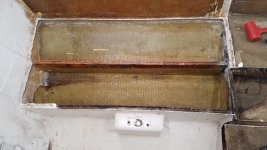
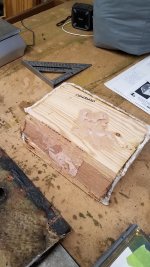
I got the ski locker floor cut out tonight. I started by going around the outside with my multi-tool to cut the fiberglass tabbing, then used a chisel to start separating the fiberglass from the wood, then progressively larger crow bars until it was completely de-skinned. The decking was attached to the center stringer by adhesive, staples, and screws. I removed the screws, having to cut slots in about half of them which had resin in the cross of the head. Next, I used pry bars to gently separate the decking from the stringer. It's pretty rotten, but thankfully I got it out as one piece so I can template it. I was very surprised to find 2-3 gallons of water still under there. I had the bow jacked way up for about 3 weeks and would only get about a tablespoon of water per day out of the weep hole in the bilge. I vacuumed all the water out and called it a night.

Ski locker floor de-skinned:
20201104_185115.jpg

Bottom of ski locker floor. Rotten, rotten, rotten:
20201104_191329.jpg

Surprised to find this much water still under there:
20201104_191319.jpg

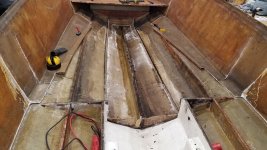
Current status - pretty much all the decking (that I plan on removing) is pulled up.
20201104_193925.jpg
 

todhunter

Canoeist
Joined
Sep 15, 2020
Messages
1,308
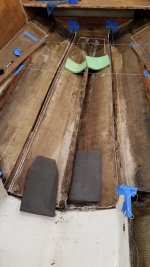
Started sketching the structure layout tonight. I also pulled some taut string lines to mark where the two inner stringers were. These were completely rotten when I pulled the floor up and they just crumbled, so this is the best way I can think to recreate them. The two horizontal strings are taped to the top of the outer stringers and to the bottom of the remaining pieces of the deck to set the height for the stringers. I measured every foot. My plan will be to make some dummies out of pink foam and test fit them, then cut the actual ones from plywood. There's still more measurements to do tomorrow.

20201105_202708.jpg
 

Baylinerchuck

Commander
Joined
Jul 29, 2016
Messages
2,726
I did in essence the same thing. It works out quite well. It’ll still be little off, but you can use a scribe to get the 1/4” clearance you need for proper bedding.
 

kcassells

Fleet Admiral
Joined
Oct 16, 2012
Messages
8,715
Started sketching the structure layout tonight. I also pulled some taut string lines to mark where the two inner stringers were. These were completely rotten when I pulled the floor up and they just crumbled, so this is the best way I can think to recreate them. The two horizontal strings are taped to the top of the outer stringers and to the bottom of the remaining pieces of the deck to set the height for the stringers. I measured every foot. My plan will be to make some dummies out of pink foam and test fit them, then cut the actual ones from plywood. There's still more measurements to do tomorrow.

View attachment 328510
Are you going to get rid of and replace that center keel striger?
 

todhunter

Canoeist
Joined
Sep 15, 2020
Messages
1,308
I got the bilge area stripped today so I can start working on gutting the transom this week. I got all the short pieces of stringer out in one piece...barely. If it weren't fore the fiberglass the two inner ones would have completely fallen apart. As I was cutting the tabbing in a few places, water began to run out, lol. Thankfully I still think I'll be able to use them for templates, though.

The engine mounts were encapsulated in fiberglass separate from the stringer/bulkhead system, which explains why they had no rot when I drilled a core sample. This has me thinking - is there any reason why I should not encapsulate each separate stringer and bulkhead before installing them? This in theory would prevent rot in one board from spreading to the next that touches it.

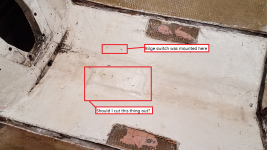
Last question for today - it looks like a small board was glassed into the bottom of the bilge. The bilge pump was mounted here, but the switch was mounted up the side of the "V", and from what I can tell it was just screwed into the fiberglass. Should I cut out and replace the board that's under the glass where the bilge pump mounted?

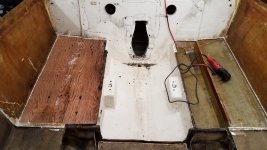
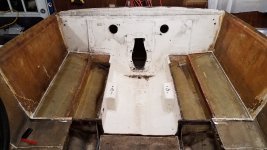
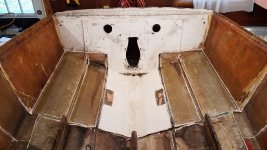
Bilge bulkhead, stringers, and engine mounts removed - ready to start on the transom.
20201108_134800.jpg

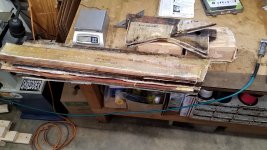
Pieces of bulkhead and stringers that were removed.
20201108_134809.jpg

This piece of stringer weighed nearly 13 pounds...almost 3x what it should! All that extra weight is water.
20201108_112200.jpg

No rot in the engine mounts! I'll be rebuilding them, though.
20201108_112522.jpg


20201108_135356.png
 

Baylinerchuck

Commander
Joined
Jul 29, 2016
Messages
2,726
If it were me, I’d cut it out and mount the bilge pump a different way. At a minimum, you should drill a sample and make sure it’s solid wood, or not wet.
 

todhunter

Canoeist
Joined
Sep 15, 2020
Messages
1,308
If it were me, I’d cut it out and mount the bilge pump a different way. At a minimum, you should drill a sample and make sure it’s solid wood, or not wet.
Any ideas for another way to mount the bilge pump? Adhesive? I don't like the idea of a piece of wood with holes/screws in it down in the part of the boat that is supposed to catch fluids.
 

Baylinerchuck

Commander
Joined
Jul 29, 2016
Messages
2,726
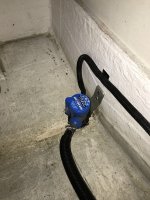
I used an aluminum bracket and mounted the pump to the first cross member between the stringers in the bilge. It’s directly behind the drainage system into the bilge from other cavities, and just in front of the motor. The aluminum bracket is attached with screws dipped in 5200, however, the screws are above the float switch, meaning water shouldn’t ever get that high.

Please excuse the dirty bilge. It hasn’t had its after season cleaning yet, lol.

867D6A1E-7FA3-4004-88BE-FF4397E204D4.jpeg
 
Top